HotplateReflowTechnique
Contents
Hotplate Reflow Technique
Soldering SMT parts is simple and easy. Its actually quite forgiving, and is very accessible, even for a beginner! You don't even need any fancy tools. Its quite possible to get by with things you already have in your house. There are some tools that make it simpler, but they are not required. The only thing that you absolutely need is a syringe of solder paste, some decent tweezers, and a hotplate. A magnifiying glass can be very helpful, but if you have good eyes, you can easily get by without one.
For more info on what tools you need to do SMT soldering, check out our SMT Toolkit Guide.
The Process
The basic process for soldering a board that has SMT parts is this:
- Apply Solder Paste to all the SMT pads.
- Place all SMT components in the appropriate place.
- Heat up the entire board to melt the solder and solder all parts simulaneously.
- After the board has cooled, fix any solder bridges.
- Solder in the remaining through-hole parts, if any.
Applying Solder Paste
Solder Stencil
<div class="thumb tright"></div>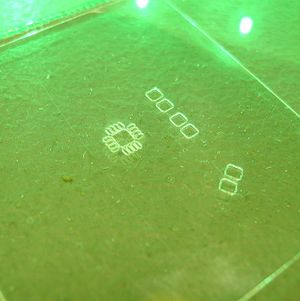
There are a few different techniques for applying solder paste. If you are doing runs of 5+ boards, you will probably want to make a solder paste stencil. This is simply a stencil made from Mylar or Kapton that you lay over the board, wipe solder paste over, and then remove. It makes the solder paste application process quick and painless. Making these stencils can be somewhat pricey or difficult if you do not have access to a lasercutter.
More info on using a solder stencil forthcoming once we have some experience with it.
Solder Paste Syringe
<div class="thumb tright"></div>
The simple way for small quantities of boards, such as making a kit or a prototype is to use a syringe of solder paste. This allows you to apply the solder directly to the pads where you want it, and its cheap too. This is the method that we use for constructing our prototypes as well and for making small amounts of kits. The hardest part is applying the paste to pads for chips like SOIC and TQFP. However, it's easy to fix if you put too much solder paste on the pads.
Also, if you do manage to completely mess up and apply too much solder to a pad, you can easily wipe it off with a towel or swab of some sort. Applying the solder paste is completely reversible and if you want to try it a few times just to practice, then go for it.
The basic technique for applying the solder with a syringe is to press down on the syringe plunger and dab the solder onto the pad. You will want to practice this a few times, but you'll quickly get the hang of it.
A large number of SMD parts have fairly big pads, especially the SMD part that we use for RepRap. Resistors, capacitors, LEDs, 7805s, etc. have large pads. Simply apply solder to those pads and you're good. The key is to put a bead of solder paste, but not to flood the pad. If you put too much solder paste down, you'll end up with solder balls. These are not fatal, but could theoretically cause you problems, so its best to put down the right amount in the first place.
The trickier pads to apply paste to are the chips. SMD chips come in a variety of sizes, and we try to use only the large ones to make it easy on all of us. The big ones are things such as SOIC, which we use wherever possible. There are smaller chips which come in a package called TQFP. This package is pretty small, but its the only SMT package that many chips come in, such at atmega chips.
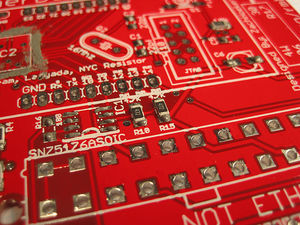
For SOIC chips, you can generally just apply the paste directly with the syringe. If you're good with the solder paste, you can lay a thin line of the paste on the pad, and do that for every pad. This is the recommended way, but it can be tricky. If you want to cheat, simply lay a bead of solder paste along the entire line of pads. Don't put too much, otherwise you'll definitely get solder bridges. You really don't need too much solder paste to make a good solder connection.
For TQFP chips and other fine-pitch components, its almost impossible to lay down individual beads, so you have to switch to a different strategy. Lay down a bead of solder paste along all of the pads, and then use your finger to smear it so that it is just a thin layer. You will want to clean up the excess outside the pads with a Qtip or something as well. Most likely you'll get a few solder bridges no matter what, so just assume that it will happen and move on.
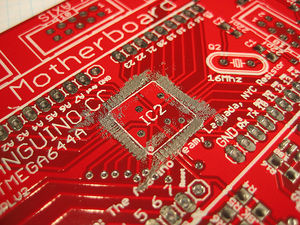
Place the Components
Placing the components is pretty easy, but it can be intimidating at first. Don't worry... those little parts won't bite you. Just try and relax and pretend what you're doing is normal, because after doing it a couple times, it will be!! Keep in mind that if you mess up on the placement of a part, its easy to try again. Nothing you've done yet is permanent, so just stay chilled out and it will go well for you. Frustration is the enemy, so keep a smile on your face... you're part of the future now.
You'll want to place most parts with some tweezers. If you spend money on any part of your setup, get a good pair of tweezers. Seriously, it will make a huge difference. A nice pair has thin, pointy tip. I like the ones with curved tips, because they make it easier to position the parts.