HuxleyMotors
General
This page and its peers should guide you through assembling a RepRap Huxley from the TechZone kit, or from parts you have printed which are the same as the TechZone parts. It is a work in progress, and needs some help, feel free to edit this document to add comments of you your own, or contact us [here] and send us messages asking us for better clarification or details.
I am starting by posting the pictures I have, and over the next few days, I will fill in the instructions and detials (24 Dec 2010)
Thanks,
Lambert (TechZone R&D/Support/Documenter)
You can access this page and it's peers (for the other parts of the Huxley assembly from the Main Huxley page or from the TechZone Huxley Page
Contents
Before installing the motors, I recommend that you hook them up to the electronics and adjust the trimpot on the electronics. The reason is that if the trimpot is up too high, the motor will get hot and warp your plastic parts. To protect your machine and all your hard work, take a few minutes to got to the first installation section of the electronics page to get the motors adjusted correctly.
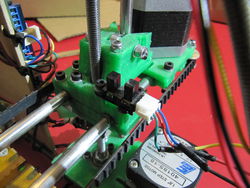
X Axis Motor, Belt, and Endstop
Y Axis Motor, Belt and Endstop
(While TechZone is getting around to supplying the "official" layout, here is my (--AlexRa 21:42, 30 January 2011 (UTC)) version of how the Y belt should be mounted.)
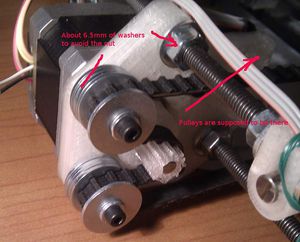
Note that the plastic Y-motor mount is similar to what's used in a full-size Mendel, and has a special extrusion for mounting 2 pulleys. However, with that path the belt meets the pulleys (or at least some of them) teeth-in. That might be acceptable for Mendel which uses larger bearings for the pulleys, but for Huxley with its 10mm bearings (and the same belt pitch) the teeth-in placement isn't a very good idea. Instead, I used 2 of the motor mounting screws to install the pulleys on them, very similar to how it's done on the X axis:
To align the idlers with the driving gear, you need to install them about 6mm above the mounting plate. I had a few spare large (20mm) washers, so I used them here. If you don't not have that many from the kit, use two M3 nuts (plus some small washers) instead. However it looks like the washers will withstand the belt tension better.
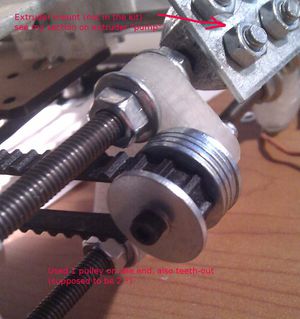
One the opposite side, another 2 idlers presumably should be installed, but I found that only one is needed. It's mounted exactly as the ones above:
Installed this way, the belt moves easily, never meets any idlers teeth-in and doesn't touch any other part of the construction (although it does come uncomfortably close to the Z belt).
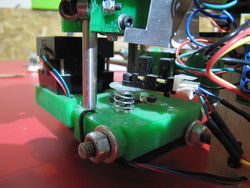
Z Axis Motor, Belt and Endstop


