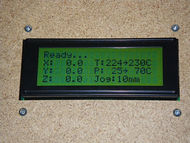
LCD And Keypad for Generation 3
Release status: unknown
LCD & Keypad for Generation 3 is an idea from RevarBat on Thingiverse that he implemented for Makerbot using Generation 3 Electronics. This page describes how to do the same thing for a 'Standard' Mendel. Adding the LCD & Keypad with the needed firmware changes allows operating your Mendel without a PC or laptop. The extruder and temperatures can be set and viewed and it is possible to print gcode files directly from the SD card.
Overview
Under construction, more coming soon!
Power
We may no longer use the +5 volts from the USB to power the Motherboard (and SD card) so we must cut this added wire and add a 7805 voltage regulator to generate the +5 volts from our +12 volt power supply.
Step/Dir signals
The Mendel design uses two of the outputs planned for I2C as the STEP and DIR signals to the extruder stepper motor.
I2C
Now that the I2C connections are free we can connect the serial LCD to these pins.
Mechanical
The standard Mendel design mounts the Motherboard and Extruder Controller on the thick plate mounted on the top front of the Mendel. This is also a good location for our LCD/Keypad and since we really don't need constant access to the reset button or SD card and since seeing the LCD is more interesting than watching the blinking lights we will simply mount the LCD/Keypad on top of the Motherboard/Extruder controller by using an additional thick plate with appropriate cut outs for the LCD/Keypad.
Firmware
Of course the firmware must be modified to provide all the nice functionality that we want using the LCD, Keypad and SD card.
