Mendel Rostock
|
[[::Mendel Rostock|English]] • [[::Mendel Rostock/ar|العربية]] • [[::Mendel Rostock/bg|български]] • [[::Mendel Rostock/ca|català]] • [[::Mendel Rostock/cs|čeština]] • [[::Mendel Rostock/de|Deutsch]] • [[::Mendel Rostock/el|Ελληνικά]] • [[::Mendel Rostock/es|español]] • [[::Mendel Rostock/fa|فارسی]] • [[::Mendel Rostock/fr|français]] • [[::Mendel Rostock/hr|hrvatski]] • [[::Mendel Rostock/hu|magyar]] • [[::Mendel Rostock/it|italiano]] • [[::Mendel Rostock/ro|română]] • [[::Mendel Rostock/ja|日本語]] • [[::Mendel Rostock/kr|한국어]] • [[::Mendel Rostock/lt|lietuvių]] • [[::Mendel Rostock/nl|Nederlands]] • [[::Mendel Rostock/no|norsk]] • [[::Mendel Rostock/pl|polski]] • [[::Mendel Rostock/pt|português]] • [[::Mendel Rostock/ru|русский]] • [[::Mendel Rostock/tr|Türkçe]] • [[::Mendel Rostock/ua|українська]] • [[::Mendel Rostock/zh_cn|中文(中国大陆)]] • [[::Mendel Rostock/zh_tw|中文(台灣)]] • [[::Mendel Rostock/he|עברית]] • |
Release status: working
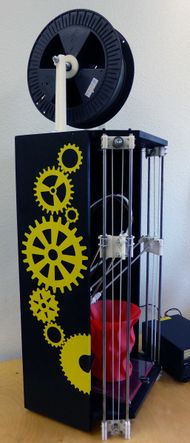
| Description | Mendel Rostock (modified in Jena).
|
| License | GPL
|
| Author | |
| Contributors | |
| Based-on | |
| Categories | |
| CAD Models | |
| External Link |
This articel is for all, who are interested in the RepRap model Mendel Rostock (modified in Jena by electronic things) and want to know how this 3D-printer will be constructed. Hereinafter we will explain step by step how the printer will be built up and this procedure will be illustrated with pictures.
Building up the printer chassis
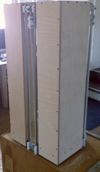
In order to build up a 3D printer the framework has to be arranged together with the mounting of the end-effector. Wooden panels form the body of the printer. It consists of a base plate, a top plate and four side walls. The original consists of two side walls, but for stability reasons, we use more. First, these panels we be fitted. Silver steel bars and ABS printed filament parts form the so-called tower (guide rails of the suspensions). In a next step the top and base plate will be connected together with the four side walls (see Figure 2). The walls serve the stability and are useful for the attachment of subsequent components such as the electronics. Thereafter, the silver steel bars and the corresponding brackets from ABS filament are mounted. Before attaching the cover, make sure that the plain bearings are pushed onto the bars.
End-effector
The end-effector consists of penholder, platform and hotend. The penholder here represents the support for the hotend. First, the joints are inserted into the gaps of the platform. Later on there will be the attachment of the printer arms. The hose clip is screwed directly into the hotend and the assembly is fixed in the penholder. Concerning the hose clip, we have introduced a new system with a screw. The already built-up end-effector will be pictured in Figure 3.
Suspension
The production of arms is done by the installation of 6 mm aluminum hollow tubes into the jaws. Jaws thereby designate the ends of the printer arms through which the arms, the end-effector as well as the extended sledges (carriages) are joined together. The carriages are located on the vertical guide rails, the towers. They are hung through cable ties on the bearings on the silver steel bars. When attaching the strapes one end is clamped and fixed between the carriage and belt tensioner. After turning the belt around pulley and ball bearings, the other end of the strap is clamped in the second tensioner and fixed. Figure 4 illustrates the entire suspension. This allows the tensioning of the belt, as opposed to the original Rostock. In addition to the slides a screw will be screwed in, which will later limit the end triggers.
Electronics
Regarding the electronic components, the end switches are attached to the ABS-parts at the top of the tower and the stepper motors mounted at the feet of the printer under the base plate. On top of the bottom plate will be the attachment of the heat bed. The use of compression springs is an important factor to level the heater bed at any time. In Figure 5, the heat bed incl. glass plate is illustrated.
Extruder
Our extruder is a modified wade extruder, which will be used to drive the filament. The material opening has been modified in order to screw a hose clamp into. By connecting both hose clamps (+extruder and effector) with the help of the Teflon tube, the filament can be shipped through. The drive is realized by a stepping motor, which drives the filament via translation. In order that the screw grasps the filament, a ball bearing will be installed on the opposite side, wherein the sideways force exerted on the material by pressure springs is adjustable. In Figure 6, the extruder is ready. After building and installing the electronics and the configuration / calibration of repeating firmware and software, the printer is ready.
If you have questions about the structure in detail, please contact us via E-Mail to: [email protected] or by phone: +49 (0) 3641 50 96 06. A detailed assembly instruction will be in the attached pdf-Document on our blog: electronic things .
Here is full metal extruder [1]


