Prusa Mendel Assembly (iteration 2)/es
Antes de empezar
Antes de ensamblar el Prusa Mendel, asegúrate de disponer de todas las piezas necesarias. Para obtener el listado de todos los materiales, visita: Prusa Mendel.
Notas:
- Este documento todavía está en desarrollo.
- These instructions follow making a PLA based Iteration 2, where integrated bushings are included as part of the RP objects. The design officially supports different bearing combinations, including brass bushings, felt, and linear bearings. RP parts that are for different bearing types will look different and require additional steps but the primary assembly remains essentially the same.
- Source STL files for the printed parts are available from the prusa mendel github repository
- TODO: Merge contents of Kliments Pastebin: http://pastebin.com/t8LcB1du
- Although most steps are absolutely harmless when done right, you still might want to take precautions for your Health and Safety.
- In this manual it is assumed that your X and Z smooth rods are 405mm each and the Y smooth rods are 425mm
The resulting threaded rod lengths are:
1x 450mm - low center rod
2x 440mm - top rods
6x 400mm - frame vertex
4x 320mm - lower rods for front and back side
2x 250-300mm - Z threaded rods
Instrucciones de montaje
Assembling the X-axis
Parts Required
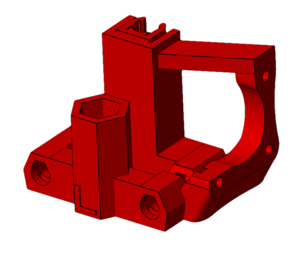
- 1 RP x-end-motor
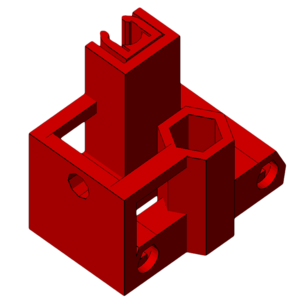
- 1 RP x-end-idler
- 2 405mm smooth rods (420mm in recent instructions)
- 3 M3x10 bolts
- 1 608 bearing
- 2 M8x30 fender/mudguard washers
- 1 50mm M8 threaded rod and 1 M8 nut or 1 M8x25 or longer bolt
- 3 M8 washers
- 1 M8 nut
- 3 LM8UU Linear Bearings
Instructions <videoflash>K9bXwOZOXps</videoflash>
- Drill out the center hole in the hexagonal section of the x-end-idler and x-end-motor parts to 8mm, if it is not already this size.
- Drill out the 4 holes into which smooth rod pieces will be inserted. (Using a reamer is more precise than using a regular bit)
- Take the x-end-idler part. Check the size of the hole on the flat, thin side surface. If it is 4mm in diameter, enlarge it using a file until it's 8mm in diameter.
- Place the x-end-motor and x-end-idler parts 50cm apart, so that the hexagonal sections are facing each other. The x-end-motor should be on the left and the x-end-idler should be on the right
- Slide the two 420mm smooth rods into the x-end-idler part.
- Look at your X Carriage and determine which side is the front and which side is the back. Then, look at the bottom of the X Carriage and see which side has a slot for 1 linear bearing and which side has a slot for 2 linear bearings. Place 2 linear bearings on one of the 420mm smooth rods and 1 linear bearing on the other depending on the proper orientation of the X Carriage
- Slide the other ends of the rods into x-end-motor part. The hexagonal sections of the motor and idler parts should still be facing each other.
- Make sure the rods are seated as far as they will go into the x-ends.
- Thread an M8 nut onto one end of the 50mm threaded rod, if not using a bolt.
- Put the following parts in this order onto the free end of the threaded rod (behind the nut) or M8 bolt: 1 fender washer, 1 M8 washer, 1 608 bearing, 1 M8 washer, 1 fender washer.
- Thread the free end of the threaded rod into the side of the x-end-idler part. The bearing should be on the outside. Put an M8 washer and an M8 nut on the inside and tighten.

