Prusa Mendel Assembly (iteration 2)/es
Contents
Antes de empezar
Antes de ensamblar el Prusa Mendel, asegúrate de disponer de todas las piezas necesarias. Para obtener el listado de todos los materiales, visita: Prusa Mendel.
Notas:
- Este documento todavía está en desarrollo.
- These instructions follow making a PLA based Iteration 2, where integrated bushings are included as part of the RP objects. The design officially supports different bearing combinations, including brass bushings, felt, and linear bearings. RP parts that are for different bearing types will look different and require additional steps but the primary assembly remains essentially the same.
- Source STL files for the printed parts are available from the prusa mendel github repository
- TODO: Merge contents of Kliments Pastebin: http://pastebin.com/t8LcB1du
- Although most steps are absolutely harmless when done right, you still might want to take precautions for your Health and Safety.
- In this manual it is assumed that your X and Z smooth rods are 405mm each and the Y smooth rods are 425mm
The resulting threaded rod lengths are:
1x 450mm - low center rod
2x 440mm - top rods
6x 400mm - frame vertex
4x 320mm - lower rods for front and back side
2x 250-300mm - Z threaded rods
Instrucciones de montaje
Assembling the X-axis
Parts Required
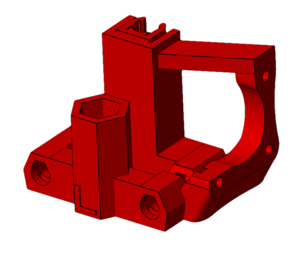
- 1 RP x-end-motor
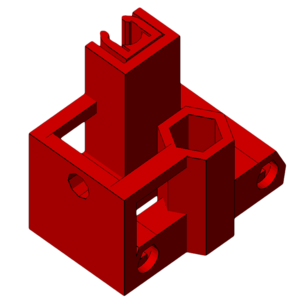
- 1 RP x-end-idler
- 2 405mm smooth rods (420mm in recent instructions)
- 3 M3x10 bolts
- 1 608 bearing
- 2 M8x30 fender/mudguard washers
- 1 50mm M8 threaded rod and 1 M8 nut or 1 M8x25 or longer bolt
- 3 M8 washers
- 1 M8 nut
- 3 LM8UU Linear Bearings
Instructions <videoflash>K9bXwOZOXps</videoflash>
- Drill out the center hole in the hexagonal section of the x-end-idler and x-end-motor parts to 8mm, if it is not already this size.
- Drill out the 4 holes into which smooth rod pieces will be inserted. (Using a reamer is more precise than using a regular bit)
- Take the x-end-idler part. Check the size of the hole on the flat, thin side surface. If it is 4mm in diameter, enlarge it using a file until it's 8mm in diameter.
- Place the x-end-motor and x-end-idler parts 50cm apart, so that the hexagonal sections are facing each other. The x-end-motor should be on the left and the x-end-idler should be on the right
- Slide the two 420mm smooth rods into the x-end-idler part.
- Look at your X Carriage and determine which side is the front and which side is the back. Then, look at the bottom of the X Carriage and see which side has a slot for 1 linear bearing and which side has a slot for 2 linear bearings. Place 2 linear bearings on one of the 420mm smooth rods and 1 linear bearing on the other depending on the proper orientation of the X Carriage
- Slide the other ends of the rods into x-end-motor part. The hexagonal sections of the motor and idler parts should still be facing each other.
- Make sure the rods are seated as far as they will go into the x-ends.
- Thread an M8 nut onto one end of the 50mm threaded rod, if not using a bolt.
- Put the following parts in this order onto the free end of the threaded rod (behind the nut) or M8 bolt: 1 fender washer, 1 M8 washer, 1 608 bearing, 1 M8 washer, 1 fender washer.
- Thread the free end of the threaded rod into the side of the x-end-idler part. The bearing should be on the outside. Put an M8 washer and an M8 nut on the inside and tighten.
Frame Triangles
This step takes about 15 minutes per triangle, for a total of 30 minutes.
There is a triangle on each side of the Prusa RepRap. You will need to make two of these and then connect them together (in the next steps) to form the Prusa frame. Each side is an equilateral triangle with a frame vertex on each corner. You can use either footed or non-footed vertices to build this. (The footed ones look better, but are not critical.) The instructions assume you are using footed vertices.
Parts Required (per triangle)
- 2 RP footed frame vertices
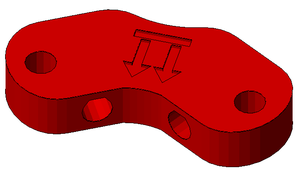
- 1 RP frame vertex (non-footed)
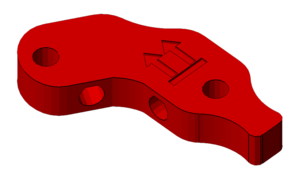
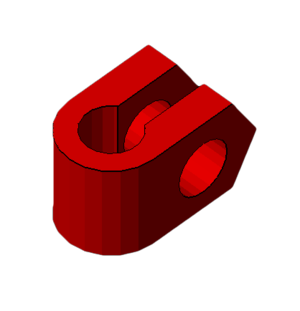
- 1 RP bar clamp
- 3 400mm M8 threaded rods
- 14 M8 nuts
- 14 M8 washers
<videoflash>-PFy4KhW9gE</videoflash>
- Take one of the 400mm threaded rods, and slip an M8 washer onto the middle of it.
- Take the RP bar clamp (the U-shaped bit with the two holes) and slide the threaded rod through the two holes until the clamp sits next to the washer.
- Slide another washer onto the rod from the other side.
- Thread two M8 nuts onto either side of the clamp, until they are next to the washer, but do not tighten them yet.
- Thread another two nuts on each side of the rod, followed by washers. See the picture for what it should look like. <flickr>5188262096|thumb|right|m|The bar clamp on the threaded rod.</flickr>
- Slide the rod through the wider bottom (footed) side of two vertices. Make sure the feet point in the same direction, and the bulge on the non-footed sides of the vertices point outwards.
- Place another washer and nut on the other side of the vertex. Tighten, but not too much. We'll need a bit of flexibility here still.
- Take another 400mm M8 threaded rod and place a nut followed by a washer at each end.
- Place one end of the threaded rod into the one of the two footed frame vertices. It should be in the same plane as the first threaded rod. Fix it in place with a washer and nut. You should now have two sides of the equilateral triangle.
- Take the third piece of threaded rod and put a nut and washer on each end. Place it in the other footed vertex and fix it in place with a washer and nut. You should now have a triangle of threaded rods with two footed vertices on two of the corners, nothing in the third corner, and a bar clamp between the two vertices.
- Adjust the nuts around the bar clamp (but do not crush the bar clamp together yet) until it's approximately in the middle of the rod. Leave the nuts there loose. See the photo for what you should have at this point.
- That's it, that's one of the triangles done. Repeat the entire procedure for the second triangle.
- After you have done the second triangle, you need to make sure that both triangles are the same. To make sure the holes line up, you can lay the triangles on top of each other and insert six M8 bolts through the each hole in the vertices. When they all line up, tighten all the bolts.
Next we will connect the two frame triangles to form the Prusa RepRap frame. The easiest way to do this is to thread everything onto the front and rear threaded rods and attach those to the triangles first, and then thread the top rods through. That's the method the instructions below will follow.
