RepSnapper Manual:RepSnapper Howto
Contents
Basic Usage
Launching
To run repsnapper on windows double click the repsnapper.exe file within the repsnapper/Src directory
On linux type repsnapper/Src/repsnapper into the console window.
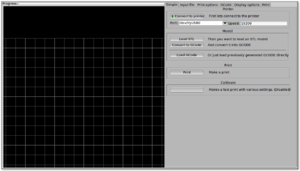
After launching the repsnapper application you are presented with the main window of the application
On the left is the 3D view and on the right is the confuguration and control panel.
Loading an STL
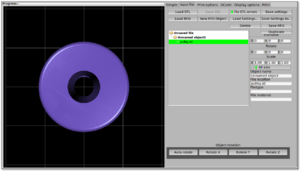
To load an STL into the 3D view click on the tab labeled Input file and press the Load STL button. In revision prior to ??? you are presented with a Fluid file browsing dialog. In later versions you will be presented with your standard operating systems file browse dialog. Choose the STL that you wish to load and click OK. The 3D view should now display your STL. Use this button to pull in a facet file to process into Gcode.
- TIP: If repsnapper crashes at this point you might have an STL file that is "Bad Input" try converting it to binary using ./ivcon file.stl file.stlb and loading the binary version into repsnapper instead. you can get ivcon here. Compile using gcc -lm ivcon.c -o ivcon
Veiwing the STL
Once an STL is loaded you can rotate translate it and scale it in the 3D view so as to see what the object looks like, doing so will not effect the print its mearly for viewing purposes
- To rotate the STL hole down the left mouse button and drag.
- To translate the STL hold down the left and right mouse button and drag.
- To scale the STL hold down the right mouse button and drag.
Working with STL
Once an STL is loaded, you can move it to further onto the build platform, rotate it and scale it. You can also duplicate it and load additional STL files onto the build platform.
- To move the STL, first select it on the browser, then tab to the translate box and enter absolute values into the X and Y fields. You can also drag the object by left-click-hold in the X or Y box then dragging it with the mouse. Apparently changing the Z value is not recommended.
- Duplicate adds another copy of the STL beside the first.
Convert to GCode
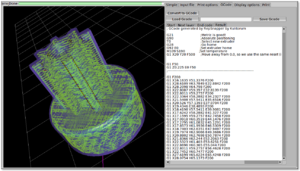
Converting to GCode is a simple process, click the GCode tab and press the Convert to GCode button.
If you like you can remove the homing and shield code from the next layer tab. This will save time between layers during prints, but should only be done if your machine is reliable and your steppers don't skip steps. Converts the STL model into GCode (machine language)
- TIP: For a technical overview of the GCode generation read this
To send the GCode to a FiveD GCode compatible printer open the Print tab, and click the Connect to printer button. Check the Communication Log tab to make sure the printer has connected and is receiving temperature signals from the Extruder Controller. To start printing click the Print button. This starts sending commands to the printer for execution.
Configuring Printer Settings
Simple tab
- Connect to printer:
Establishes communications between the PC and the main board.
- Port:
Manually selects the serial communication port that you want to talk across.
- Speed:
The serial communications baud rate. Typically 19200
- Load STL
Loads an STL file
- Convert to GCode
Converts the STL to GCode
- Load GCode
Loads previously generated GCode file
Starts printing
- Calibrate
Does something clever
- TIP: This feature is currently not implemented
Input File tab
- Load RFO:
Best Guess: This will load multiple STL's zip format as is supported by the official Java Reprap Host software for printing whole beds of parts at a time.
- New RFO:
Best Guess: This will create a new multiple STL zip file.
- Save RFO:
Best Guess: This will save multiple STL zip file based on the currently loaded STL's
- TIP: RFO stands for Reprap Object Format However RFO support is currently not working in repsnapper with any known revision.
- Duplicate:
Creates a copy of the STL file
- Translate, Rotate and Scale:
If an STL object is first selected in the browser, this will alter the part for creating gcode.
- Object Name, File location, File type and file material:
Name a file system and document the contents.
- Object rotation:
Best Guess: Selects the plane to rotate the object about. Doesn’t seem to make a difference other than the view angle.
- Save Settings
Saves all configuration settings. The configuration settings are stored in a file called Repsnapper.xml
- TIP: Repsnapper currently stores the setttings file the current working directory (So If you start repsnapper in a different working directory don't be surprised that you now have all your settings back to defaults) This will hopefully be rectified soon.
- Load Gcode
Loads a previously generated Gcode file.
- Fix STL errors
Presumably makes the structure water tight and aligns all surface normals.


