Smartrap mini
|
English • العربية • български • català • čeština • Deutsch • Ελληνικά • español • فارسی • français • hrvatski • magyar • italiano • română • 日本語 • 한국어 • lietuvių • Nederlands • norsk • polski • português • русский • Türkçe • українська • 中文(中国大陆) • 中文(台灣) • עברית • azərbaycanca • |
Smartrap Mini | How to Get Smartrap | Smartrap Build Manual | How to Use Smartrap | Smartrap Improvements
Release status: working

| Description | A small but strong RepRap designed to be really easy to build and maintain.
|
| License | |
| Author | |
| Contributors | |
| Based-on | |
| Categories | |
| CAD Models | |
| External Link |
Vision: Goal
The Smartrap mini is a new design of a RepRap 3D printer. It is inspired by the (outdated) Wallace model, which is itself inspired from the Printrbot, designed by Brook Drumm.
- I tried to make the design even simpler. This design is made with mostly printed parts, so it's easy to reproduce and is released under the GPL license, which means it's open for anyone to use, edit, improve and redistribute.
The goal of the Smartrap is to become THE viral 3d printer. Anyone following the RepRap project dreams about a design that is a perfect combination of the most easy to build and replicable machine without the need for external tools. All while being licensed under the GPL license and cheap to build. We can see any one of these features in a reprap model out there, but the combination of all those features combined into one machine is still not available. I wouldn't dare to say we are at this point with the Smartrap, but it's where we want to go. We believe there is one place for such a printer in the world. Even if we know it's totally incompatible with the classical business model of a startup company selling models in mass production. There must be one crazy team doing that, and that's maybe us? Let's see how it goes.
Features (in no order particular order):
- Real Reprap: most of the structure should be printed, so it can easily print itself for machines. Only the common base should be bought at special shops (motors, hot end, controller, LM8UU linear bearings, endstops).
- Simpler assembly: There should be no need for special tooling, ultra precision cuts, drills or even adjustments. The ultimate goal would be an assembly with no screws, where (almost) everything snaps together in place.
- Open source!: Since it is GPL, you can build it, sell it, make a business of it etc. Everything is fine as long as you stay under the GPL licence.
- Cheap as possible: Currently working with fishing line, printed linear bearings (not well working for me now), and less costly electronics (no heat bed, four motors, no fan).
- Optionally open to experimentation: I've tried so many configurations. For example, aluminium rails with 608zz, fixed axis with moving hot end, moving axis with fixed hot end, etc. (I should put them all online one day).
Features
Print size: From 150 x 150 x 150 to around 250 x 250 x 200. The first prototype is 200 x 200 x 150
PLA only: It's a political decision; even if ABS gives better results , the fumes and the ecological impact outweigh the pros. PLA can be composted and uses less power. (Open for discussion!)
Layer height: Not fully tested yet, but looks like 0.2 works well
Printed parts: 16
Screws: M6 x ??? mm qty 2; M3 x ??? mm qty 16.
Non Printed parts: 6 smooth rods 8mm , 12 LM8UU, 1 M5 , 2 fishing lines 500mm , 4 nema17 motors, 1 hot-end j-head, 1 controller board , 3 mechanical end stops.
Assembly operations: There aren't many steps, but it's not entirely clear yet. Even though I've already assembled three versions, the process was not as smooth as it should be. The main design is ready, and we will now focus on details to make the assembly easier.
Practical Info: Tips and Tricks
Rod Lengths: Right now we have 90mm lost on the X axis and 70mm lost on the Y axis. It's too much, but I'm working on it for version 0.5. So if you want 200x200 you need 290mm rods on the X axis and 270mm rods on the Y axis.
For Z-Rods, the current recommended length is 250mm.
Gallery
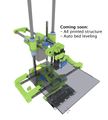
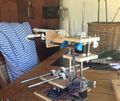
update July. was a long I didn't updated here. sorry for that . there's so much channels to update. this is the last version 2014
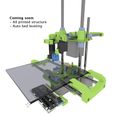
same. other angle
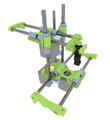
update January. actual print quality. z is great, stability is ok. we need work on flow with bowden cable.
another angle

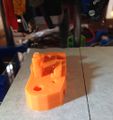
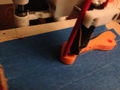
very detailed object with lot of small moves. good for testing fishing lines and stability. apart flow, it's not that bad.
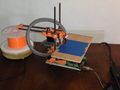
this will be the first version with options. it's definitely better. actually printing and assembling.
same another angle.
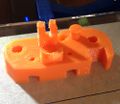
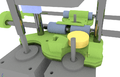
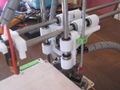
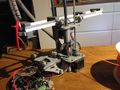
Update v0.4.5: new LM8 holders! The integrated ones broke to easily (due to the printing orientation). Now it's a separated part that's easier to print and more stable!
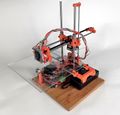
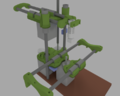
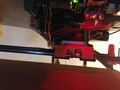
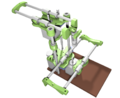
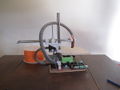
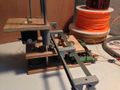
Everything put together
The plate_Base is smaller. Extruder was turned 180 degrees
- 045 4.png
Shorter plate_x, LM8 holders and new screw on Z axis for bed leveling

New v0.4 updated. LM8 holders were too low and tight. Now it works great out of the box
A better picture of this version
v0.4! No more plate_X_bottom. Only 8 printed parts now :)
New simplified plate_X. In v0.4 it's more integrated and LM8 holder are longer, so it's straighter
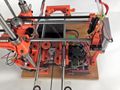
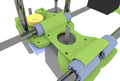
Under the cover
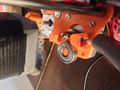
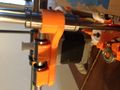
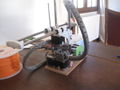
Integrated direct drive.
Printing right on first test
Customized (no more plate-X_bottom) v0.3 ready to print!

Everything put together :)
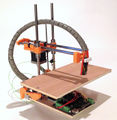
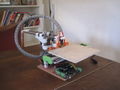
Final v0.3 blender version, now in github
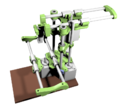
v0.3 final view from back
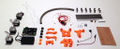
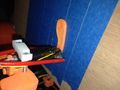
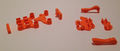
The whole kit, before assembly.
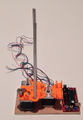
v0.3 assembly tests
Almost all of the printed parts needed (only the z coupling missing)
v0.3 printing :)
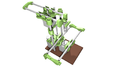
Blender preview of 0.3. Looks better and is simpler
From back
Close up
First picture of the final design v0.1
Old design
Old design, testing with original aluminium rail. Very light and cool, but wasn't straight enough.
Old design


