Talk:P3Steel
Contents
Stainless steel build
I've build this printer with 3mm V4A steel instead of simple steel. It more than doubled the price of the material (steel 80€, V4A steel 180€) but corrosion isn't a problem anymore and i don't have to paint anything. A perfect add to this build would be a 3mm lasercut x-axis motor holder/idler and carriage! --jcollasius (talk) 05:09, 3 May 2014 (EST)
- I have built two versions of the P3Steel, the first one in 3mm stainless steel (€90 for the frame plus shipping) and the second one in 3mm S235 structural steel (€55 for the frame, plus shipping).
- There is actually no difference at all in the build process as I got to paint all the steel parts for both frames with inexpensive acrylic paint (see the wiki page I created for this P3Steel construction step). Although I am not using any anti-rust primer for the structural steel version, I don't really expect to have any problems with rust within the expected lifetime of these printers (10 years?).
- The prices I am quoting are for purchase here in Spain.
- I am not sure the extra €35 for the stainless steel frame are worth it, but it's nice to have the option anyway. I would say go with whatever suits you, the end result won't differ much. --AndrewBCN (talk) 16:38, 12 October 2014 (PST)
2.01 version based on Irobri's design
I have added a note about version 2.01 of the frame. I edited Irobri's .dwg file (using exactly the same program that he used to create his original .dwg file - DraftSight). I have uploaded the new file to Thingiverse too ([1]). I have been told this .dwg file can't be open with some CAD programs, but it can certainly be opened with a recent version of either DraftSight (proprietary but free for download) or SolidWorks.
--AndrewBCN (talk) 16:55, 3 December 2014 (PST)
This is a more detailed explanation of why I came up with version 2.01 of Irobri's design and the reason for each of the small changes I made.
First I must say that I wanted to remain within the philosophy of the P3Steel as defined by Irobri: an economical laser-cut steel structure that results in a very compact and strong Prusa i3 variant.
Let's see each of the changes in detail:
- Solving the interference between the Y-axis stepper and the nyloc nut is obvious. Stretching the stepper holder by 2mm has negligible effects on the manufacturing cost of the frame and also negligible effects on the operation of the printer as a whole.
- Stretching the frame by 9mm. The reason for this is that after having built my first P3Steel I realized it would be very difficult to effectively use the 200mm along the Y-axis offered by the MK2B heatbed. What I really had available was a little bit less, something like 195mm if I was very careful when adjusting the Y-endstop. Stretching the frame by 9mm makes it much easier to effectively get these 200mm without going to great lengths setting things up. Also the difference in cost for the frame is again, practically negligible. As for the Y-axis smooth rods, they get changed from 341mm (specific to the P3Steel) to an easier to find 350mm (the original length for the Prusa i3).
- Adding the two M3 holes along the front length of the gussets has negligible impact on the laser cutter tool path but gives the P3Steel builder a new option to attach some accessories to the frame such as an LED light or some cable guides. So again: practically zero cost and a little bit more flexibility when building the P3Steel.
- Removing the useless laser-cut Y-belt holder is easy to explain: it decreases the cost of manufacturing of the frame. And having tried to use this laser-cut Y-belt holder, I can confirm that it is nearly impossible to install and get a properly tensioned Y-belt with it. There are much better printed designs, the one I have been using is the one by Pedro Lahuerta, it is easy to install and it works very, very well (see P3Steel_Proteins/es#Y-Axis_belt_holder).
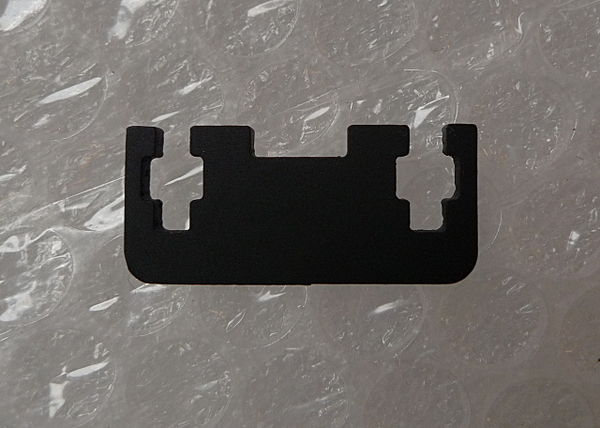
Here is the part that I deleted:
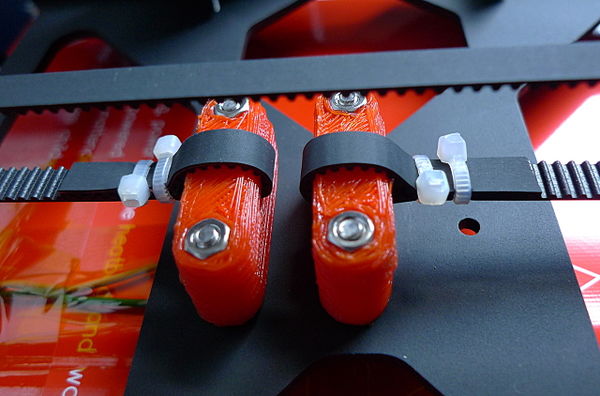
And here is the printed part that I suggest people use instead, installed on my 2nd P3Steel:
This is a simple Y-axis GT2 Belt Holder for the P3Steel designed by Pedro Lahuerta which is easy to print, easy to install and works very well.
--AndrewBCN (talk) 14:11, 11 December 2014 (PST)
Documentation improvement plan
P3Steel documentation TODO in 2015:
- Finish the pages that already exist and all the pages linked to.
- Add a page for Firmware Configuration (Marlin, perhaps Repetier) and Calibration.
- Add a page for First Prints and Troubleshooting.
- Spanish translation.
- French translation.
- Portuguese translation.
Yes, that is quite an ambitious plan! Let's see how much time I can dedicate to this and how much help I get! --AndrewBCN (talk) 00:07, 29 December 2014 (PST)
2.01 build laser cut
Just wanted to mention that the first batch of P3Steel 2.01 frames was laser cut here in Barcelona last Friday! This Monday I went to check the quality of this first batch at the offices of MakershopBCN and I am very happy to report that it's excellent: the cuts are very clean and precise and the steel is very high grade structural steel. And the best thing: all parts fit perfectly as intended and I didn't mess anything up in Irobri's original brilliant design. I'll post pictures of an assembled 2.01 frame ASAP. --AndrewBCN (talk) 12:51, 19 January 2015 (PST)
2.5 version derived from 2.01
I am releasing version 2.5 of the P3Steel frame, derived from my earlier version 2.01. I have made as few small changes to the P3Steel 2.01 as possible to accommodate an optional dual Bowden extruder setup, but the P3Steel 2.5 can still be built using exactly the same parts and components as the P3Steel 2.01, except for the following:
- The X and Z-axis 8mm smooth rods and the Z axis 5mm threaded rod are 10mm longer.
The use of the Bowden extruder mounts is optional. Basically the P3Steel 2.5 DXL can still be built exactly like the original P3Steel, with a single Greg's Wade's Geared Extruder on the X-carriage, or one can use a single Bowden extruder mounted on either sidepanel, or two Bowden extruders mounted on both sidepanels. The looks, weight and overall dimensions are similar to the original P3Steel 2.0 by Irobri. And of course it still uses 3mm laser cut steel as its base material. BTW, one of the reasons for mounting the Bowden extruder steppers motors directly to the steel frame is that the steppers can get quite hot, and contrarily to printed parts, the steel frame has no problems with heat and even acts as a heatsink, helping to keep the steppers within a reasonable temperature range.

