CncExtruder
Release status: unknown
| Description | Simple CNC-compatible Extruder
|
| License | |
| Author | |
| Contributors | |
| Based-on | |
| Categories | |
| CAD Models | |
| External Link |
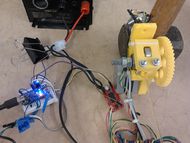
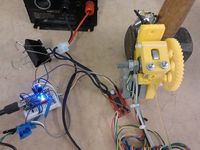
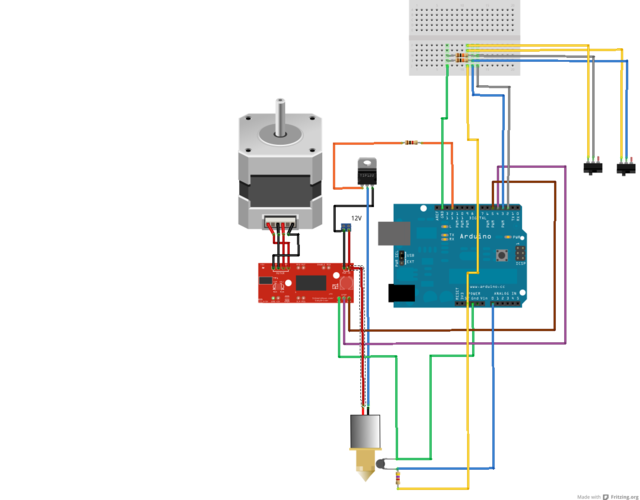
This is a simple adaptation of a Wade-style extruder with a minimal control system and an exceptionally simple Arduino program that we put together here at Diamond Age Solutions. It is intended to hook into existing proprietary CNC systems by being turned on and off as the "Coolant" or "Pump" or suchlike, for which most CNC machines provide Gcodes. It does not do fancy acceleration as this would require too tight an integration with existing proprietary CNC machines. If you have an Open one, then the task is much simpler and you can reprogram it as a giant RepRap. If you cannot or do not want to change the code, use this hack. A suggested pinout and wiring plan is given in the code file at the end.
HOWTO
A few things you need to know about this design:
It runs off 10-16V for the steppers and a convenient USB port for the 5V (which makes the blue light come on). I have not fused it. Fusing and safety is your problem :)
When you apply 5V it will try to turn the extruder heater on. This causes the yellow light to come on. it is possible for the yellow light to come on and the heater not work, but one thing at a time, eh?
DO NOT EVER run the extruder until the yellow light is slowly blinking on and off. It is not currently very smart and you can seriously wreck the hot end while it's cold. Keep the control lines grounded.
For your first time, I strongly suggest connecting some kind of thermal probe to the extruder tip's body with as much contact as you can get. If the temperature continues to rise at the same rate 10 seconds after the yellow light goes out, you may have a fault and need to disconnect the 12V.
You can vary the temperature by changing the annotated analog sensor target value in the Arduino code. I aim for a nozzle temp of around 180C.
You will see attached a black wire with a little plug on marked "GND", the ground pin. Two other wires are marked "Go" and "R" which are floating input pins. If "Go" is raised to 5V, the extruder motor will move. To change the movement speed, either add more "step" sequences to the Arduino code that twiddles the stepPin or change the delay at the end of the main loop.If "R" is raised to 5V the extruder will run in reverse when "Go" is high. This is extremely useful for getting the filament out and for retracting before movement.
I suggest you design a simple interface to allow your CNC machine's coolant and spindle contacts, for example, to activate the "Go" and "R" lines. Typically CNC machines have additional Gcodes to turn these on and off and a simple find/replace text filter of a gcode control program will allow you to turn "Motor On" commands into "Go".
If you are using switches or relays to switch the "Go" and "R" lines, you may need to add a pull-up or pull-down resistor as per the basic Arduino switch tutorial http://arduino.cc/en/tutorial/button
That's it. I said it was simple, right?
The Arduino program
/*
 The circuit:
 * 4K7 connected to 5V and analogue "sensor" pin
 * 100K NTC Thermistor connected to analogue "sensor" pin and ground.
 * D4 Is the stepper motor driver STEP pin
 * D5 Is the stepper motor driver DIR direction pin.
 * D12 connects via 1K resistor to the Base pin of a TIP122 transistor or similar
 * TIP122 Emitter goes to GND, Collector to heater, heater to 12V
 *
 * Note: because most Arduinos have a built-in LED attached
 * to pin 13 on the board, the heater indicator LED is optional.
 * Otherwise:
 * LED anode (long leg) attached to digital output 13
 * LED cathode (short leg) attached to ground
 *
 */
int stepPin=4;      // Stepper driver step pin.
int dirPin=5;        // Stepper direction pin.
int sensorPin = A0;    // select the input pin for the potentiometer
int ledPin = 13;      // select the pin for the LED/Heater
int heaterPin=12;
int goInputPin=3;    // Input to make stepper "go"
int reversePin=2;    // Input to put stepper in reverse gear.
int sensorValue = 0;  // variable to store the value coming from the sensor
int speedDelay=4;  // millisecond delay between seps.
int revDebounce=0;  // Debounce counter for reverse pin.
int revLast=LOW;    // Last reverse line reading

void setup() {
  // declare the ledPin as an OUTPUT etc.
  pinMode(ledPin, OUTPUT);
  pinMode(heaterPin, OUTPUT);
  pinMode(stepPin,OUTPUT);
  pinMode(dirPin,OUTPUT);
  pinMode(goInputPin,INPUT);
  pinMode(reversePin,INPUT);
}

// Suggested enhancement: Make extruder "back up" when turned off and
// initially rush forward when turned on.
void loop() {
  // read the value from the sensor:
  sensorValue = analogRead(sensorPin);
  if (sensorValue>100)  {// 100 gives 185C temp with 4K7 & Honeywell thermistor. 800 gives about 50C
    // turn the ledPin on
    digitalWrite(ledPin, HIGH);
    digitalWrite(heaterPin, HIGH);
  } else {
    // turn the ledPin off:
    digitalWrite(ledPin, LOW);
    digitalWrite(heaterPin, LOW);
  }
  // Check inputs for direction/go
  if (digitalRead(reversePin)==revLast) {
     if (revDebounce++ > 0)
        digitalWrite(dirPin,!revLast);
  } else {
     revLast=!revLast;
     revDebounce=0;
  }

  if (digitalRead(goInputPin)!=0) {
    // Lower the step signal twice 'cos we're slow.
    digitalWrite(stepPin, HIGH);
    delay(1);
    digitalWrite(stepPin, LOW);
    delay(1);
    digitalWrite(stepPin, HIGH);
    delay(1);
    digitalWrite(stepPin, LOW);
  }
    delay(speedDelay);
  // And back round we go....
}


