HandmadeGears
Contents
How to Make Handmade Gears
Tools Required
- Drill or Drill Press
- Drill Bits / Hole Saws
- Vice or Clamps
- Cheap Threaded Rod / Nuts / Washers
- Pliers, etc.
Consumables Needed
Polymorph Thermoplastic
A low temperature plastic that you will use to form the gear itself.
Timer Belt
This is used as the form for the gear. It should be cut off from the same type of belt as you intend to drive the gear with. It should be 6mm thick.
Acrylic Sheets
These are your standard acrylic sheets you can buy in most hardware stores. Make sure they are 3mm thick, i.e. that they can be stacked exactly to a thickness equivalent to the width of the belt. In this case we require 4 pieces. They need to be large enough to accommodate the gear and enough margin to still be relatively rigid. 100mm square would be about right.
PVC Food Wrap
This is the everyday plastic you probably have in your kitchen. Commonly known as Saran Wrap, its the thin, transparent, stretch plastic that comes on a roll. You'll need just a tiny bit, but if you miss it out your mould will stick together vicously.
Make It!
Please read the Working With Thermoplastic guide first
Cut and test-fit the mold
Stack the sheets of acrylic, clamp, and mark centre by drawing two diagonal lines. Drill a small (3mm approx) hole in the centre. Put a bolt in to stop it moving around.
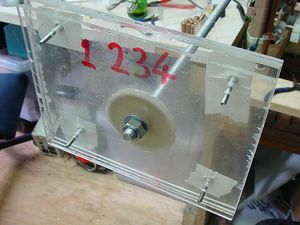
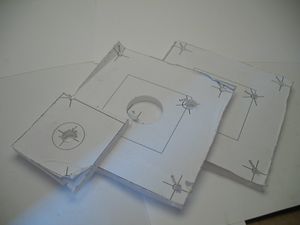
Drill a hole near each of the corners. These are your alignment holes. Remove the clamp and bolt. Mark the sheets from the top down 1,2,3 & 4 with an indellible marker, as in the image on the right (note: some acrylic discs have been left off in this image).
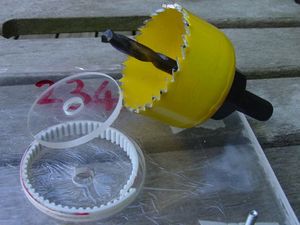
Using a hole saw - a kind of tubular saw designed to fit on a drill, illustrated below - cut holes of a suitable diameter for the gear you intend to produce in sheets 2 & 3. In this case 45mm. DO NOT use the cheap, flexible hole saws as they are not sufficiently accurate. Use the central hole as a guide. Keep the discs that get cut out and drill their centre holes to 8mm.
Using an 8mm drill bit drill out the centre holes on sheets 1 & 4. This will allow an M8 bolt or section of rod to go through the mould, providing an anchor point for compression and threading the centres of the gears.
Insert M3 bolts through the bottom of sheet 4 and tape them in place. These are your location pins. Cut a square of PVC food wrap larger than the finished gear and place it centrally on sheet 4. Stack on sheets 3 & 2. Place a similar square of wrap on the underside of sheet 1. Poke hole through the wrap on sheet 4 through the top of the mould with an M8 bolt and remove the central punch-out.
Line the central hole with a piece of belt, carefully cut so that the ends meet while maintaining the teeth spacing (hold in place with a little tape). It must be a snug fit. If the strip of belt is a little short, stick strips of tape evenly around the smooth side until the ends meet.
Your mould is now ready.
Assemble the mould
Put a nut & washer on a piece of M8 studding or a long bolt. On top of this place
- One of the discs
- Sheet 4
- Layer of PVC wrap
- Sheet 3
- Sheet 2
Snugly fit the strip of belt into the edges of the central hole.
Fill mold with plastic
If there is too much plastic, squeeze it up into a lump and remove the lump with scissors. This is actually easier than teasing bits out and causes less disturbance within the mould.
Press plastic into gear shape
Add Sheet 1 to the stack and cap it with the remaining disc, a washer and M8 nut.
Trim it and finish
Use sturdy scissors for trimming work. They actually work better than a craft knife for this task.
Slideshow
<iframe align="center" src="http://www.flickr.com/slideShow/index.gne?user_id=29642607@N00&tags=vikollivergears" frameBorder="0" "width=500" height="500" scrolling="no"> </iframe>


