Prusa i3 Rework X axis assembly
|
English • العربية • български • català • čeština • Deutsch • Ελληνικά • español • فارسی • français • hrvatski • magyar • italiano • română • 日本語 • 한국어 • lietuvių • Nederlands • norsk • polski • português • русский • Türkçe • українська • 中文(中国大陆) • 中文(台灣) • עברית • azərbaycanca • |
Introduction | Bill of materials | Y-axis assembly | X-axis assembly | Connecting X-axis and Z-axis | Motor assembly
X and Y-axis motions | Heated bed assembly | Extruder assembly | Electronics and wiring | Marlin Firmware
X End Idler & X End Motor assembly
Needed parts :
- X End Idler
- X End Motor
- 1x 624 ball bearing
- 4x LM8UU linear bearing
- 1x Endstop
- 2x M5 nut
- 1x M4x20 mm screw
- 1x M4 nut
- 2x M3x14 mm screw
- 2x M3 nut
Please take note that Step 1 is if you are using the vanilla Prusa I3 and is not required if you use the RP designed for the Reworked version found at https://www.thingiverse.com/thing:119616
Step 1
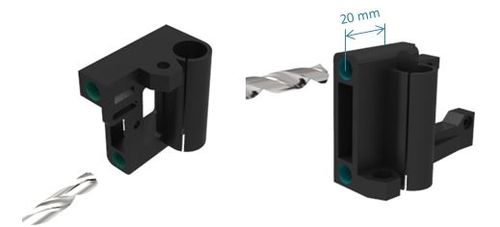
Drill with an 8 mm drill X End Idler and X End Motor holes (displayed in green). Do not drill deeper than 20 mm on the X End Motor. Set counterclockwise rotation and drill progressively and carefully along the axis.
Step 2
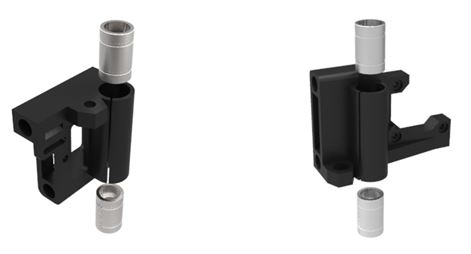
Push two LM8UU linear bearings in the X End Idler and two LM8UU linear bearings in the X End Motor. They can be pushed with hands but you can use a rubber mallet carefully if necessary.
Step 3
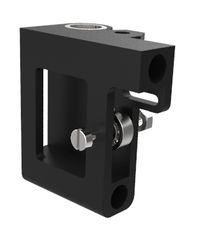
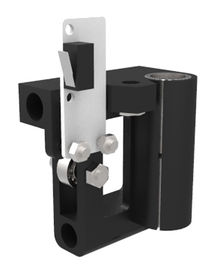
Insert an 624 ball bearing (the smallest) between the X End Idler and slide an M4x20 mm screw.
You may have to force the screw into the part but on the Rework's RP (link above) simply screw the M4 into both sides but do not force it. Fix them with a M4 nut and tighten slightly.
Step 4
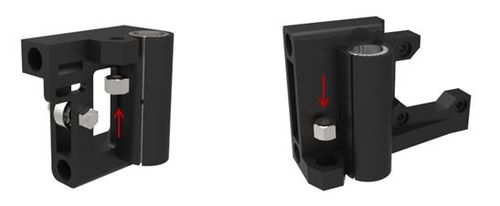
Insert two M5 nuts in their marks. In order to do that, thread a threaded rod M5x300mm opposite to the nut. Slightly heat the nut using a lighter or a blowtorch then pull the rod. Be careful with this operation.
Step 5
Affix one endstop with two M3x14 screws and two M3 nuts on the X End Idler.
Note: The SainSmart endstops do not have clearance for the screws due to the placement of the wire harness connector.
One of the following workarounds may work but attempt at own risk.
- Use a flat head screw from the side with the cable wiring harness. Even then 14mm is way too long and 8-10mm would be adequate.
- Reposition the wire harness connector by carefully and slowly bending it outwards just enough to clear the screws; use the wire harness for added leverage.
X Carriage
Needed parts :
- X Carriage
- 4x LM8UU linear bearing
- Zip-ties
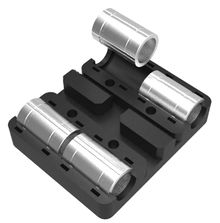
Insert four LM8UU linear bearings on the X Carriage and fix them with eight zip-ties. Make sure to put the « head » of the zip-tie on bearings side.
X-Axis assembly
Step 1
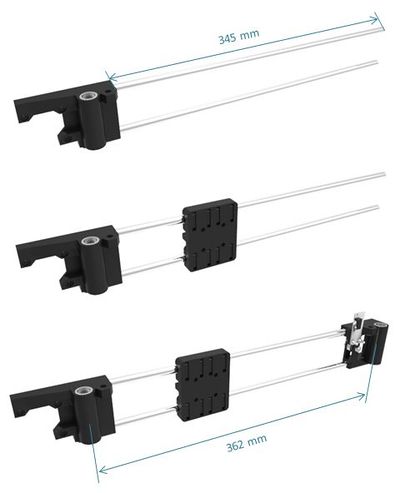
Push two smooth rods Ø8x370 mm through the X End Motor. Use a rubber mallet carefully if necessary. The excess length is about 345 mm.
Step 2
Slide the X Carriage assembly carefully through smooth rods.
Step 3
Insert the X End Idler assembly and adjust the distance between both Z-axis (about 362 mm).
