RUG/Pennsylvania/State College/3D scanning
Back to State College RepRap Main
Contents
Current Progress
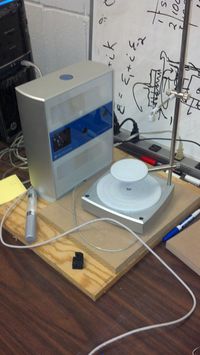
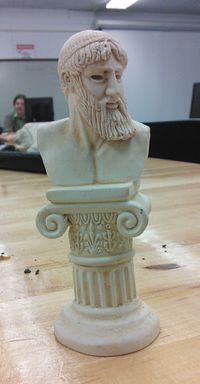
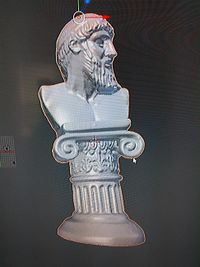
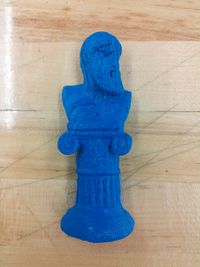
Penn State RUG is currently using the NextEngine 3D scanner to replicate and print objects. The initial scanning process is relatively simple, but aligning point data and creating a water tight model is a tedious task. The NextEngine ScanStudio software has successfully produced printable files and other software exists that makes turning the scan into a clean printable model. Penn State RUG currently uses Netfabb and Blender to clean, touch-up and ready a scanned model for printing.
When to scan
Scanning is good for replicating objects that are already made. The Scanner used by Penn State RUG is the NextEngine laser scanner. There are some negatives to the laser scanner that need to be taken into consideration when choosing if the object will scan well.
Surface Finish
Laser scanners have problems scanning objects that have a shiny surface since the light is reflected. Laser scanners also have a problem scanning objects that are dark in color, since most of the light is absorbed. One way to correct this is to apply talcum power to surface using the brush supplied with the NextEngine. If the powder is not stick apply hair spray to the model before brushing with talcum powder. If powder does not work then a light colored matte paint can be applied to surface of the model. Be careful to not apply too much paint so that the object's features are obscured.
Geometry
Laser scanners will ignore features that are not visible from the surface, like internal hollow shapes. They also have issues with undercut angles, since there is no way for the lasers or camera the reach behind the face of the object. To reach hidden faces try repositioning the model and scanning again.
Time
Laser scanner are one of the slowest types of scanners, since it needs to sweep the laser across the screen. Scanning simple objects can be slower than it is to draw up the model in 3D modeling software. The higher the detail the longer the scan will take. For an average size model using medium resolution completing the full scan takes around an hour to complete.
How to scan objects
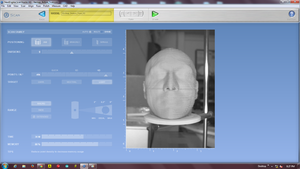
Place your object on the stand in front of the scanner. Using the image on the right side of the scan mode, center your part in the frame.
1. Choose Positioning of scan, there are three options to choose from.
360 scan rotates the object 360 degrees and takes scans from many different positions.
Bracket takes three scans separated by the user inputted angle.
Single scan takes a single digital image in it's current position.
2. Choose the number of divisions. The division changes the angle between each scan. In 360 scans, the number of divisions is the number of scans it will take to complete the full circle. If 4 divisions are chosen the angle between each scan will be 90 degrees.
For a bracket scan the division changes the angle between each scan. To find the angle between each scan divide the division number from 360. The divisions slider is not used for single scans.
3. Choose the density of each scan. The higher the density the more data points per square inch. A higher number of data points that are taken means more detail but also a larger file size and longer scan time.
Optional: Choose your target. This is used to tell the scanner if the piece is a light, neutral or dark color.
4. Choose the range of the scan. There are two main modes used by Penn State RUG, macro and wide. The optimal distance from the object to the scanner for macro is 6.5 inches and 17 inches for wide. Once you have adjusted the distance you may need to recenter your part in the frame on the right side of the computer screen.
At the bottom of the scan window there are bars that will show the time and memory estimate for the scan.
Example
An example of this initial set up for scanning can be viewed in this Youtube video, in which the user is setting all of the above parameters for his own object. He also demonstrates how to focus the scanner on the object within its own frame.
Aligning, Trimming and Fusing scans
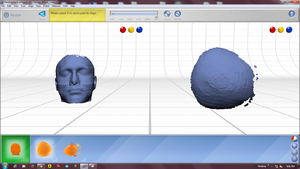
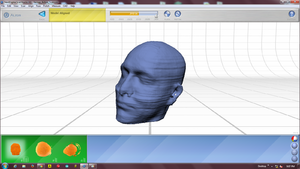
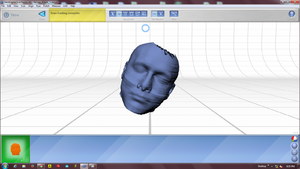
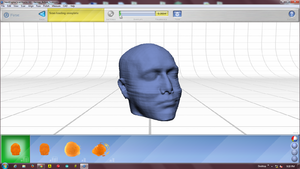
To create a complete 3 dimensional image, you will probably need to run several different scans with your object positioned at different angles. The example below shows a model of a person’s head made from a 360 degree scan with the model positioned upright plus a single scan of the top of the model’s head.
Aligning
Aligning multiple scans will help to position them and line them up so they can be fused into one model.
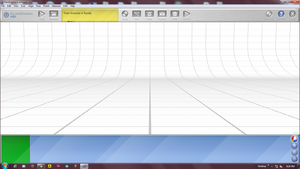
1. To start aligning you scans click the align button at the top of the ScanStudio main page. A number of dots will appear on the screen.
2. To align the scans start by placing the red dot on either of the images. Then place the other red dot on in same spot on the other image. The better the precision the better the final product will be, so pick a prominent feature.
Note: It may be help full to mark the object before scanning for easier alignment.
3. Continue to place the blue and yellow dots just like the red dot in step 2.
Note: Three dots is the minimum needed to align the scan but more dots can help to provide better precision
4. When all the dots are placed hit the align button at the top of the window and Scanstudio will align do the rest of the work.
Example
A visual for this can be viewed in this Link and the following Youtube video illustrates this at 4 minutes into the video. Also, another example of this alignment process can be viewed at 6:10 minutes into the following tutorial video.
Trimming
Trimming the model will allow for removal of any extra data that is not needed. There are six main tools that can be used to trim the model. These can be seen at the top of the trim page.
Pointer
The pointer can be used to move your model without fear of accidentally selecting necessary data and deleting it from your model
Circle
The circle allows for the a circular patch of data to be selected for removal. To use it click and hold the left mouse button and highlight the data that needs to be removed.
Square
This square is the same as the circle but selects a square patch of data.
Square line selector
The tool allows you to select a large area for removal. It works by creating a box around the data that is going to be removed. Click on one part and move the mouse the other side, creating a square with you two data points being the on a diagonal from each other.
Lasso
The lasso allows you to select large areas of data to be removed. Clicking on a spot on the screen allows you to create a line by connecting a group of lines together. All the data points enclosed will be selected for removal.
All
Selecting all will select all data for removal
Process
1. To start trimming your model click the trim button at the top of the ScanStudio main page
2. Choose your trimming tool from the tabs at the top of the page.
3. Hold down the right click button and highlight the data that needs to be erased.
Warning: Be Careful to select only data that needs to be erased
Note: You can choose to either select data or deselect it by choosing the plus of minus button
4. Once all data is selected click the trim button at the top and let the computer remove those data points.
Example
To see an example about how all of the above commands were used, you can view this tutorial video at 0:18 to see how to access the trim commands and become familiar with all of the different methods that were mentioned earlier.
Fusing
Fusing the model will turn a family of scans into a watertight model that can be printed
To fuse the group of scans together, click the fuse button at the top of the main ScanStudio page. Choose the level of tolerance for the scan and click fuse.
Example
To see an example of Fusing and making a watertight model, see this tutorial video at time 3:45 minutes.
Making Scans printable
To make a watertight model printable there are different methods that can be used. The three main methods used by Penn State RUG are ScanStudio Polish Tools and Netfabb.
ScanStudio Polish Tools
There are three main tools that are included in the ScanStudio software
Fill
The fill tool allows for holes in the finished model to be fixed.
Buff
The buff tool smooths the surface of the scan.
Simplify
The Simplify tool will simplify the mesh and lower the total file size. It can be used to lower the number of data points on areas with constant geometry, like smooth and flat surface.
Netfabb
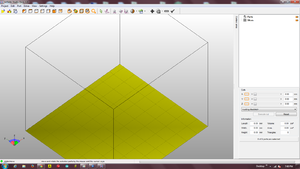
Netfabb is currently used to make the bottom of the print flat for easier printing. It is also used to fix error that can arise during conversion to .STL that causes slic3r to slice it incorrectly.
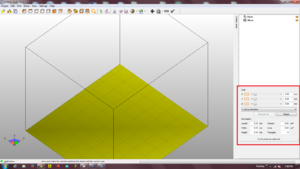
Making Flat Bottom
1. Using the sliders on the right bottom corner move the blue line into position.
2. Click the "Execute Cut" button
3. Click "Apply Cut" at bottom right corner
4. Now select the part that is no longer needed and delete it.
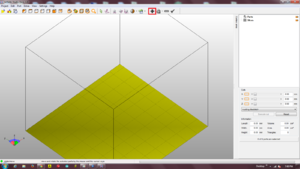
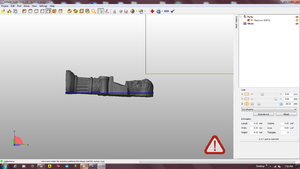
Fixing STL
1. Click the red cross at top of the page.
2. The defaults work well so click "Apply Repair" at bottom of page
Instructions for 123D Catch
123D Catch is a computer program, produced by AutoDesk that allows the user to take 20-70 pictures of a single object, upload them to an AutoDesk "cloud" and have those photo processed through an algorithm that produces a 3D model. After the model is processed, the "scene" which you took photos of can be downloaded in the form of a 3D Catch file (AutoDesk's own file type), an object file or an STL. However, if you download the file as an STL, you will have a lot of trouble modifying the surroundings of the object that you were focusing on. However, I have made a set of brief instructions to allow anyone who wishes to utilize the program.
For starters, I included an introductory video below to give you a clear idea of 123D Catch's purpose.
Now, here's the process that you must follow.
1. Create an free AutoDesk account. This can be done in this Link.
2. Obtain a device to take 20 to 70 digital photos (I personally recommend take 30 to 40 photos of most small objects though).
3. Choose an object to take photographs of.
4. Take photographs by focusing your select number of photographs around the center of the selected object. Although it is not necessary, AutoDesk's instructions recommend taking these photographs in sequential order and in small angle increments from one photograph to the next. An example of how to do this can be viewed in the following video.
5. After taking an extensive set of photographs, go to this site and Sign in under the username and password that you created in Step 1.
6. At the top of the page, select the tabe "Apps."
7. From this tab, select "Launch 123D Catch Online."
8. Click "Start New Project."
9. Click "Select Photos" and upload the photographs that you previously took with your portable device in Step 4 and follow the instructions for uploading these.
10. Select "Process Capture."
11. After hitting process capture, depending on how many photographs you took, it may take 20 to 60 minutes for 123D Catch Online to process these photographs. You will automatically be brought to a gallery, where you can continue to view the progress of your capture, but if you feel like exiting out of this page, you can do so and return to your capture by going to "My Profile" and the tab titled "Me" in the upper right hand corner (This is only visible on the website when you are signed in) and then clicking on "Projects" under your profile. An example of this set-up can been seen here.
12. When the analysis of your capture is complete, as stated before, you will be able to download the file as an STL, object file or 123D Catch file. I would recommend downloading this as an object file. Object files are relatively easy to edit and make printable.
13. Download a program that you are able to edit object files with. There are many that you could use, but for this example, I will use Meshmixer, which you can download for free here.
14. Although you can open an object file directly in meshmixer, you may want to scale your photoscene. To do this, you must open the 123D catch file in the computer software versions of 123D Catch, which can be downloaded here. After doing so, you can then set a dimensional scale for a known distance in your photoscene. The reference numbers that you send in 123D Catch are unitless, but when you transfer these files to another program such as meshmixer, you can set units to these numbers there. Rather than trying to describe setting reference distances here, I decided to include the follow Link 1 and Link 2 to illustrate how to do this.
15. After this, you can then export your 123D Catch file as an object file type, which can then be opened in another program such as meshmixer.
16. When in meshmixer, you can start editing your photoscene by deleting all of the extraneous surfaces, which is done by using the select button on left side bar. This will then give you several options for how to select unwanted areas. After doing so, you can then press "x" on your keyboard to delete these surfaces until you are only left with your target surfaces. This is illustrated in the pictures below.
17. After this, select the "Analysis" button on the left column and the select "Inspector." Although it may not do it in a neat way, it will seal up the open surfaces.
18. Edit the surfaces using the various tools in Meshmixer. This can be done by using options under the sculpt button and other options. Different tools can be used to do things such as smoothing surfaces and adding more realistic touches to bland surfaces. A summary of these tools can be found in the following Link. It would be excessive to go over all of these tools, but that link should serve as a good resource if you have a question about how to do something. However, the step that I will mention in particular is plane cut, because this tool is necessary to create a flat surface for you to print your model. The plane cut command can be found under the "Edit" button and it can be used in the same manner as portrayed by this video.
19. Now use the "Align" command under "Edit" to align the x, y or z axis with a certain feature (The flat surface that you created by using Plane Cut in Step 18).
20. After aligning your model, export your file as an STL file by going to "File," selecting "Export" and then selecting "STL (Binary)."
Congratulations! You successfully created a 3D STL from AutoDesk 123D Catch that is now ready to be oriented in Replicator G and sliced in Slic3r!
Also, if you wish to read an article that reviews the same process but with slightly more visuals, I would recommend checking out the following instructables article as well.
3D Scanning Practice -- Nittany Lion
Photos I got
You can see from the picture that each two of them are similar with each other, so as to convenience for the App to transmit it to 3D image. The brightness and contrast may greatly changed, but it doesn't matter since the App can still recognize the similar part, which is the most important element.
Some tips
123D catch: Currently is the most popular 3D scanning app, which I think is much better than others, but Autodesk has the right to share your works. You can easily take pictures at different position and height around the target object, and upload them in maximum 70 pics through Chrome online app, only need to wait for 1 or 2 hours you’ll get your 3D image and export with .stl or .obj. Here are some experiences of mine:
1. You need to keep the distance between you and the object almost the same when you move around it, it cannot distinguish some very close detail pictures if each one seems totally different in the center.
2. Cloudy weather is good for our photography, choose to take outdoor pictures when sun set, or backlight surface would be very dark.
3. Sometimes flash light would be help, don’t worry too much about great color change between photos, in normal conditions your smartphone can also adjust the exposure rate automatically.
4. It’s not necessary to take detailed picture closely, the app seems cannot distinguish them, so it just ignored those totally different pictures.
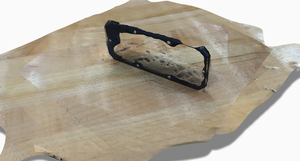
5. It’s also not necessary to upload your pictures by the sequence you took them, just pick some of them you think clear enough and can express the whole object. But the most important thing is every picture contains the whole contour of the object, or the result would be very bad. (see right, which indeed is a small black piece)
| File:Nittany Lion.stl | Exported .stl file of Nittany Lion from 123D Catch online app |
Scanning using a Microsoft Kinect
Programs
There are many programs out there that can use a Microsoft Kinect to 3D scan and object. Many are expensive but a few are free/free with limitations.
Skanect
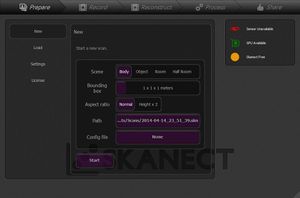
Skanect is a program that is free to use but you either have to upload your design to their server to print or you STL's are limited to 5000 faces if you export to your computer. 5000 faces will not get you far with an STL. I have found this to work very well but use is limited unless you pay for it.
To scan an object, select the scene and size (this helps the program start scanning by limiting the area where scan data will be collect. Click the start button and line up your object in the bounding box and hit record. Once you are done hit stop and follow the steps to finish off your model. You can make it watertight or crop data out using the reconstruct tab.
Overall this is an easy to use program but its biggest limitation is that you must pay for it.
Scenect
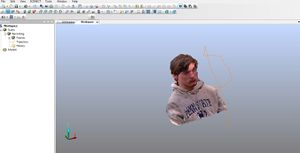
Scenect is a free program that can use either a Microsoft Kinect or an Asus Xtion Pro Live to scan objects. Both of these use infrared lasers to scan for depth and a camera to capture color. When you scan an object, it creates a point cloud of the object that can be turned into an stl with some work.
This program has a steep learning curve but Faro had a youtube playlist that outlines every step of the process from scanning to making your model 3D printable. The playlist link can be found on the Scenect page or by clicking here For 3D printing you will need a program like meshlab which can be downloaded here. Meshlab is an editing software that can be used for STL's OBJ, and more file types.
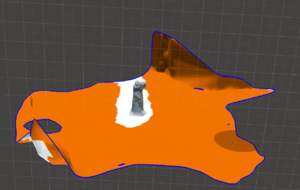
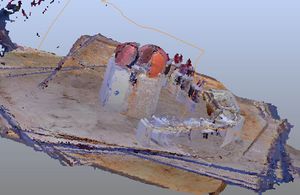
I have used this program with mixed results. I have found it is good with large objects like a room, car, etc. It is ok with medium sized objects such as a face but when you get to small objects, the kinect does not collect detailed enough information and the scan will fail as can be seen in the pictures below.
Tips
1. Scan from at least one meter away. Just like when using a kinect with an xbox, when you get too close it stops working. 2. Use in a well lit room without harsh sunlight. 3. Watch all the tutorials. They are helpful and much more helpful than any written explanation could be. 4. Take your time. If you go to fast it will lose its place and it can be hard to get it back. 5. Learn how to use a mesh editer like meshlabs or blender to fix errors in your model. 6. Use a site like netfabb to fix any errors in your files.
Meshlabs can be downloaded for free here. It is good for editing many files including obj, point cloud and stl's. You can regenerate meshes, fix the normals of the surfaces and cut away parts you no longer want/need.
Blender can be downloaded for free here This can edit stl's, obj, and more. There are many mesh features and more. It has a steep learning curve though but search on youtube and watch tutorial videos. Just be prepared to spend a while learning the program.
Extras
Pictures
Links
- Nextengine ScanStudio Demo Old Version of ScanStudio
- NextEngine 3D Scanner
- Blender
- Netfabb
- How 3D scanning works
