ShowCase
Contents
RepRap Showcase
This page illustrates the concept of what we're trying to achieve and our progress so far. For the very latest news and technical developments you'll want to check out the RepRap blog (which also has a complete development history).
The concept
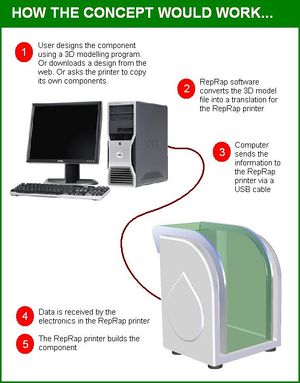
Printers are a common everyday machine. They use ink and technology to make things in 2 dimensions. Imagine if instead of printing on bits of paper, you had a printer that works in 3 dimensions. You would have to use a solid ink, but you would be able to print real, robust, mechanical parts. To give you an idea of how robust these parts could be think of Lego bricks and you're in the right ballpark. You could make lots of useful stuff. Interestingly, you could also make most of the parts to make _another_ 3D printer, but not all of them. That would be a machine which could make itself.
This RepRap printer will make the components using fused filament fabrication Rapid Prototyping technology, which essentially builds the component up in layers of plastic. This technology already exists, but your cheapest setup would set you back �15,000. And it isn't even designed so that it can make itself! So what we, the RepRap team, are trying to do is to develop and _give away_ the designs for a much cheaper (material costs will be about �300) setup with the novel capability of being able to make most of its own parts - so you can give one to a friend for Christmas. For more information on this whole concept, please click here.
We're working on three areas to achieve this:
- The software for your computer to send the 3D model files to the RepRap printer
- The physical electronics for the RepRap printer
- The RepRap printer design
And when they're all brought together we'll have a replicating rapid-prototyper. And pretty soon after, so might you...
Software
Creating Component Designs
Assuming you haven't downloaded a design off the web, or you haven't asked the printer to make a a copy of itself, you'll want to design your own components.
We use the open source (that means free!) Art of Illusion 3D modeling package (AoI) and save designs as STL files. But anything that can create an STL file can be used to design objects for the RepRap printer. This includes all commercial 3D CAD systems, and open-source alternatives to AoI, such as Blender.
Sending the design to the printer
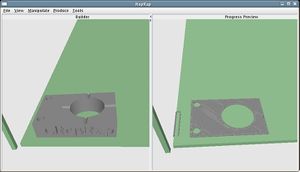
When sending the design file to the RepRap printer you'll go through the graphical user interface (above). You'll load virtual objects for the printer to make into the left-hand window, and - using the mouse - move the objects about to the place on the RepRap machine's base you want them built (you can make more than one thing at once, of course). You then select "build" from a menu, and then your computer automatically sends all the instructions needed to the RepRap printer to make the objects. The right-hand window simulates the printer as it works; it is synchronised with the actual machine's movements.
The software that runs on the host computer for the RepRap is being written in Java for platform independence, so it will run on any computer under any operating system (Windows, Linux, Unix, Mac and so on). And of course we're giving all the software away free too.
Firmware
We're also developing the software for the microchips in the printer's electronics. This is being mostly written in C and C++ using the Arduino IDE for AVR microcontrollers. (A few developers are developing alternate control electronics, using the open-source SDCC compiler for PIC microchips.)
Electronics
The electronics in the RepRap printer handle the real-time tasks.
Some developers prefer to assemble each of the 5 sections by hand on a separate bit of stripboard.
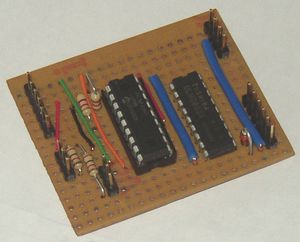
Other developers prefer one big custom PCB. Such All In One Electronics eliminates board-to-board wiring.
A USB cable connects the electronics to the controlling PC (see below).
Machinery
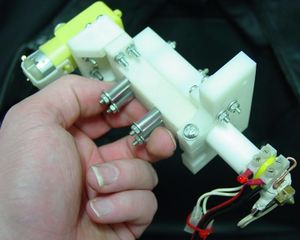
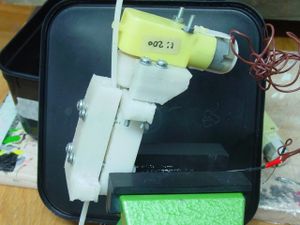
We've developed our own plastic extruder print head - the crucial bit which the printer uses to build components with. It squeezes out a thin filament of plastic which is used to make each layer.
But what's the whole printer going to look like? Well, we're working on three different concepts at the same time. When they're all done we can take the best bits from each concept and come out with an all-singing, all-dancing hybrid architecture.
Printer Concept 1: "Da Witch"/"Zaphod"
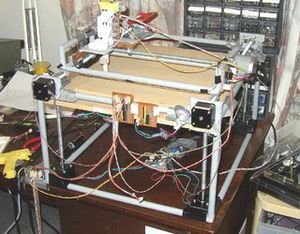
Da Witch is a 3-axis prototype with a single static extruder printing head. The bed on which objects are built moves around on screw-driven axes below the head, powered by electric motors. It is notable because it is actually fully-functional today, allowing concepts and software to be tested.
And apart from the frame, rods and fastenings, all parts are made using its hosting RP technology. So it's nearly capable of making all its own parts.
A cooling fan has been added, and the frame has been made from copper tube to save weight for transport. A second head has been added, causing the device to be renamed "Zaphod". The bed has been surfaced with sanded wood, which has proved to be an excellent deposition surface.
Progress: Recently, Zaphod made the main parts of a Mk2 extruder. The fabricated extruder worked.
Printer Concept 2: "RepStrap"
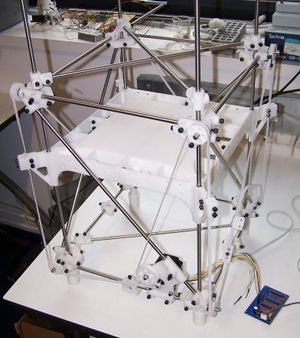
The RepStrap is a 3D printer that can be built out of readily available parts and is compatible with all of the RepRap electronics and software. Since you can normally only build a RepRap if you already have a RepRap machine, the intention of the RepStrap is to provide a simpler means of producing the parts for a full RepRap machine without already owning one.
Progress: The RepStrap is currently fully functional however it requires some work to improve quality. It currently uses a 0.5mm extruder that needs to be made smaller. It also currently uses a standard RepRap extruder which cannot be easily built from readily available parts.
Printer Concept 3: "Tommelise"
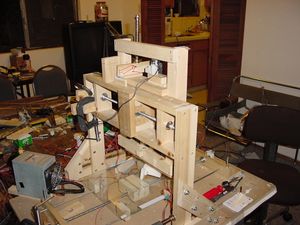
The device name Tommelise is an reference to the size of this system, which has a working volume of 300x300x150mm. The system uses a combination of threaded drive rods and cabling to create a stable positioning system. The structural prototype is made of milled poplar lumber, a inexpensive, light, easy-to-work material.
Tommelise is a test platform for low cost, very energy efficient pseudostepper motors instead of unipolar or bipolar stepper motors. It also uses a more powerful PIC 18F4610 microcontroller which runs all three axes and the extruder.
Progress: Tommelise is operational and is printing objects in high density polyethylene (HDPE)
Printer Concept 4: "A.R.N.I.E."
This concept is a half-way-house between the previous two. The print head can only move in the horizontal plane at the top of the machine, and not up or down. It's the bed which increments the component away from the head by dropping down a step when each layer is finished.
Progress: The device is now complete, and has printed an alcohol-tight shot glass. Calibration continues.
And has RepRap made anything yet?
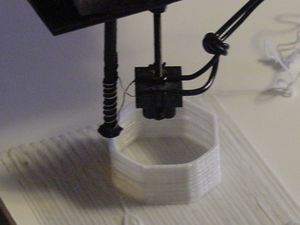
Yes - after all that, Zaphod made its first part for use in itself in September 2006, shown here working:
We're just getting to the stage of making simple objects and things are hotting up. Zaphod has printed an almost complete set of components for another extruder (see below). Check out our blog for the latest exciting developments...
RepRap handout
There is a two-page [[File:ShowCase-handout.odt that you can download and print to give an overview of the RepRap project. It is in .odt format for OpenOffice. There is also a .pdf version here.|thumb]]
Next: How to Build One
- shot glass:

