Portable USB Ubuntu RepRap Host
This page is a development stub. Please enhance this page by adding information, cad files, nice big images, and well structured data!
Release status: unknown
| Description | Allows the Host RepRap software to be run off a USB installation of Ubuntu
|
| License | unknown
|
| Author | |
| Contributors | |
| Based-on | |
| Categories | |
| CAD Models | |
| External Link |
Contents
Introduction
This is a user guide for installing a portable version of Ubuntu onto a USB pen and running the Reprap software off it. So that no matter what PC or laptop you are running it will run so long as there is a USB slot free, leaving you existing configuration on your hard drive totally unchanged.
Pre-requisites:
1. A USB stick 2GB or larger
2. Ubuntu CD Image
3. PC/laptop/Mac
4. A working and functioning RepRap
Install Ubuntu onto USB pen
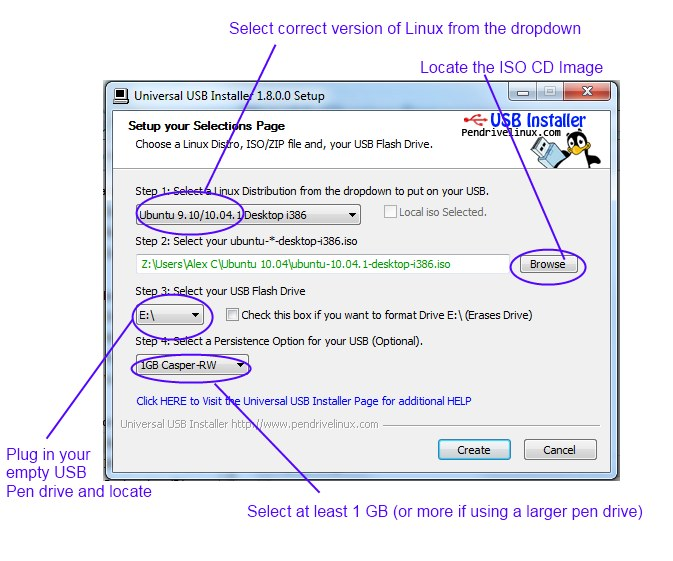
1. Grab the ISO from http://www.ubuntu.com
2. Grab Installer for a USB stick http://www.pendrivelinux.com/universal-usb-installer-easy-as-1-2-3/
3. Run the ‘Universal USB installer’
4. Plug in your empty USB stick
5. Ensure you have a persistence option of at least 1 GB if you want to save settings when running/exiting Ubuntu
6. Click ‘create’ and install onto USB.
Run the USB installation of Ubuntu
1. Restart your Comouter with the USB stick still plugged in.
2. Change the boot device to the USB Pen in the BIOS.
3. This is done by pressing ‘Del’, ‘F10’ or some other button at first boot (black screen with white type)
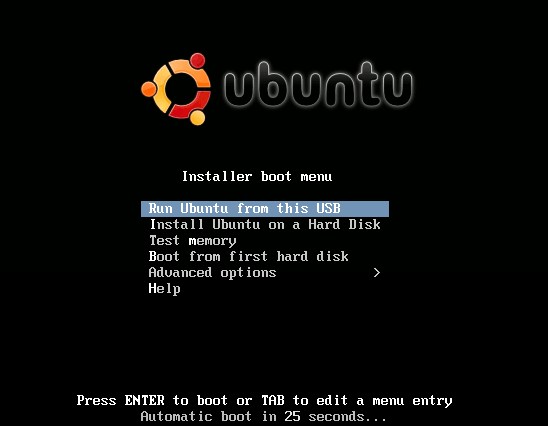
4. Wait for the USB pen to boot and select ‘run from USB’. Ubuntu should start up.
Setting up the Ubuntu environment – installing Java
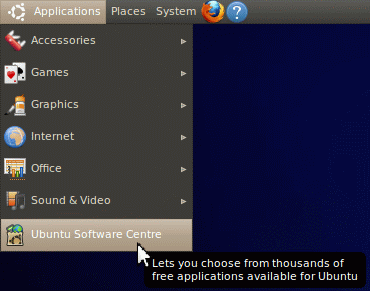
1. Install/run the ‘root terminal’. To install go to applications > Ubuntu Software Centre and under search type ‘root terminal’.
2. Apply and install, now it should be under the applications > system tools menu.
3. In order to run the RepRap software you need to Java to be installed in ‘root terminal’ type these one line at a time pressing enter each time:
sudo add-apt-repository "deb http://archive.canonical.com/ lucid partner"
sudo apt-get update
sudo apt-get install sun-java6-jdk
4. Download the latest build of the RepRap software: http://sourceforge.net/projects/reprap/
5. Unzip onto the desktop (or wherever you like).
6. Plug in the RepRap to the computer's spare USB port.
Starting and Configuring the RepRap
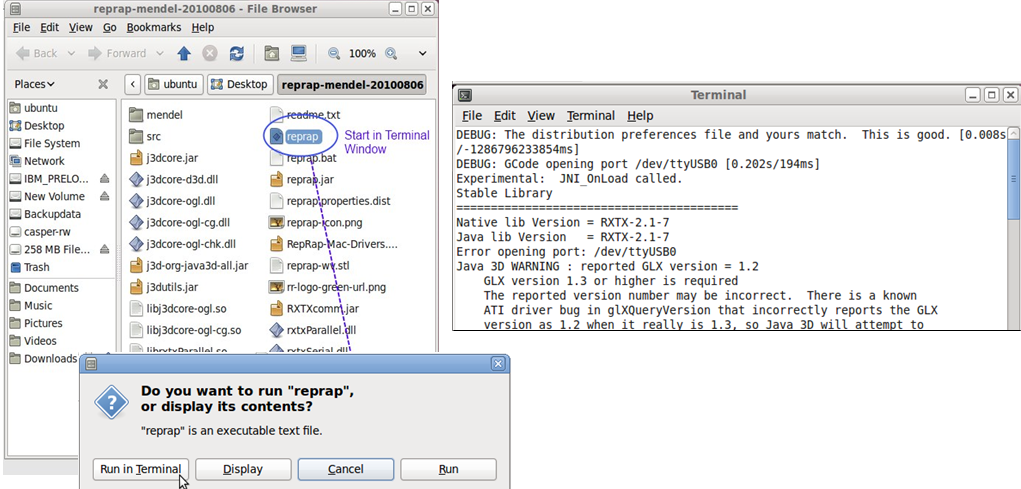
1. Press the reset button on the Anduino board and start the RepRap software by double click ‘reprap’ and running in terminal as described below. If you have a message in terminal saying
Error opening port /dev/ttyUSB0
Look at connecting the “connecting the RepRap in Ubuntu”
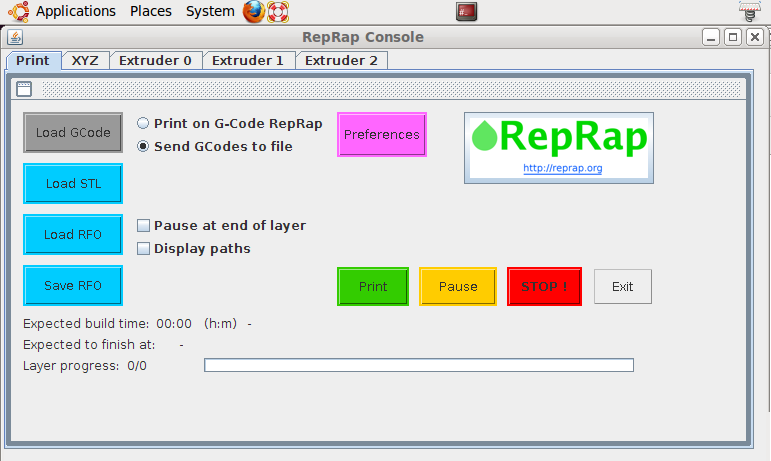
2. *Important* before generating GCode just double check the ‘preferences’. As once the GCode is written, the preferences can only be changed by manually editing the lines of GCode in a text editor.
A more detailed explanation of what each parameter means in the “extruder” and “is found here: http://reprap.org/wiki/Java_Software_Preferences_File
Troubleshooting / Connecting RepRap in Ubuntu
1. Connect up the Anduino board on the Reprap and the PC/Laptop via USB. Ensure the USB connection to the RepRap/Anduino PCB is working (green light flashing and red light on etc). 2. Within Ubuntu run ‘root terminal’ type ‘dmesg’ – this should output alot of stuff but towards the last few lines look for:
[  117.746733] usbserial_generic 2-1:1.0: generic converter detected
[  117.747011] usb 2-1: generic converter now attached to ttyUSB0
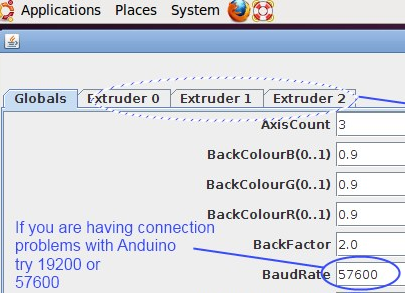
2. If you can’t see it, follow the steps below. If you can but the RepRap still does not appear to communicate with the computer try changing the ‘Baudrate’ to 57600 or 19600 if it still does not work.
3. Again in the ‘root terminal’ type ‘lsusb’ it should output something like this:
Bus 004 Device 001: ID 1d6b:0001 Linux Foundation 1.1 root hub
Bus 003 Device 001: ID 1d6b:0001 Linux Foundation 1.1 root hub
Bus 002 Device 002: ID 0403:6001 Future Technology Devices International, Ltd FT232 USB-Serial (UART) IC
Bus 002 Device 001: ID 1d6b:0001 Linux Foundation 1.1 root hub
Bus 001 Device 001: ID 1d6b:0002 Linux Foundation 2.0 root hub
4. Make a note of the ID (in bold above) and again in the ‘root terminal’ type:
gksudo gedit /etc/modules
this should open a text file.
5. Add this line to the next line of text, this will load the USB driver in Ubuntu each time it starts:
usbserial vendor=0x0403 product=0x6001
Note how the numbers are matched from the output of the ‘lsusb’. Save the file and exit.
6. Restart Ubuntu and the RepRap software – it should now load the drivers for the USB connection as ttyUSB0.
