00str00der2
Release status: work in progress
| Description | The RepRap Wiki 00str00der2 page.
|
| License | BSD (revised, 3-clause)
|
| Author | |
| Contributors | |
| Based-on | |
| Categories | |
| CAD Models | |
| External Link |
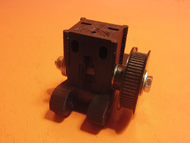
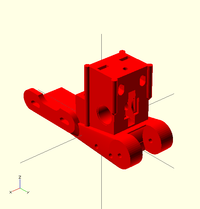
The 00str00der2 is a bearing-free, belt-driven, gear-based, open-source extruder design intended for RepRap 3D Printers. It uses a precision linear-drive system to drive a knurled or hobbed bolt (or similar drive that grips filament/material), which in turn supplies filament to a nozzle used for 3D printing. The 00str00der2 is created by Free Beachler, creator and owner of Longevity Software LLC d.b.a. Terawatt Industries. Based on the original 00str00der#Version_1.3, it is entirely bearing-free, with a smaller bushing-based drive system; and is reinforced, redesigned, and re-coded.
Contents
- 1 Summary
- 2 Background
- 3 Mechanical Construction
- 4 Extruder Calibration
- 5 Stepper Driver
Summary
00str00der2 is a work in progress.
The 00str00der2 is version 2 of the 00str00der belt-driven extruder.
The 00str00der was originally conceived and designed in 2012. It is perhaps the most versatile and reliable extruder available on the market today. It offers an ultra-long-life design with GT2 pulleys and belts, and supports direct-drive and Bowden configurations. The design has been revised several times and proven in the field by Terawatt Industries and Reprap users. Now it is almost 2015 and it is time for major upgrades offered by 00str00der2.
Background
The original design has been revised several times and proven in the field by Terawatt Industries and Reprap users. A few issues have emerged:
- Stress on the extruder tower (upper block) can cause breakage. It must be printed 100% solid.
- Heat from hotend (direct-drive configuration) causes lubricants from bearings to drain. This drained lube may contribute to random hotend problems. The bearings wear much faster than they would when cooler.
- Wobble on the hobbed bolt. Corrected in version 1.3
00str00der v2 attempts to address these issues and more in a bid for the perfect open source extruder design!
The 00str00der2 is designed from the ground up. It looks similar to the original 00str00der, and it shares some of the original code, but overall this is a new/original design with nearly all original code and concepts. I spent a long time trying to think of a new tower design, even if just for aesthetics, but ultimately I came back to the rectangle-shaped tower.
There is no quick-release for the idler, again. I recently heard that Makerbot had possibly filed a controversial patent in 2014 over that design, but no matter. I never intended a quick-release because the Greg's-style designs have never worked for me: the pivoting screws wear out and break the plastic, full stop, in all my experiences so far, which do not specifically include the patented design (disclaimer). Anyway I was thinking of something radically different for a quick-release - something derived from a bicycle quick-release for wheels, seat post, etc - if it ever happens it will probably be something quite different from the patent and quite clearly open-source, i.e. published here and Github or similar. This design will always be 100% open source.
A subtle but important difference in the new idler is the mount gender -- in v.2 the idler is a male part and the block is a female part as this allows for more reinforcement in a tighter space.
Major improvements in this design include:
- Lube-free, bearing-free design
- M6 acetal bushings
- M6 knurled bolt
- M6 idler bolt
- Custom idler for 00str00der
- Stronger idler fulcrum mount.
- Reinforced extruder base, tower, and motor mount
- Same belt-driven design as original 00str00der
- Increased motor adjustment freedom for belt tensioning
Mechanical Construction
TBD Assembly instructions will be similar to the original 00str00der, with a similar BOM, but M6 instead of M8. Idler roller assembly will be quite different though.
Some instructions for idler roller assembly are provided in order to provide open source protection for this design.
Materials
- 4x M6 self-aligning acetal bushings with flange, or non-self-align
- 1x M6 knurled bolt
- 1x M6 idler bolt
- 1x 00str00der2 idler roller
- 2x M3x12mm(?) socket cap screws for NEMA17 motor, with washers and lock washers
- M4 mounting hardware
- 1x NEMA 17 Stepper Motor
- 1x GT2 60T pulley, 6mm width
- 1x GT2 16T pulley, 6mm width
- 1x GT2 90T belt, 2mm spacing, 6mm width
TBD
Although 00str00der2 is a WIP, the 2.0 BOM is available from KitBom at http://kitbom.com/terawattindustries/00str00der-extruder-v20.
00str00der2 Idler Roller
The 00str00der2 introduces the concept of a custom idler roller for 3D printing. Its time is overdue, but this also presents significant acceptance and manufacturing challenges. To address this, the design and manufacturing process of the idler roller and idler bolt _must_ be 100% open source.
The idler roller is already designed in OpenSCAD but it is a WIP. Open source manufacturing instructions are TBD.
The idler roller is made from brass, aluminum, or steel, in order of preference. It is approximately 20mm in diameter and 5mm thick. It is knurled and grooved, with a smooth <1mm groove, thus creating a smooth trough and rough saddle. The groove can be any shape, can be smooth, completely rough, or partially smooth and/or rough. The idler roller has a 12mm bore which accommodates a teflon or acetal/delrin bushing with ~12mm diameter and ~5mm thickness. The teflon bushing has a 6mm bore for an M6 bolt. The teflon bushing is also manufactured with a pair of teflon washers that are assembled on either side of the bushing.
The M6 bolt is fully threaded. One set of metal M6 washer, M6 nut, and M6 jam nut are assembled on each side of the teflon washers, with metal washers next to teflon washers, then tightened to hand. The bolt assembly (with all including nuts, bushings, roller) is inserted into a slot in the idler and affixed with nuts on either side of the idler.
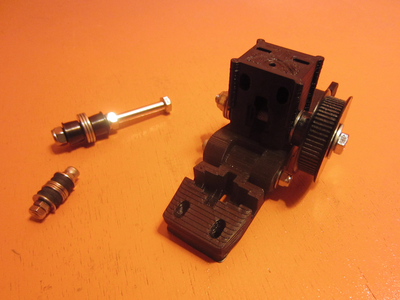
18.11.2014 - The attached photo shows some of the first prototypes for idler rollers. Metal on metal works OK but not very well under pressure or on threads. After further thought the idler bolt will have to be M4. The teflon bushing will need an inner liner and I am going to try printing a tiny part for this, otherwise it will have to be metal. I may modify the design to use rubber washers and teflon washers.
M6 Knurled Bolt
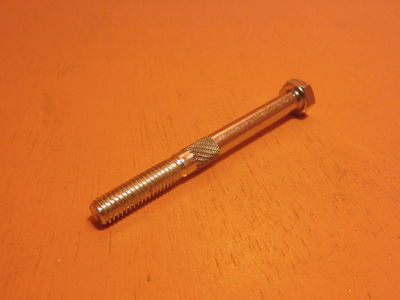
00str00der2 is designed for an M6 knurled bolt. The bolt has excellent grip and is lighter than the M8 counterpart. Perhaps someday we will design an M8 variant or go back to M8 but first we'll see how M6 does in the field.
The M6 knurled bolt is not necessarily precise, but it typically is within the M6 diameter by +/-0.2mm(?).
Printed Parts
The 00str00der tower and idler have been completely redesigned. Reinforcements have been added to the design everywhere while attempting to maintain a similar form factor. We do not know if 100% solid infill is required yet, it might not be with a thick shell and hollow inside.
Printed Parts
See Terawatt's 00str00der Github repo for slicing instructions.
| Quantity | Description | Comments | Diagram |
|---|---|---|---|
| 1 | extruder block | ||
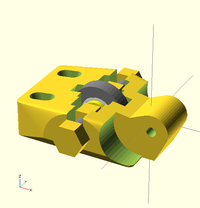
| 1 | extruder idler block | ||
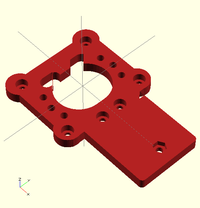
| 1 | adapter plate | optional - for mounting to www.thingiverse.com/thing:18657 - not needed for Sheliak X-Carriage |
Non-Printed Parts
- M6 knurled bolt
- M6 idler bolt
- M6 idler roller with 1x teflon bushing and 2x teflon washers
- 6x M6 jam nuts
- 60T GT2 pulley w/6mm bore
- 16T GT2 pulley w/5mm bore
- 90T GT2 belt w/2mm spacing
- NEMA17 stepper motor
- J-head hotend (for direct-drive)
- (optional) Press-to-fit connector (for Bowden)
- M4 mounting hardware (TBD)
3D CAD Files
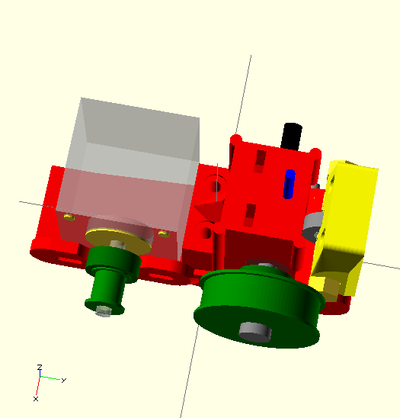
The OpenSCAD files have been completely overhauled. Most are coded from scratch. Only two have been revised from the original version, 00functions.scad and 00configuration.scad.
How to make the hobbed bolt
TBD - separate page
How to make the idler
TBD - separate page
Assembly instructions
TBD
Upgrade/Retrofit
Backwards compatibility was abandoned on this design long ago, and the new drive system is very different. The only parts that can be kept are the motor, small pulley, and some M4/M3 mounting hardware. The rest will have to be obtained separately.
Direct-Drive Configuration
Direct-drive configuration is where the 00str00der2 sits on a moving platform attached to the print-head (hot end), such as an X-carriage, as is popular on many Mendel-type designs.
There are two ways to upgrade or retro-fit an existing direct-drive machine to an 00str00der2:
- Use the 00str00der2 Adapter Plate to attach to a compatible X-carriage. This is the fastest way. The plate is designed to work with hole spacing used on many popular open-source x-carriages found on the interwebs. (TODO: cite hole-spacing spec).
- Assemble the 00str00der2 with idler arm, hobbed bolt, pulley motor, hotend, and all.
- Attach the 00str00der2 onto the adapter plate using the 3-point mounting holes.
- Note the recessed holes (on bottom of plate) to accommodate two (2) M4x30mm socket cap screws; these are for the socket-cap screw heads. The screw heads must not protrude from the bottom of the plate so the plate can mount flush to the x-carriage.
- The third mounting point is one (1) M4x16mm low-head socket cap screw, underneath the motor. The nut is on the bottom of the plate here - reverse of the M4x30mm mounting screws. This screw can protrude from the bottom.
- Attach 00str00der2+plate to a compatible x-carriage.
- Use the Sheliak X-Carriage to replace the entire x-carriage. The Sheliak X-Carriage is designed specifically for the 00str00der and is compatible with many Mendel-type machines that use 50mm linear rail spacing. NOTE: update required to PrismX for 00str00der2 mounting holes. Perhaps the best reason to replace the whole X-carriage is to take advantage of the press-fit bearing mounts on the Sheliak X-carriage. CAD files for the Sheliak X-carriage are in the PrismX 3D Printer Github repository.
- Assemble the x-carriage
- Assemble the 00str00der2 with idler arm, hobbed bolt, pulley motor, hotend, and all.
- Attach the 00str00der2 to the x-carriage
- Replace an existing x-carriage with the new one. Steps for this procedure depend on the type of 3D printer and are beyond the scope of this article.
Bowden Configuration
00str00der2 will support the same press-to-fit connectors as the original 00str00der. It will also support a right-angle mounting setup for Bowden just like the original. This is all WIP.
Version History
Version 2.0
First prototype printed with 3.5mm shell and 35% infill. The acetal bushings fit well but maybe a little more clearance - maybe, if so less than 1mm. It looks like the assembly needs teflon washers next to the acetal bushings, on the knurled bolt. The metal on acetal works acceptably but it needs to be smoother. No design changes are needed for this so I am going to machine some and update. The idler fits really well but requires M4x45mm and I think a recessed cavity will allow M4x40mm and then clear the pulley nicely.
Optional Parts
JK Adapter Plate
The adapter plate is based on the version 1.3 mountplate. It is a WIP and will be revised for modified mount hole and hotend positions.
00dapter
The 00dapter can still be used in v2 for a modified setup with the budaschnozzle.
Extruder Calibration
Configurator
Terawatt Industries has created the 00str00der Configurator which calculates the steps-per-mm for you. To use the 00str00der Configurator open a web browser to http://store.terawattindustries.com/00config.
Manual Procedure
The procedure to calibrate the 00str00der is as follows:
- Measure the O.D. of the knurled (hobbed) area of the M6 hobbed bolt, preferably with digital calipers. The exact OD will depend on things like manufacturer and batch. If the bolt is knurled then its diameter will typically be very close to the diameter of an M6 bolt ~= 6mm.
- Calculate the gear ratio between small and larger gear.
- Find the step angle for the motor - most common NEMA17 motors are 200 steps per revolution.
- Find the microstepping value supported by your stepper drivers. This usually depends on brand of driver and type of control electronics.
- Use the following formula:
steps_per_mm = (gear_ratio / (hobbed_bolt_OD * Pi)) * ((360 / motor_step_size) * (1 / driver_microstepping))
For example:
- A hobbed bolt where the knurled bolt measures 7.52mm in outer-diameter (O.D.)
- The gear ratio for a 17-to-65-tooth gear system is ~3.8235. In other words, ~3.8235 revolutions of the smaller gear equal one revolution of the larger gear.
- NEMA17 motors are common with 1.8 step angle and RAMPS 1.4 with pololu drivers supports 1/16 microstepping.
steps_per_mm = (3.8235 / (7.52 * 3.1416)) * ((360 / 1.8) * (1 / 1/16)) = 517.8957 ~= 517.9
Stepper Driver
You can use community-tested electronics to drive this extruder.
