EMCRepRap
These pages should be merged such that both pages do not attempt to cover the duplicate topics.
Release status: unknown
| Description | documenting a generic tool/artpiece
|
| License | |
| Author | |
| Contributors | |
| Based-on | |
| Categories | |
| CAD Models | |
| External Link |
Contents
EMC Based RepStrap
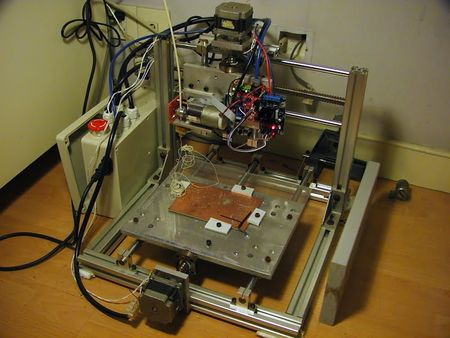
A collection of tools intended to RepStrap an EMC controlled CNC Mill or Router.
There are (at least) 3 ways people combine the excellent EMC software with RepRap technology:
- (a) Use a CNC milling machine hooked up to the parallel port of a PC running EMC, and attach a plastic extruder to the spindle. Let EMC continue to control all the motors through the parallel port, and the extruder through a USB port (or perhaps a spare pin on the parallel port). This can be used as a RepStrap to print out all the parts for Darwin or Mendel or Huxley. The rest of this EMCRepRap page describes how to do that.
- (b) Use some other RepStrap or a standard RepRap, and instead of hooking up the stepper drivers to an Arduino-based controller running the RepRap firmware, connect the drivers to the parallel port of a PC running EMC. In principle the software should not be able to tell the difference between (b) and (a), and it should produce the same plastic parts, so in principle the rest of this page describes how to do that, but I don't know anyone that has successfully made good parts this way.
- (c) Connect all the stepper drivers of a RepRap or CNC milling machine to an Arduino-based controller (such as a standard RepRap Motherboard 1.2). But instead of using the standard "RepRap Host Software" (does this have a better name???) or RepSnapper as in a standard RepRap CAM Toolchains, instead we use EMC to control everything through a single USB cable. This approach allows us to run EMC on laptops that don't have a parallel port, and use it to not only drive a RepRap but a variety of other CNC machines -- a very useful capability. A few small steps have been made in this direction (see "Emc2Arduino", "RepRap forums: How to establish a connection EMC2 with RepRap ?" and "Arduino in EMC" giving a board with 6 * 10-bit analog inputs; 6 * 8-bit PWM "analog" outputs; 6 digital inputs/outputs). Alas, as far as I know, no one has successfully made good parts with this approach (c). If you've gotten this to work, *please* tell us how.
Riding on the G-Code based tool-chains being developed this project provides some relatively simple "glue" applications and configurations which are intended to make it easy to bolt an extruder to an existing CNC mill or router and start printing. See: http://www.linuxcnc.org
Consists of the following parts:
- M-Apps : Small applications that EMC calls when it encounters a custom M-Code. See: MCodeReference
- User-Space HAL Driver : Python application which provides status from the extruder back to EMC/Axis.
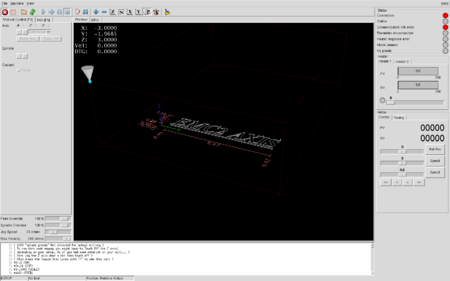
- pyVCP : A virtual control panel providing a GUI for the extruder. Integrated into the Axis GUI.
- HAL config files : Define the 'wiring' of the signals and ports defined by the User-Space HAL Driver and the VCP.
- EMC ini File : More of a sample really. Has the various bits of configuration needed to pull all the above parts together.
- axis_gts_handler.py : A Python application configured as an Axis FILTER which allows a GTS file to be opened directly from Axis. (Calls Skeinforge to process the GTS into G Code printing instructions.)
Feature Points
- Uses the official Arduino-based extruder electronics and (thus far) the official Arduino firmware.
If you have a CNC machine which you control using EMC2 on GNU/Linux, you can just mount the plastic extruder and start printing using EMC2. See here an old video that shows EMC2 printing (registed by Casainho on 2009.11.09).
Please note that the current hardware, firmware and software needed to run EMCRepStrap is not used by many people (maybe just 3 users??, with his own forks) and so it's not very well tested and documented. If you want to be able to print with the best technology available, RepRap Mendel is by far the best technology and investment you can do, because it is used by everyone and all developments happens there.
There are at least 4 users that already made an EMCRepStrap and documented and shared their code:
- David Carr using 5D code in 2010;
- raumfahrtagentur on 2009;
- Casainho follow the code from Sam Wong (with much of his help), on 2009;
- Sam Wong on 2009 - (Sam blog message) ;
- Brendan Jerwin on 2008.
How it works
When we have already a CNC machine and want to be able to use it as a 3D printer like RepRap, we just need to add the plastic extruder and his controller to the CNC. The 3 motor axes of the CNC will be controlled as normal by EMC2 and the same normal hardware controllers.
When we convert the STL files to GCODE files using Skeinforge, Skeinforge will produces some special GCODE like M100, M101 to control the extruder, along with the normal G1 movement code.
Now, it is crucial to understand the differences between two systems to see why this is a favorable RepStrap setup, especially if you own a CNC mill already. And what the differences are, and how we can close the gap.
Similarity
Mechanically, they are both consists of a 3-Axis motor driven platform. While CNC Mill has a motor spindle for milling, the RepRap has a plastic extrusion motor and a nozzle temperature readout device. So by converting a Desktop CNC mill, the 3-Axis platform (the most complicated part) can be reused.
As both system are controlled by GCode, the whole 3-Axis platform system as well as its electronics and logical signal can usually be totally reused.
Differences
We need to overcome the following differences to convert the CNC Mill to a RepStrap.
GCode Decoding
A standard RepRap takes the GCode from SD Card or Serial Port, parsed and decoded in the RepRap Motherboard. The motherboard then control the 3-Axis bot directly, and the Extruder indirectly through the Extruder Controller by communicating over RS-485 and some internal protocol. The motor and heater control logic resides in the Extruder Controller.
A standard CNC Mill controlled by EMC2 takes the GCode from a file, parsed and decoded in the computer. Then the 3-Axis bot is controlled by some kind of hardware driver. The most common desktop CNC setup being the Stepper driver through parallel port. However, EMC2 has no knowledge about the temperature and extruder GCode command extended by RepRap team.
Solutions
- Filter scripts are created to transform the output of Skeinforge to something understandable by the EMC2.
Hardware Interfacing
Parallel port device is being the most common hardware interface for a typical EMC2 setup. However, it lacks of the ability to read the temperature input - something that requires Digital-Analog Conversion.
Also, there might not be enough leftover hardware pin to control the extrusion motor - be it a stepper motor, or DC Motor with Encoder.
Solutions
- Reuse the standard Extruder Controller controller for the missing hardware interface we needed. A special firmware and EMC2's userspace driver script has to be built for that.
- Script which redirects and parse the extended GCode, and communicate with the aforementioned driver.
Note: If you have the hardware (like interfacing card) providing all the additional input and output needed, you could interface the EMC2 directly to the extrusion motor, the heat element and temperature read-out. Potentially, you could translate the extrusion and temperature command as another "virtual" axis, and hook them up with the PID loop in the EMC2, just like how you treat a normal axis. EMC2 comes even-better-than-RepRap algorithm and processing power to handle all these.
Conclusion
The Wiki here focus on the most common scenario, that's it:
- You own a Desktop CNC Mill, already usable with EMC2.
- You interface it with the Parallel Port. And that's the only low level hardware interface your computer has.
So the solutions mentioned above applies, and the material here should be able to walk you through. Please be aware that this implies:
- You still need to obtain a Extruder Controller. But not the Motherboard as EMC2 replaces 100% of its role.
- You still need the actual extruder, like Motor, Barrel, Nozzle and such..., and be able to replace your Mill's spindle with this.
These are out of the scope of this document.
Walkthrough
NOTE: This guide follows the work of sam0737 user.
End to End Story
Hardware Setup
- Keep your 3-Axis bot setup, including the limit switches.
- Remove the spindle component and connections.
- Hook up the Extruder Controller board. Connect 12V power to it.
- Connect the Extruder Controller to the computer's serial port, usually through a Arduino compatible USB->TTL programmer cable.
How to print?
- Export the object as STL file from the 3D authoring software
- Use Skeinforge to convert the STL to GCODE
- Print the GCODE with EMC2
Current developers/users
Here is a list of active developers/users:
- Casainho (from Portugal) started to build his EMCRepStrap following the steps of Sam Wong and with a lot of his help. Casainho page about his EMCRepStrap and blog. Contacts: casainho-at-gmail.com
- Sam Wong (from China) shared his code files for EMCRepStrap on 2009. Contacts: Website and e-mail: sam-at-hellosam.net
Other Information
If you are going through this route, of course you will need a CNC machine. MillStrap#Really small mill lists many CNC mills. Several of them are under $400, one of them allegedly under $100.


