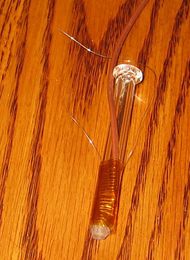
Glass Nozzles
Release status: Experimental
| Description | Glass Nozzle to replace PTFE/Brass combination
|
| License | GPL
|
| Author | |
| Contributors | |
| Based-on | |
| Categories | |
| CAD Models | |
| External Link |
One of the most frequently described failure modes for a working reprap is an extruder failure. This often occurs because the brass nozzle works loose in the PTFE thermal break, or slight mismatches in drilling create choke points that jam. Using a single material for both nozzle and thermal break would greatly simplify the construction of extruder nozzles, eliminate the drilling mismatches, and reduce or eliminate the nozzle working loose from the thermal break.
Recent discussions about reducing the heat flow from the nozzle to the ABS mounting bracket pointed out that even stainless steel, a very poor conductor of heat, was still way too good for any normal length nozzle. The only way to reduce the temperature of the stainless steel tube in that short a distance is to add many washers or other heat sinks to cool the metal before it melts its mounting bracket. However, this cooling wastes a great deal of power and releases heat inside the RepRap where it does no good.
The only solution so far is to use a ceramic or glass nozzle. High-temperature ceramics of the needed type require expensive specialized equipment to produce. Existing ceramic nozzle shapes can be used, but often need to be machined to the final shape. On the other hand, glass can purchased in bulk and worked with a common gas heating torch to create a very small orifice. There are two simple methods for producing a nozzle:
One method involves heating the end of a tube until it closes due to surface tension. The resulting blunt tip can then be ground down until a funnel-shaped section with a diameter matching the desired orifice size is reached.
The other method consists of heating the glass tubing in the middle and pulling both ends out, just like making a micro-pipette. This can produce small orifice sizes, but leads to very thin, fragile walls at the tip. The blunt nosed nozzle previously mentioned is very strong and should be able to resist breakage even after a Z axis crash.
Both types can be fitted with a flange at the other end and used with a simple saddle clamp to make a secure mount, or left as-is for mounting via compression fitting. The mounting end may also incorporate a key to prevent the nozzle spinning in the clamp.
media:MVI_7637.AVIThis page describes how to use a glass nozzle with a nichrome wire heating element. The Heater Block For Glass Nozzle page describes how to use a glass nozzle in a resistor heater block.
This page present methods to wire up a glass nozzle, and to build simple mounts for them
Contents
- 1 Forum/Mailing List
- 2 Wiring the nozzle
- 2.1 Step 1 Assemble Parts and Tools
- 2.2 Step 2 Cut Heater Wire
- 2.3 Step 3 Start first piece of Tape
- 2.4 Step 4 Insert Thermocouple
- 2.5 Step 5 Add Nichrome Wire
- 2.6 Step 6 Secure First piece of Tape
- 2.7 Step 7 Cut Second piece of Tape
- 2.8 Step 8 Wrap Heater Wire
- 2.9 Step 9 Secure Heater Wire with Tape
- 2.10 Step 10 Test Nichrome wire for Shorts
- 3 Mounting a Flanged Glass Nozzle
- 3.1 Step 1 4x3x2 Block
- 3.2 Step 2 Drill Nozzle Hole
- 3.3 Step 3
- 3.4 Step 4 Drill Bolt Holes
- 3.5 Step 5 Test Bolt Holes
- 3.6 Step 6 Cut Block in Half
- 3.7 Step 7 Check Nozzle Fit
- 3.8 Step 8 Sand to expand Gap
- 3.9 Step 9 File to fit Index Key
- 3.10 Step 10 Test Fit the Index Key
- 3.11 Step 11 Hand Test Assembly
- 3.12 Step 12 Mount Nozzle to Extruder
- 4 ideas for future experiments
Everything below this point is working notes.
Wiring the nozzle
Step 1 Assemble Parts and Tools
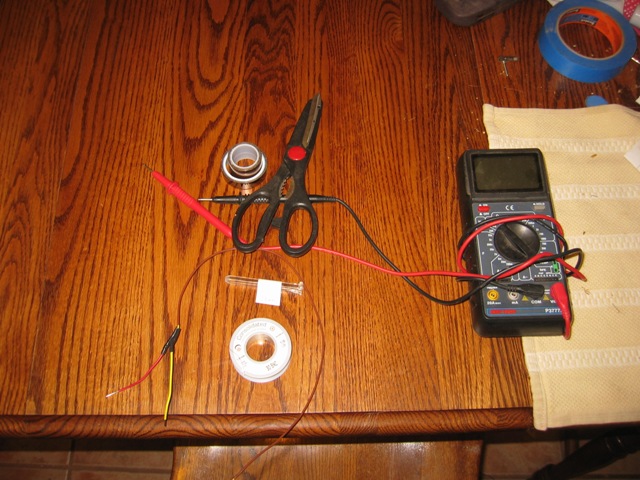
Here is a photo of the material needed to start. A glass nozzle, of course. This one has a flange and index key as well. Scissors to cut the Kapton tape as well as the Nichrome wire. A thermocouple has been prepared from extension wire by twisting and soldering the tip. A multimeter that read both ohms and degrees C from a Type K thermocouple.
| Description | Quantity |
| glass nozzle | 1 |
| Kapton tape 1" | 1 |
| nichrome wire #30 | 1 |
| thermocouple | 1 |
| Ohm meter | 1 |
| scissors | 1 |
Here is a complete list of all the parts and materials and tools needed.
Step 2 Cut Heater Wire
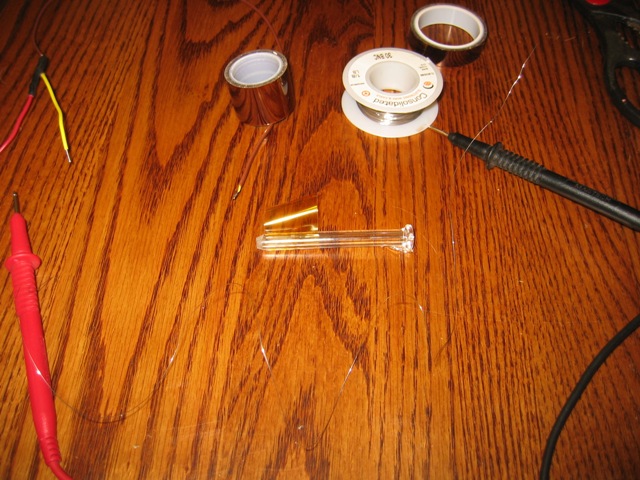
Cut off a 10 ohm length of nichrome wire. This will set the maximum heating rate to be 15 watts. For 30 gauge nichrome wire, this is a length of about 12 inches or 30 cm. The wire is so thin it is hard to see in this picture. Use the ohm meter to verify the resistance before you start. Remember the value, as we will check it again when done to test for shorts.
Also make sure your thermocouple is ready to install. You can simply strip the ends of the thermocouple extension wire and twist them together, but it is better to solder or weld them together so that there is never any loose of continuity. Since the voltage differential is generated by the temperature change across the each wire, it does not matter if they are soldered together instead of welding. But don't splice any other type of wire to the thermocouple to extend it to the electronics. If you must extend it, use more thermocouple wire.
Step 3 Start first piece of Tape
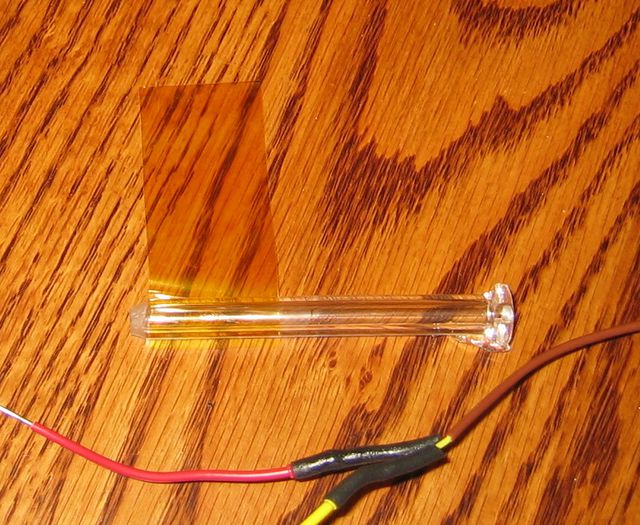
Cut a piece of Kapton tape long enough to go at least twice around the glass nozzle. Start the first little strip to get it securely bonded to the glass nozzle. Place the edge as far down the nozzle as possible. To get good flow rates, the very tip needs to be hot, and unlike the brass nozzle tips, glass does not easily conduct extra heat here. Having the tape all the way down means that the first few loops of nichrome wire will be that far down, too.
Step 4 Insert Thermocouple
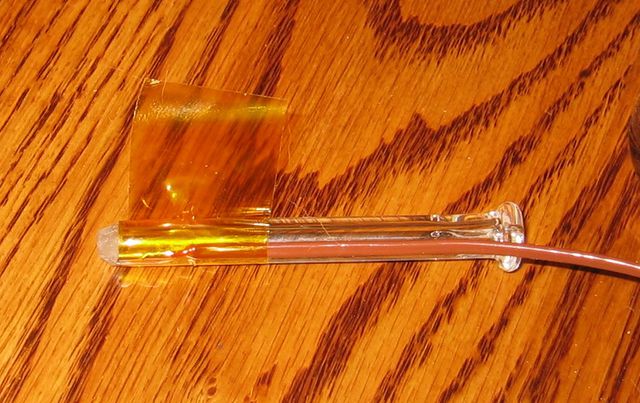
Insert the thermocouple first. It is the most difficult to keep in place, and needs the strongest taping. Notice that the thermocouple wire and the glass key index match up. This will help later when mounting the nozzle.
Step 5 Add Nichrome Wire
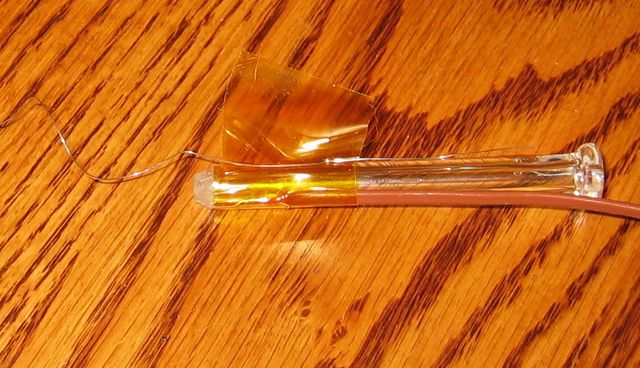
Pull the tape firmly to get a good hold on the thermocouple, go about half way around and then stop. Now place the nichrome wire cut off in step 2 so that one end just sticks past the top of the nozzle. This will allow connecting it to the power leads using the same bolts that hold the mount the nozzle to the extruder base. The long end should run straight off the tip of the nozzle. Once again, the edge of the tape should be as close to the tip of the nozzle as possible.
Step 6 Secure First piece of Tape
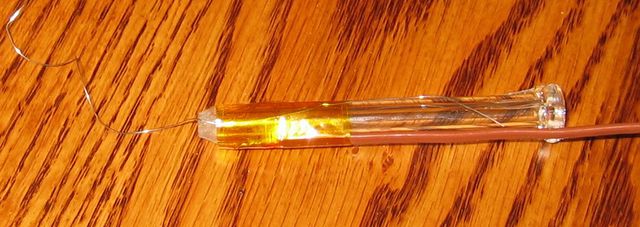
Finish wrapping the tape on to the nozzle. This will hold the thermocouple and the starting point of the nichrome wire spiraling back up the nozzle.
Step 7 Cut Second piece of Tape
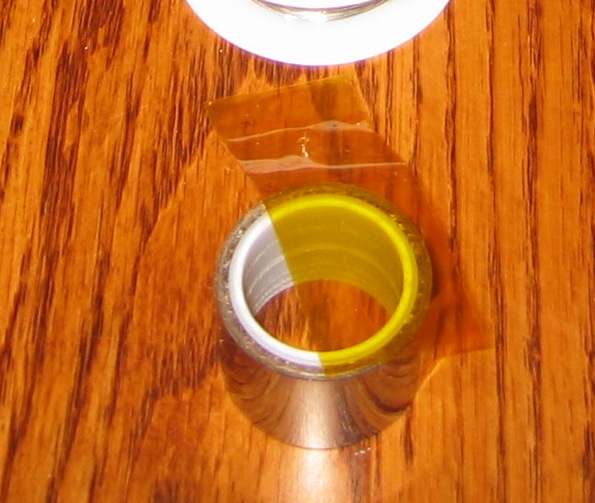
Prepare the second piece of Kapton tape BEFORE you begin winding. Once you have the wire tightly wrapped around the glass, you will not be able to let go until the loose end is secured.
Step 8 Wrap Heater Wire
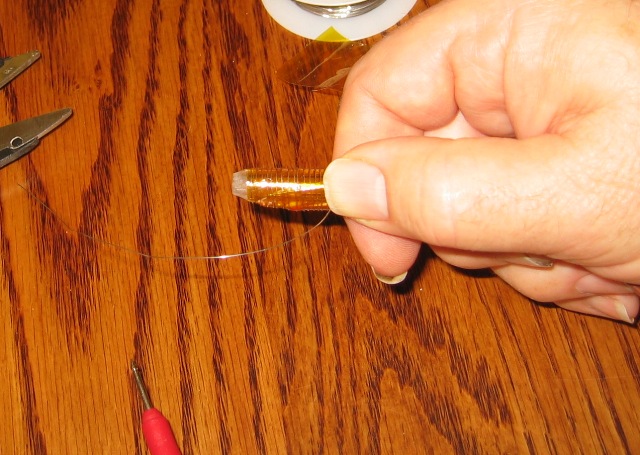
Now coil the wire as tightly as possible without have one loop touch another and short out a section. Don't worry too much if this happens once, but if it happens in several spots, stop, relax, and start over. You want to have as many loops as possible close to the tip. When you get near the other end of the wire, start spacing out the loops much further apart with each loop. This will cause a more gradual drop if glass temperature and reduce the chance of thermal stress induced breakage.
Step 9 Secure Heater Wire with Tape
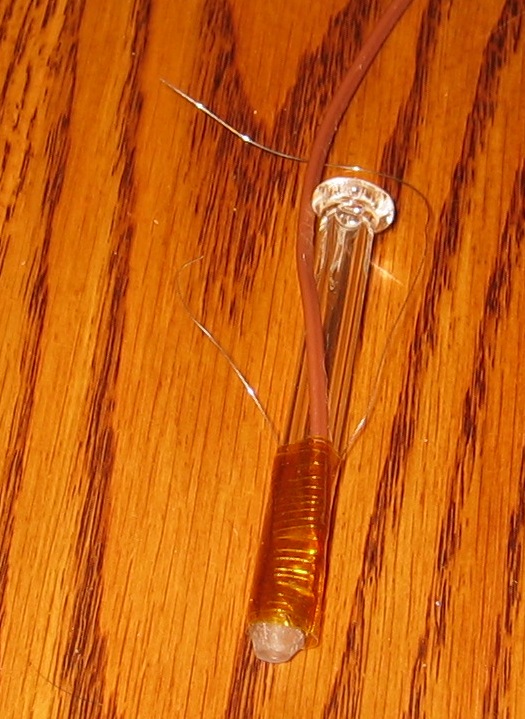
This is what the completed nozzle should look like. At this point, both the heater wire and the thermocouple are installed, and should be ready to wire up. You may decide to wrap some extra layers of Kapton tape around the heater section to provide insulation, or you may wrap fiberglass or other high temperature insulating material around the heater wires to keep the heat in.
Step 10 Test Nichrome wire for Shorts
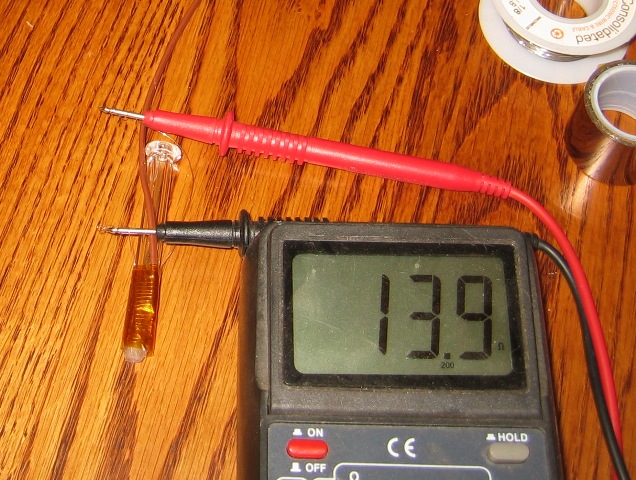
To verify that the nichrome wire coils did not short each other out, test the resistance of the wire again. It should be fairly close to what you had before wrapping it. If it is too low, pull off all the tape and start over because the coils are partially shorted out and the heating will be very uneven.
Mounting a Flanged Glass Nozzle
Step 1 4x3x2 Block
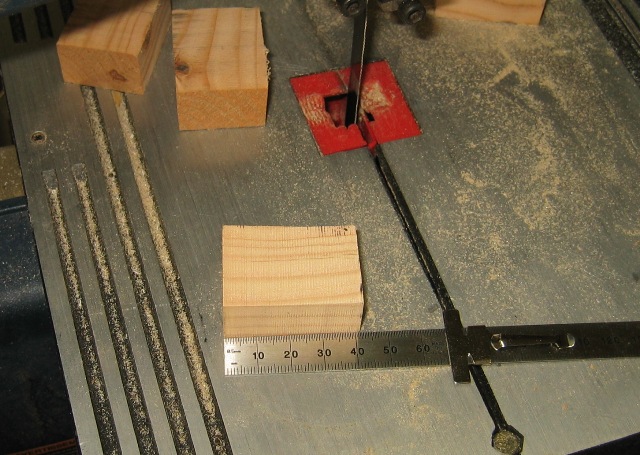
The simple way to mount a flanged glass nozzle, and also works for an unflanged one too, is to cut out a block of wood and use it to make a saddle clamp for the nozzle. Start with a block that is 4x3x2 cm, with the grain running in the longest direction. I ended up shortening the 3 cm side a little to keep the bolts from being too long, but don't go under 2.5cm. I am fortunate to have a band saw to do the cutting, but this is not precise work, and can easily be done with a hand saw.
Step 2 Drill Nozzle Hole
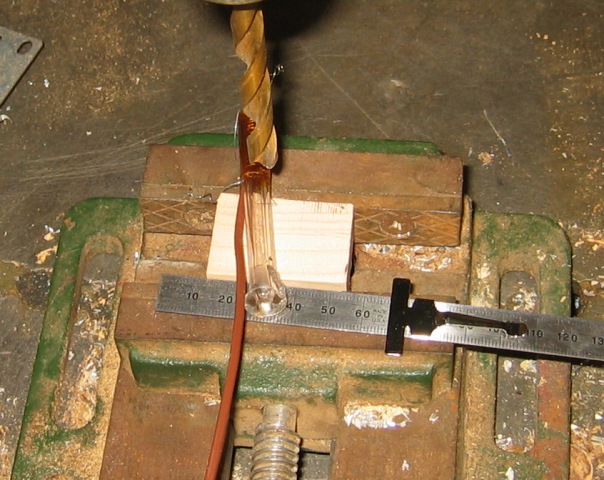
Find a drill bit that is very close in diameter to the outside of the glass nozzle, which should be around 8mm. It does not have to be exact, and it is probably better to be slightly too large than slightly too small. Drill a hole in the center of the 4x3 side. Once again, a drill press is nice, but a hand drill will be adequate. This hole determines what angle the glass nozzle sticks out of the bottom of the clamp, so try to get it perpendicular. But don't worry if it isn't, once rigidly mounted, the nozzle position will be repeatable, even if slightly off the true center.
Step 3
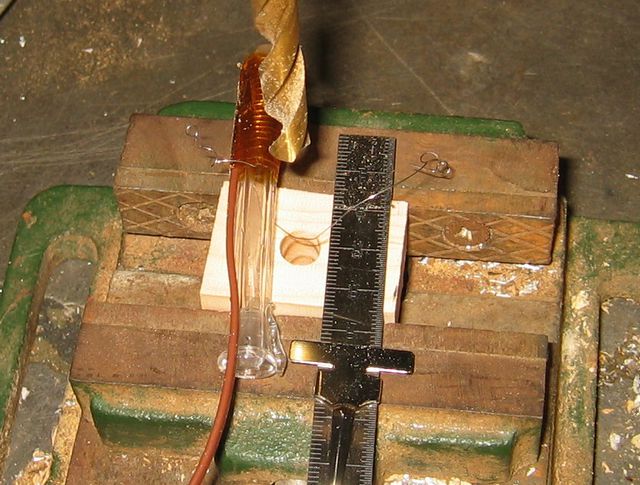
Here I have placed the glass nozzle next to the hole. It would be nice to place it into the hole now to check the size, but now that there is heater wire on one end, and the flange on the other, we can not test it until we cut the block in two.
Step 4 Drill Bolt Holes
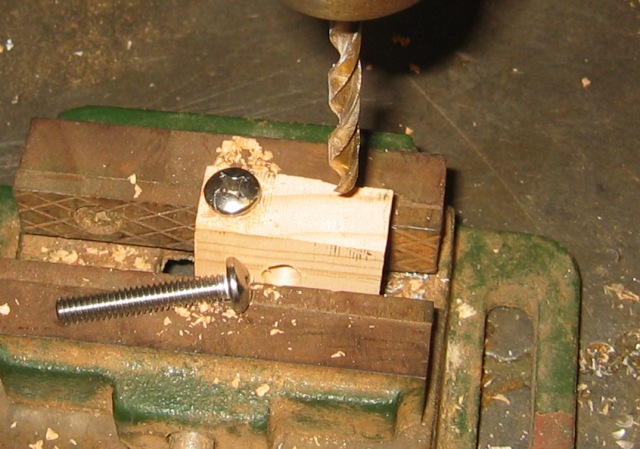
Next flip the block on its side so that the 4x2 side is exposed. Drill two smaller holes for the two bolts to go through. I used 1/4 20 bolts, which on reflection look over sized for the job. You might prefer #10 bolts or 4mm bolts. Drill one hole on each side, far enough out that neither hole intersects the hole for the glass.
Step 5 Test Bolt Holes
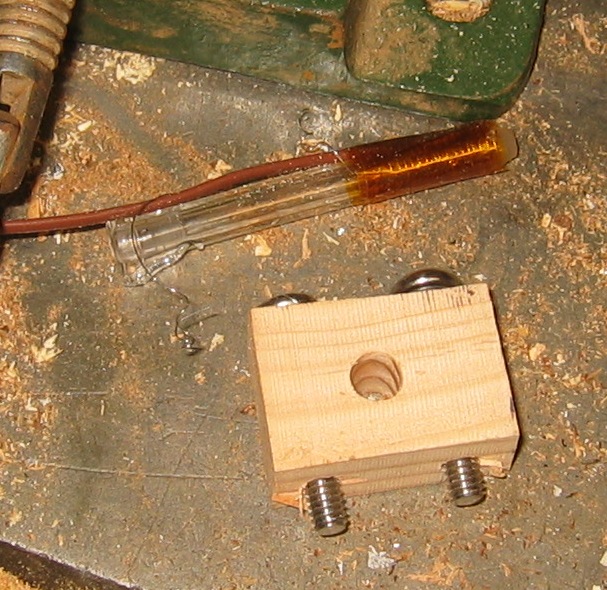
Place the bolts into the bolt holes to verify that they are long enough, and that they will not interfere with the glass nozzle.
Step 6 Cut Block in Half
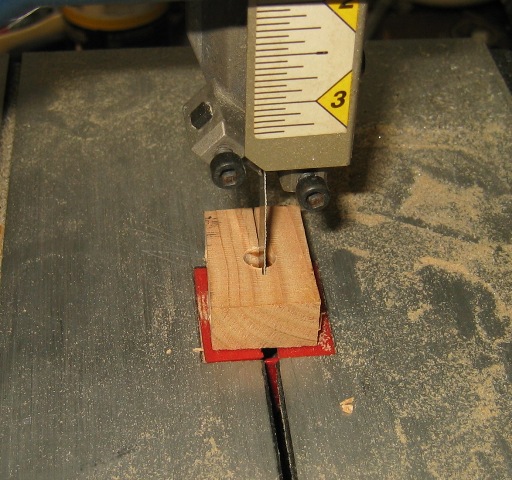
Once all the holes have been drilled, you are ready to cut the block in half and make it a saddle clamp. Once again, a band saw is nice, but a hand saw will suffice. You also don't need to worry about a thick cut, because you want some space between the pieces so that when you tighten the bolts it holds on to the glass.
Step 7 Check Nozzle Fit
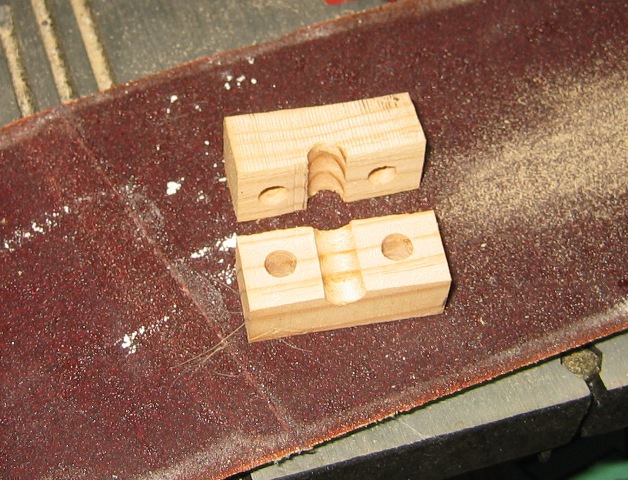
Once you have cut the block all the way through, check to make sure that the body of the glass tube fits in there easily. If the hole turns out to be slight small, widen the edges so that the tube can fit deep into each half block. Also check to make sure you cut the two bolt holes in half. If not, then they can not tighten the clamp and hold the nozzle securely.
Step 8 Sand to expand Gap
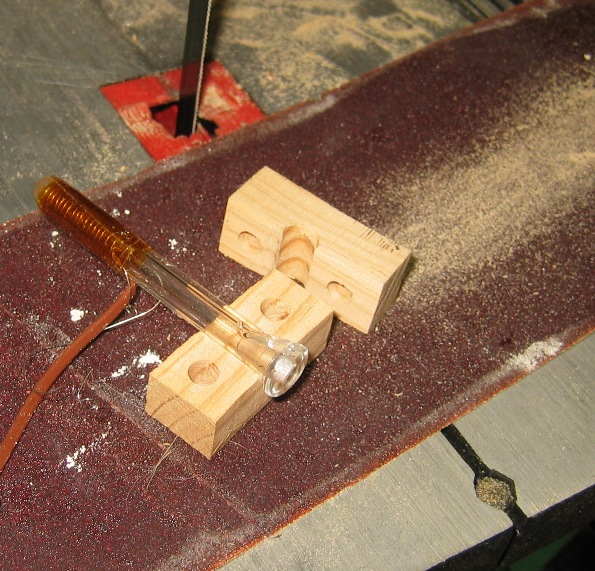
To make sure the cut is wide enough, and there is enough play to clamp the glass securely, sand down each half block where they were cut in half. This will also flatten out and bends and twists that happen to have occurred while sawing the block in half. You will know when you are done when you put the glass nozzle into the hole and press the two halves together. They should fail to touch and rock back and forth slightly around the glass tubing.
Step 9 File to fit Index Key
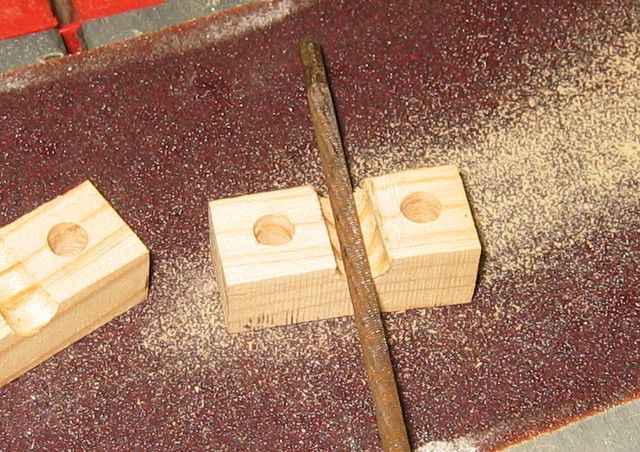
The flange keeps the nozzle from sliding out even when the stepper motor pushes the filament in very forcefully. The index key is a small strand of glass perpendicular to the flange to prevents the nozzle from rotating during use. To lock the nozzle in position, you need to find a very small round file and file a notch into one block to allow the index key glass to fit into the notch when assembled. Be sure to check which side the thermocouple comes out, and notch the block so that when bolted to the extruder base, the thermocouple is in front and easily accessible.
Step 10 Test Fit the Index Key
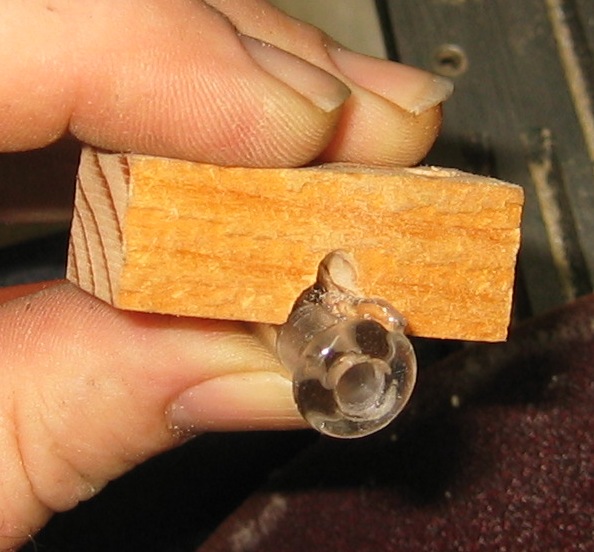
It may take several tries to get the slot deep enough. Try to avoid letting it get very wide, as that will allow the nozzle to rotate some, and that might allow the tip to wander during printing.
Step 11 Hand Test Assembly
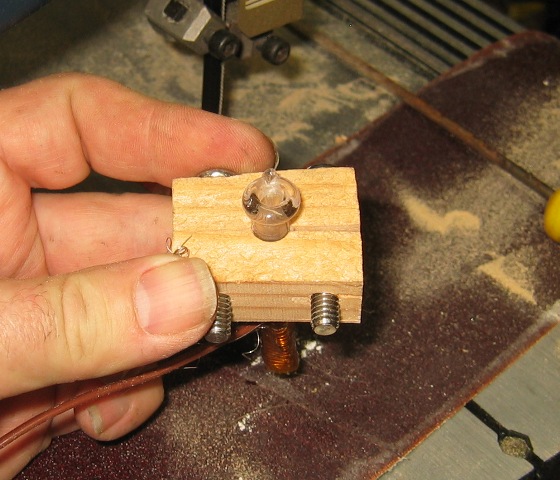
Now that the saddle clamp is complete, hand assemble all the parts to make sure everything fits together and that there is still some gap between the pieces to allow the bolts to compress the clamp around the glass tub and hold it firmly in place.
Step 12 Mount Nozzle to Extruder
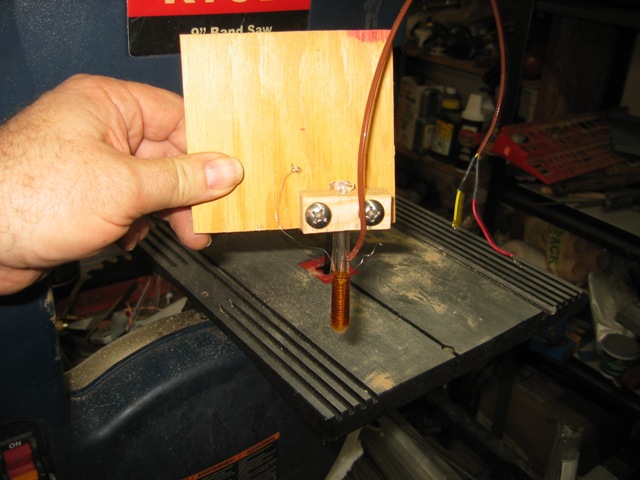
I don't have an extruder yet, so I just bolted the assembly onto a piece of plywood. I will try adding the stepper motor and gears later. This was enough to test the nozzle, using a variable power supply and the thermocouple temperature displaying on a multi-meter with type K thermal couple input.
ideas for future experiments
The above glass extruder nozzles were apparently (?) formed out of Pyrex glass borosilicate tubing, something like these Pyrex glass tubes.
Perhaps using glass already formed into approximately the desired shape would require less manual machining to produce a glass extruder nozzle:
- capillary tubing ?
- small glass centrifuge tubes (for microcentrifuges) ? These are designed to handle pretty high forces.
- glass measuring pipet (volumetric pipet) or glass eyedroppers? Maybe if we're lucky someone already mass-produces one that can be used as-is, as an extruder nozzle, without further machining.
