Merlin Hotend
|
English • العربية • български • català • čeština • Deutsch • Ελληνικά • español • فارسی • français • hrvatski • magyar • italiano • română • 日本語 • 한국어 • lietuvių • Nederlands • norsk • polski • português • русский • Türkçe • українська • 中文(中国大陆) • 中文(台灣) • עברית • azərbaycanca • |
Release status: working

| Description | Short hotend with replaceable airbrush nozzels
|
| License | |
| Author | |
| Contributors | |
| Based-on | |
| Categories | |
| CAD Models | |
| External Link |
The Merlin design is the result of about 1 year of development, starting in 2011. The goal was to create a reliable and compact hotend for general purposes.
Several members and friends of Hackerspace FFM were involved in the refinement and testing process.
The final design of the hotend features an airbrush nozzle, it turned out that this is ideal for the printing of small details and overhangs/bridges. Printing smooth top finishes requires precise calibration of the amount of extruded material, more so than many other hotends where the flatter nozzle tip allows for "ironing" of the surface. Another advantage of the airbrush nozzle is that it can be easily and cheaply replaced if damaged.
The hotend can be used without cooling, but a fan, directed at the 20mm long exposed PEEK part, is recommended.
Contents
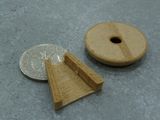
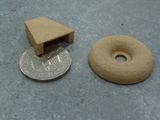
Print examples
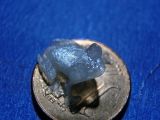
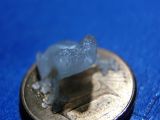
Material Test - Woodfill
Material Test - Woodfill

Example by forum user 'Ratmonkey'
Example by forum user 'Ratmonkey'
Example by forum user 'Ratmonkey'

Example by forum user 'Hardwarekiller'
Example by forum user 'Hardwarekiller'
Example by forum user 'Hardwarekiller'

Example by forum user 'Hardwarekiller'


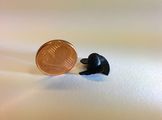
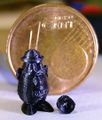
Note: The pictured 1 (Euro-) cent coin has a diameter of about 16mm.
Assembly

Regardless if you build it yourself or bought the hotend, you need to make sure of a few things when assembling it.
1. Doublecheck that the parts are clean, especially small PTFE parts can quickly jam the nozzle.
2. Make sure the inlay is screwed into the PEEK part deep enough, the upper end should sit flush in the PEEK.
3. Tighten the brass nozzle enough so it sits tight against the PTFE, check that a little bit of threading is still visible so you know it sits tight against the PTFE, not the PEEK. If you don't tighten this sufficently you get a small gap between PTFE and brass which will allow plastic to escape.
You can check the tightness by inserting some filament in the cold hotend, if you can easily push it right down to the end of the brass it isn't to tight. If it stops within the PEEK part it is to tight.
4. When inserting the thermistor take care to not damage it
5. Glue the thermistor in place using red seal, or similar heat resistent flexible glue. You can get away with thermal paste, but you have to make sure that the thermistor stays in the heatblock using different means then.
6. Make sure the thermistor leads are sufficently insulated using heat resistant insulator. You can use small PTFE tubes.
Heaterblock assembly

Some requested more detailed info on the assembling of the heater block.
Attached you can see the heater block as it comes with the Merlin Nozzle from Reprapdiscount and how the components belong together. You should use a thermal glue or heat resistent silicone to mount the thermistor.
Using thermal paste for thermal conductivity and kapton tape to fixate it can work, but it is not a lasting solution. Also make sure that the wires of the thermistor are correctly isolated, especially if you use thermal compound, since that is often conducting electricity.
You can use very small PTFE tubings to isolate the thermistor contacts, thermal glue to fix the thermistor and kapton tape to hold it all together.

This is how a heater block might look after a couple of rolls of different materials and some rough handling. Please note that it still works just fine.
Troubleshooting / Usage
Like with every PEEK hotend there is a limit to the maximum temperature you can use. In General you should stay below 250°C It is very important that you check that the thermistor and thermistor table are set up correctly since overheating can quickly damage the PEEK part. PEEK melts at over 300°C, but becomes soft much earlier
If you encounter leakage it is recommended to screw the PTFE and brass parts tighter together. This will reduce the inner diameter of the PTFE, so to make it work again you have to open it up with a 1.9/3.1 mm drill or preferably reamer. Make sure no residue is left behind that could clog the nozzle.
Do not cover the outer M10 threading of the PEEK part with Kapton tape or other things. The threading is used to increase the surface area of the hotend and provide the necessary cooling.
If you need to change the nozzle you should do so while the hotend is hot, at least to the point where the last used plastic goes soft.
In case the nozzle got damaged and broke off, you can use an Airbrush needle, or similar, to unscrew the remaining thread from the PEEK side of the hotend.
Cooling
The Merlin is designed as a passive cooling hotend. Nevertheless, some users experienced problems when printing PLA without cooling the hotend.
The Merlin kits sold by reprapdiscount contain a 40mm fan for that purpose.
Sources
Parts
Here File:Merlin Complete.PDF and here you can find the PDF files with construction schematics.
The hotend is made up of the following parts:

14 mm long 16mm diameter aluminum mount

20 mm long 6mm diameter brass nozzle
The brass part is threaded with M6 on the upper half.
Drill diameter for 3mm filament is 3.2mm, for 1.75 filament it is 1.9mm.
Drill depth is ca. 18mm, you need at least 2mm material remaining at the lower end.
For the airbrush nozzle a hole with M 1.75 thread is needed at the lower end.
M1.75 is not the exact size of the thread of the airbrush nozzle, it makes sure that the nozzle sits tight and does not leak. If you were to use the correct thread the nozzle would leak and possibly unscrew itself during printing.
The Merlin Hotend made by RRD has a diameter of 5mm at the lower end of the brass part, the heaterblock a matching 5mm hole.

30 mm long 10mm diameter PEEK Heatbarrier
The PEEK part needs an outer M10 thread and an inner M6 thread. When drilling or machining PEEK take it slowly and use a lot of coolant/lubricant.

20 mm long 6mm diameter PTFE inlay
The PTFE part needs an outer M6 thread.
Drill diameter for 3mm filament is 3.1mm, for 1.75 filament it is 1.8mm.

Heatblock for 6mm diameter nozzle, 10mm thick
... and 1 pcs. Airbrush Nozzle
Mounting
The Merlin hotend comes with a J-Head compatible Groove Mount.
Another approach is a slightly modified wade's extruder. By printing this and cutting a M10 thread into the cold end the Merlin can be mounted directly to the extruder. This will result in a really, really short hot end (about 25mm remaining length).
Additional Links
- http://www.thingiverse.com/thing:290966
- http://www.thingiverse.com/thing:1077222 Silicone Cover for Merlin
License
All information regarding the construction of the Merlin hotend is provided under CERN OHL 1.2. This hotend is open hardware, everyone can make an own version for personal or commercial use.