TZBowdenExtruder
(AlexRa: I'm not with TechZone, but rather a buyer of their Huxley kit. Information on how to assemble the contraption has been rather scarce, so here is my 2 cents):
Attaching the Bowden extruder to the Huxley
Assembling the extruder's "cold end" (which I tend to call "the pump") is not very complicated. However, there are a few nuances that should be documented. Unlike the "standard" Mendel, in a reprap with Bowden cable, the "pump" is not mounted directly on the X caret, but is connected to the rest of the contruption with the Bowden cable (a think-walled plastic tube through which the filament is pushed).
So you get this big ugly geared thing assembled, with no obvious way to attach to the rest of the device. There are probably many ways to do it, that's what I came up with:
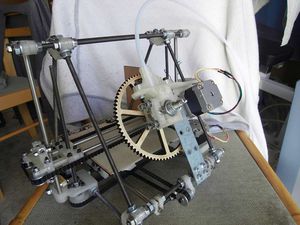
The extruder is shown in its "storage" position. It swings out for printing. It appears that the Bowden cable in this configuration can be cut off to about 35-40cm, although I haven't done any testing yet.
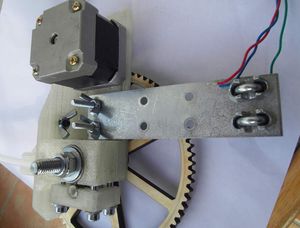
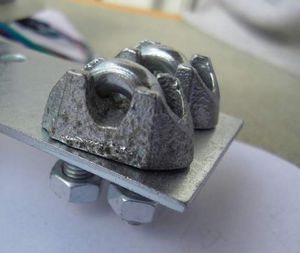
Here is the close up (there is no special reason to use winged nuts there, they just happened to be available at the moment):
The metal plate and the two fixtures are not part of TechZone's kit, but the result of a raid on a local hardware store. The metal plate can be replaced with a laser-cut "thick sheet" part (provided that the "thick sheet" is not the weak cardboard as in TechZone kit, but something stronger, like plywood). The two fixtures can be replaced with RP parts that snap onto the Huxley frame:
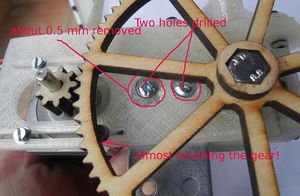
Note that in TechZone's extruder, the big gear is placed very close to the plastic, so you have to be extra-careful with the screw heads. I used the flattest-head M4 screws I could find, and still had to Dremel out around the holes (which certainly isn't not good for the part's integrity):
Attaching the Bowden cable to the "pump"
The plastic holder is supposed to hold the Bowden cable very tightly and resist the mighty forces pushing the cable away. There are two similar (although not identical) holders in the kit, one for each end of the Bowden. As it happened, in the kit that I got the "hot end" holder does hold the cable properly, but the "cold end" one doesn't. The Bowden just slides out of it. Of course, with RP parts its very difficult to guarantee the required precision.
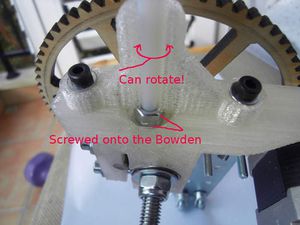
This took some tinkering, but the loose holder turned out to be a good thing. Several ways to fix the Bowden are described elsewhere on this wiki; I found that screwing two M6 nuts on the end of the pipe fixes it very reliably, while it can easily turn inside the holder (as the X caret moves back and forth):
To screw on the nut(s), cut about 1mm with a knife at the end of the tube, then just screw on the nut. No threading with a die is needed. The inner hole will be compressed under the nuts, so drill it out back to 3mm.
Update: A pencil sharpener works very well "sharpening" the cable.
