How to improve my overhang
Posted by cubedude76
|
How to improve my overhang May 18, 2014 05:48PM |
Registered: 10 years ago Posts: 4 |
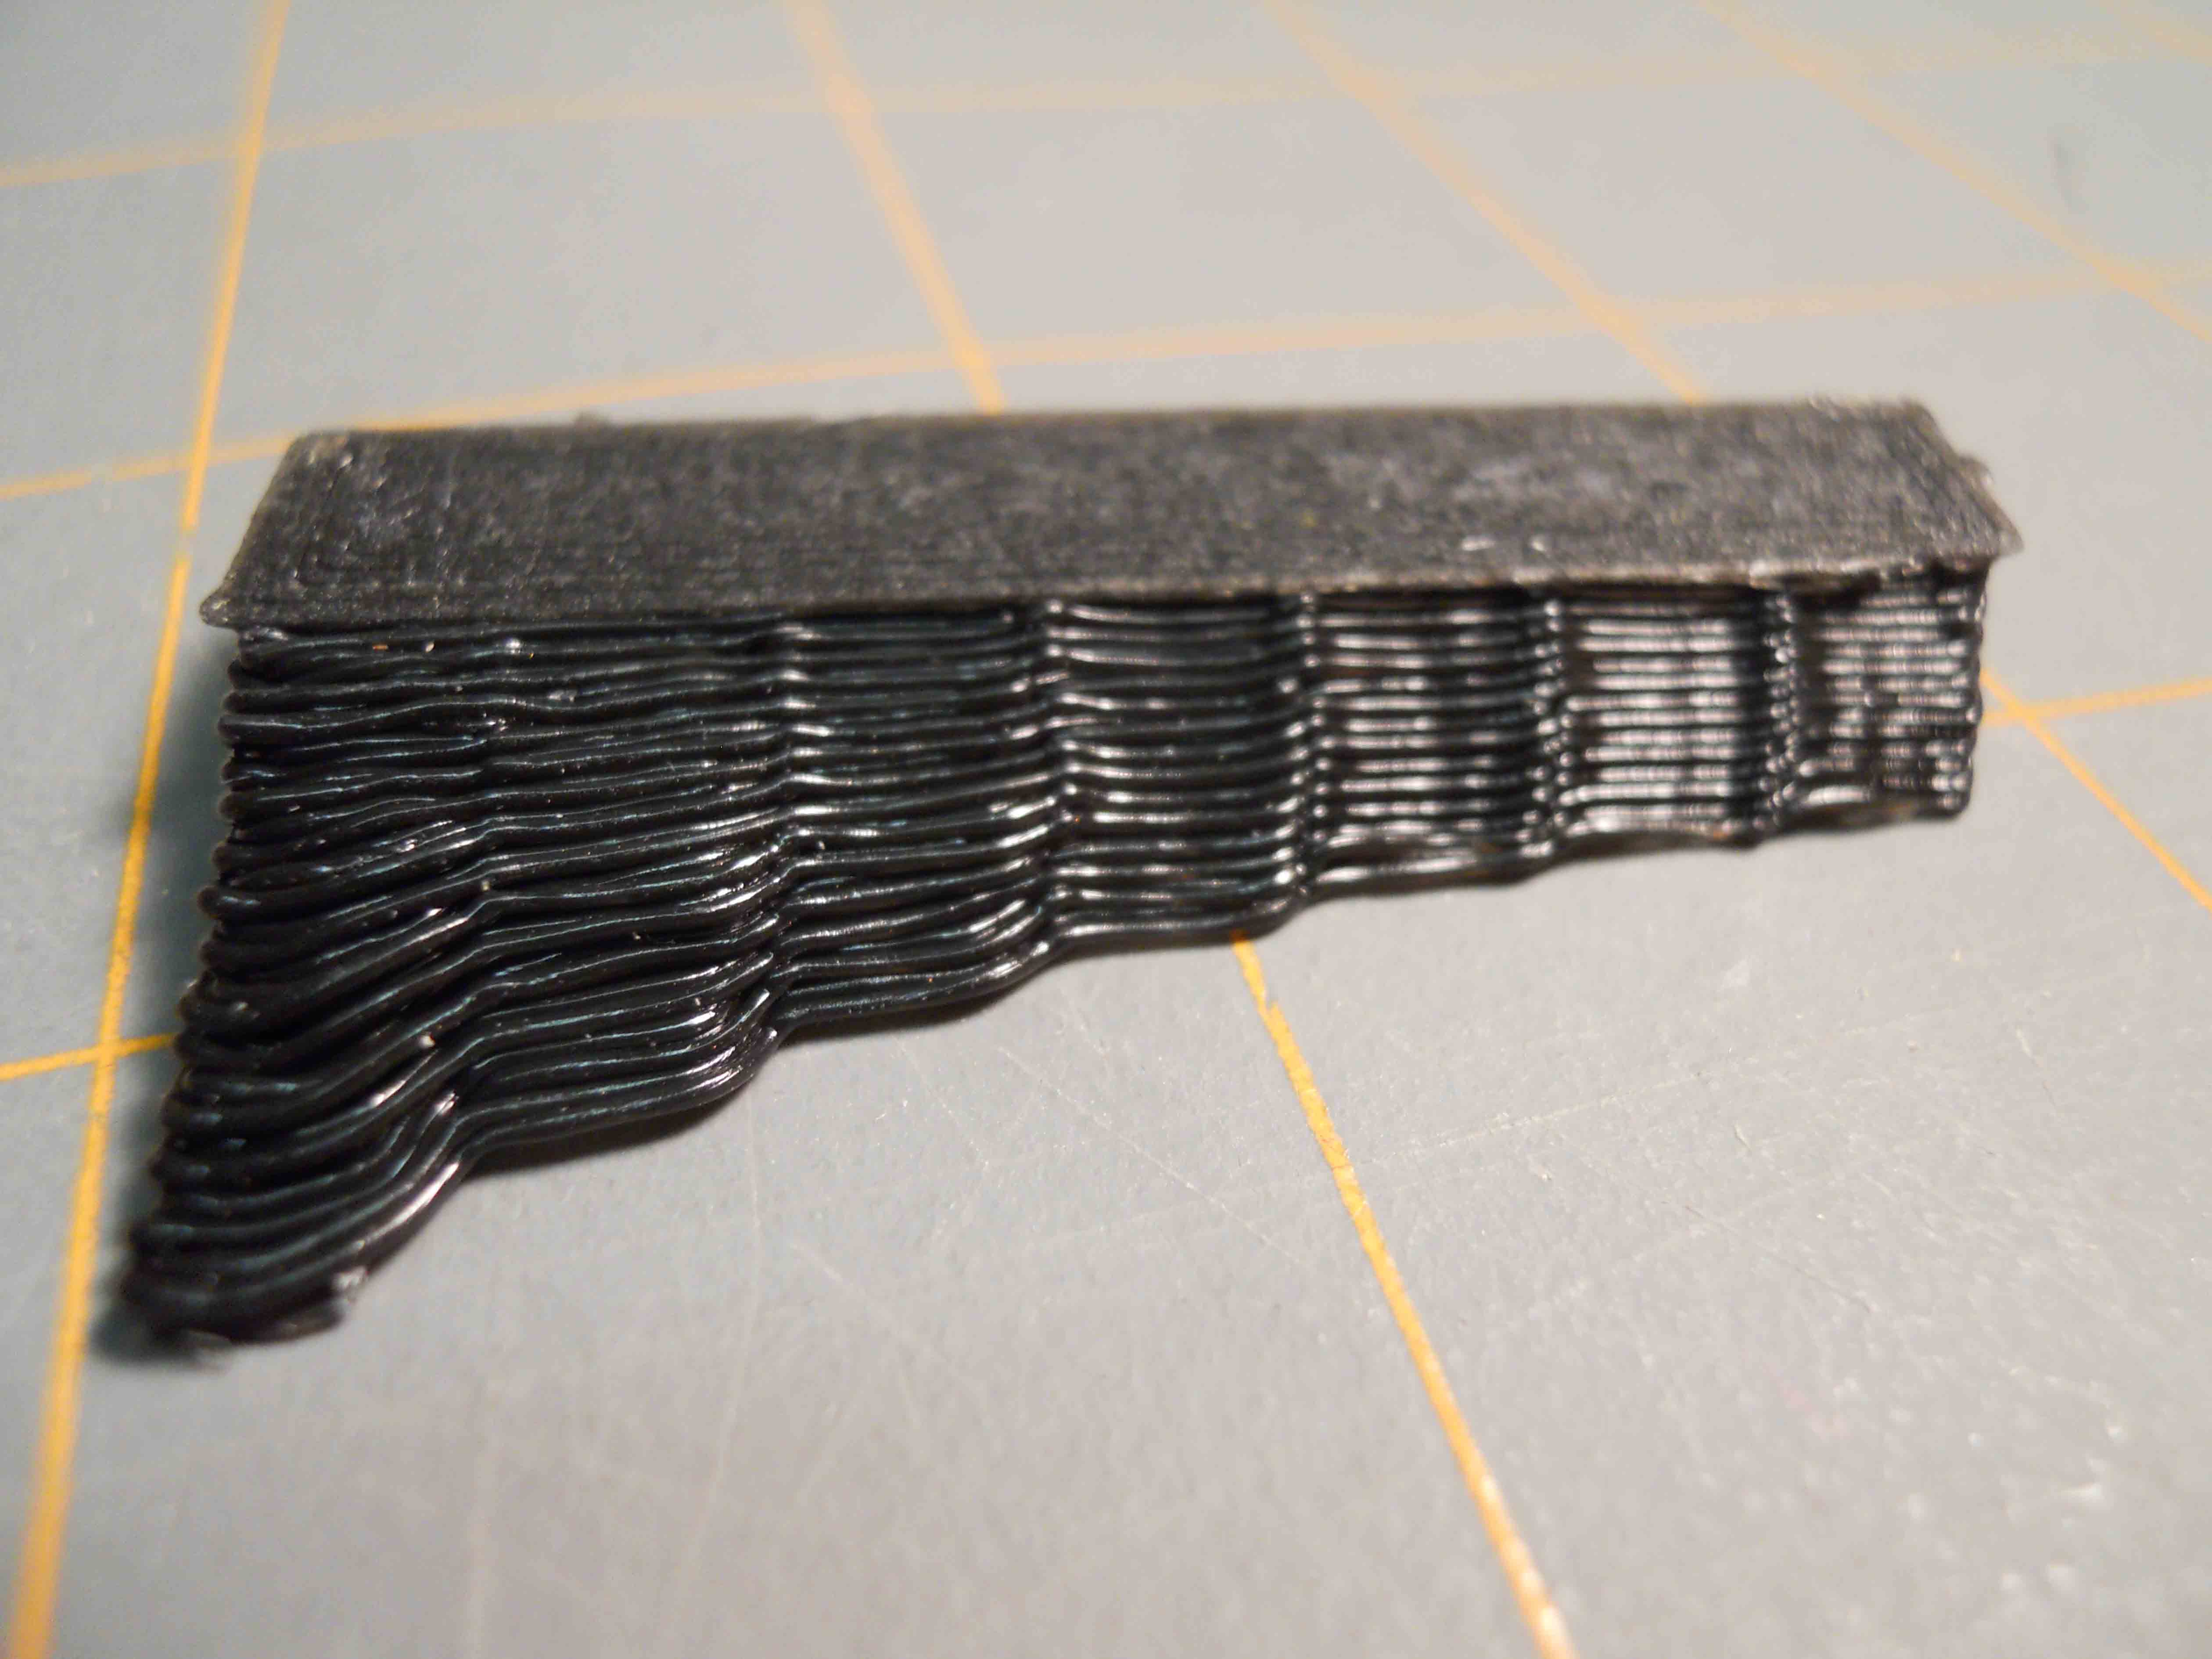
I was wondering how to improve the overhang capabilities on my printer. I printed an overhang test part 4 different times with different settings with no substantial improvement. I have a 0.5 mm nozzle, gen 6 electronics, PLA plastic. I use Slic3r and pronterface for printing. I can give other important information if I forgot something.
1st picture
Layer height-0.3
Nozzle temperature-185
Fan-no
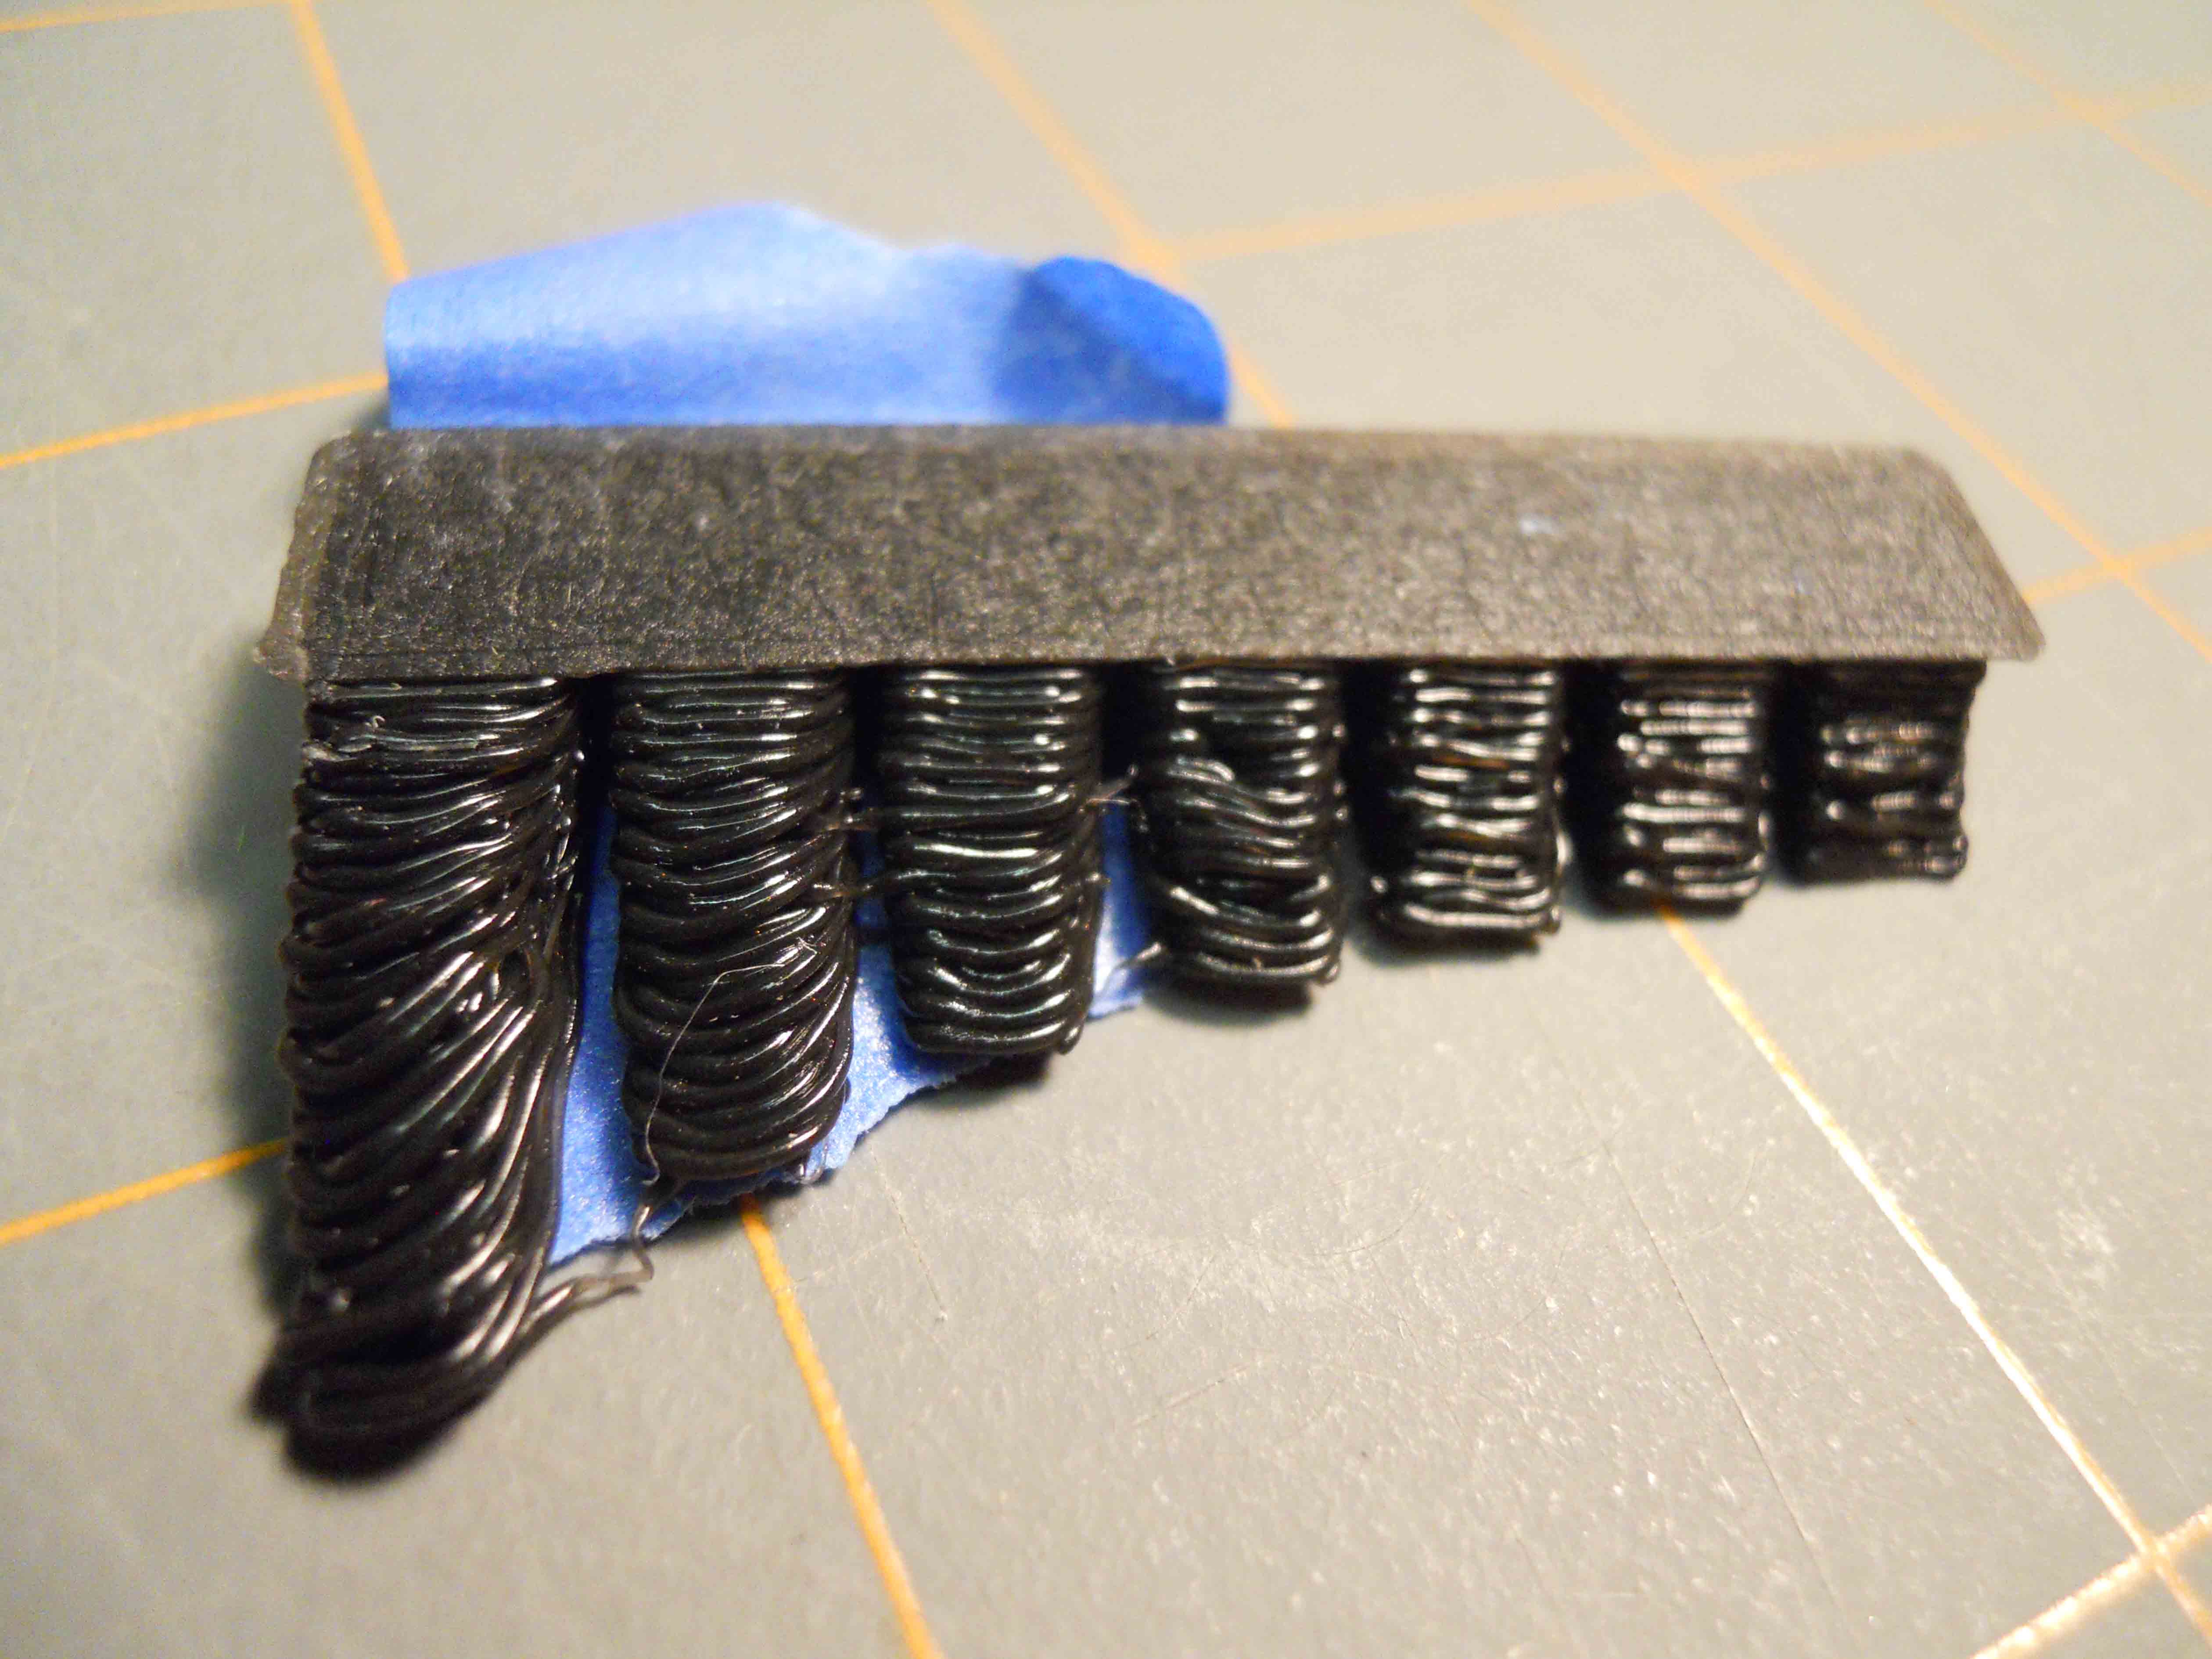
2nd picture
Layer height-0.3
Nozzle temperature-165
Fan-no
3rd picture
Layer height-0.2
Nozzle temperature-165
Fan-no
4th picture
Layer height-0.3
Nozzle temperature-170
Fan-yes
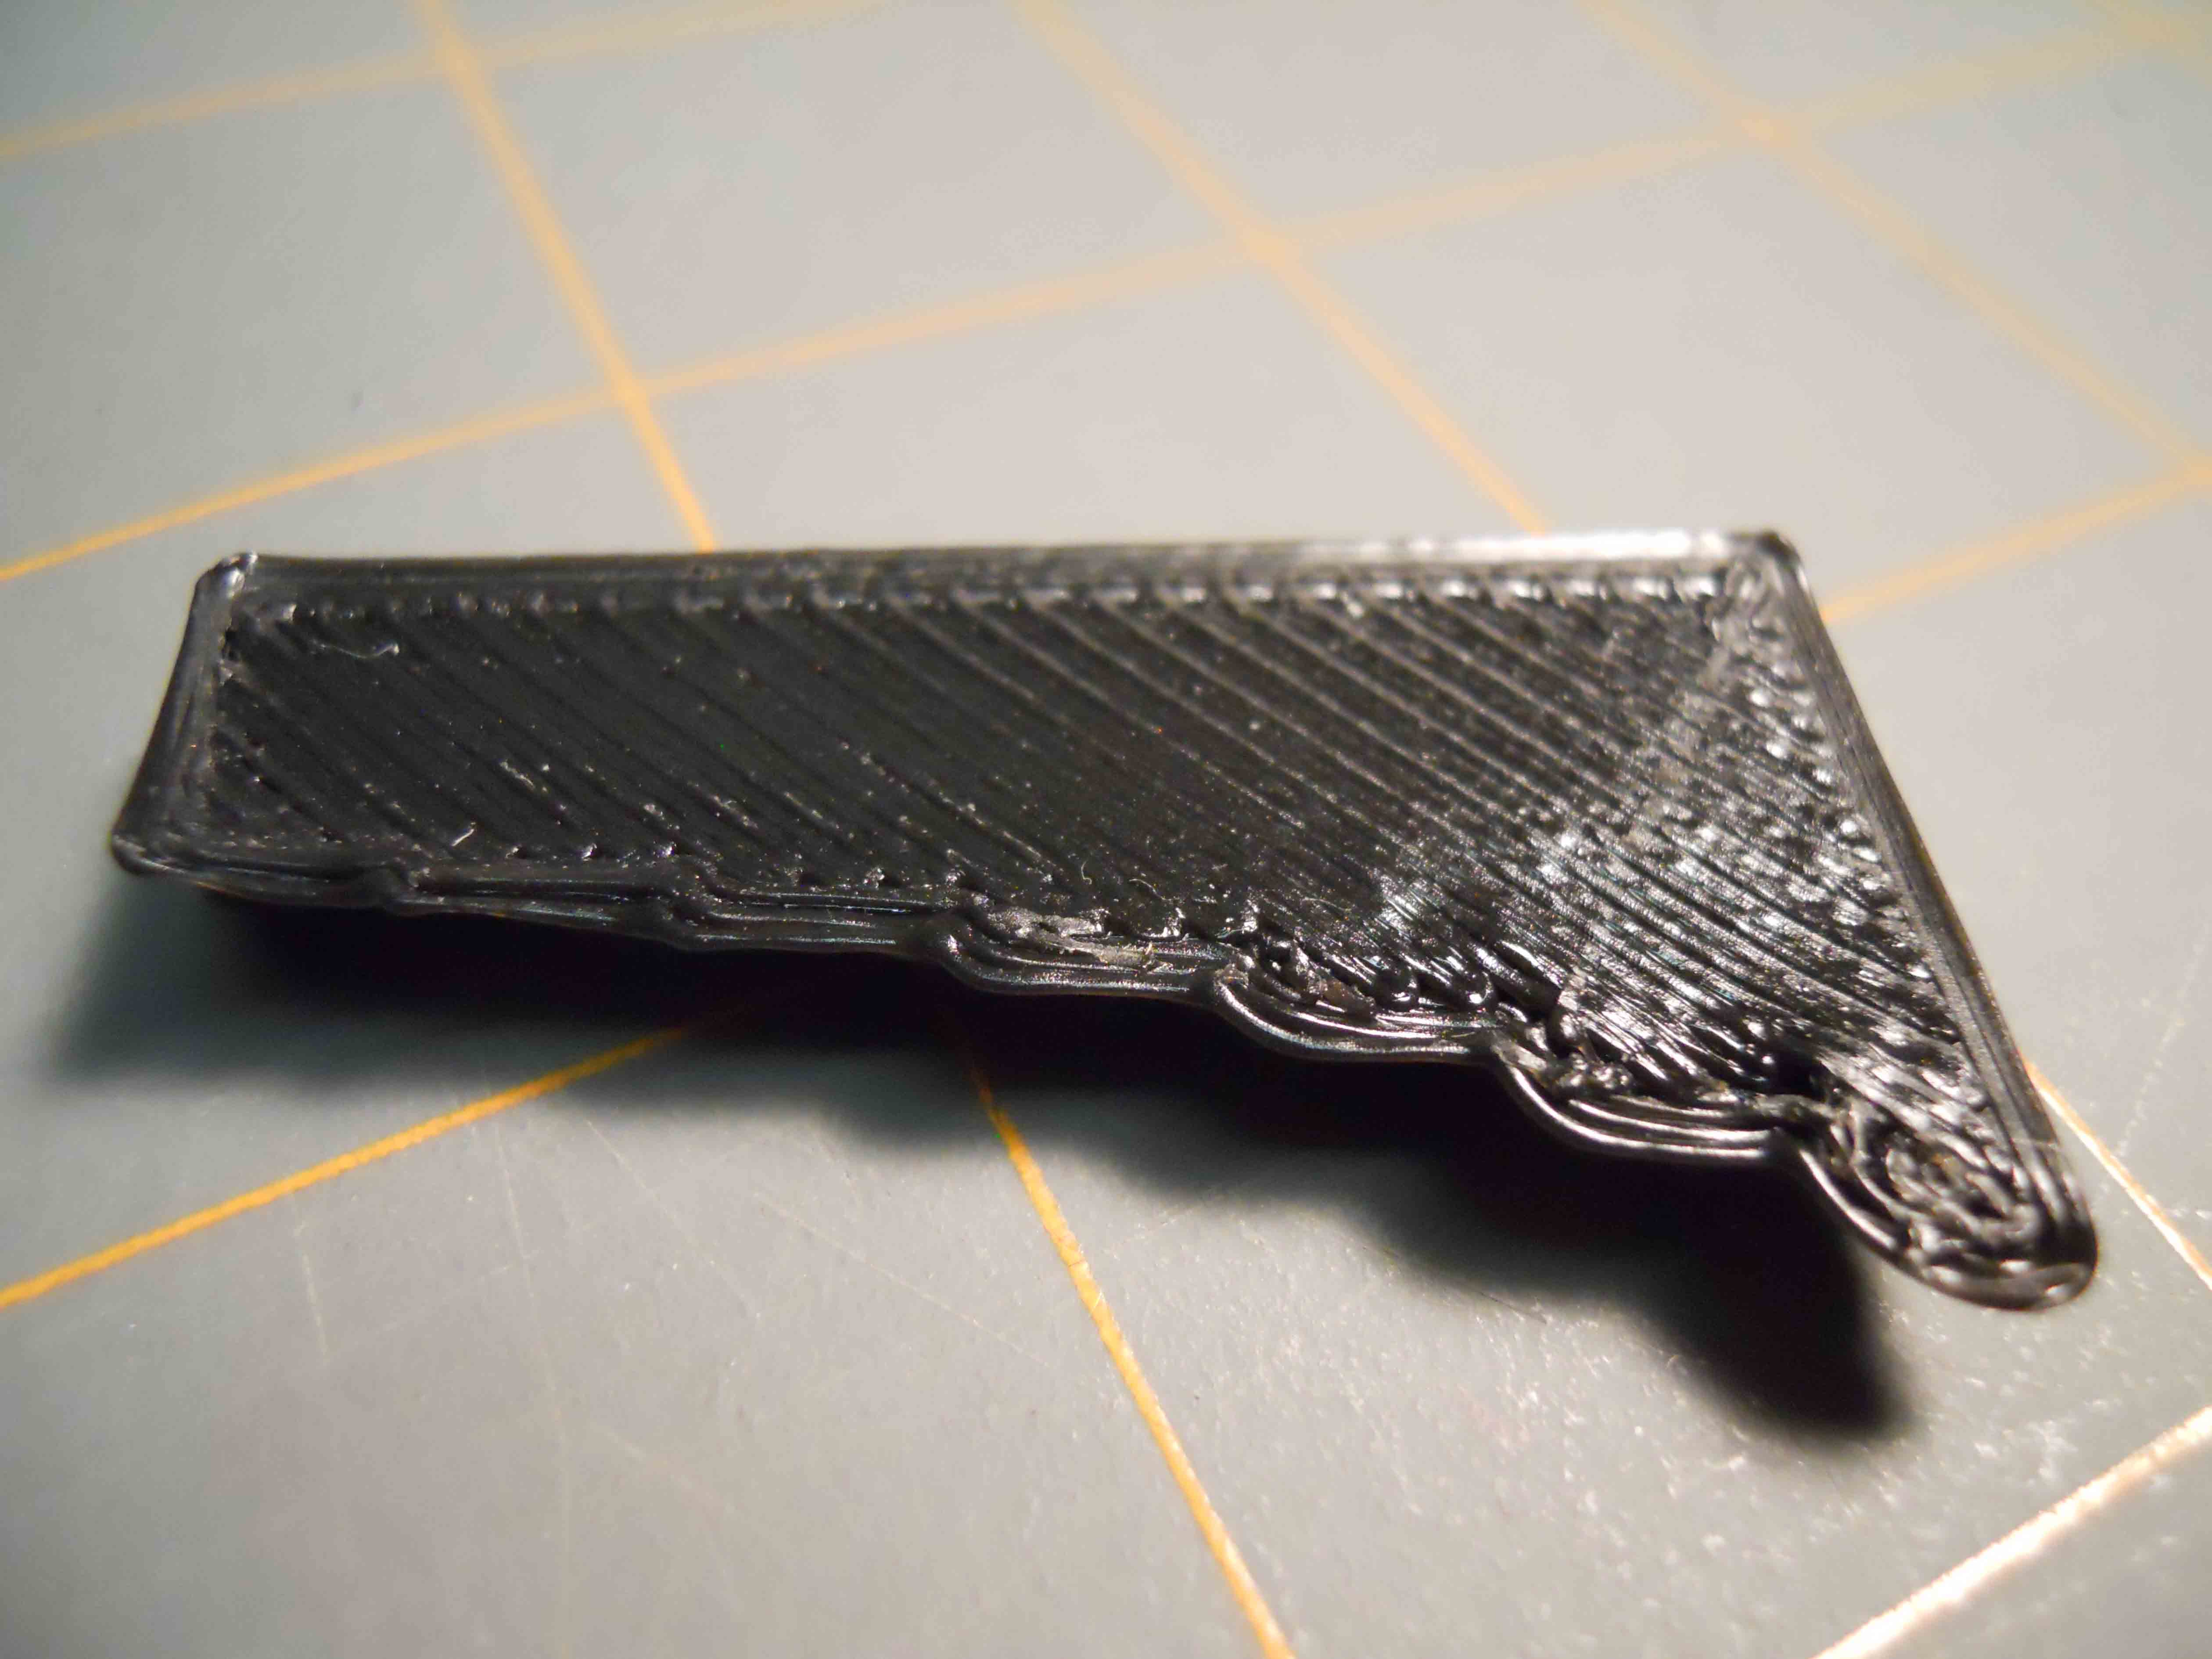
5th Picture- what the tops of most of these parts looks like.
I would really appreciate any advice to improve my printing quality. Thanks
1st picture
Layer height-0.3
Nozzle temperature-185
Fan-no
2nd picture
Layer height-0.3
Nozzle temperature-165
Fan-no
3rd picture
Layer height-0.2
Nozzle temperature-165
Fan-no
4th picture
Layer height-0.3
Nozzle temperature-170
Fan-yes
5th Picture- what the tops of most of these parts looks like.
I would really appreciate any advice to improve my printing quality. Thanks
|
Re: How to improve my overhang May 19, 2014 01:55AM |
Registered: 11 years ago Posts: 1,592 |
|
Re: How to improve my overhang May 19, 2014 09:11AM |
Registered: 11 years ago Posts: 198 |
Adding a fan when printing pla, makes life a lot easier.
Thaid said, layer width vs. layer height e.g. Width Over Thickness, has an influence on the quality of overhanging perimeters, the wider you print, the more overhang you can get away with.
Sli3r doesn't seem to care about this. For a test I made a cone with a 30 degree overhanging taper, and sliced it with 0.25mm layer height. With a nozzle diameter of 0.35mm Slic3r chooses 0.35mm as perimeter width. Trying to print this would fail epicly, because for each 0.25 mm the cone gets taller, the walls taper out ~0.43mm, so the outer perimeter would be printed in thin air.
Try setting your perimeter layer width manually, you can start out with 0.75mm for 0.2mm layers, then reduce this until the print starts to fail.
But as Waitaki said, extrusion should be well calibrated.
|
Re: How to improve my overhang May 19, 2014 09:13AM |
Registered: 10 years ago Posts: 790 |
^ new information for me, and much useful information.
Realizer- One who realizes dreams by making them a reality either by possibility or by completion. Also creating or renewing hopes of dreams.
"keep in mind, even the best printer can not print with the best filament if the user is the problem." -Ohmarinus
Realizer- One who realizes dreams by making them a reality either by possibility or by completion. Also creating or renewing hopes of dreams.
"keep in mind, even the best printer can not print with the best filament if the user is the problem." -Ohmarinus
|
Re: How to improve my overhang May 19, 2014 03:29PM |
Registered: 10 years ago Posts: 4 |
ok I had another issue that interfered with my testing but i got that fixed and I also fixed my extrusion steps per mm. I think it was incorrect because i was using 1.75 mm filament when i calibrated it and now im using 3 mm filament.
I made 4 prints today and used the information from Ralf.
the first print was just a different overhang test that i made but then i decided to separate each angled piece for the next 3 prints.
2nd print (more of a control test using my typical settings)
layer height-0.3
temp-185
no fan
no extrusion width setting
3rd print
layer height-0.2
temp-185
no fan
extrusion width- 0.75mm
4th print
layer height-0.2
temp-170
fan-yes
extrusion width- 0.75mm
i included the two top views to show that the top view of my typical print setting has a few minor issues but after adding the 0.75 mm print width there are voids in the infill. it doesn't fill all the way to the perimeters. overall there still isnt much improvement. Oh also, the fan i am using is just a large fan that is close to the print and set to high. another thing i should mention is that i have gen 6 electronics which dont have a feature for bed temperature control so my printbed gets rather hot. (about 88 C) could this be causing the overhang issue? could the hot printbed be causing the layers to curl up as you can see from the top view of the 3rd print?
Thanks for the help guys!
|
Re: How to improve my overhang May 19, 2014 04:00PM |
Registered: 10 years ago Posts: 790 |
Here's something to try: disable Slic3r's "Detect bridging perimeters," if you have it enabled. In my experience, it only makes prints worse, I've never had it help a print.
What are your movement speed/acceleration settings?
Realizer- One who realizes dreams by making them a reality either by possibility or by completion. Also creating or renewing hopes of dreams.
"keep in mind, even the best printer can not print with the best filament if the user is the problem." -Ohmarinus
|
Re: How to improve my overhang May 19, 2014 04:51PM |
Registered: 11 years ago Posts: 198 |
^What he said..  I have seen that "Detect Bridging Perimeters" triggers the bridging logic in Slic3r on overhangs, so at overhanging perimeters the print speed from bridges print speed is used, this is default 60mm/s.
88 degrees is too hot for PLA, normally the bed temperature should be around 60 degrees, so this is probably part of the problem. Try if you can get the print to stick without heating the bed, or turn it off after the first layer, and hope that the print sticks.
How fast are you printing? I would start out at around 15-20mm/s until things is under control.
I have seen that "Detect Bridging Perimeters" triggers the bridging logic in Slic3r on overhangs, so at overhanging perimeters the print speed from bridges print speed is used, this is default 60mm/s.88 degrees is too hot for PLA, normally the bed temperature should be around 60 degrees, so this is probably part of the problem. Try if you can get the print to stick without heating the bed, or turn it off after the first layer, and hope that the print sticks.
How fast are you printing? I would start out at around 15-20mm/s until things is under control.
|
Re: How to improve my overhang May 19, 2014 05:32PM |
Registered: 10 years ago Posts: 790 |
The slower you go on overhangs and bridges, the more it's going to droop, again, in my own experience.
On my Solidoodle, I bridged at 70mm/s.
Realizer- One who realizes dreams by making them a reality either by possibility or by completion. Also creating or renewing hopes of dreams.
"keep in mind, even the best printer can not print with the best filament if the user is the problem." -Ohmarinus
On my Solidoodle, I bridged at 70mm/s.
Realizer- One who realizes dreams by making them a reality either by possibility or by completion. Also creating or renewing hopes of dreams.
"keep in mind, even the best printer can not print with the best filament if the user is the problem." -Ohmarinus
|
Re: How to improve my overhang May 20, 2014 03:23PM |
Registered: 11 years ago Posts: 198 |
Normally if I have problems with overhanging perimeters, I slow down. Not sure if it is the best solution, but for ABS is is often the only, apart from printing more of the same part. This is to allow the layer to cool before the next layer is laid down.
But if printing pridges in thin air, speeding up is most often the best option.
But if printing pridges in thin air, speeding up is most often the best option.
Sorry, only registered users may post in this forum.