Mark Stephen's Smartrap Build
Posted by markstephen
|
Mark Stephen's Smartrap Build April 17, 2014 07:10PM |
Registered: 10 years ago Posts: 229 |
Well, enough of that monkeying around with the CAD... Got my Smartrap under power and did an "Air Print".  Woo-Hoo!
So far everything seams to be going along just great. I did have both my X and Y moving in reverse, but a simple swap of the stepper plugs, (each winding has it's own 2 pin plug) and all was right with the world. Still have a bit of tidying up to do with the old PC power supply, like getting rid of all the extra wires, and I plan on mounting it on top of the PS with a sloped panel on the front to mount the PS power switch and the LCD display. With some big rubber feet on the bottom of the PS, it should make for a nice little package.
Anyway, here are a few pics to get this thread started. I think I am really going to like this Smartrap.
Mark
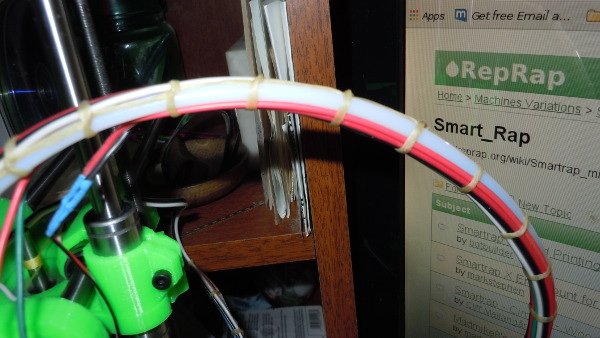
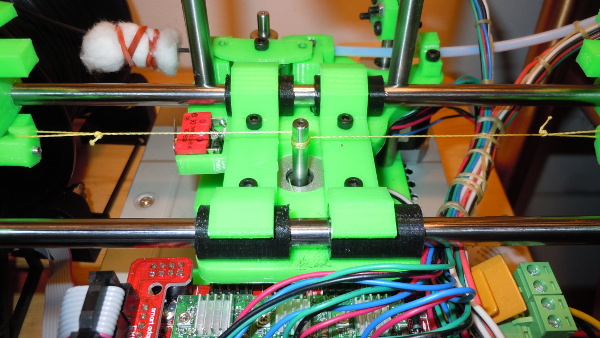
Practicing a little "Lost Art". Yes, that is real waxed cable lacing twine.
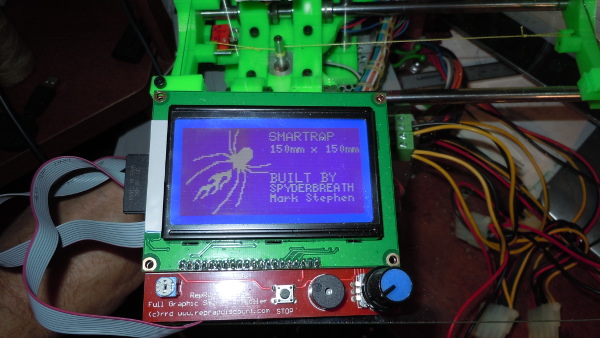
Had nothing better to do while waiting on parts to arrive for the build, so....... Custom Boot Screen!
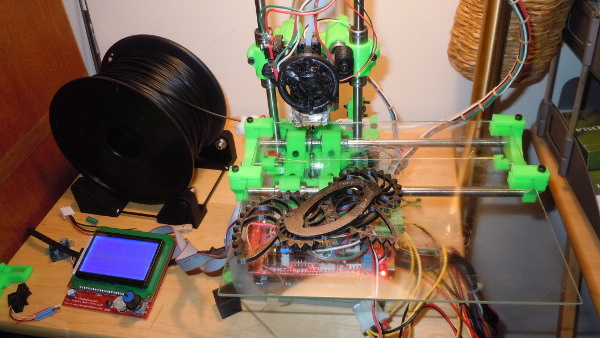
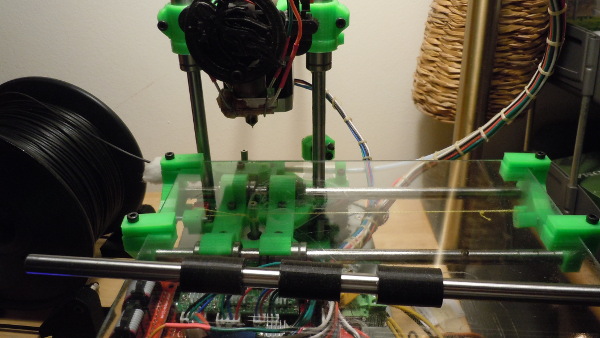
And the current state of things. Notice the temporary servo arm (1/16" ply) and ALL those wires.
 Woo-Hoo!
So far everything seams to be going along just great. I did have both my X and Y moving in reverse, but a simple swap of the stepper plugs, (each winding has it's own 2 pin plug) and all was right with the world. Still have a bit of tidying up to do with the old PC power supply, like getting rid of all the extra wires, and I plan on mounting it on top of the PS with a sloped panel on the front to mount the PS power switch and the LCD display. With some big rubber feet on the bottom of the PS, it should make for a nice little package.
Anyway, here are a few pics to get this thread started. I think I am really going to like this Smartrap.
Mark
Practicing a little "Lost Art". Yes, that is real waxed cable lacing twine.
Had nothing better to do while waiting on parts to arrive for the build, so....... Custom Boot Screen!
And the current state of things. Notice the temporary servo arm (1/16" ply) and ALL those wires.
|
Re: Mark Stephen's Smartrap Build April 17, 2014 07:32PM |
Registered: 10 years ago Posts: 814 |
|
Re: Mark Stephen's Smartrap Build April 18, 2014 02:25AM |
Registered: 10 years ago Posts: 992 |
really great Mark,
It's good you experience the servomotor version you will see the difference with the new version . I guess you found my two marlin versions on smartfriendz github ?
I didn't document so much that there are smartrap defines at the beginning of the configuration.h . From what i see, you should comment servopololu
I hope you will like it and be ready for the next update soon.. We of course print things with this printer, but part of the project is to disassemble it and rebuild with updated structure. One is coming soon
the Smartrap project
[smartfriendz.com]
[www.thingiverse.com]
[reprap.org]
[github.com]
doc assemblage: [reprap.org]
NEW: Forum smartfriendz: [smartraptalk.smartfriendz.com]
It's good you experience the servomotor version
 you will see the difference with the new version . I guess you found my two marlin versions on smartfriendz github ?
 I didn't document so much that there are smartrap defines at the beginning of the configuration.h . From what i see, you should comment servopololu

I hope you will like it and be ready for the next update soon.. We of course print things with this printer, but part of the project is to disassemble it and rebuild with updated structure. One is coming soon

the Smartrap project
[smartfriendz.com]
[www.thingiverse.com]
[reprap.org]
[github.com]
doc assemblage: [reprap.org]
NEW: Forum smartfriendz: [smartraptalk.smartfriendz.com]
|
Re: Mark Stephen's Smartrap Build April 19, 2014 01:15AM |
Registered: 10 years ago Posts: 229 |
Well, I haven't got the new parts printed out yet. Had/have a few calibration issues. First off, I recalculated the steps per mm for X&Y taking into account for the string dia and that is now working right. My prints had the leans to them like in the other thread, but a bit of tightening, (real tight) of the strings fixed that right up. You can play a tune on those strings now. So that is solved...
Now I have printed out a test part, a disk, and it is supose to have a 45 mm OD, with a 20 mm ID and has 3, 5, 8, and 10 mm holes around. Every last diameter has come out .5 mm smaller. The 45 mm OD is 44.5, the 20 mm ID is 19.5, all the same down to the 3 mm hole that is 2.5 mm. This one has me puzzled? I'm going to try another slicer next, and see if that won't make a difference.
Mark
Edited 1 time(s). Last edit at 04/19/2014 01:16AM by markstephen.
|
Re: Mark Stephen's Smartrap Build April 22, 2014 03:20PM |
Registered: 10 years ago Posts: 229 |
Got the No Servo bed leveling mod done. Now all I need to do is figure out how to stop the nozzle from dragging across the plate after the probing. My post about that is here
On the up side, this little printer is doing a bang up job on making prints. Most all my trouble is with the slicer settings and that's getting better with most every print. So far, I'm very happy with my Smartrap. Don't think I could of picked a better "First Printer". The $$ to education ratio is way to the plus side of education! I am well under $300 US including the spool of PLA.
Mark
|
Re: Mark Stephen's Smartrap Build April 22, 2014 04:05PM |
Registered: 10 years ago Posts: 814 |
I used the Smartrap Slicer config from the github and it printed great from the start. I have been tweaking it mainly to account for differences in filament. My first spool seemed to be of better quality than my second spool. Lower Temp and Higher Speeds. I've also played with infill just to see the difference.
You should post up what your Slicer settings are after you get it running smoothly for future builders.
I've got to agree, Great first printer. I have an Ordbot Hadron kit I started on last year. It's almost done now, thanks to my Smartrap.
The Smartrap went together rather painlessly, and has taught me a bunch.
|
Re: Mark Stephen's Smartrap Build April 22, 2014 04:57PM |
Registered: 10 years ago Posts: 148 |
they released a new version of slic3er today that weirdly gives me better prints with my old configs ?
Must be some things fixed that I cant change ?
its booring to wait and see wath I get over after the bills so I also can get going with my build
I love that spider fan protection
Edited 1 time(s). Last edit at 04/22/2014 04:58PM by Cliff Mellangård.
Must be some things fixed that I cant change ?
its booring to wait and see wath I get over after the bills so I also can get going with my build

I love that spider fan protection

Edited 1 time(s). Last edit at 04/22/2014 04:58PM by Cliff Mellangård.
|
Re: Mark Stephen's Smartrap Build April 23, 2014 10:23AM |
Registered: 10 years ago Posts: 229 |
I have had some mixed results with the new servo-less J-head mount. This is because I ended up needing to install a spring to counter the pull that the Bowden tube was making on the arm. The tension of the tube wanted to pull the arm up into the switch and would pull enough to trip it on Y moves. Last night when I was testing the new end with the print below, (Golden Ratio Gears), it dawned on me like a smack up side the face - mirror the end and arm on X so the pull is holding the arm down instead of up. So I'll include the mirrors with the new revisions when I post them. I'll make note of that in the other thread when it's done. The problem with the spring is it puts to much tension on the arm and the Y flexes when it extends for the probing and the bed level is way off, by about 0.6 mm off.
On the up side, it does hold the J head in the right place and I now have my 100 mm build height back. Other than the spring issue, it works very well, and should work perfect once the new parts are printed and the spring is removed from the equation.
Mark
On the up side, it does hold the J head in the right place and I now have my 100 mm build height back. Other than the spring issue, it works very well, and should work perfect once the new parts are printed and the spring is removed from the equation.
Mark
|
Re: Mark Stephen's Smartrap Build April 23, 2014 11:24AM |
Registered: 10 years ago Posts: 992 |
Super nice Mark.
About the head scratching the glass plate right after probing, It's my fault because i didn't say well i changed the start gcode in slic3r config . now I have :
M109 S[first_layer_temperature_0];set extruder temp and start heating
G28 X0 Y0 ;home X and Y
G29 ;probe bed
G90; set absolute coordinates
G92 E0; reset extruder distance
G1 Z3 F3000; get out of the bed after probe
G1 X10 Y10 F3000 ; move to back right corner
Note the G1 Z3 that will prevent this scary sound. lol
sorry for that .
the Smartrap project
[smartfriendz.com]
[www.thingiverse.com]
[reprap.org]
[github.com]
doc assemblage: [reprap.org]
NEW: Forum smartfriendz: [smartraptalk.smartfriendz.com]
About the head scratching the glass plate right after probing, It's my fault because i didn't say well i changed the start gcode in slic3r config . now I have :
M109 S[first_layer_temperature_0];set extruder temp and start heating
G28 X0 Y0 ;home X and Y
G29 ;probe bed
G90; set absolute coordinates
G92 E0; reset extruder distance
G1 Z3 F3000; get out of the bed after probe
G1 X10 Y10 F3000 ; move to back right corner
Note the G1 Z3
 that will prevent this scary sound. lol
 sorry for that .
the Smartrap project
[smartfriendz.com]
[www.thingiverse.com]
[reprap.org]
[github.com]
doc assemblage: [reprap.org]
NEW: Forum smartfriendz: [smartraptalk.smartfriendz.com]
|
Re: Mark Stephen's Smartrap Build April 23, 2014 04:59PM |
Registered: 10 years ago Posts: 814 |
|
Re: Mark Stephen's Smartrap Build April 23, 2014 05:23PM |
Registered: 10 years ago Posts: 229 |
Printing now. As soon as it's done and I know everything works, I'll upload it. Maybe even include a video, but no promises... Had a bearing go bad on me of all things. Well, @ $7 for 12 of them... So I printed out a replacement and installed it so that was a bit of a delay. I think the balls were jamming or something because it was starting to cut a grove into the drill rod and it was causing the prints to slant. All fixed now. I used this printed bushing, though mine look a bit nicer than the ones in the picture. Once the new X end is mounted and working, think I'll print some more and give then a real try.
Mark
Edited 1 time(s). Last edit at 04/23/2014 05:24PM by markstephen.
Mark
Edited 1 time(s). Last edit at 04/23/2014 05:24PM by markstephen.
|
Re: Mark Stephen's Smartrap Build April 23, 2014 05:34PM |
Registered: 10 years ago Posts: 992 |
I will update soon now . I was waiting for more tests, but i'm happy with the actual version ( which is on github in /dev/ anyway ) . I was in fact waiting to integrated the j-head version of no-servo . I cannot update on thingiverse without j-head version, not nice .
Mark, we use the same bushing, funny ! I've found those the best ones. i've tried 4 or 5 different .
I'm testing with alu tube and printed bushing ( and rack and pinion).. so light I hope i can make a video soon, but first the documentation !! i'm so late .
the Smartrap project
[smartfriendz.com]
[www.thingiverse.com]
[reprap.org]
[github.com]
doc assemblage: [reprap.org]
NEW: Forum smartfriendz: [smartraptalk.smartfriendz.com]
Mark, we use the same bushing, funny ! I've found those the best ones. i've tried 4 or 5 different .
I'm testing with alu tube and printed bushing ( and rack and pinion).. so light
 I hope i can make a video soon, but first the documentation !! i'm so late .
the Smartrap project
[smartfriendz.com]
[www.thingiverse.com]
[reprap.org]
[github.com]
doc assemblage: [reprap.org]
NEW: Forum smartfriendz: [smartraptalk.smartfriendz.com]
|
Re: Mark Stephen's Smartrap Build April 24, 2014 09:51PM |
Registered: 10 years ago Posts: 229 |
Gave the new No Servo J-head mount more of a workout today. I can say that fan duct I printed out sure makes a difference, top stays nice and cool, bottom stays hot, PLA flows easier. not wanting to waste time and gas running into town for nothing more than a grub screw, I just cut one of my M3 16 screws and cut a slot in it for a jewelers screwdriver to fit and away we go. offset is 0.9 now... very nice for the auto level routine and the head does not need to rotate that far to trip the switch.
First, printed out 3 more bushings and while they came out fitting great, I used Repsnapper for slicing / Gcode and I am really not liking that program. It seems that the people writing it found a random number generator and decided to use it on the retract! The thing has retracts where they make no sense and it's a flip of the coin whether or not it will retrace or EXTRUDE when moving between parts! Hokey smoke, what a mess!
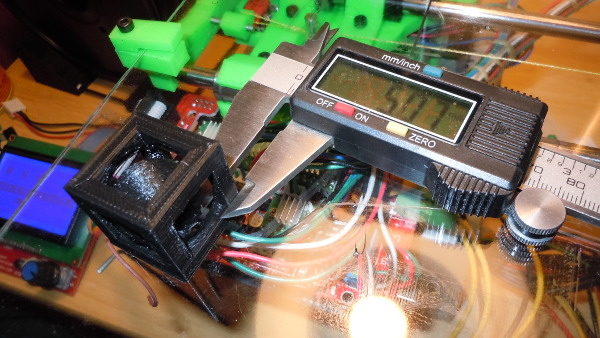
Anyway, I then did a box in cube to test out the scale and output from the CuraEngine plugin for FreeCAD, and it worked real well except for the 15mm bridging I made it do without support. If it would of been all straight lines, or I had a cooling fan/duct on the plastic, it would of come out near perfect, but other than a few wild stringers that fell, it printed out rather well. Everything square, 5 mm legs measure 4.96 - 5.1 mm, 25 mm OD came out 24.93 to 25.16 depending on which way you measure the cube... All in all, I'm very pleased. If any of you guys are using FreeCAD, grab the CuraEngine plugin, install or compile Cura or at least the engine and give it a go.
Still need to do a video...
@ Serge - I'm really liking this Smartrap. A big tip of my hat to you! I think it's a great design.
Mark
I'll install these to go along with the one that is there now, once I get a wild hair to take my machine apart again.
Measuring one of the legs. Printed without support on my Smartrap.
First, printed out 3 more bushings and while they came out fitting great, I used Repsnapper for slicing / Gcode and I am really not liking that program.
 It seems that the people writing it found a random number generator and decided to use it on the retract! The thing has retracts where they make no sense and it's a flip of the coin whether or not it will retrace or EXTRUDE when moving between parts! Hokey smoke, what a mess!
 Anyway, I then did a box in cube to test out the scale and output from the CuraEngine plugin for FreeCAD, and it worked real well except for the 15mm bridging I made it do without support. If it would of been all straight lines, or I had a cooling fan/duct on the plastic, it would of come out near perfect, but other than a few wild stringers that fell, it printed out rather well. Everything square, 5 mm legs measure 4.96 - 5.1 mm, 25 mm OD came out 24.93 to 25.16 depending on which way you measure the cube... All in all, I'm very pleased. If any of you guys are using FreeCAD, grab the CuraEngine plugin, install or compile Cura or at least the engine and give it a go.

Still need to do a video...
@ Serge - I'm really liking this Smartrap. A big tip of my hat to you! I think it's a great design.
Mark
I'll install these to go along with the one that is there now, once I get a wild hair to take my machine apart again.
Measuring one of the legs. Printed without support on my Smartrap.
|
Re: Mark Stephen's Smartrap Build April 26, 2014 11:49AM |
Registered: 10 years ago Posts: 229 |
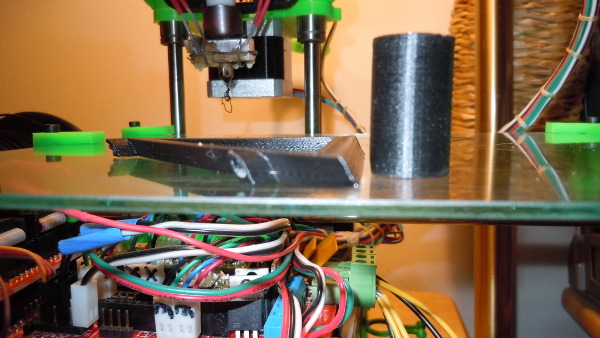
Last night I managed to learn a couple of things. The first is, it seems that the Marlin firmware does a MUCH better job when using the 4 point bed probing than it does with the 3 point. Once I switch from the 3 point to the 4 point grid, all of my bed leveling problems went away. The second thing I found, and this may be related, is that the firmware does not like print triangles. I printed half a dozen triangle shaped brackets, using different slicers / adjusting the machine, etc., and ALL of them came out with the Louisiana leans. I then printed out another LM8 bushing and it is as straight as anything. Same printer, same slicer, same everything...
I'm thinking there is something funky going on with the math when Marlin plots the moves from the Gcode doing triangles. Something it wrong there and at least some of the slanted prints people are seeing might not be the fault of our Smartraps per say.
Mark
Bushing printed right after the triangle with NO adjustments to the machine.
EDIT - The triangle brackets were for the LCD display... Went ahead and used them anyway.
Edited 1 time(s). Last edit at 04/26/2014 11:57AM by markstephen.
|
Re: Mark Stephen's Smartrap Build April 26, 2014 12:43PM |
Registered: 10 years ago Posts: 814 |
|
Re: Mark Stephen's Smartrap Build April 26, 2014 03:39PM |
Registered: 10 years ago Posts: 229 |
Quote
madmike8
Mind posting the triangle? I'd like to try to print it.
Sure. Just note that this is scaled +2% (1.02) for calibration to my Smartrap, so if your planning on using it, adjust accordingly.
 Let me know if it gives you the leans. Everything else prints just fine, this part... not so much.
Mark
01_LCD_Bracket_Final.stl
|
Re: Mark Stephen's Smartrap Build April 27, 2014 09:02PM |
Registered: 10 years ago Posts: 229 |
With a BIG thank you to madmike8, I'v got my printer going in the proper directions and while I had the glass of and messing with the motor wiring, I went ahead and installed the other 3 bushings and already I can tell there is a difference. Had another bearing going bad, (looks like the balls were jamming up almost side by side in their groves), so there was no time like the present. Think I'll print up 4 more and install them on the Y next.
Mark
Mark
|
Re: Mark Stephen's Smartrap Build April 27, 2014 09:27PM |
Registered: 10 years ago Posts: 814 |
|
Re: Mark Stephen's Smartrap Build April 27, 2014 11:24PM |
Registered: 10 years ago Posts: 229 |
At around ~$0.015 a piece in PLA and the time to print, sure won't hurt to give them a go on the Z. I'm thinking that with some dry lubricant like graphite powder or the like, (a couple-3 $ at Lowe's), they could last a long time and give real trouble free operation. Next time I'm in town, think I'll pick some of the stuff up and test it out.
To tell the truth, the Y kind of ballances on the Z, it does not see the travel that the X and Y do, so I'm thinking they should work out just fine. The bushings that I am printing and using are a good design IMO, and seem to really do the job.
Mark
To tell the truth, the Y kind of ballances on the Z, it does not see the travel that the X and Y do, so I'm thinking they should work out just fine. The bushings that I am printing and using are a good design IMO, and seem to really do the job.
Mark
|
Re: Mark Stephen's Smartrap Build April 28, 2014 11:10AM |
Registered: 10 years ago Posts: 349 |
I have some brass bushings (Self lubricating) i want to try on the SmartRap, unfortunately the outer diameter is not as big as the LM8UU so i first need to have my Rapper fully functioning, unless someone else will have a go at it...
I do like the all printed approach
BTW, you might want to have a look at this new IGUS filament specially made to make bushings
IGUS Tribo Plastic Filament
I do like the all printed approach
BTW, you might want to have a look at this new IGUS filament specially made to make bushings
IGUS Tribo Plastic Filament
|
Re: Mark Stephen's Smartrap Build April 28, 2014 12:32PM |
Registered: 10 years ago Posts: 229 |
Looks like cools stuff, but it's not available yet. Their website has preorders for a "start kit" where they say they will privide ~25G to try out but give no pricing... Guess i can sign up and see what happens. Thanks for the info.
Mark
Mark
|
Re: Mark Stephen's Smartrap Build June 01, 2014 02:00AM |
Registered: 10 years ago Posts: 229 |
I ended up spending most of today working on a decent adjustable extruder for my Smartrap. I liked the way the one verteez printed but when I hunted it down, it had a very bad model for the base. So I tracked down the source for it and carved my own out of it. It fits the MK7 hobbed drive pulley and exits to the right like the original does. It also takes the M4 nut on the end of the Bowden tube like the orignal but this one you can just slip out if you need access to the tube without having to tear everything apart to unscrew it. It really is a very compact and handy little guy, and is working like a champ!
You can find the .stl's on Thingiverse here -> [www.thingiverse.com]
Mark
You can find the .stl's on Thingiverse here -> [www.thingiverse.com]
Mark
|
Re: Mark Stephen's Smartrap Build June 01, 2014 02:10AM |
Registered: 10 years ago Posts: 229 |
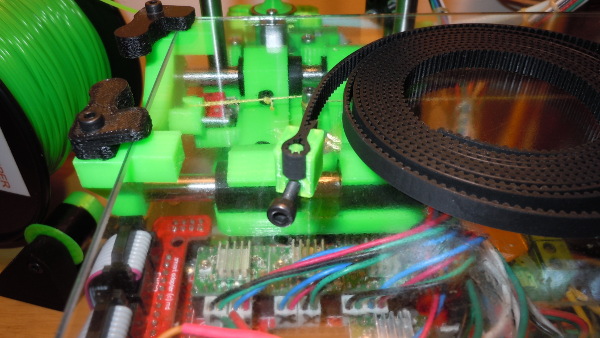
I'm also working towards doing a belt conversion and I printed up some of these little belt capture ends that will tension the belt with the same screws that currently tension the string. I just thought to myself... why not? i didn't think these little parts needed posting anywhere else, their so simple... but if anyone is interested, the STL file is attached.
Mark
Nice fit on the belt
Set of 4 belt captures.
STL file with a set of 4 captures, ready for printing.
TimingBelt_Capture.stl
Mark
Nice fit on the belt
Set of 4 belt captures.
STL file with a set of 4 captures, ready for printing.
TimingBelt_Capture.stl
|
Re: Mark Stephen's Smartrap Build June 01, 2014 12:07PM |
Registered: 10 years ago Posts: 814 |
|
Re: Mark Stephen's Smartrap Build June 02, 2014 12:54AM |
Registered: 11 years ago Posts: 791 |
Quote
markstephen
I'm also working towards doing a belt conversion and I printed up some of these little belt capture ends that will tension the belt with the same screws that currently tension the string. I just thought to myself... why not? i didn't think these little parts needed posting anywhere else, their so simple... but if anyone is interested, the STL file is attached.
Mark
Nice fit on the belt
[attachment 33985 Belt_Capture.JPG]
Set of 4 belt captures.
[attachment 33986 Belt-Capture_Set.JPG]
STL file with a set of 4 captures, ready for printing.
[attachment 33987 TimingBelt_Capture.stl]
Easier way for the belt ends, just a toothed slot in each X or Y end.
You can pull it tight and just slip it in the slot and it stays there.
Easy to adjust as well if the belt stretches, but I have never had one stretch yet.
[regpye.com.au]
"Experience is the mother of all knowledge." --Leonardo da Vinci
|
Re: Mark Stephen's Smartrap Build June 03, 2014 05:52AM |
Registered: 10 years ago Posts: 992 |
nice belt capture ends mark, looks better than mine 
overal, it's nice work going on here too . congrats !
On my side i've just updated model to gt2 integrated in addition to other systems , still available with the same model ( fishing line and racks&pinion).
next : separate extruder to let users choose the good one ?
you can find some pics on french forum and i've just updated the documentation with interactive 3d model updated regular on smartfriendz.com . So everyone can see where we go on our side ?
thanks fro all guys, it's very inspiring
the Smartrap project
[smartfriendz.com]
[www.thingiverse.com]
[reprap.org]
[github.com]
doc assemblage: [reprap.org]
NEW: Forum smartfriendz: [smartraptalk.smartfriendz.com]
|
Re: Mark Stephen's Smartrap Build July 01, 2014 12:23AM |
Registered: 10 years ago Posts: 229 |
OK, A couple of things here.
First I had read back in one of the other threads, Serge had mentioned that he had "added a tweak" to the firmware to compensate for the auto level not getting it quite right. I posted back and asked about it but it was probably overlooked. Everything is going great with my Smartrap until I try printing parts that are approaching 100mm or more square. Then I get one side too low and the other too high. Does anyone know where in the firmware one would apply this tweak to compensate for the level being a bit off?
Second thing, I just did a demo video titled From FreeCAD To The Real World and features my Smartrap printer. At least a few people seem to like it, so I thought I would pass it along.
Mark
First I had read back in one of the other threads, Serge had mentioned that he had "added a tweak" to the firmware to compensate for the auto level not getting it quite right. I posted back and asked about it but it was probably overlooked. Everything is going great with my Smartrap until I try printing parts that are approaching 100mm or more square. Then I get one side too low and the other too high. Does anyone know where in the firmware one would apply this tweak to compensate for the level being a bit off?
Second thing, I just did a demo video titled From FreeCAD To The Real World and features my Smartrap printer.
 At least a few people seem to like it, so I thought I would pass it along.
 Mark
|
Re: Mark Stephen's Smartrap Build July 01, 2014 12:38AM |
Registered: 10 years ago Posts: 814 |
|
Re: Mark Stephen's Smartrap Build July 01, 2014 12:48AM |
Registered: 10 years ago Posts: 229 |
|
Re: Mark Stephen's Smartrap Build July 01, 2014 12:58AM |
Registered: 9 years ago Posts: 178 |
// these are the offsets to the probe relative to the extruder tip (Hotend - Probe)
  #define X_PROBE_OFFSET_FROM_EXTRUDER 0
  #define Y_PROBE_OFFSET_FROM_EXTRUDER 0
  #define Z_PROBE_OFFSET_FROM_EXTRUDER 1.9
  #define Z_PROBE_OFFSET_FROM_EXTRUDER_DELTA_X 0.5 // smartrap: special quantic error mesurement from porte a faux design (see marlin.cpp)
Is the delta x maybe? I am having similar problems, so cant be positive but far out in the y+ i have problems with adhesion and close to home it seems a bit smashed.
Awesome video!!
Sorry, only registered users may post in this forum.
