Hi and help? Smartrap built but...
Posted by Wibbles
|
Hi and help? Smartrap built but... February 26, 2015 01:05PM |
Registered: 9 years ago Posts: 91 |
Hi
First of all hi to everyone on the forum, I have just bought and built a Smartrap (Ebay version), but have problem and I don't have a clue whether this is normal or whether something isn't working.
What works?
I have no SD card installed.
It is hooked up to my Windows pc (tried on my Linux laptop with same result).
The Arduino flashes once.
The LCD all works.
Downloaded Repetier
Downloaded Arduino 1.0.6
The Printer setup screen in Repetier will only allow me to connect to the printer if I select Virtual Printer.
The only other options are TCP/IP and Serial Port.
When connected I cannot manually move the x, y, z at all.
Using the LCD controls, I can see the temp, it says it is ready for use, and selecting home will centre, or at least move, the x,y, z motors.
It is running off the supplied psu, no heat bed, and auto levelling (but still awaiting instructions on where the servo/sensor plug in on the board.
The USB is plugged in.
So, are there any wise people out there who can tell me what I need to do? I am ok with electrics but the first to admit that 3D printers are a total mystery to me.
I have seen references to an .ini file, is this the missing link? If so where do I find one and where does it go?
Many thanks
RobG
|
Re: Hi and help? Smartrap built but... February 26, 2015 01:41PM |
Registered: 10 years ago Posts: 814 |
|
Re: Hi and help? Smartrap built but... February 26, 2015 03:03PM |
Registered: 9 years ago Posts: 91 |
|
Re: Hi and help? Smartrap built but... February 26, 2015 03:05PM |
Registered: 9 years ago Posts: 91 |
|
Re: Hi and help? Smartrap built but... February 26, 2015 06:35PM |
Registered: 9 years ago Posts: 180 |
|
Re: Hi and help? Smartrap built but... February 27, 2015 06:30AM |
Registered: 9 years ago Posts: 91 |
Well after abandoning the Linuxmint option (a bit of research revealed that it is not a simple process due to baud rates etc), I moved to my Windows pc.
I deleted all Slicr, Repetier and Arduino software, then ran CCleaner to remove any registry entries.
I reinstalled all three.
I ran through the setup for each one, including running Arduino and selecting 2560 as the board.
Installed the ini file through Slicr.
Com 7 now appeared as a port option, so selected that.
I could even set the baud rate to 250000.
Just switched it all on, and bingo I have manual control through Repetier. Can even heat up the extruder.
Now that the printer is working, I will have to await a reel of filament before I can do any more. Jeez that was a long haul, but I got there. I have no idea what the issue is with Linuxmint, but after installing Mono, MonoDev and trying every suggestion that I could see anywhere, it would not solve the Comm problem.
I would much prefer to use Linux, so if anyone knows the solution and can post up commands that a retarded babboon could understand, I will give it a go.
I still need to plug in the servo and sensor for the bed levelling, so if anyone know where these plug in, please let me know. I have not yet had a response from the suppliers, their build instructions were pretty much flawless otherwise.
Cheers
Rob
|
Re: Hi and help? Smartrap built but... February 27, 2015 09:49AM |
Registered: 10 years ago Posts: 170 |
Hi,
You purchased a kit that I produce and sell on ebay and I can assist you in any matter you need. I was traveling latelly and didn't had a change to update the documentation with servo wiring diagram. Now this is fixed and you can check it here: [build3dparts.com].
Also on that page you will get the Marlin firmware that came preinstalled when you got the kit. If you use Repetier I can't assist you since I have no experience with it. I use a combination of Marlin firmware with Pronterface on my computer. Please install provided firmware and let me know if everything is ok. Servo bedleveling will work only with my provided firmware.
Dan.
Edited 1 time(s). Last edit at 02/27/2015 10:09AM by ldanut.
|
Re: Hi and help? Smartrap built but... February 27, 2015 02:20PM |
Registered: 9 years ago Posts: 91 |
Hi Idanut
First of all can I compliment you on the build manual. It was incredibly easy to assemble the kit. I have never built a printer before but I had it all assembled in appx 12 hours. I even threaded the plastic with an M3 thread cutter for extra security on each M3 bolt. Everything fitted perfectly.
The wiring took another 5 hours, but this was only due to assembling the Dupont plugs without the correct crimping tool.
The servo and sensor are now completely installed.
I have now got the printer functioning with Repetier from my Windows PC, but will switch to Marlin firmware to keep things nice and tidy. I could not get the Repetier to work with my Linux laptop, too many problems with the baud rate compatibility, so I gave up.
It's good to know that you are on the forum.
Regards
Rob
|
Re: Hi and help? Smartrap built but... February 27, 2015 02:25PM |
Registered: 10 years ago Posts: 170 |
|
Re: Hi and help? Smartrap built but... February 27, 2015 03:03PM |
Registered: 10 years ago Posts: 814 |
|
Re: Hi and help? Smartrap built but... February 27, 2015 05:06PM |
Registered: 9 years ago Posts: 91 |
Hi Dan
I see that the servo is white/red/black, which is signal/live/negative. The pins on the board are marked signal/negative/live. When I plug the servo in the board shuts down, so as the board pins are in a different order I will need to cross over the +/-. It might be an idea to mention this in the manual as others may not be aware without looking at the board. I build 1/16 scale radio control tanks, hence I tested the servo on one of those and it operated ok.
The sensor schema shows the socket on the sensor board the opposite way around to mine, so I am wondering whether these should also be reversed also?
Regards
Rob
|
Re: Hi and help? Smartrap built but... February 28, 2015 08:16AM |
Registered: 10 years ago Posts: 170 |
Rob,
you are right about inverting red and black wire. Thanks. I forgot to mention as a warning and I fixed. I think the sensor picture i used might be reversed but just wire the V output to red wire, G output to black wire and S output to white wire as in diagram and you will be set.
Dan.
you are right about inverting red and black wire. Thanks. I forgot to mention as a warning and I fixed. I think the sensor picture i used might be reversed but just wire the V output to red wire, G output to black wire and S output to white wire as in diagram and you will be set.
Dan.
|
Re: Hi and help? Smartrap built but... February 28, 2015 11:14AM |
Registered: 9 years ago Posts: 91 |
Hi Dan
I only mentioned it as my guess was that anyone who was used to RC kit would do what I was about to do and go buy a servo extension lead to run down to the box and just plug it in.
Ok, I now have this whole thing up and running, just had to make a few adjustments to the print speed (50-60), filament feed and speed, and the nozzle temp (190). I printed one of the parts from the files that you have put in the servo Z section, or tried to? lol. Edges were good, but as height increased the nozzle got closer to the previous layer.
After a couple of false starts I used the sugar /water method to make the first layer stick, and even though I used it directly on the glass, what was printed came off with minimal pressure. Cleaning up a glass bed is a piece of cake with acetone, or if anyone has some lying about, airbrush cleaner.
I now have one problem. I installed the firmware mentioned on the Servo update page, but when I start a print I don't get the auto bed levelling. Is there a trick to activate this, as I think that this was what caused my print to start going awry after a few slices had been printed. Eg - The print head started to smudge at one end of the printed item.
I am guessing that the length of the rod is quite critical to the bed detection. Eg Bed detection without the hot end touching the bed? Does the first layer nozzle height need to be set somewhere?
I am running it from a Windows PC, using Pronterface, and do not have an SD card installed, so if this makes a difference let me know.
Sorry for posting the questions here, but I guess that if anyone else has the same questions at least they will see the answers and know what the solution is.
Regards
Rob
|
Re: Hi and help? Smartrap built but... February 28, 2015 01:00PM |
Registered: 10 years ago Posts: 170 |
Rob,
To make sure the probe rod is corectly installed you will use two gcode comands:
M401 - Lower z-probe if present
M402 - Raise z-probe if present
First lower the probe using M402 and make sure the probe rod tip is lower than hot end tip and it also doesn't block the sensor. After its set fix it using small plastic block screw. Now run M401 to retract the probe and make sure probe tip is above print head tip.
After you tuned the probe rod you need to put G29 gcode at the init part of slicing software. This autolevel gcode comand. To make sure after you probe the bed the Z0 is just at surface of the bed you need to set the Z offset between probe and hot end tip. To do this you first do a G28 to auto home the printer and then using pronterface move down the head until hotend tip just barely touch the print surface. Using M114 gcode find current position of Z axis. It should be zero and if not the value indicated is the Z axis offset you need to set using M555 Z.
This should be all. I will also write this to my blog.
Dan.
Edited 1 time(s). Last edit at 02/28/2015 01:02PM by ldanut.
|
Re: Hi and help? Smartrap built but... March 01, 2015 05:38AM |
Registered: 9 years ago Posts: 91 |
Hi Dan
It took a bit of figuring out, but considering that I have never been near a 3D printer before in my life before this week, I got there.
The bed levelling works, and I have a set of Gcode buttons across the bottom of the Pronterface screen that allow me to send individual commands to the printer, should I ever need to.
I did a test print and it was square, small holes were round etc.
The trick was also to put Pronterface into expert mode, and set everything up in there, then save all of the tabs, then make them the default print settings.
If I had to make two suggestions for improvements:
1. The probe locking block, move the screw hole to the front. It cannot be accessed when the servo is installed. The rod needed shortening on mine, so I cut 10mm off, then slipped a piece of styrene tube over the end. I could slide the tube up and down the rod until I had the precise clearance, then I taped it securely.
2. It might be an idea to find a way to lock the print head assembly onto the rods, when the printer homes it may gradually push the assembly back off the rods. This will cause the print head to move. Same at the other end, a couple of screw holes to secure the plate onto the rods. Just an idea?
All in all a great learning experience, my only advice to anyone buying one would be to purchase the pre-crimped plugs. Without the Dupont crimping tool it was probably the most difficult and time consuming part of the build, and if bad connections are made they take forever to isolate and resolve (and I had plenty - )
Many thanks for your help, I would recommend the printer to anyone.
Kind regards
Rob
It took a bit of figuring out, but considering that I have never been near a 3D printer before in my life before this week, I got there.
The bed levelling works, and I have a set of Gcode buttons across the bottom of the Pronterface screen that allow me to send individual commands to the printer, should I ever need to.
I did a test print and it was square, small holes were round etc.
The trick was also to put Pronterface into expert mode, and set everything up in there, then save all of the tabs, then make them the default print settings.
If I had to make two suggestions for improvements:
1. The probe locking block, move the screw hole to the front. It cannot be accessed when the servo is installed. The rod needed shortening on mine, so I cut 10mm off, then slipped a piece of styrene tube over the end. I could slide the tube up and down the rod until I had the precise clearance, then I taped it securely.
2. It might be an idea to find a way to lock the print head assembly onto the rods, when the printer homes it may gradually push the assembly back off the rods. This will cause the print head to move. Same at the other end, a couple of screw holes to secure the plate onto the rods. Just an idea?
All in all a great learning experience, my only advice to anyone buying one would be to purchase the pre-crimped plugs. Without the Dupont crimping tool it was probably the most difficult and time consuming part of the build, and if bad connections are made they take forever to isolate and resolve (and I had plenty -
)Many thanks for your help, I would recommend the printer to anyone.
Kind regards
Rob
|
Re: Hi and help? Smartrap built but... March 01, 2015 09:43AM |
Registered: 10 years ago Posts: 170 |
Rob
thanks for your suggestion. This is my first iteration of the probing mechanism and any sugestion are welcomed. I will move secure secure screw in front and I think i need to use a grub screw not nu bumb into servo arm. I like your ideea with sterene tube. Can you please post a picture with how it looks?
I agree with your issue with x ends pieces. I will change them so holes in plastic are longer and be able to lock them with screws. On my next iteration also I will add some lateral pieces of mdf to secure top Z axis rods and screw.
Preparing all the wires to exact length and crimp them is a time consuming job even if you have crimp tool. People want really cheap printers and one way to do that is not to prepare the wires and make it an option.
Thansk for your feedback and i'm glad you have a good experience with it. It looks like you really know what you are doing. This is a printer designed by great guy at smartfriendz and I just played with it and tuned for an year and shared back the changes I considered based on my experience. Its an ongoing process and you will do it too .
.
Dan.
thanks for your suggestion. This is my first iteration of the probing mechanism and any sugestion are welcomed. I will move secure secure screw in front and I think i need to use a grub screw not nu bumb into servo arm. I like your ideea with sterene tube. Can you please post a picture with how it looks?
I agree with your issue with x ends pieces. I will change them so holes in plastic are longer and be able to lock them with screws. On my next iteration also I will add some lateral pieces of mdf to secure top Z axis rods and screw.
Preparing all the wires to exact length and crimp them is a time consuming job even if you have crimp tool. People want really cheap printers and one way to do that is not to prepare the wires and make it an option.
Thansk for your feedback and i'm glad you have a good experience with it. It looks like you really know what you are doing. This is a printer designed by great guy at smartfriendz and I just played with it and tuned for an year and shared back the changes I considered based on my experience. Its an ongoing process and you will do it too
.Dan.
|
Re: Hi and help? Smartrap built but... March 01, 2015 03:40PM |
Registered: 9 years ago Posts: 91 |
Hi Dan
Ok firstly, here is a pic of my probe, nothing very clever but it works perfectly and made it a lot easier to set up.
The other pics are of what I printed just to show any passing viewers that the quality is good.
Then there is a problem I encountered after printing them. The filament became completely log jammed in the hotend feed cap, where the blue push fit for the tube locates. I tried heating the hotend to 250 degrees but nothing would shift it in or out. The only way that I could get the filament back out was to micro drill it until it freed up, and snapped, and then pull it out from the extruder motor end.
I assume that the blue cap cannot be removed, so is it possible to source the brass holder/cap?
Once I have that problem solved, I need to reassemble the cooling fins at the correct height, can you advise me on the measurements for this?
Regards
Rob
Ok firstly, here is a pic of my probe, nothing very clever but it works perfectly and made it a lot easier to set up.
The other pics are of what I printed just to show any passing viewers that the quality is good.
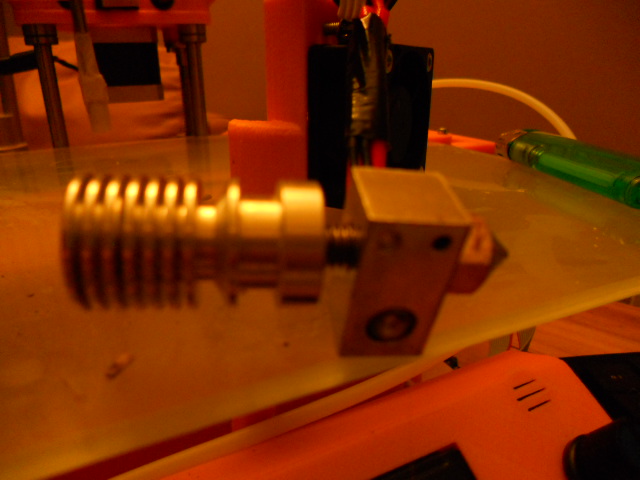
Then there is a problem I encountered after printing them. The filament became completely log jammed in the hotend feed cap, where the blue push fit for the tube locates. I tried heating the hotend to 250 degrees but nothing would shift it in or out. The only way that I could get the filament back out was to micro drill it until it freed up, and snapped, and then pull it out from the extruder motor end.
I assume that the blue cap cannot be removed, so is it possible to source the brass holder/cap?
Once I have that problem solved, I need to reassemble the cooling fins at the correct height, can you advise me on the measurements for this?
Regards
Rob
|
Re: Hi and help? Smartrap built but... March 01, 2015 04:45PM |
Registered: 9 years ago Posts: 91 |
Just to add to the previous message, is the hotend threaded section supposed to be in two parts? I have a long section that the finned section screws onto, but there was a 5mm section that fell out of the top when I removed the filament tube holder. I can't figure out whether the short section should be seperate or not??
Regards
Rob
Regards
Rob
|
Re: Hi and help? Smartrap built but... March 02, 2015 11:12AM |
Registered: 10 years ago Posts: 170 |
The hotend needs to be active cooled all the time is heated up. Otherwise the heat will rise and clog it. This is more problematic to PLA.
I think the short one is used to hold in place the ptfe tube inside the heat break threaded rod. Can you send me a picture with your hot end so I can understand better what you are talking about? In the third picture you send I see that you put the oposite way the aluminium cooling block into the heat break threaded pipe.
I think the short one is used to hold in place the ptfe tube inside the heat break threaded rod. Can you send me a picture with your hot end so I can understand better what you are talking about? In the third picture you send I see that you put the oposite way the aluminium cooling block into the heat break threaded pipe.
|
Re: Hi and help? Smartrap built but... March 02, 2015 12:50PM |
Registered: 9 years ago Posts: 91 |
Hi Dan
I have looked around on the web, and I may be wrong but it appears that the threaded rod has a section without thread, this goes at the bottom to act as a heat break between the hot end and the cooling fins. On mine it was at the top, which was where it had broken inside the finned section.
If it should have been at the top then the heat was allowed to travel up the threaded section, through the alloy cooling section and into the union at the top. I removed the union, cut the PTFE pipe off and it was clogged solidly inside the union.
Pics are attached showing what I have, but if the threaded section was assembled incorrectly it would indicate what caused the problem. I am no expert on these things?
My next problem is either getting a replacement head, or the threaded bar and a new union. The only source that I can see on the web for spares is Ebay/China.
Hoping you can help.
Regards
Rob
|
Re: Hi and help? Smartrap built but... March 02, 2015 02:30PM |
Registered: 10 years ago Posts: 170 |
These hot ends are genuinely purchased from [3d-industries.myshopify.com] the producer of them. They come pretested and assembled and we haven't any problem with any of them. I think you are not suposed to take them apart. They are not chinese knock offs. Those you are mentioning are E3D V5 knocks off the chinese make.
You have the producer on reprap on [forums.reprap.org].
Wiki page: [reprap.org]
I don't see anything wrong with our hot end. It has all the parts as I see and that small threaded grub screw it used to retain the ptfe liner inside heat break pipe. I think you should not shortnen the PTFE liner otherwise will move inside and clog.
Edited 1 time(s). Last edit at 03/02/2015 02:32PM by ldanut.
|
Re: Hi and help? Smartrap built but... March 02, 2015 03:16PM |
Registered: 9 years ago Posts: 91 |
Dan
I had no choice, I had to take it apart to get the filament blockage out, I didn't say that they were Chinese, I said I was looking for spare parts so that I could replace the broken throat and replace the union at the top. I will take a look at the site that you have mentioned and see if they can help.
It is perfectly ok to dismantle an extruder assembly, my search led me to many sites that explain why people do this to clear blockages.
I haven't touched the PTFE liner in the throat, I have only removed the PTFE tube from the union at the top to find out where the blockage was. The throat is broken so it has to be replaced anyway, so it would make no difference.
Regards
Rob
|
Re: Hi and help? Smartrap built but... March 02, 2015 04:00PM |
Registered: 10 years ago Posts: 170 |
I think i don't understand the terms you are using. The hot end is made up from (from up down):
-PTFE tube
-PTFE pushfit connector
-auluminium cooling sink
-6mm hollow set screw
-6mm about 50mm long heat break treaded pipe from stainless steel
-PTFE liner that runs into heat break pipe
-heating block
-nozzle.
Which one of these is broken for you and maybe you can send me a better picture to undestand. I will supply the replacement but first i need to understand whats the defect. Worst case you just send me the entire hot end and I will issue an replacement.
Dan.
|
Re: Hi and help? Smartrap built but... March 02, 2015 05:33PM |
Registered: 9 years ago Posts: 91 |
Hi Dan
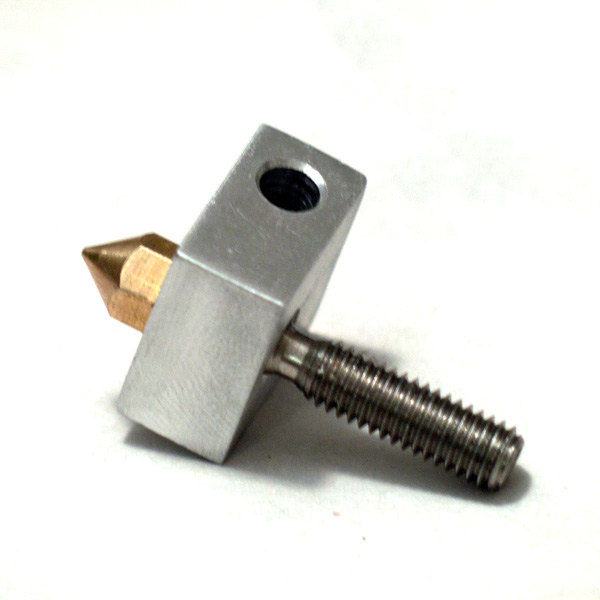
That's not a problem, I understand that the terms may be confusing, there was a picture of the parts in my post. There are only 4 parts.
1. Bowden tube union at the top
2. Cooling fins
3. Hollow threaded rod that feeds the hotend
4. Hotend at the bottom
It is the hollow threaded rod (3) that has broken, there is a narrow area that has no thread, it is called a 'heatbreak' on the manufacturers website. The rod is still attached to the hotend (4).
I have only removed the top (1) where the bowden ptfe tube is attached. The cooling fins (2) simply unscrew and can be removed, but this has now been reinstalled on the rod.
I am happy to return it to you for replacement. If you can let me know the address via PM, I will get it in the post tomorrow.
Kind Regards
Rob
|
Re: Hi and help? Smartrap built but... March 04, 2015 04:09PM |
Registered: 11 years ago Posts: 791 |
Quote
Wibbles
Hi Dan
I only mentioned it as my guess was that anyone who was used to RC kit would do what I was about to do and go buy a servo extension lead to run down to the box and just plug it in.
Ok, I now have this whole thing up and running, just had to make a few adjustments to the print speed (50-60), filament feed and speed, and the nozzle temp (190). I printed one of the parts from the files that you have put in the servo Z section, or tried to? lol. Edges were good, but as height increased the nozzle got closer to the previous layer.
After a couple of false starts I used the sugar /water method to make the first layer stick, and even though I used it directly on the glass, what was printed came off with minimal pressure. Cleaning up a glass bed is a piece of cake with acetone, or if anyone has some lying about, airbrush cleaner.
I now have one problem. I installed the firmware mentioned on the Servo update page, but when I start a print I don't get the auto bed levelling. Is there a trick to activate this, as I think that this was what caused my print to start going awry after a few slices had been printed. Eg - The print head started to smudge at one end of the printed item.
I am guessing that the length of the rod is quite critical to the bed detection. Eg Bed detection without the hot end touching the bed? Does the first layer nozzle height need to be set somewhere?
I am running it from a Windows PC, using Pronterface, and do not have an SD card installed, so if this makes a difference let me know.
Sorry for posting the questions here, but I guess that if anyone else has the same questions at least they will see the answers and know what the solution is.
Regards
Rob
The water sugar method can only be used on a heated bed. The bed should be set at 65-70C for PLA and 110C for ABS. If using a cold bed, use the PVA glue method.
[regpye.com.au]
"Experience is the mother of all knowledge." --Leonardo da Vinci
|
Re: Hi and help? Smartrap built but... March 04, 2015 04:36PM |
Registered: 9 years ago Posts: 91 |
I can only say that I have been using it straight onto glass, simply wiped a few drops over the glass with a sponge, let it dry for 5 minutes, and printed. The parts came straight off with minimal pressure and the surface that was on the glass had a totally flat gloss finish.
Easy job to quickly wipe the glass with airbrush cleaner to remove any residue, everything comes straight off, recoat, and good to go again on a perfectly clean surface.
Easy job to quickly wipe the glass with airbrush cleaner to remove any residue, everything comes straight off, recoat, and good to go again on a perfectly clean surface.
Sorry, only registered users may post in this forum.