VertX
Release status: experimental

| Description | a direct-drive extruder/x-carriage for the V9 hotend (for the moment) and its whole vertical x-axis
|
| License | |
| Author | |
| Contributors | |
| Based-on | |
| Categories | Development
|
| CAD Models | |
| External Link |
Contents
Inspiration
- EMAKER_Huxley
- Huxley-eg
- The Gen X Skb-Kiparis remix I discovered on this thread : http://forums.reprap.org/read.php?94,84403,93044#msg-93044
- Orca and the v9
- And all the existing reprap stuff that certainly influenced me
I wanted to design a vertical carriage with linear bearings, but mixed with the ideas behind the V9 (direct drive, no damn PTFE, no mouting block) to make it even simpler. And thus came this "carriage-struder":
Benefits
- a very compact (74mm wide x 42mm deep x 83mm tall) and accessible extruder, made of only 2 pieces.
- with LM8UU, zip-tie locked, and which bearing holders tend less to snap, thanks to the printing orientation
- active cooling with a little fan (or two), mounted on only one point : just rotate if you need to access behind
- Double pulley driven x-axis (inspired from the Madkit's double resolution mod), that don't bend the belt backward
And for the x-axis
- the whole x-axis may be assembled without removing any Z-rods (except to put the linear bearing on it)
- the x-carriage can move over a distance of 250mm (230mm with two little belt loop)
Sells/Prusa Mendel (30mm between the z rods)
(See the distances we agreed upon : http://forums.reprap.org/read.php?2,95828,96294)

VertX (beta)
If you upgrade from a classic Sells Mendel, you already have a long belt and most if any of the vitamins required.
| Item (and approximate weight/time | Quantity/File | Vitamins |
x-carriage  ~30gr/80min |
1 x-carriage-struder | 4 LM8UU 4 M3x8 (motor) (1 M3-4x10 for the optoflag) 1 M4x20 (fan) 2 M4x55 (+ 2springs) 2 624bearing (and 2 M4x16-20 + 2-4 M4 mudgard washer) |
x-carriage-idler  ~4gr/10min |
1 x-carriage_idler | 1 624bearing + 1 M4x20 (to hold the bearing in the idler) 1 M4x40 (axis) |
x-end-motor ~40gr/90min |
1 x-end-motor | 2 M8 nuts and 2 LM8UU 4 M3x10 (motor) 2-4 M3x15 (clamping the smooth rods) 1 624bearing + 1 M4x30 + 2 M4 mudgard washer 1 M3x8 (opto-endstop) |
x-end-idler ~30gr/60min |
1 x-end-idler | 2 M8 nuts and 2 LM8UU 2-4 M3x15 (clamping the smooth rods) 2 624bearing + 2 M4x30 + 2 M4 mudgard washer 1 M3x8 (opto-flag) |
| Total : ~100gr. and ~4h | Add some zip-tie and as many washers/nuts as needed |
Useful Addition : z-rod-stabilizer (http://www.thingiverse.com/thing:9864), printed opto-flag (seems to work when printed in black)
How to assemble it ?


First, remove your old x-axis. Begin by the extruder/carriage/belt, then the 180 and 360 bearing plates.

Now the important part : remove the M4 bolts on the upper z-rod-clamp (but don't touch at the M8 nuts, thus you keep everything in place).
Also untighten the two bolts of the rod-clamp at the other end, and that will let you slide the rod to add the linear bearings.


X-ends
X-end-motor:
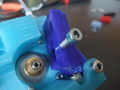
Opto-endstop (with M3 screw) and bearing (624+M4x40)

 Bearing image
With motor (don't tighten yet its bolts as it will serve to tighten the x-belt), and bolts (M3) to lock the smooth rods :


Assure you that the threaded rod can spin easily. For that, put one nut in place, and then turn and try often to set the other nut. Sometime a 1/4 of turn can make the difference.
X-end-idler: Same as precedent but simpler (without motor/endstop, but with an additional bearing)
Once the x-ends are in place, you can slide the x-smooth-rods. And add the linear bearings, or directly the x-carriage (but it's easier without it at this stage).


You may want to add two "z-rod-constraint" at the top of the threaded rod to remove any risk for the x-ends to fall off from the M8 nuts.


X-carriage
picture of a nice exploded view ala Ikea

Idler:
Give some turns at the bolt (M4X20), already or not on its axis (M4x40)
Put the bearing in place through the back of the idler

Finish screwing


X-Carriage-Extruder:
- I suggest you to begin with the hot-end
- Then add the extruder-idler
- Bearings with mudgard washer
- Prepare 4 zip-tie and mount the carriage on the linear bearing previously added on the rods
- Opto-flag
- Belt (you'll need 1250-1300mm lenght, so the 1400mm belt of the Sells mendel is fine)
- make a little loop with two zip-tie and hang it to the x-end-idler
- pass it trough the x-carriage bearing, and the x-end-idler bearings, and then around the pulley of the x-end-motor, the bearing of the x-carriage and finish by another little loop
- Tighten the belt with the motor on the x-end-motor
- Add the extruder motor (4 M3x8 and 4 M3 washer)
- Push some filament in (optional)
- Put springs in place (2 M4x60)
- Fan (M4x20)
R&D
VertX 0.7.3 (coming)
Move/heat/print test :
- need to redesign the x-carriage-idler (bump on a nut that hold the v6)
- move the hole to mount a fan 15-20mm left
- adjustable-z-opto-mount
- printed flags
The z-opto-endstop will be mounted directly on the smooth rod, but I'll keep using a screw+spring to precisely adjust it.
<flickr>6327256102|left</flickr>
Manual move : smooth ! <videoflash>gwKG6C917AE</videoflash>
VertX for hotends with mounting points (for the v6 in my case)
<flickr>6295678268|left</flickr>
VertX 0.7
- 70mm between x-rods and minors improvements
- In order to center the motor instead of the hotend I had to invert the x-end-motor orientation and thus we are back to the two motor on the same side, but maybe the mass will not be such a problem (or compensated by the centered extruder)
X-carriage and idler
<flickr>6198877704|left</flickr>
<flickr>6198878278|left</flickr>
X-end-motor
<flickr>6192479889|left</flickr>
<flickr>6192480835|left</flickr>
X-end-idler
<flickr>6189576449|left</flickr>
<flickr>6190095252|left</flickr>
Coming changes:
<flickr>6104181571|left</flickr>
Vertical Axis V0.6
First move/heat test --Emmanuel 16:08, 29 August 2011 (UTC)
<flickr>6104725870|left</flickr>
It move ! more pictures/videos on flickr : http://www.flickr.com/photos/watsdesign/6093138294/in/photostream
As expected in a "double-resolution" configuration it only make half of the distance with the old E_Step_MM and we must double it in the firmware.
I also tested the heat-resistance of the x-carriage-struder, and thanks to the little fan it can handle 270°C (the resistance couldn't heat more) without any deformation and while the upper part of the v9 is only a little warm (can be touched without problem). Thus I suppose that it can also extrude ABS.
First assembly
<flickr>6090296087|center</flickr>

X-carriage-struder v4


manu_x-carriage_pushspring optional, for comfort to push on the two springs
(hmm finally it feel better without))
X-ends v6 There is also a version of the x-ends with one added bearing to avoid to bend the belt backward in a "double-resolution" configuration, if you fear for the belt's life (as Droftarts suggested).


X-end-idler :

X-end-motor :

There is a video of a print of the x-end-motor : <videoflash type="youtube">1AA38w8l-1M</videoflash>
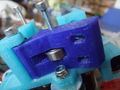
Detail of the mounting of the opto-switch :

Axis V0.5
A LOT of modification were made (quite time consuming)... but it's on its way ! (some more pics on flickr)
X-end-idler v5
Only ~30gr (15gr saved from the v2) and ~45min to print (at 40-120mm/s with Marlin)
<flickr>6083753400|center</flickr>
<flickr>6083752324|center</flickr>
<flickr>6083753038|center</flickr>
X-end-idler v2
33mm between the rods was finally too much, it seems to be ~28mm
<flickr>6083737416|center</flickr>
<flickr>6083195165|center</flickr>
X-carriage v2
I inverted the angles of the LM8UU seats for the V3 (to avoid removing the carriage when pushing on the filament by hand by example)
<flickr>6083736386|center</flickr>
<flickr>6083194353|center</flickr>
V0.4
X-ends also integrate something for the opto/microswitch

And as AhmetCemTuran suggested, the bearings seats of the X-carriage_v2 are now at an angle to snap them without removing the smooth rods :)

V0.3
Yay !


V0.3a

Buback suggested to put the motor face to face to center the overall mass :)
V0.2
And the x-ends that will have to be tested too. The spacing between the Z rods are for a Sells Mendel, to replace the classic x-axis (don't checked for a Prusa but if different that may not be difficult to adapt and re-export)
V0.2.2
<flickr>6080067127|left</flickr>
<flickr>6080604538|left</flickr>
<flickr>6060884422|left</flickr>
<flickr>6070660239|left</flickr>

V0.2.1

V0.1


When looking back at the eMaker, maybe two LM8UU can be enough ?
Orca (70mm between x-rods)
~70mm between horizontal rods, center-to-center.
V1b
Not tested yet and could be refined (rounded edges, some details, inverting the bearing parts that drive the belt to hang it close to the linear bearing and thus make it more compact)
But it's supposed to be a drop-in replacement of the actual x-carriage :

eMaker Huxley
Get rid of the gears too ! (future addition)
With a nema17 we know that works, but I've no idea for a nema14.