RepRapPro Huxley/es
|
English • العربية • български • català • čeština • Deutsch • Ελληνικά • español • فارسی • français • hrvatski • magyar • italiano • română • 日本語 • 한국어 • lietuvių • Nederlands • norsk • polski • português • русский • Türkçe • українська • 中文(中国大陆) • 中文(台灣) • עברית • azərbaycanca • |
| Introducción | Materiales y herramientas necesarios | Montaje de la estructura | Montaje de Y | Montaje de X | Montaje de Z | Montaje de la base calefactada | Montaje del extrusor |
| Montaje del calentador | Cableado | Puesta en marcha | Imprimiendo | Mantenimiento | Resolución de problemas | Mejoras |
Contents
Introducción

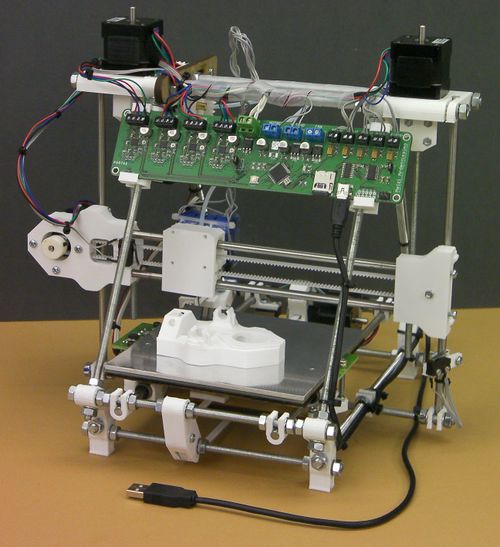
Estas páginas son las instrucciones completas para el montaje, puesta en marcha y uso de la versión RepRapPro Ltd de la impresora RepRap Huxley.
Como toadas las RepRap, ...
Like all RepRap machines, RepRapPro Huxley is fully open-source. It is licenced under the GPL. All the design files and software are available from the RepRapPro Ltd Github repository; the electronics are here: https://github.com/mosfet/melzi. And it is here in the Thingiverse.
If you want to print the plastic parts for a RepRapPro Huxley, see this wiki page.
Notas generales
Give yourself plenty of space and ensure your work area is clean. Dust and dirt are a 3D printer's worst enemy. All printed parts have been printed on various RepRap machines from suppliers within the RepRap community. Despite the fact that these machines are highly tuned RepRap 3D printers, some holes and features may need a little fettling to get the best performance from the RepRapPro Huxley. This is especially true for the Igus bushings used for the Z axis. There is a video how-to on fettling 3D printed parts here on Vimeo. Don't fettle the 3mm holes on the huxley-x-carriage though (we changed the assembly screws without changing the drawing)!
Before you start the build, please ensure you have all the components as listed on the packing list included in the kit. If anything is missing, please contact us via email: ![]()
We understand that people may want to change aspects of the machine's design, and in fact we encourage this as it is one of the benefits of open source development. Before changing anything, please be aware that the RepRapPro Huxley has been designed to maximise the build volume relative to the the machine's footprint, and as such many of its components fit closely to others. So consider your changes carefully before you try to implement them. And when you find improvements, please tell us so that we can include them in future kits, and so that existing owners can upgrade their own machines.
BEFORE YOU ATTEMPT TO ASSEMBLE ANY PART OF THE RepRapPro HUXLEY 3D PRINTER, PLEASE READ THESE BUILD INSTRUCTIONS FULLY AND ENSURE YOU UNDERSTAND THEM. Although all parts are covered by warranty, this will be invalidated by your not following these build instructions.
The RepRapPro Huxley is a robust RepRap machine once assembled; however it does require a certain amount of care during assembly. If in doubt, force is usually not the answer! There are many ways to get support and advice, see the Get Support section below.
Table of Contents
- Frame assembly
- Y axis assembly
- X axis assembly
- Z axis assembly
- Heated bed assembly
- Extruder drive assembly
- Hot end assembly
- Wiring
- Commissioning
- Printing
- Maintenance
- Troubleshooting
- Improvements
Donde obtener ayuda
If you find you need help or advice with assembling, commissioning or using your RepRapPro Huxley 3d printer, you can use the following channels:
- Our Forum. This is shared with the eMaker Huxley forum, as the machines are so similar.
Documentos de versiones anteriores
If you have an older RepRapPro Huxley and want a past copy of this documentation see this link:
RepRapPro Archived Documentation
Listado de herramientas
Mecánicas
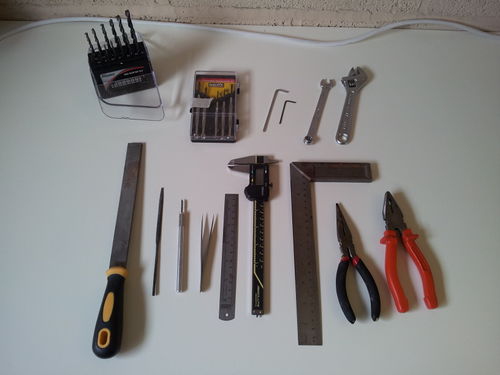
Las herramientas necesarias para el montaje mecánico de tu RepRapPro Huxley son:
- Brocas
- Juego de destornilladores de precisión
- Llaves allen de 1.5mm y 2.5mm
- Llave fija de 10mm (para tuercas M6)
- Llave inglesa ajustable de 15cm
- Lima plana
- Lima semicircular
- Cutter
- Pinzas finas
- Regla de 300mm
- Calibre (analógico o digital)
- Escuadra
- Alicate de punta fina
- Alicate
- Tornillo de banco
- Cinta de teflón de fontanero
Eléctricas
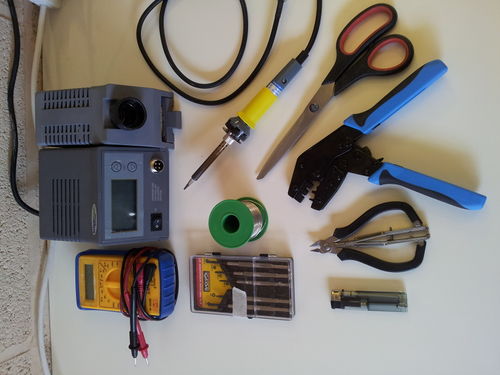
Tools required for the electrical build of the RepRapPro Huxley 3D printer:
- Digital Multimeter
- A fine-tipped soldering iron
- Precision screwdrivers
- Solder (flux is also useful)
- Hair dryer (or other heat source for heating heatshrink wire sleeving; the barrel of a soldering iron works OK)
- Wire strippers/cutters
- Ratchet crimp tool Such as this one
- Molex crimp tool (such as the 63811-1000, you may also want the extraction tool 11-03-0044, Molexkits.com)
- Scissors

