Mondrian
|
English • العربية • български • català • čeština • Deutsch • Ελληνικά • español • فارسی • français • hrvatski • magyar • italiano • română • 日本語 • 한국어 • lietuvių • Nederlands • norsk • polski • português • русский • Türkçe • українська • 中文(中国大陆) • 中文(台灣) • עברית • azərbaycanca • |
Release status: working

| Description | another folding reprap
|
| License | |
| Author | |
| Contributors | |
| Based-on | |
| Categories | |
| CAD Models | |
| External Link |
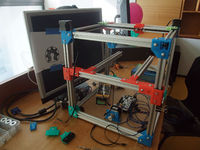
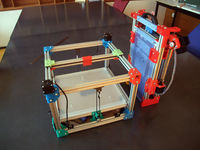
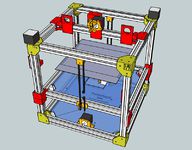
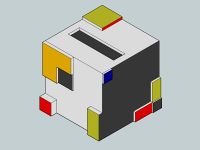
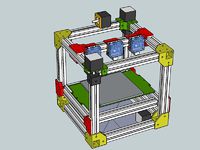
Codename : Mondrian
Here is what I wanted to try among the possibilities to make a Foldable RepRap.
I didn't pursued the XY-head + telescopic Z because I couldn't get my head around how to do it properly at this moment.
But after having seen the Create it gave me some new ideas, for a future v2 of the FoldaRap :)
<videoflash>iblqWGGPKoU</videoflash>
<videoflash>DySxmGJvnyQ</videoflash>
<videoflash>PEaP7HCyGPY</videoflash>
Contents
Specifications
- Printed Parts: 20-21
- Non-Printed Parts: ?
- Material Cost: ?
- Cost: ?
- Printing Size: lenght of choosen extrusion minus 50-100mm (=100^3 for 200mm ; 200^3 for 300mm ; 350^3 for 400mm ; etc.)
- Resolution : XY = 0.0125 mm ; Z = 0,00025 mm with m5 rods
- Accuracy : 0.1 mm
- Speed: 50 - 500 mm/s (print-travel, max speed tested yet)
Special features
- Modular/scalable design (with the same printed part you can build a small cube or a big plotter frame, just choose accordingly your length of extrusions/belt)
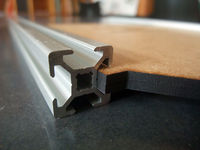
- Based on standard/cheap 20x20mm aluminium extrusion (with 6mm slot)
- The frame is the linear guide for X, Y, Z axis
- Easy to build, with few tools
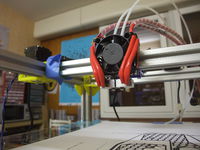
- 1.75mm Direct Driven Bowden Extruders (dual-head)
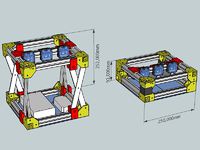
- small footprint : lenght of extrusion plus 40mm (240x240 for 200mm ; 340x340 for 300mm ; etc.)
- Big Blue Power Switch
- [to-do] scissor-lift Z (not on the intermediate iteration), for a "flat" printer that expand as it print
Naming Convention
- FoldaRap2-M222 : Mondrian (non-foldable verion), 200mm extrusion in X, 200mm in Y and 200 in Z (the first prototype, the 9th iteration achieved the first nice print)
- FoldaRap2-M332 : the second prototype (300x300x200)
- FoldaRap2-M333 : the third prototype
- FoldaRap2-M763 : just an idea for a laser cutter :P
- FoldaRap2-M71010 : actual prototype (10th iteration) for the science faire (700 x 1000 x 1000 mm)

To Do
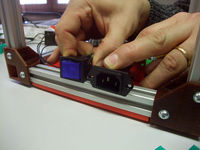
- place the endstops
- active cooling addon
- bed leveling
- dual-extrusion settings
- x-addon for the chocolate extruder of LaurentF.
- mini-cnc addon [55]
- foldable Z axis (long term)
- bio-printing
R&D
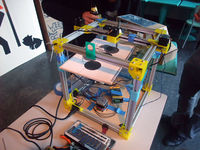
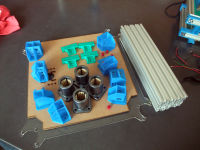
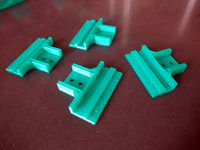
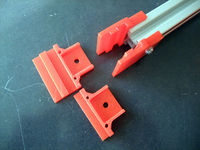
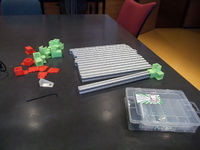
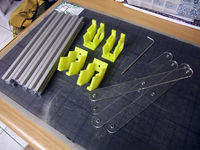
let's see if it's truly scalable ^^ (note : all the plastic parts are taken from the 300mm prototype, excepted for the red square braces)
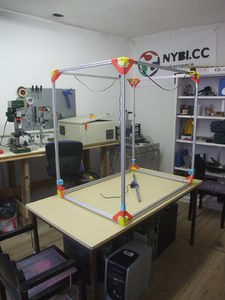
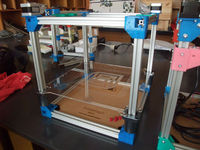
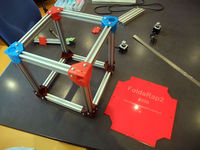
a giant Mondrian ! (70x100x100cm)

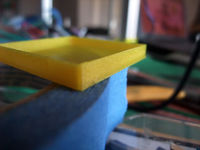
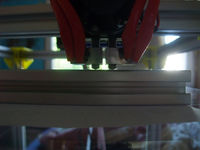
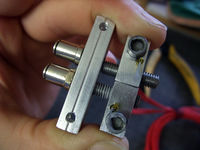
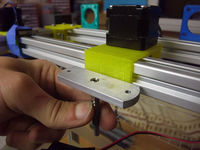
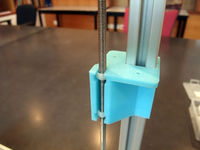
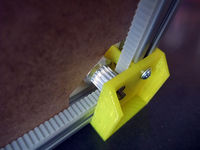
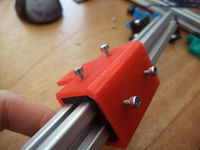
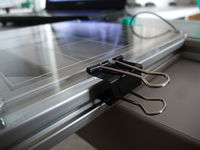
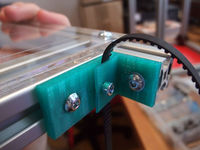
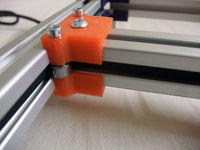
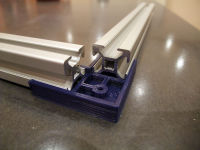
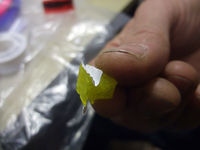
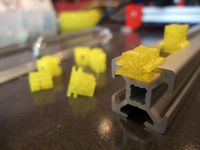
a simple way to clamp the belt in the extrusion

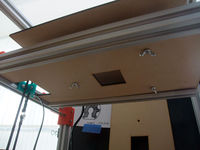
nice print during the summer (although a corner was broken, had time to reprint one after)


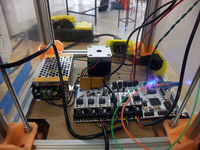
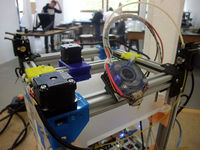
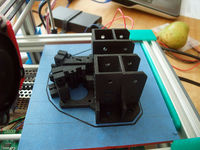
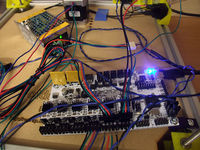
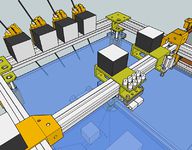
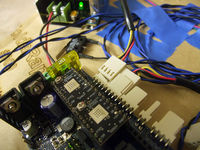
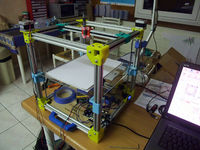
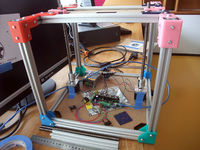
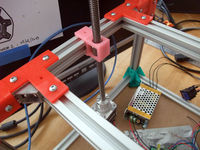
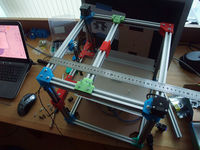
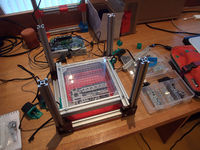
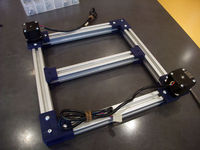
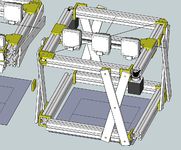
all the electronic :)

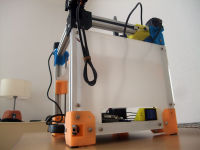
rear
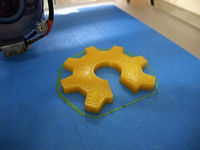
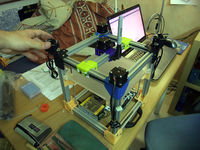
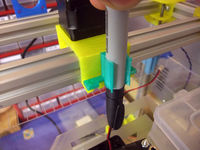
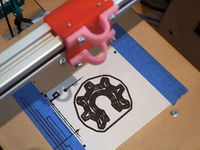
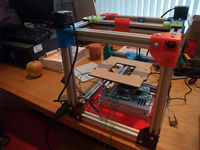
First print !! (30-jun-2013)
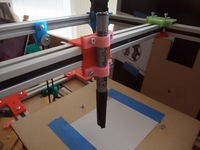
quick change head (video [1])
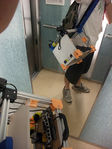
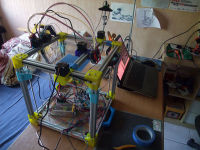
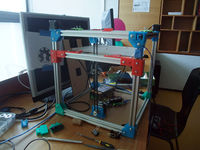
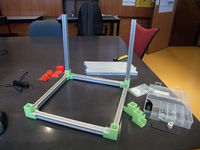
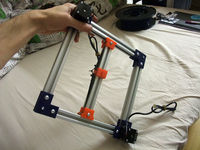
not foldable yet, but still easy to carry ;-)
right
left
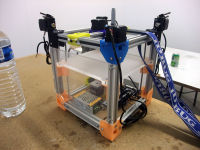
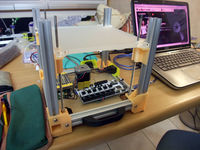
9th prototype born in the night of the 27-28 june, small and beautiful ^^
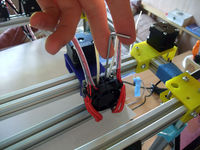
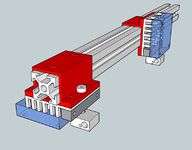
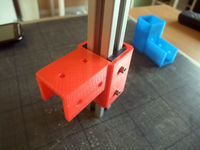
the integrated corner-extruder-idler (maybe better to have it separated)
M222
9th iteration coming thanks to this reduced Z-slider ;)
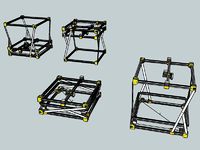
wondering about different arrangements, moving the XY from the bed (z-motors at the base, or with the XY), or upside-down moving only the bed from the XY at the base

video [4]

first and second print (extruder not tensioned, temp. too low)
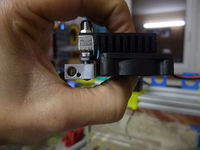
second nozzle locked
height adjusted
quick mount, video [5]
vidéo [6]
back with the Rumba
easy leveling : lock the first, adjust the second and lock it with the pneumatic fitting (using an hex key)

after a short discussion with Thomas Landrain from La Paillasse of a possible usage for 10 nozzles

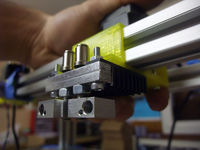
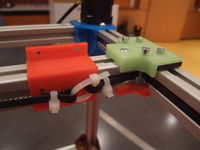
mounting points dimensions
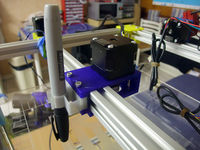
for those who prefer other kind of nozzle, plotter/j-head/prusa/etc. :)

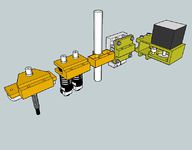
modular assembly of x-carriage and plugins
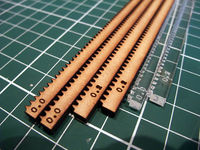
tries at lasercutting a test rack
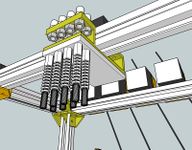
up to 8 :P
or a prusa nozzle, or many other eventually (easier to adapt on this horizontal mounting than on the huxley/foldarap carriage)
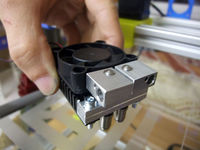
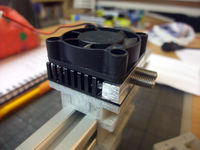
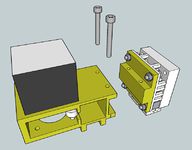
if only the fan could be used also to cool the printed parts
video [7]
a quick and dirty belt tensioning system :P
as I have one Z-motor and two Y-motors, I switched them (and the according pins in the firmware)

or many more, just kidding :P
forgot to add that it must use two hotends (material+support) RepRapPro_Dual_Hotend
just a thought, with a rack you can have several carriages running on it :)
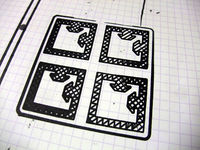
much better than the previous try ! but not perfect yet. [21]

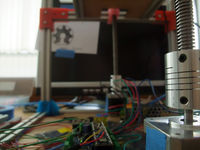
the electronic side will need some tidying


details of the belt tension system (as on the kosselM, one loop in on the carriage, the other goes through it)

video, manual moves [24]
new iteration to assemble, and parts to reprint ^^'
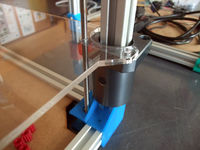
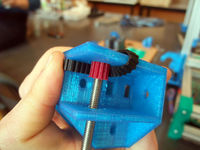
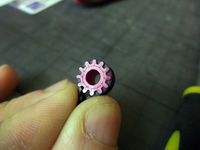
after the small printed pulley + igus square bushing -> printed bushing + classic metal pulley
while I still have to assemble my last iteration and three other things to try, I'm also considering a no-belt approach (maybe more suited for huge XY tables) [25]
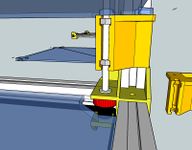
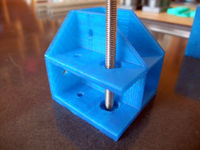
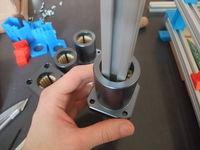
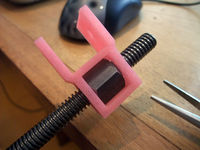
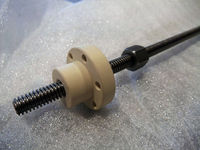
the nice detail is to keep the leadscrew in the hole of the flange ! (an M5 nut snuggly fit inside)
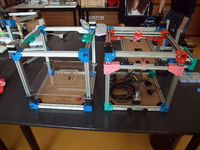
the previous and current prototype (I also switched to short nema17)
locked with a nut
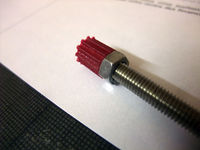
printed 10t2.5 pulley (10mm diam. ^^)
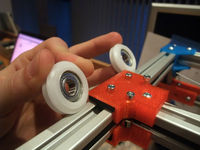
may try to use a roller based carriage [26]

sexy z-stage
igus QJFM-02-20, nice square bushings (video [29])
forget about them, metal on metal will grind the aluminium they told me
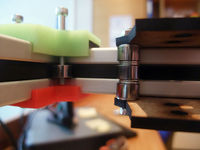
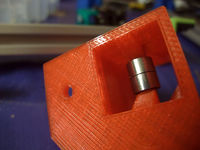
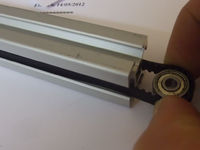
after a talk with albill I wanted to try using bearing instead of pads, but 603zz in this case, not the bulky 608 we usually see on this kind of sliders :)
an idea of a different arrangement of the compact reprappro hotend, in which the fan may serve to cool the print at the same time
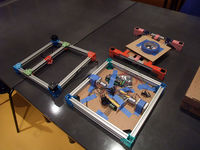
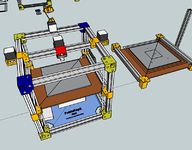
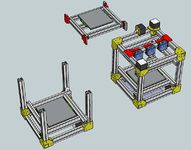
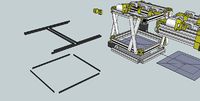
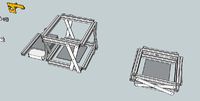
the 3 main plates (base, Z, XY), the Z extrusion are stored in the base plate for transport
once disassembled :)
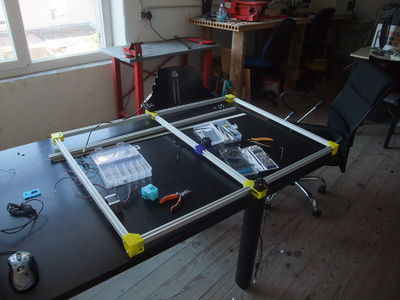
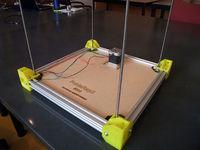
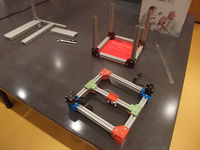
now we have two independant modules (the XY and the cube-Z) really usable, lets put everything together !
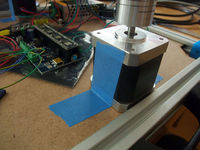
the blue tape work surprisingly well at holding the motor down on the plate :)
5th iteration, the bearing pad corners are good but finally the Z-stage will be better when supported from both sides (and will be more prone to be scaled a little more before going to 3 leadscrews)
need to rebuild the XY, some play have been introduced when scaling up from 200 to 300mm
3 points leveling
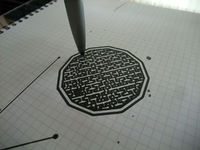
I'm not fully satisfied but it's usable to try a second drawing :)
video [32]
4th iteration : back to the 2 points z-stage, nema17 and belt (ready to switch to trapezoidal leadscrew)
nice try, but the nema14 are too weak for the whole z-stage at this scale ^^'
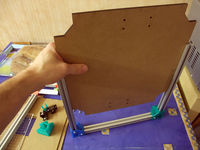
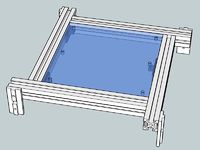
inserting the base plate
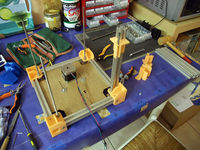
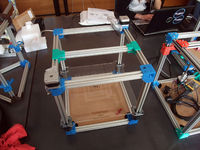
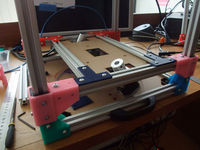
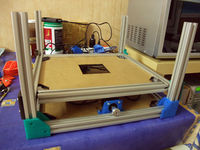
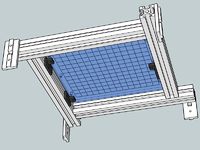
current version in test, now based on 300mm extrusion (as we already have the little FoldaRap)
current version in test, now based on 300mm extrusion (as we already have the little FoldaRap)
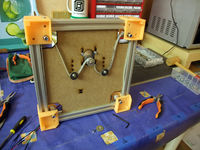
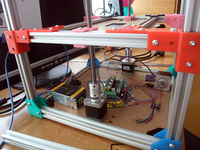
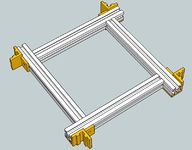
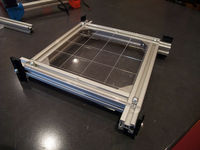
new strategy for the base build, the electronic plate now serve to set the distance between the extrusions to make a perfect square
need to add something to hold them on the frame like on the Foldarap 1 :)
thing to integrate : having replacable builds plate to avoid manipulating the z-stage
third Z test : printed part could work, but need a very well built frame, will probably go with the UHMW pads instead
including a first drawing !! [33]
it will be probably powered by a RUMBA board
second test for a Z-stage
manual sliding video [36]
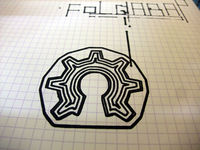
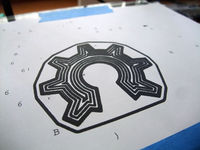
started some early research for a logo with a friend github/com, then found something like I wanted to do on thingiverse
at a point the 20x20 extrusion will start to flex a little and we may add some additional feet for a big plotter frame, but we could already scale a machine to a nice size as is :)
with 3 leveling point this time
another way to add the bed plate
will be the second test of the Z-stage
(up to 8 just for fun)
theoretical mounting of the extruder(s)
why a z-belt ? -> instant Z-lift (eliminating the need of springs), and if it don't work swaping for a leadscrew is easy.
I hope to keep it as compact for the foldable version
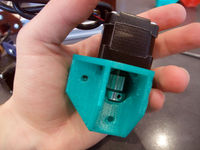
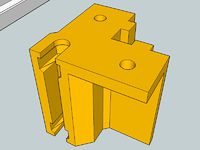
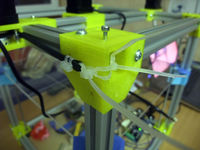
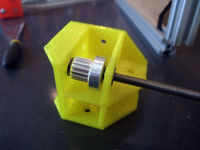
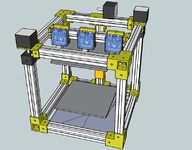
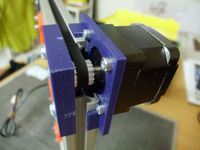
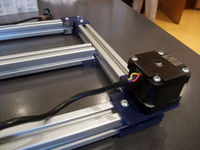
new corner-motor, enclosed

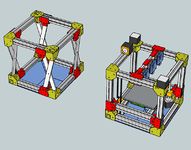
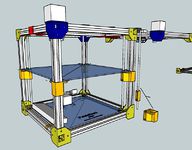
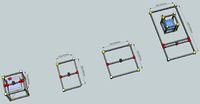
the intermediate and long term versions

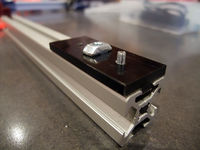
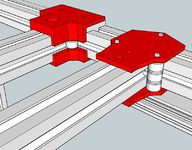
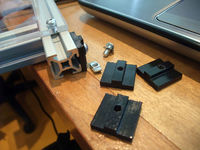
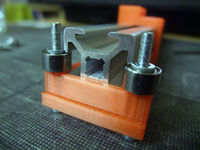
with a bolt long enough, we could even fix a pad directly onto an extrusion
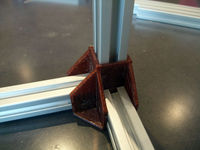
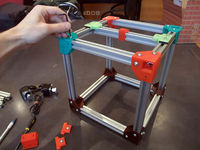
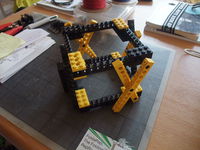
third iteration, a little sturdier
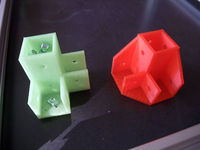
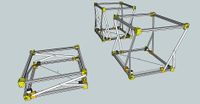
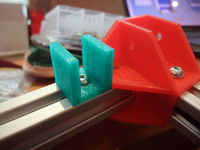
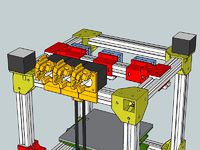
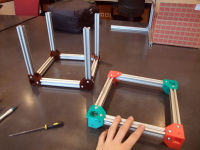
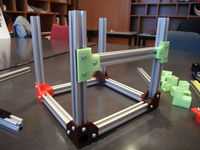
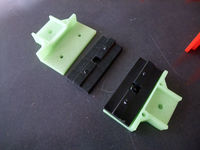
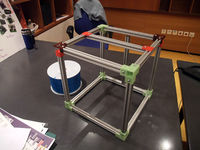
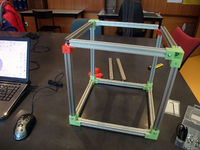
the corner allowed some flex in the cube (since the extrusion profile are not edge to edge), but the new one is much better :)
sliding video [47]
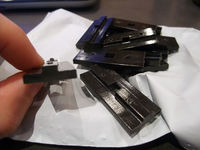
80/20 linear bearing pads, the solution taken from the video "MechBass", if printed parts aren't good enough
I like the simplicity of using m5 rods, but I want to try a real leadscrew just to experience the difference (or a belt-driven Z stage, as in the Printxel)
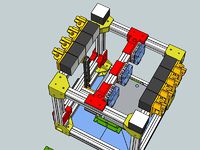
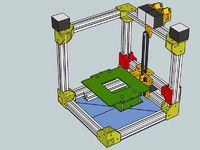
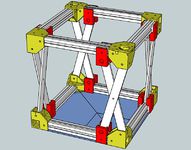
some researches for the Z, sliding on the four corners to avoid the Z wobble of the gantry a la makerbot2

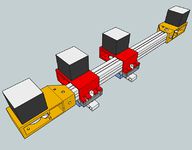
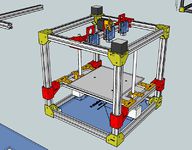
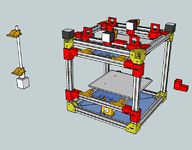
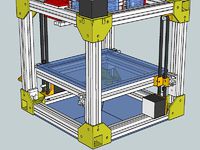
few printed parts, and few type of parts (central symmetry powa)
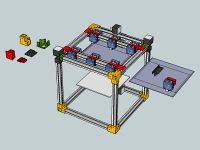
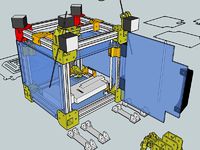
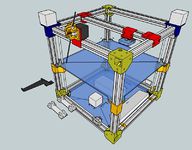
I love the modularity of using extrusions instead of laser cut sheets (300mm extrusion version, similar to an Ultimaker), this one may host 4 hotends (if you place two reprappro dual mod on each side of the carriage)
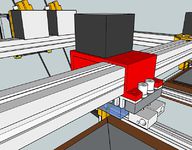
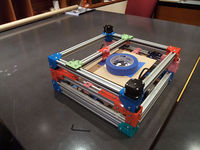
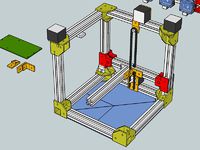
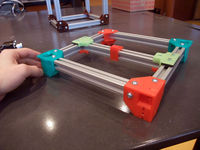
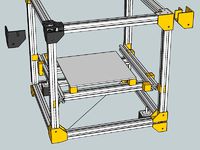
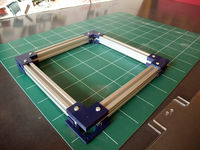
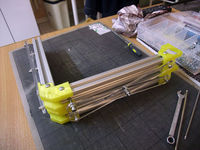
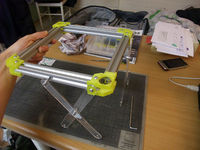
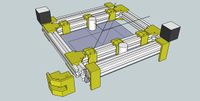
intermediate iteration to validate the H-bot part of the machine, an easily scalable cube, or just replace some corners and you can make it foldable :)

fortunately there is only 4 possible combinations of true/false in the firmware, just try and see which one is good
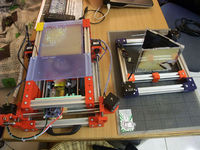
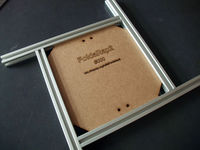
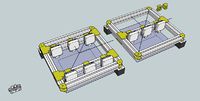
comparing the footprint with the Foldarap000 (same print surface)
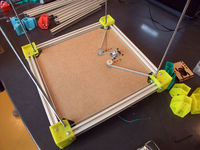
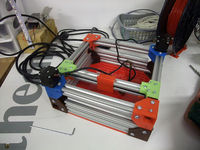
and a short video to show manual moves [50] (you really need to build a h-bot to understand how it works ^^')
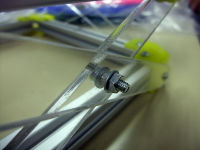
the pulley need a short grub screw, or it will rub against the printed part sides
the 603zz are a perfect fit
y-sliding video [51]
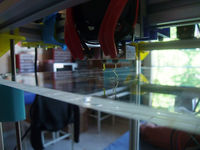
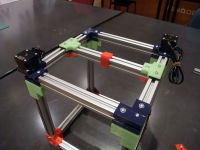
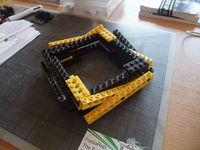
there is a 2mm gap between the profiles
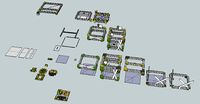
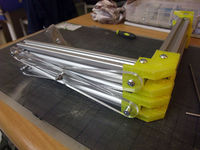
starting over... the corners use much less material this time.
the sliders are a critical part, for better wear resistance they may be coated with some ptfe tape or even machined in ptfe (if printed pla wear too quickly)
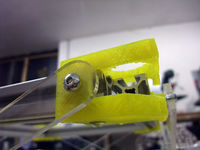
we need also a belt-tensioning system, maybe in the corners (at the motors or bearings corners), but I hope the zip-tie trick will be sufficient.

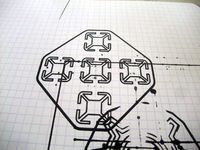
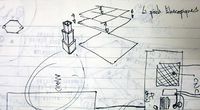
for this try the shape of the scissor is very basic, maybe a shape like a "S" could be better
ideally (for long term usage) we should add a ptfe insert as an axis and between the two scissors (something like a piece of tube or a machined part)
and there is a video too [54] :)
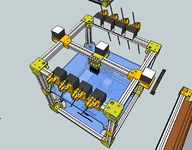
the xy platform may serve for other light application (mini laser engraver?)
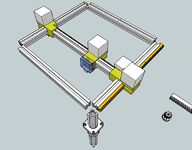
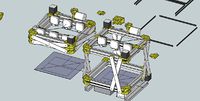
H belt path for the XY, and below the one that synchronize the four Z-scissors


External links, media/press, etc.
- Github mentioning an "awesome" project among others ^^
More inspiration
- Scissor Z

<videoflash>qpffEF9Jew0|320|240</videoflash>
- H-XY
<videoflash>Hc0ADpQ6FBg|320|240</videoflash> <videoflash>FP2ciUBT6nY|320|240</videoflash> <videoflash>uqW3t7c3u4M|320|240</videoflash> <videoflash>_EWfmcWAz-M|320|240</videoflash>
- From http://forums.reprap.org/read.php?1,163243 remember to disable the idle-motor line in marlin to activate properly the CoreXY feature
- Direct sliding on the aluminium frame
<videoflash>5UYMnzXQEtw|320|240</videoflash>