First prints from Makergear Prusa kit
Posted by fittoextrude
|
First prints from Makergear Prusa kit November 02, 2011 10:12PM |
Registered: 12 years ago Posts: 10 |
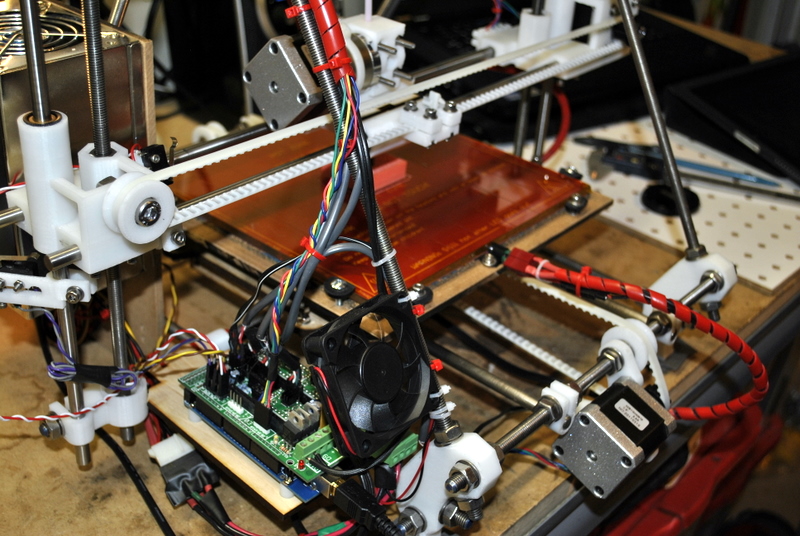
I am new to this forum and first off, I want to thank the reprap community and Makergear Rick for all the good advice while I was building my printer. I did my research to see what was going to be the path of "least resistance" before building and decide on the Makergear Prusa kit.
Needless to say, I am delighted with the care with which this kit was put together. Hats off for Makergear for offering a good quality product.
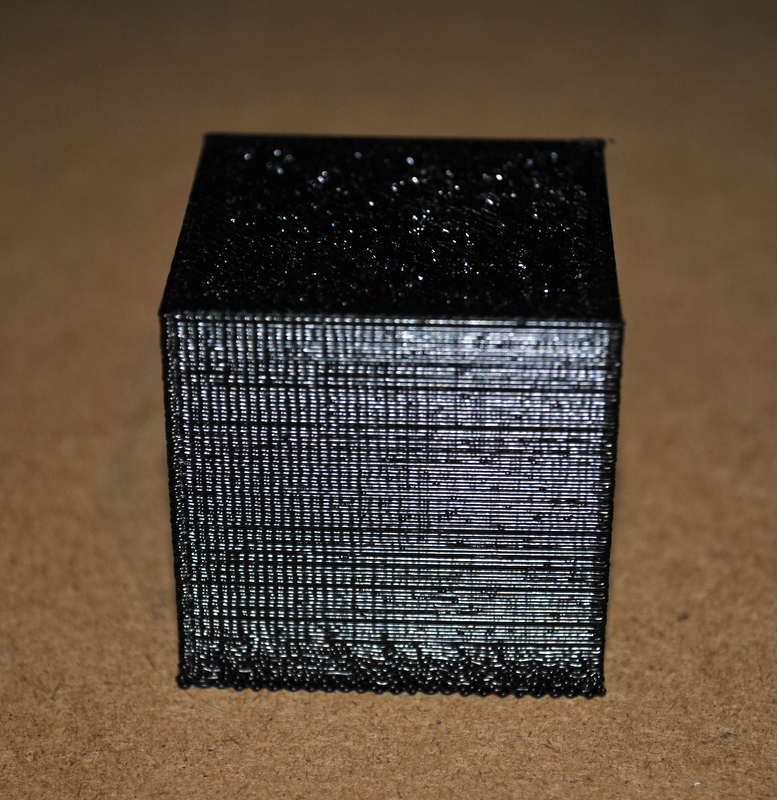
For firmware I am running sprinter and pronterface with Sfact (Kliment Printrun). As filament I am using 1.75 ultimachine ABS and a nozzle diameterof .35mm. I have included some pictures of my first prints, including a 40mm calibration cube. I used the calibration cube to adjust
my E steps in the firmware to about 0.5mm tolerance at first go, I could not get my supplied dual rail 12 volt power supply to work because of
an error I made, so I am using an older ATX instead out of the parts bin.
Unfortunately this power supply does not seem to heat up my pcb enough. I get about 90 degrees max with the pcb touching nothing and 83 degrees mounted on insulation and topped with pyrex. All the insulation does is contain heat loss so the glass heats up a lot quicker with it. The layers are: 1/4" MDF (mounted to carriage), alu foil,cork rubber gasket. The cork rubber gasket has cutouts that trap air and fiberglass to prevent heat radiation to the MDF. I embedded PTFE washers into the gasket to maintain consistent thickness. Before, I tried to mount solid cork rubber gasketing material and found it took nearly an hour to heat up to 83 degrees. With the modifications, it takes "only" fifteen minutes. I am sure that if I had a better power supply,perhaps with a higher voltage, I could reach my target bed temperature of 110-120 Celcius, and a lot faster. The old ATX is "heavy" on the 5 volt rail and with a switching supply that may mean having to place a load on it for the 12 volt rail to come alive.
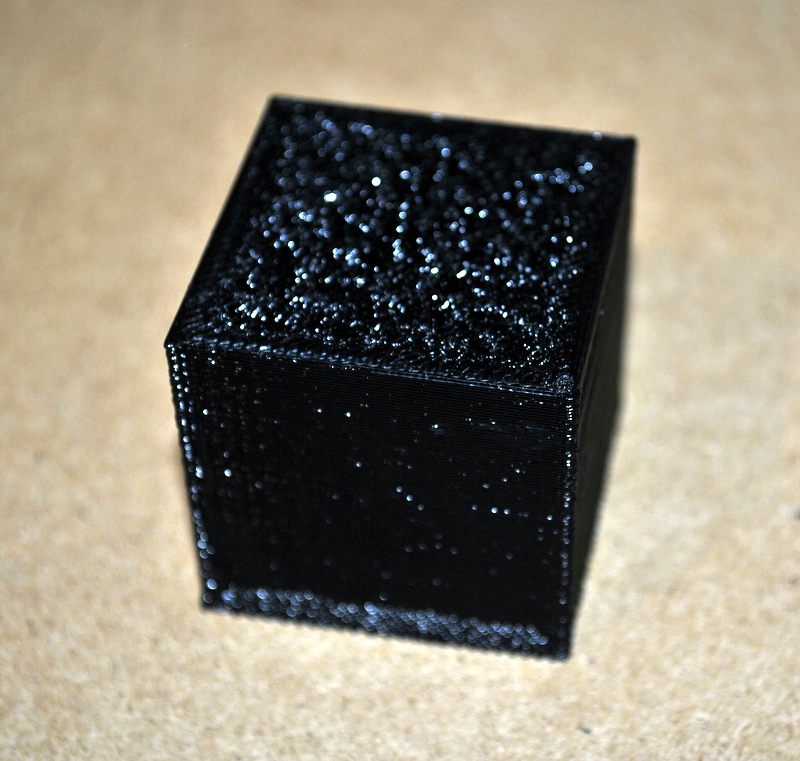
My first prints have "rough" first layers, probably from the heat loss when the melted ABS hits the Kapton. I am otherwise delighted with the results. The other thing I noticed is that two upright corners on my test cube facing the -x direction have a bit of "overhang". I am not sure what that is....belt not tight enough, rails not sliding well enough, not enough current to the stepper motor. I will have to play around with that a bit. Lastly, there does not seem to be enough infill, or my ABS temperature is not hot enough since I get this puckering with the top layer of the
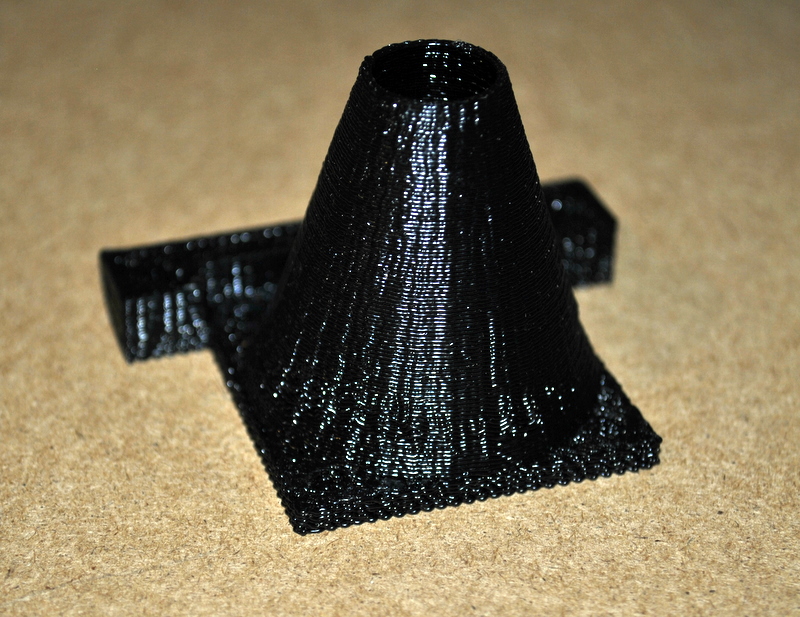
black ABS test cube. Pictures are attached.
I am open to any suggestions or otherwise good advice.
Thanks again,
Bob
Needless to say, I am delighted with the care with which this kit was put together. Hats off for Makergear for offering a good quality product.
For firmware I am running sprinter and pronterface with Sfact (Kliment Printrun). As filament I am using 1.75 ultimachine ABS and a nozzle diameterof .35mm. I have included some pictures of my first prints, including a 40mm calibration cube. I used the calibration cube to adjust
my E steps in the firmware to about 0.5mm tolerance at first go, I could not get my supplied dual rail 12 volt power supply to work because of
an error I made, so I am using an older ATX instead out of the parts bin.
Unfortunately this power supply does not seem to heat up my pcb enough. I get about 90 degrees max with the pcb touching nothing and 83 degrees mounted on insulation and topped with pyrex. All the insulation does is contain heat loss so the glass heats up a lot quicker with it. The layers are: 1/4" MDF (mounted to carriage), alu foil,cork rubber gasket. The cork rubber gasket has cutouts that trap air and fiberglass to prevent heat radiation to the MDF. I embedded PTFE washers into the gasket to maintain consistent thickness. Before, I tried to mount solid cork rubber gasketing material and found it took nearly an hour to heat up to 83 degrees. With the modifications, it takes "only" fifteen minutes. I am sure that if I had a better power supply,perhaps with a higher voltage, I could reach my target bed temperature of 110-120 Celcius, and a lot faster. The old ATX is "heavy" on the 5 volt rail and with a switching supply that may mean having to place a load on it for the 12 volt rail to come alive.
My first prints have "rough" first layers, probably from the heat loss when the melted ABS hits the Kapton. I am otherwise delighted with the results. The other thing I noticed is that two upright corners on my test cube facing the -x direction have a bit of "overhang". I am not sure what that is....belt not tight enough, rails not sliding well enough, not enough current to the stepper motor. I will have to play around with that a bit. Lastly, there does not seem to be enough infill, or my ABS temperature is not hot enough since I get this puckering with the top layer of the
black ABS test cube. Pictures are attached.
I am open to any suggestions or otherwise good advice.
Thanks again,
Bob
|
Re: First prints from Makergear Prusa kit November 03, 2011 06:12AM |
Registered: 12 years ago Posts: 147 |
Hi Bob,
Those are some nice looking prints. It simply looks like your first layer is too high. You want to squish the plastic onto the platform a little. Experiment with the initial height until you're pleased with the results.
Regarding the infill > It's really hard to see with the reflections (black is awful to photograph!). The solution will depend on your slicer, assuming you are using Skeinforge, In 'Fill' the 'Grid overlap ratio' controls the line spacing. Default should be 1, but I have seen it at 1.2. The lower the number the further apart the lines.
[wiki.bitsfrombytes.com]
This wiki will be useful (not entirely) for tweaking your settings
|
Re: First prints from Makergear Prusa kit November 03, 2011 08:52AM |
Admin Registered: 17 years ago Posts: 7,879 |
The first layer is wiggling. That usually means you are trying to compress the filament rather than stretch it. I.e. you are trying to print with a layer height that is too big for the nozzle. If you measure the diameter of the filament extruded into fresh air you should keep the layer height less than 80% of that and the width over height no less than 1.5.
I also failed to get a Prusa PCB bed up to 120C with a PC power supply. Even with dummy loads on the 5V and 3.3V, about four 12V feeds in parallel, 36 strand wire and a very low RDSon MOSFET. I had to use 15V to get it to 120C in a reasonable time.
Edited 1 time(s). Last edit at 11/03/2011 10:41AM by nophead.
[www.hydraraptor.blogspot.com]
|
Re: First prints from Makergear Prusa kit November 03, 2011 10:19AM |
Registered: 13 years ago Posts: 485 |
|
Re: First prints from Makergear Prusa kit November 03, 2011 10:52AM |
Registered: 14 years ago Posts: 3,742 |
YES, it works very well but an AC heater pad and the proper DC/AC relay is definitely not cheap.
I paid 55€ for the silicon heating pad and I think around 10€ for the relay.
It does work very reliably and is easy to install. Comes with adhesive backing to attach to the aluminum plate.
Bob Morrison
Wörth am Rhein, Germany
"Luke, use the source!"
BLOG - PHOTOS - Thingiverse
I paid 55€ for the silicon heating pad and I think around 10€ for the relay.
It does work very reliably and is easy to install. Comes with adhesive backing to attach to the aluminum plate.
Bob Morrison
Wörth am Rhein, Germany
"Luke, use the source!"
BLOG - PHOTOS - Thingiverse
Sorry, only registered users may post in this forum.