|
Tripteron Implementation November 03, 2016 07:45PM |
Registered: 7 years ago Posts: 143 |
Howdy folks
Decided to make a thread to track my progress in designing and building a Tripteron 3D printer implementation. I'm pretty far already, and have most of a frame designed/printed/built, since I had pretty much all the parts already.
First, a link to a video of the Tripteron example robot, built at the University lab that came up with the mechanism
YouTube Link
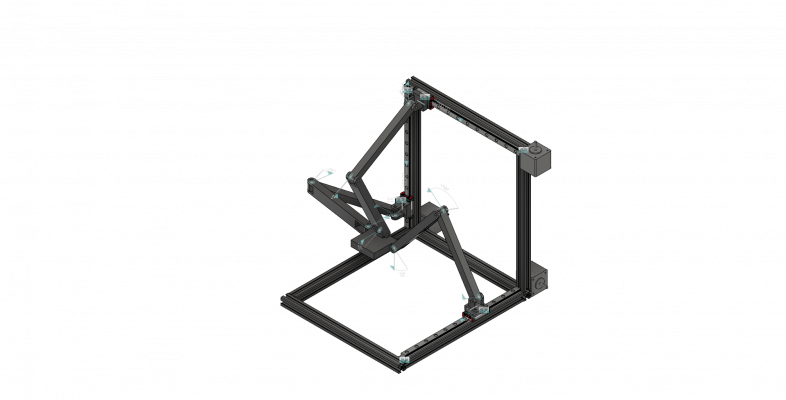
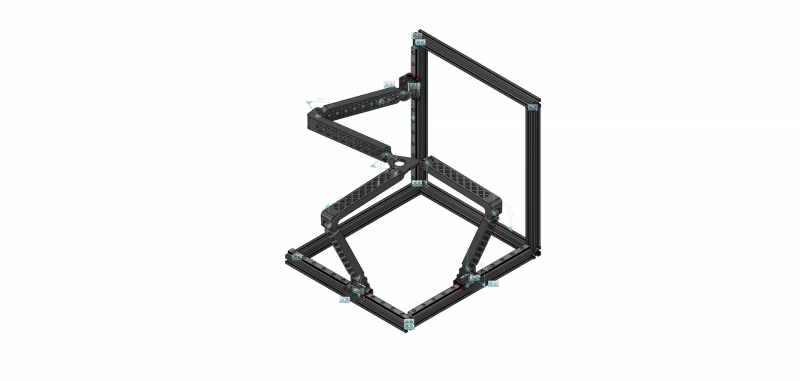
And the CAD models I have mocked up so far
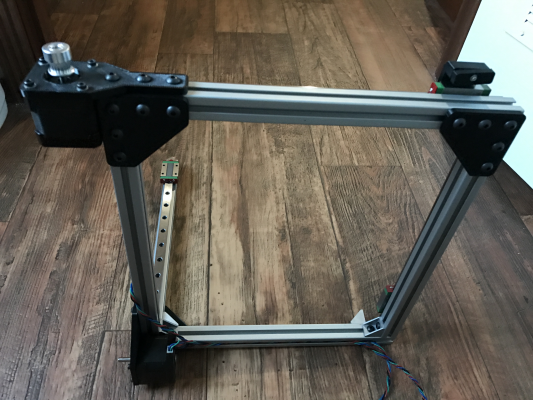
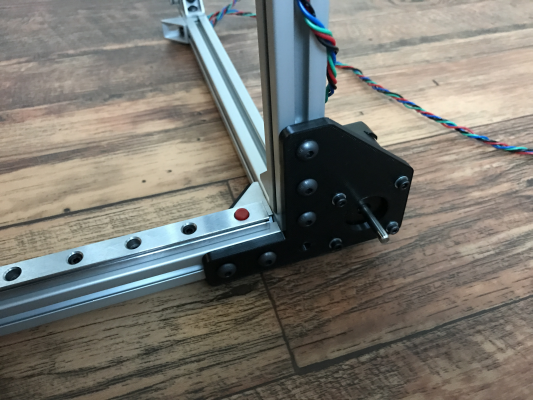
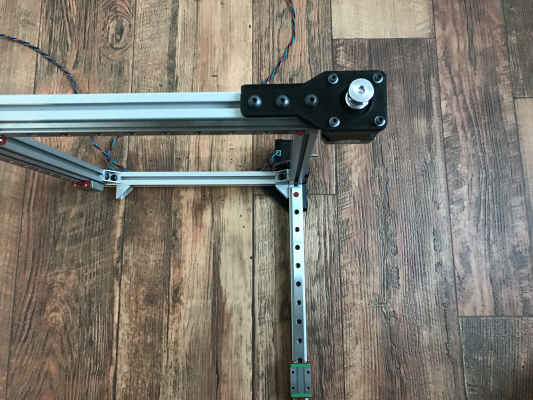
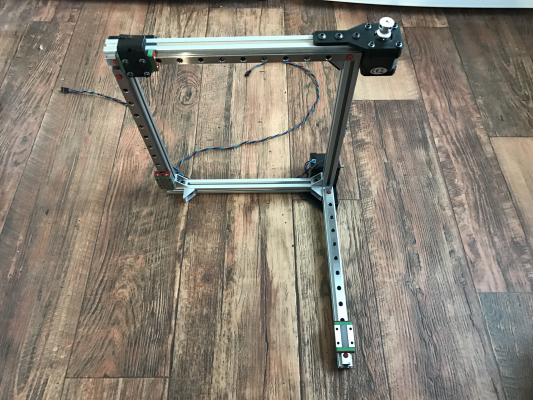
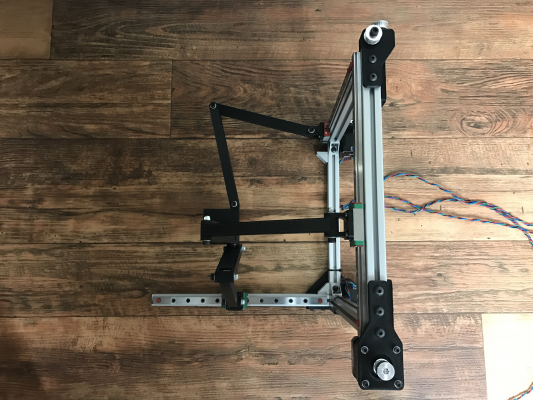
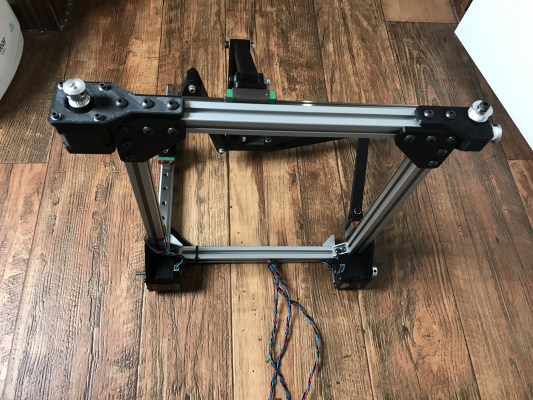
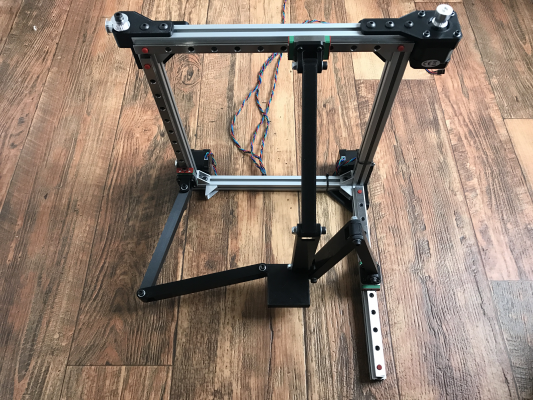
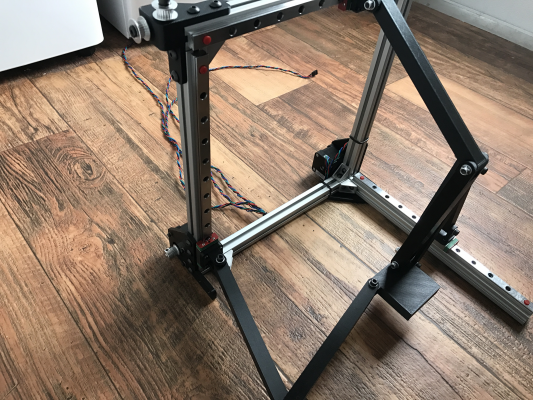
And my build progress so far. More to come, still waiting on some more 2020 extrusions as well ;P
I'll be adding a lot more info here as I go, but this should be a fun project! Similar enough to the inverted delta I was working on with the arms, but pure Cartesian kinematics, and I get to use my linear rails!
|
Re: Tripteron Implementation November 04, 2016 12:44AM |
Registered: 11 years ago Posts: 5,780 |
Interesting mechanism! I think the most critical part of the build is going to be the hinged joints. Once you get the platform/extruder moving around I think you'll find that the L shaped frame isn't going to be nearly rigid enough- look at the size of the frame members used on the machine in the video.
Ultra MegaMax Dominator 3D printer: [drmrehorst.blogspot.com]
Ultra MegaMax Dominator 3D printer: [drmrehorst.blogspot.com]
|
Re: Tripteron Implementation November 04, 2016 04:50AM |
Registered: 8 years ago Posts: 5,232 |
*signed* 
The z-axis will be the toughest part regarding accuracy. Like with deltas you might want to use 0.9° steppers. An 8bit controller would do, though.
All the arms are working on side load only. A nightmare to make it stiff and light at the same time. Carbon rods would be my favourites.
Hinges were already mentioned, but doable.
I have a few steppers with linear guides from DVD-drives laying around. Tempted to build a tiny demo version of it.
Print volume almost equals build frame and kinematics are easier than with CoreXY.
I love it!
-Olaf

The z-axis will be the toughest part regarding accuracy. Like with deltas you might want to use 0.9° steppers. An 8bit controller would do, though.
All the arms are working on side load only. A nightmare to make it stiff and light at the same time. Carbon rods would be my favourites.
Hinges were already mentioned, but doable.
I have a few steppers with linear guides from DVD-drives laying around. Tempted to build a tiny demo version of it.

Print volume almost equals build frame and kinematics are easier than with CoreXY.
I love it!
-Olaf
|
Re: Tripteron Implementation November 04, 2016 09:54AM |
Registered: 7 years ago Posts: 143 |
Quote
the_digital_dentist
Interesting mechanism! I think the most critical part of the build is going to be the hinged joints. Once you get the platform/extruder moving around I think you'll find that the L shaped frame isn't going to be nearly rigid enough- look at the size of the frame members used on the machine in the video.
Yeah, it is! And yes, the joints are definitely critical. The L-frame may not be rigid enough, and I've got enough 2020 extrusions arriving early next week to make it a full box if necessary, so we'll see what happens with the L and shore it up if it's insufficient.
That said... I printed out some very light arms in CF to do the first prototype testing. Just need to figure out the shoulders so they can clamp to belts, and this thing will be moving in a day or two. Probably mount the arms with the shoulders I have right now and make some video of manual manipulation a bit later today just for fun

|
Re: Tripteron Implementation November 04, 2016 09:57AM |
Registered: 8 years ago Posts: 601 |
The print volume doesn't match the arms unfortunately, so enclosing the printer is difficult. When the Z arm reaches 0,0 for X and y, it will extend outside the build volume by about half the distance of y, so a 40cm cubed build volume needs an 80cm wide and 60 cm tall frame. This is assuming the arm is nearly fully extended at the furthest point away from its base.
A corexy can reach a better build volume /frame size ratio if designed well I believe.
If well built though, this will be somewhere between a delta and corexy for speed, and can easily be made to have multiple degrees of freedom. It will possibly be cheaper to make than other machines too, depending on how the arms are made. I like it! Since you postest this in your other thread I have started designing my own.
|
Re: Tripteron Implementation November 04, 2016 10:00AM |
Registered: 7 years ago Posts: 143 |
I don't think the Z will be any more difficult with accuracy, per se, but I'm currently using 20T pulleys on 1.8° steppers, which gives me 200 micron/0.2mm for full steps. 12T would give 125/0.125mm.Quote
o_lampe
*signed*
The z-axis will be the toughest part regarding accuracy. Like with deltas you might want to use 0.9° steppers. An 8bit controller would do, though.
Quote
All the arms are working on side load only. A nightmare to make it stiff and light at the same time. Carbon rods would be my favourites.
Hinges were already mentioned, but doable.
Carbon fiber is indeed the way to go, IMO, and that's why I've printed my first set of prototype arms in CF infused PETG again
 We'll see what stiffness ultimately should look like vs accel vs top speed and such as we go along... but for the moment, these arms are Very light all together.
Quote
I have a few steppers with linear guides from DVD-drives laying around. Tempted to build a tiny demo version of it.
Print volume almost equals build frame and kinematics are easier than with CoreXY.
I love it!
-Olaf
Yeah!! It's such simple kinematics and yet such a small adjustment to a linear Delta's theory. Please do build a demo version if you get the urge!
|
Re: Tripteron Implementation November 04, 2016 10:13AM |
Registered: 7 years ago Posts: 143 |
Quote
Origamib
The print volume doesn't match the arms unfortunately, so enclosing the printer is difficult. When the Z arm reaches 0,0 for X and y, it will extend outside the build volume by about half the distance of y, so a 40cm cubed build volume needs an 80cm wide and 60 cm tall frame. This is assuming the arm is nearly fully extended at the furthest point away from its base.
A corexy can reach a better build volume /frame size ratio if designed well I believe.
If well built though, this will be somewhere between a delta and corexy for speed, and can easily be made to have multiple degrees of freedom. It will possibly be cheaper to make than other machines too, depending on how the arms are made. I like it! Since you postest this in your other thread I have started designing my own.
Yep, the volume doesn't match the arms and enclosing would be. For me personally, I have zero interest in ABS, and like open-framed printer designs. If I can make this one work, that'd be great. Not really worried about build volume:frame volume ratios, though it's a decent volume here. Keep in mind, the arms don't have to be all the same length, and effector attachment points can vary. The Tripteron academic paper discusses this, and their demo robots have all different arm lengths. I'm sure there's many optimizations to make here.
As for speed, each axis is just linear motion. The arm extension is not a part of positioning, the positioning is pure Cartesian kinematics, and each axis moves as fast as each motor (assuming perfect stiffness). So it won't be any slower than a CoreXY.
Definitely can be super cheap, but most of all it's easy to engineer around, and fun! Definitely share if you do some work on it yourself. I'm happy to share all my model files if interested

|
Re: Tripteron Implementation November 04, 2016 10:17AM |
Registered: 7 years ago Posts: 143 |
|
Re: Tripteron Implementation November 04, 2016 03:22PM |
Registered: 7 years ago Posts: 143 |
Small update, got most of the bits together for a proof of concept. Just need to model the belt clamps into the shoulders and rig belts on it. Here's where I am so far:
Short video of manual manipulation
Yes, the joints/arms need more rigidity. I know But I should be able to finish up usable shoulders and have it printed/assembled/moving by later tonight. I'll drop a video here when I get to that point. This thing is fun!
Short video of manual manipulation
Yes, the joints/arms need more rigidity. I know
 But I should be able to finish up usable shoulders and have it printed/assembled/moving by later tonight. I'll drop a video here when I get to that point. This thing is fun!
|
Re: Tripteron Implementation November 05, 2016 04:14AM |
Registered: 8 years ago Posts: 5,232 |
I've used PETG to build semi-flexible but tough parts. Using CF reinforced PETG seems to be a step in the right direction, but is probably not the stiffest solution? ( and expensive too )
Also you loose print volume with the way your joints intertwine. In robotics, arms are often placed side_by_side, so they are ( almost ) fully foldable.
What if you print the joints only and build the arms by clamping them on real carbon tubes.
..but one step at a time
PS: Do you think counterweights on the arms would help against platform sagging? ( My biggest concern regarding z-axis accuracy )
Edited 2 time(s). Last edit at 11/05/2016 04:20AM by o_lampe.
|
Re: Tripteron Implementation November 05, 2016 06:07AM |
Registered: 7 years ago Posts: 143 |
Quote
o_lampe
I've used PETG to build semi-flexible but tough parts. Using CF reinforced PETG seems to be a step in the right direction, but is probably not the stiffest solution? ( and expensive too )
It's definitely not the stiffest. I just was enjoying printing everything in the CF PETG I had, and some flex is nice while figuring out joints. I intend to move to PLA immediately to increase stiffness.
Quote
Also you loose print volume with the way your joints intertwine. In robotics, arms are often placed side_by_side, so they are ( almost ) fully foldable.
I've moved the Y (right leg rail) effector attachment to the front right corner, more closely mimicking the original robot's joints. Preventing link overlap is part of the reason why, and there's more modifications that can be made to improve that further. I'm definitely aware of it. Feel free to sketch something up if you have a good idea. The paper I linked above discusses this to some degree, as well.
Quote
What if you print the joints only and build the arms by clamping them on real carbon tubes.
..but one step at a time
Indeed, I'm still getting the shoulders and belt clamps finalized!
 But I thought about carbon tubes as well, or even 10x10 extrusions. 150mm 1010 is <20g or so, and that's not bad at all for a massive increase in stiffness, without huge cost or difficulty obtaining/working with parts. Just one of the things I'm considering. One at a time!
Quote
PS: Do you think counterweights on the arms would help against platform sagging? ( My biggest concern regarding z-axis accuracy )
Not really, I'd like to avoid imbalancing the inertia much at this stage. And with light enough arms/hotend/etc, I don't think it's a problem. Either the arms are stiff "enough" and the joints are constrained "enough" or they're not. I think the material/design choices should get as close to "enough" as possible before considering shifting inertias and other potential bandaids. But I appreciate the input, feel free to offer any ideas!
|
Re: Tripteron Implementation November 05, 2016 07:56PM |
Registered: 7 years ago Posts: 143 |
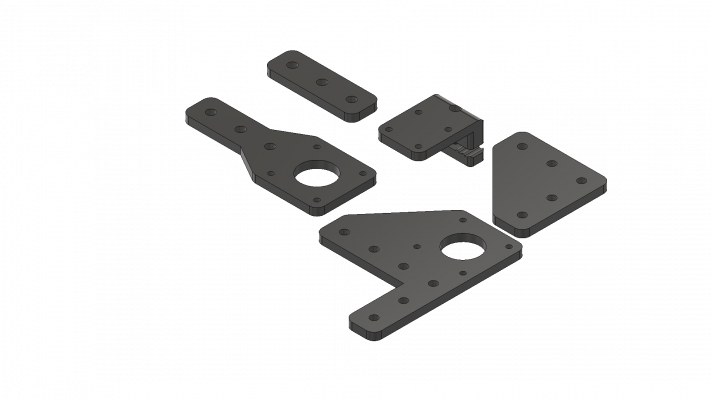
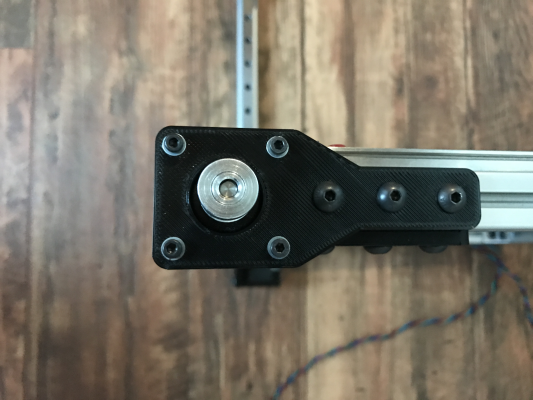
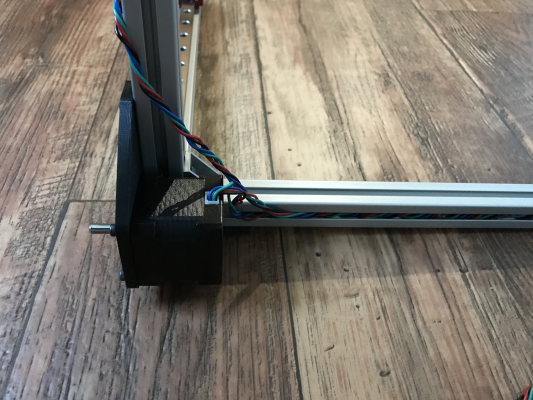
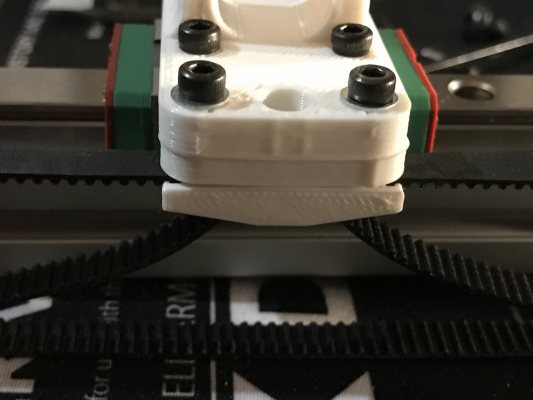
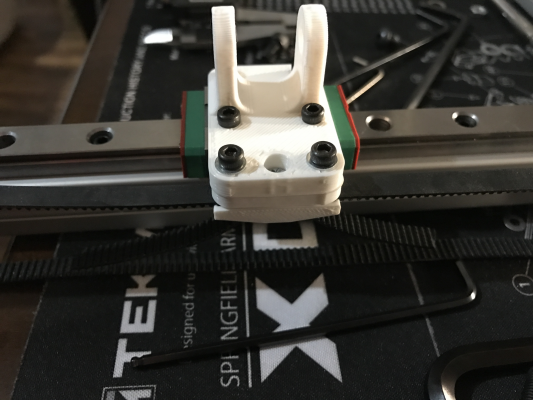
Making progress! Got shoulder bracket, spacer and belt clamp design nailed down and working. Waiting on remainder to print for other axes, and I also figured out how to reduce the distance between Z belt path and Z rail carriage; just add more idlers to shift the path! Woo 
Here's some pics
PS, yes I know the Y bracket/spacer look like shit. I was iterating prototypes at way-too-fast and way-too-thick settings to churn them out for testing and measurement quickly
Edited 1 time(s). Last edit at 11/05/2016 07:57PM by Apsu.

Here's some pics
PS, yes I know the Y bracket/spacer look like shit. I was iterating prototypes at way-too-fast and way-too-thick settings to churn them out for testing and measurement quickly

Edited 1 time(s). Last edit at 11/05/2016 07:57PM by Apsu.
|
Re: Tripteron Implementation November 05, 2016 08:36PM |
Registered: 7 years ago Posts: 143 |
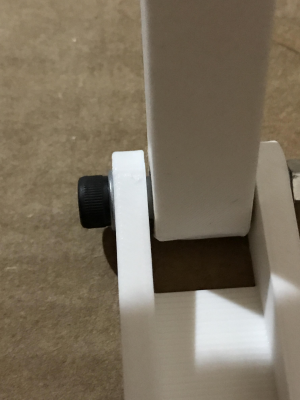
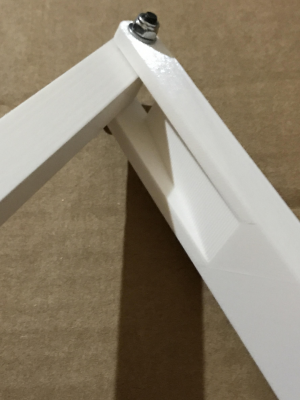
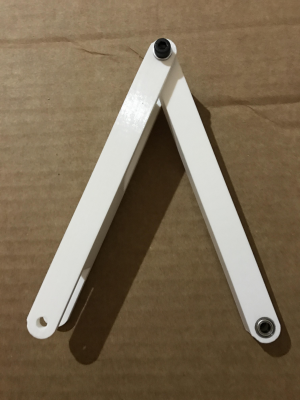
Short arm (Y side) first-pass is done, and my new joint design is flawless  Printed in Atomic Filament Ultra-Impact PLA, using 5x7x1mm bearing spacers, bearings flush with arm faces, outer forks have 1mm room on each side for spacers, then 35mm M5s with washers and nylock nut.
Detail pics:
 Printed in Atomic Filament Ultra-Impact PLA, using 5x7x1mm bearing spacers, bearings flush with arm faces, outer forks have 1mm room on each side for spacers, then 35mm M5s with washers and nylock nut.
Detail pics:
|
Re: Tripteron Implementation November 05, 2016 11:21PM |
Registered: 7 years ago Posts: 143 |
Belts ahoy!!
Running some gcode in a very handicapped configuration and "build volume" to make sure it doesn't go too far on the rails without endstops and such, lol.
YouTube Link
Not bad for a first draft. Now to finish printing the arms and effector in this super tough PLA; with my new joint design, I expect to be pleasantly surprised once it's all together.
|
Re: Tripteron Implementation November 06, 2016 06:34AM |
Registered: 8 years ago Posts: 5,232 |
I'm still concerned about the z-axis sagging and would like to ask, if a second z-stepper on the diagonal opposite side of the cube would make sense?
From what I see, the other arms wouldn't interfere.
You know the z-axis accuracy is so important for 1st. layer adhesion, I'd accept the added weight and cost for an additional set of arms,pulleys etc., just to make sure the design is on the save side.
Maybe the individual arms could be lighter then, since they share the platform weight.
I'm not a big fan of screws used as shafts, especially in such a critical place. Real 5mm shafts sure would have less play in the bearings...( You know all about it, but I guess, you want to get it running asap )
)
Edited 1 time(s). Last edit at 11/06/2016 06:39AM by o_lampe.
From what I see, the other arms wouldn't interfere.
You know the z-axis accuracy is so important for 1st. layer adhesion, I'd accept the added weight and cost for an additional set of arms,pulleys etc., just to make sure the design is on the save side.
Maybe the individual arms could be lighter then, since they share the platform weight.
I'm not a big fan of screws used as shafts, especially in such a critical place. Real 5mm shafts sure would have less play in the bearings...( You know all about it, but I guess, you want to get it running asap
 )
)Edited 1 time(s). Last edit at 11/06/2016 06:39AM by o_lampe.
|
Re: Tripteron Implementation November 06, 2016 06:18PM |
Registered: 7 years ago Posts: 143 |
Quote
o_lampe
I'm still concerned about the z-axis sagging and would like to ask, if a second z-stepper on the diagonal opposite side of the cube would make sense?
From what I see, the other arms wouldn't interfere.
You know the z-axis accuracy is so important for 1st. layer adhesion, I'd accept the added weight and cost for an additional set of arms,pulleys etc., just to make sure the design is on the save side.
Maybe the individual arms could be lighter then, since they share the platform weight.
For now, I'm going to continue to approach this with the minimal Tripteron configuration of three orthogonal arms. As for sagging or deflection, that's mostly a matter of arm and joint stiffness under expected loads. An additional arm system wouldn't necessarily improve Z precision, because it adds more potential joints and thus sources of error, as well as the fact that Z isn't supported by a single arm only. 2 arms support each axis, by design. The DOF chains are overconstrained on the effector, that's part of the design

Quote
I'm not a big fan of screws used as shafts, especially in such a critical place. Real 5mm shafts sure would have less play in the bearings...( You know all about it, but I guess, you want to get it running asap)
Absolutely, screws are far less than ideal. And yes, I know all about these things and have considered them, as well as potential solutions. But for now, yep, it's all about getting a prototype built and moving and then start tweaking from there after empirical analysis.
My new joint design actually seems to get around potential issues with M5 screws as axles. The joints can be tightened Very far without effecting bearing rotation. I have the entire thing assembled now (will post a video below), and it seems like the weak point is actually the PETG brackets/belt tension now, because the joints do *not* wobble under light load, but instead seems that the belts and brackets are wobbling a little, because the effector/arms have a slight bit of springiness to them that they do not have when not attached to the rail carriages.
|
Re: Tripteron Implementation November 06, 2016 06:22PM |
Registered: 7 years ago Posts: 143 |
It lives!!
YouTube Link
Very exciting
As I mentioned in my reply above, there's a bit of springiness to the arm/effector system that is not present in the arms themselves, or any of the joints individually. I believe this is due to PETG brackets + belts slightly undertensioned, so I am printing out a full set of HIPLA bracket replacements. 6 hours to go, and I might think about new belt tensioning designs meanwhile.
... but none of that matters yet. Because it moves and works and is pretty damn stiff!

YouTube Link
Very exciting

As I mentioned in my reply above, there's a bit of springiness to the arm/effector system that is not present in the arms themselves, or any of the joints individually. I believe this is due to PETG brackets + belts slightly undertensioned, so I am printing out a full set of HIPLA bracket replacements. 6 hours to go, and I might think about new belt tensioning designs meanwhile.
... but none of that matters yet. Because it moves and works and is pretty damn stiff!


|
Re: Tripteron Implementation November 06, 2016 09:39PM |
Registered: 7 years ago Posts: 143 |
Small update
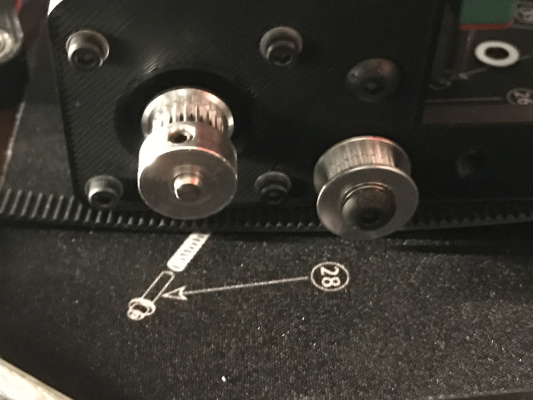
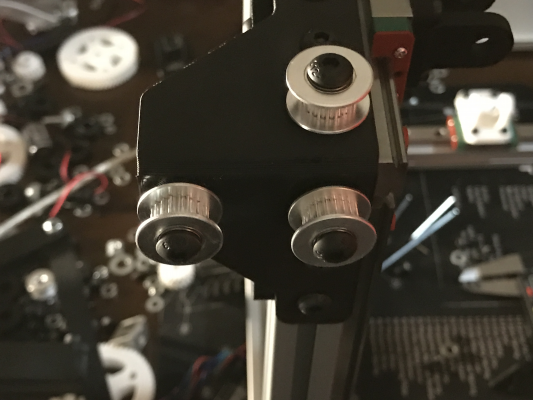
After looking at this video showing a different orientation of a Tripteron design, I've decided to rebuild my prototype using the same basic idea. I realized that by doing so, I can move all three motors to the bottom of the frame, and even use the exact same motor/idler brackets for all three axes! There are many benefits of this idea, such as:
And probably more! So yes, that's the current plan. I am printing out the bracket set in PLA now, and will reconstruct it tonight or tomorrow. Pics and such soon to come!
After looking at this video showing a different orientation of a Tripteron design, I've decided to rebuild my prototype using the same basic idea. I realized that by doing so, I can move all three motors to the bottom of the frame, and even use the exact same motor/idler brackets for all three axes! There are many benefits of this idea, such as:
- Lowers the center of gravity, increasing frame rigidity and stability without having to build a full box
- Allowing an L or double-L (bottom face + one corner of a cube) partly-open frame, which I find appealing
- Having no motor on top reduces frame torsion/vibration/noise
- Allowing Z to grow more easily without simultaneously raising X, as their positions aren't coupled anymore
- Closely matches 3D printing coordinate systems, where XY are coplanar with the build surface, and Z rises vertically from that plane
- Being more intuitive to look at, think about, and engineer on top of as a platform
- Engineering around identical brackets means I can use an extra idler per motor bracket to shift the active belt path, and keep the idler bracket *dead* simple
And probably more! So yes, that's the current plan. I am printing out the bracket set in PLA now, and will reconstruct it tonight or tomorrow. Pics and such soon to come!
|
Re: Tripteron Implementation November 06, 2016 09:56PM |
Registered: 7 years ago Posts: 18 |
|
Re: Tripteron Implementation November 07, 2016 12:27AM |
Registered: 7 years ago Posts: 18 |
As I just mentioned in IRC: a funny thought is you could gang 4 of these together to use only 3 motors for the XYZ axes and a separate motor for each extruder, and have 4 things printed simultaneously for minimal costs 
(Pretty hefty steppers, and of course, if one fails in the middle... well...)

(Pretty hefty steppers, and of course, if one fails in the middle... well...)
|
Re: Tripteron Implementation November 07, 2016 05:52AM |
Registered: 9 years ago Posts: 893 |
The only significant disadvantage I can see so far is the space it takes on the bench with its "elbows" out. A bit like sitting next to a selfish eater at a dining table... 
It would be interesting to mount a dial indicator on the central part, to see if it can maintain an even height over the bed.
Edited 1 time(s). Last edit at 11/07/2016 05:53AM by David J.

It would be interesting to mount a dial indicator on the central part, to see if it can maintain an even height over the bed.
Edited 1 time(s). Last edit at 11/07/2016 05:53AM by David J.
|
Re: Tripteron Implementation November 07, 2016 07:54AM |
Registered: 8 years ago Posts: 5,232 |
|
Re: Tripteron Implementation November 07, 2016 08:01AM |
Registered: 8 years ago Posts: 5,232 |
Just shooting from the hip, but would it be possible to fold the z-arm the other way round?
As long as it moves above the platform, it wouldn't interfere with the other arms or the printed part. ( one selfish eater less )
)
Thinking it through, it would only stick out at a different end...
Edited 1 time(s). Last edit at 11/07/2016 08:06AM by o_lampe.
As long as it moves above the platform, it wouldn't interfere with the other arms or the printed part. ( one selfish eater less
 )
)Thinking it through, it would only stick out at a different end...

Edited 1 time(s). Last edit at 11/07/2016 08:06AM by o_lampe.
|
Re: Tripteron Implementation November 07, 2016 08:15AM |
Registered: 8 years ago Posts: 5,232 |
Quote
JonathanThompson
As I just mentioned in IRC: a funny thought is you could gang 4 of these together to use only 3 motors for the XYZ axes and a separate motor for each extruder, and have 4 things printed simultaneously for minimal costs
(Pretty hefty steppers, and of course, if one fails in the middle... well...)
The parts would be mirrored in one way or the other, right?
...but you could build one bigger version and use a frame instead of the small extruder platform. Then you can mount as many extruders to the frame as you like.
*gray is all theory *
|
Re: Tripteron Implementation November 07, 2016 09:15AM |
Registered: 7 years ago Posts: 143 |
Quote
David J
The only significant disadvantage I can see so far is the space it takes on the bench with its "elbows" out. A bit like sitting next to a selfish eater at a dining table...
Yep, although I believe this could be mitigated with the correct combination of arm link lengths. Maybe even curving them.
Quote
It would be interesting to mount a dial indicator on the central part, to see if it can maintain an even height over the bed.
Not sure if you mean if it's possible in theory or if the particular material choice and part tolerance I've ended up with can do it

It's absolutely possible in theory, and in practice, the test robot the creator's built out of metal they did a lot of testing with, and a 1kg weight deflected the effector by less than 0.5mm at high speed. For this specific prototype of mine, just eyeballing it by lining it up parallel with something straight behind it (edge of my i3 mk2), it doesn't optically deviate noticeably. Of course that's subjective and inaccurate, but it's a quick check that tells me it's at least not doing anything hugely wrong, no circular deviations or major "lumps" so far. I don't have a dial indicator, but I think I can do a little better than that anyway in terms of how useful the information is.
Thinking I'll mount a marker over a dry-erase board or paper or similar, and attempt to draw layers of slightly different heights, and see when it gets to the point of JUST touching, where the dots and spaces end up being. That's a little farther along than I am yet, but we should get there soon

|
Re: Tripteron Implementation November 07, 2016 09:21AM |
Registered: 7 years ago Posts: 143 |
Quote
o_lampe
What about your linear rails ( mgn12 I guess)? Do they show any slop or springy moves? I've replaced the balls of my rails and they run supersmooth now! ( German Wertarbeit)
They are indeed MGN12, but they don't seem to have slop or springy movement. They seem rock solid, in fact. But I do think I'll end up replacing the balls, there's slightly more noise and crunch to them than I would like, even when thoroughly lubed up. That being said, got them for a *GREAT* price, so I'm not complaining in the least

|
Re: Tripteron Implementation November 07, 2016 12:21PM |
Registered: 9 years ago Posts: 893 |
Quote
Apsu
Quote
It would be interesting to mount a dial indicator on the central part, to see if it can maintain an even height over the bed.
Not sure if you mean if it's possible in theory or if the particular material choice and part tolerance I've ended up with can do it

I wouldn't be so spiteful! No, I just meant that it would only be of any use as a 3D printer if it could move in a flat plane - if it can't then it's of academic interest only. Nice if it does work OK though.
|
Re: Tripteron Implementation November 07, 2016 12:29PM |
Registered: 7 years ago Posts: 143 |
Quote
David J
I wouldn't be so spiteful! No, I just meant that it would only be of any use as a 3D printer if it could move in a flat plane - if it can't then it's of academic interest only. Nice if it does work OK though.
Maybe I wasn't being clear enough. What I was trying to say is that the geometry of the Tripteron design *guarantees* constrained, accurate Cartesian motion, assuming the arms/joints are perfectly rigid. The academic paper I linked earlier in the thread discusses the math and reasoning behind why this is so, but the tl;dr is that each arm's joint axes are orthogonal to the other 2 arms' joints, meaning each arm is constrained by the other 2. So yes, it can and does work. It's an overconstrained system, and capable of being more accurate than serial Cartesian motion platforms.
The real challenge is just an engineering one. Material choice, joint designs, etc. That's what I'm focusing on now

|
Re: Tripteron Implementation November 07, 2016 05:03PM |
Registered: 7 years ago Posts: 143 |
Working on several things at once, but got some more pics to share!
First, the reorientation, with new arm design idea:
And closeup of an arm section:
Per the new orientation, it's not finalized by any means, but I *really* like this approach. Looks more elegant and "printerlike", I think.
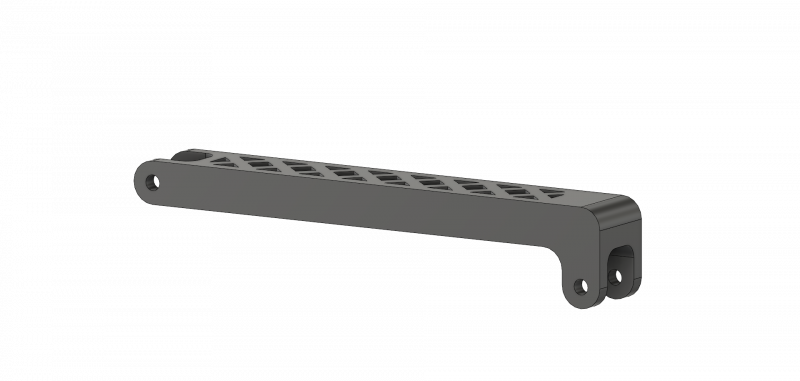
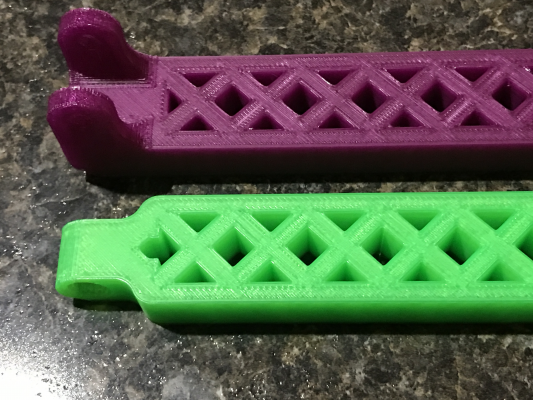
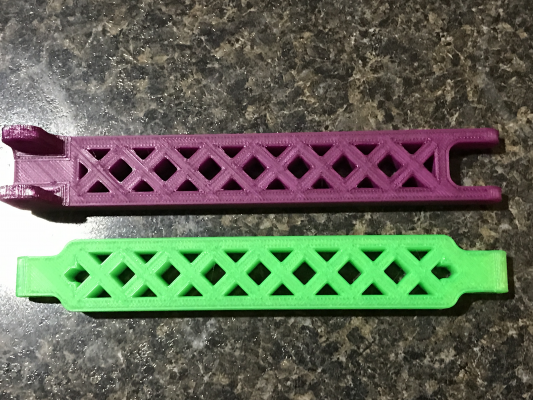
As for the arms, I discovered that most of the springiness was actually the arms themselves bending against their infill. The deflection is minor, and like a stiff spring (fast oscillation), but it's there even with the rail blocks clamped down. I decided to go with a truss-like design, in the spirit of modeling infill (so there are full perimeters and smaller sections of infill inside of them), which will allow me to also increase the infill % without vastly increasing weight or material requirements. I oriented the truss substructures so they are strongest parallel with the joint axes, which is the direction the arms will experience stress in.
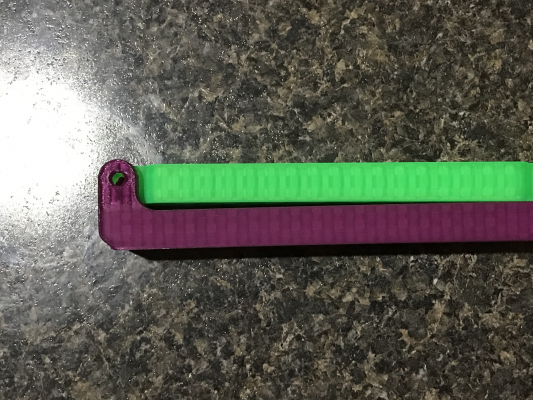
I also offset the forearm's elbow joint at a right angle, which allows it even sharper angles without cutting material off the forearm to allow the arm to fold in tight, as well as not extending outside the frame quite as far, yet gaining slightly more extension for the same length.
In short, stronger yet lighter, larger build volume for free, and more elegant layout. Think we're on the right track here

|
Re: Tripteron Implementation November 08, 2016 01:20AM |
Registered: 7 years ago Posts: 143 |
WOW
I printed out some arms to test their strength and rigidity, and holy *shit* are they strong!
I can Maybe barely flex them against the lattice using my hands and thumbs, and only slightly flex them by clamping onto a flat surface and applying several dozen kg of force on the other end. These structures are incredibly stiff in exactly the direction I need them to be.
Total weight for an arm pair is nearly 100g even (40% triangular infill on each, 0.3 layer heights @ 80mm/s for high layer adhesion, quick and dirty prints) without hardware, so lets call it 150g per arm. Given that it's taking 2 orders of magnitude more force than the arm weight to deform them a tiny bit, I think these will be way above design spec for relatively high jerk settings. I'll print out the other two and a few other minor pieces I need after the layout change, and see what happens.
The rest of the extrusions I need are coming in a day or two, so I should have everything printed and assembled and ready for testing over the course of the next few days. Might even get to the point of drawing with a pen or marker right away!
Sorry, only registered users may post in this forum.
