blt3dp's mostly metal delta build - AKA Metal Gear
Posted by blt3dp
|
blt3dp's mostly metal delta build - AKA Metal Gear September 13, 2017 02:25PM |
Registered: 10 years ago Posts: 651 |
A little back story.
I started in 3D Printing way back when by purchasing a Linear Prusa i2 kit from MakerFarm. I assembled and commissioned it, got it printing as well as it could. A month later, the Prusa i3 came out. The print quality was amazing compared to what I was getting. I immediately had buyers remorse.
Over the years I came to realize that the frame of the Prusa i2 was the main cause of it's inferior print quality. Constructed as 2 triangles made from threaded rod and plastic parts separated by more threaded rod, the frame could barely handle the moving mass of the Y axis moving back and forth without wobbling. It couldn't handle moving the X axis back and forth at all. The mass was too much for it, this was amplified by the fact that the motors for the Z axis were at the top, opposite from where the center of gravity should be. Using smooth rod and linear bearings aligned in a very imprecise manner for X and Y axis caused multiple print issues as did using threaded rod for Z axis. The bearings chatter, and the rods squeak. Using printed pulleys for the X and Y axis as well as printed gears for the extruder meant it could never be very accurate. The endstops being mounted on the smooth rods would slide, requiring adjustment every time I went to print. The RAMPS electronics are not very intuitive. Having to flash the firmware with the Arduino compiler every time you needed to adjust something is cumbersome. In all, like others have said, you spend more time working on the printer than actually printing.
Newer machines have since designed away most of these issues. By having more robust frames created from aluminum extrusion and using plastic only for non structural parts. Using actual linear rails, lead screws, and machined pulleys. Designs are much more thought out as I believe we have learned more over time. Advanced electronics and firmwares allow machines to auto calibrate and require nothing more than editing a text file if you wish to configure something in the firmware. The ability to walk up and print something immediately a real possibility.
I've stood by my Prusa i2, upgrading it to print the best parts for it's replacement. Until now. I will only be using it to print the most basic parts for the new machine that I've been designing for about a year and a half.
I'm calling it Metal Gear. As in the video game. I had a massive collection of Metal Gear stuff that I sold, and am using the profits to build this machine. Also the machine is going to be mostly metal.
I had a requirements that I needed to meet:
1. Metal - No plastic for any of the important parts, frame pulleys, etc.
2. No rods, smooth or threaded - Linear rail only.
3. Ease of use - Needs to be easy to use, configure and calibrate as well as low maintenance.
4. Self contained - No exterior components like power supply, control board, etc.
5. Enclose-able and heat-able - To print ABS as well as aesthetics.
6. Easily move-able - To be easily transported or put away.
7. Efficient space use - Best print size related to footprint. Vertical not so much of a concern.
8. Quiet - As quiet as possible.
9. Speedy - Something over 30 mm/sec
I've actually been drawing up designs in CAD for about a year and a half. I've gone through Cartesians, H-Bot, and Core XY designs. I've determined that a Delta meets all those requirements for me. Here's how.
1. Built from aluminum frame vertices from Robotdigg, as well as aluminum extrusion, and any parts available as metal versions.
2. Linear rails, I chose Igus TS-04-12 rails and TW-04-12 bearing blocks. No recirculating balls to seize, they need no lubrication.
3. Precise build and advanced electronics like the Duet Wifi should take care of this.
4. Enough space to mount everything under the build plate, including the power supply.
5. It will be enclose-able and have a heated bed. The heated bed will be mains powered so the machine can work off a smaller power supply that will fit under the bed.
6. As it will be self contained, with even the power supply under the bed, it will be easily move-able.
7. I found the footprint while about the same as my Prusa i2, makes the most efficient use of space. Giving a 300mm diameter build volume for slightly less space than the Prusa i2.
8. The Igus rails and bearing blocks are very quiet. The stepper drivers on Duet Wifi support 1/256 microstepping and cause the motors to be quiet.
9. With a solid build, I should be able to push the speed.
Here's a link to my CAD model.
delta_reprap
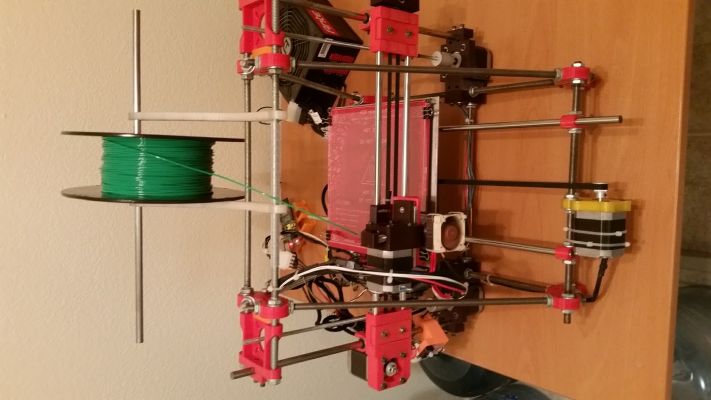
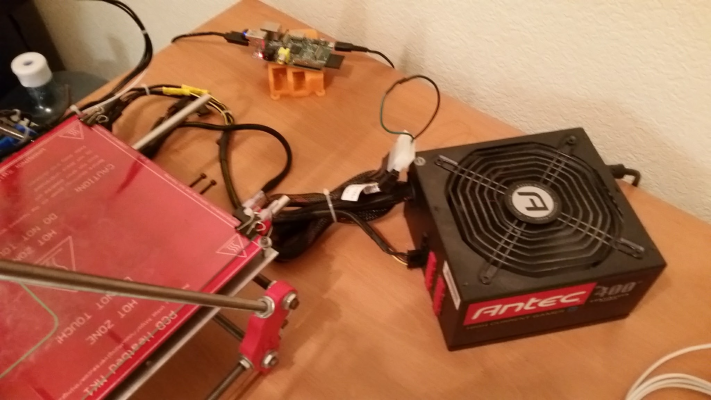
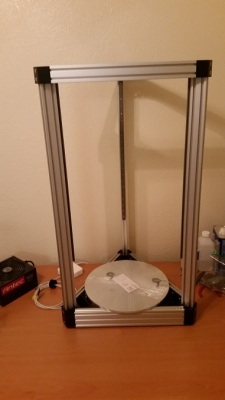
Here's the machine it's replacing. Sorry it doesn't want to display the correct way.
Edited 5 time(s). Last edit at 05/31/2019 10:52AM by VDX.
|
Re: FA-MAS mostly metal delta build - AKA Metal Gear September 13, 2017 02:29PM |
Registered: 10 years ago Posts: 651 |
The build has started. This will be built in phases so some of my requirements won't be immediately met. But I intend to get it printing as soon as possible.
I've been doing some prep work before assembling the frame.
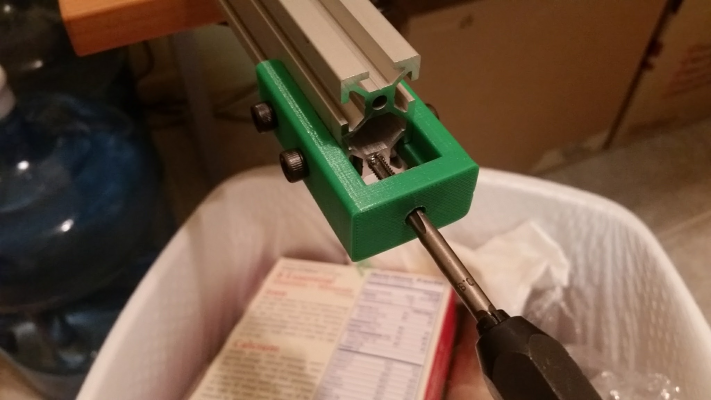
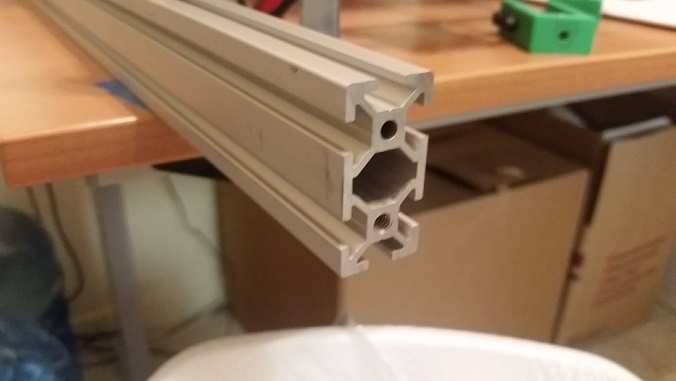
Tapped both holes on both ends of the vertical extrusions to accept an M5 screw for the feet as well as the top and bottom plates that I'll have cut later.
Used a jig from Thingiverse to help align the tap to the extrusion. Tap Jig
Doing this in an apartment, so I have the extrusion clamped to my computer desk next to the Prusa i2.
I've never used a tap before, but I used some 3-in-1 oil and went slowly making sure to reverse when I felt the chips building up.
Tapped perfectly, did the remaining holes.
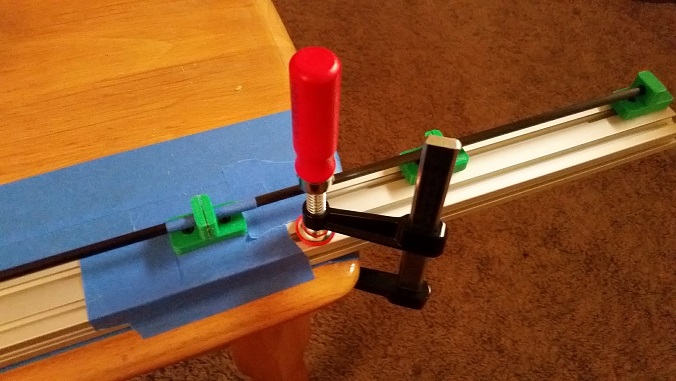
Also printed out a miter tool to assist in cutting my carbon fiber rods for the arms. Delta Rod Miter
Here it is clamped to my living room table with a rod ready to be cut.
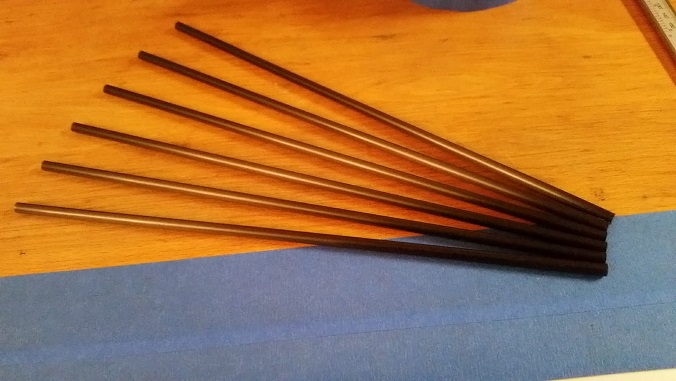
I bought 3 rods from Goodwinds. They're the .380, 91 cm pulltruded carbon fiber rods.
And here after they're cut to 300mm. They should be about 340 mm center to center with the rod ends attached.
Edited 5 time(s). Last edit at 09/13/2017 04:03PM by FA-MAS.
|
Re: FA-MAS mostly metal delta build - AKA Metal Gear September 13, 2017 02:58PM |
Registered: 10 years ago Posts: 651 |
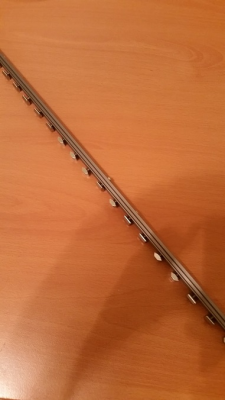
Prepping the linear rail before building the frame. These are Igus TS-04-12 rails that I had them cut at 533 mm long. They had holes for screws so I put a screw in each with an M3 T-Nut on each.
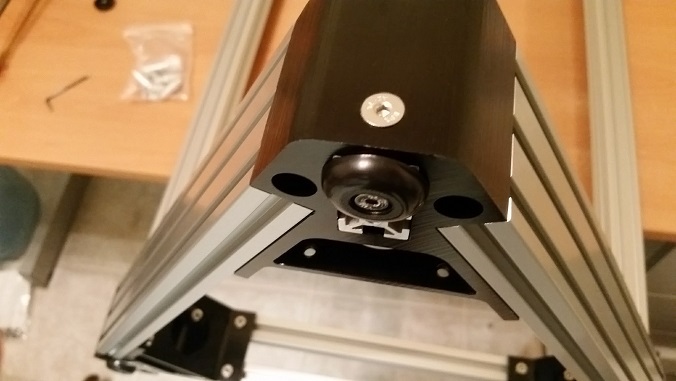
I won't bore you with the build pictures, here's the frame completed. The extrusions I got Misumi to cut. For the triangles, they are 355 mm long, 3x2040 for the top triangle and 2x2060 and 2x2020 for the bottom triangle. The verticals are 800 mm long 3x2040.
Here you see it with the print bed just to see what it'll look like.. It's a 1/4" Mic-6 plate waterjet cut disc. My original design was to have the print bed not extend past the frame. The Waterjet guys wanted $150 to cut it to the custom size I needed. So I had to go with a stock disc off the shelf from another shop.
Jetman stocks 12" discs for $40 which I went with.
http://jetmaninc.com/MACHproduct1.htm
I'll end up truncating the disc at the edges of the frame when I plan to enclose it, but for now i'll use the whole disc.
Also here are the feet that I chose. I chose these because they're readily available at Home Depot. They are rubber "anti skid" and they have a metal disc inside that the screw head goes against so you're not just squishing rubber between a screw and the extrusion.
Edited 5 time(s). Last edit at 09/13/2017 04:01PM by FA-MAS.
|
Re: FA-MAS mostly metal delta build - AKA Metal Gear September 13, 2017 03:04PM |
Registered: 9 years ago Posts: 1,159 |
Quote
FA-MAS
Prepping the linear rail before building the frame. These are Igus TS-04-12 rails that I had them cut at 533 mm long. They had holes for screws so I put a screw in each with an M3 T-Nut on each.
[attachment 98053 20170909_113748.jpg]
You don't need a screw in every hole to mount them in fact you will prob fine that quite a lot wont even catch and you wont even know it just go for one every 4 or 5 holes it is sufficient
|
Re: FA-MAS mostly metal delta build - AKA Metal Gear September 13, 2017 03:12PM |
Registered: 10 years ago Posts: 651 |
Quote
dougal1957
You don't need a screw in every hole to mount them in fact you will prob fine that quite a lot wont even catch and you wont even know it just go for one every 4 or 5 holes it is sufficient
Thanks. They all do catch and sink below the surface of the rail as to not interfere with the blocks. But it is a lot of screws to work with if I need to do anything with them. I'll probably pull some out.
Edited 1 time(s). Last edit at 09/13/2017 03:53PM by FA-MAS.
|
Re: FA-MAS mostly metal delta build - AKA Metal Gear September 13, 2017 03:24PM |
Registered: 9 years ago Posts: 1,159 |
Quote
FA-MAS
Quote
dougal1957
Quote
FA-MAS
Prepping the linear rail before building the frame. These are Igus TS-04-12 rails that I had them cut at 533 mm long. They had holes for screws so I put a screw in each with an M3 T-Nut on each.
[attachment 98053 20170909_113748.jpg]
You don't need a screw in every hole to mount them in fact you will prob fine that quite a lot wont even catch and you wont even know it just go for one every 4 or 5 holes it is sufficient
Thanks. They all do catch and sink below the surface of the rail as to not interfere with the blocks. But it is a lot of screws to work with if I need to do anything with them. I'll probably pull some out.
Yeah I would say no more than 5 or 6 across the whole length this is what I have in mine at 750 long
|
Re: FA-MAS mostly metal delta build - AKA Metal Gear September 13, 2017 03:38PM |
Registered: 10 years ago Posts: 651 |
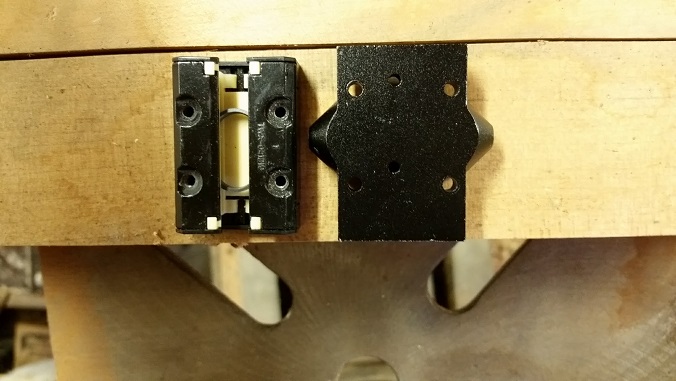
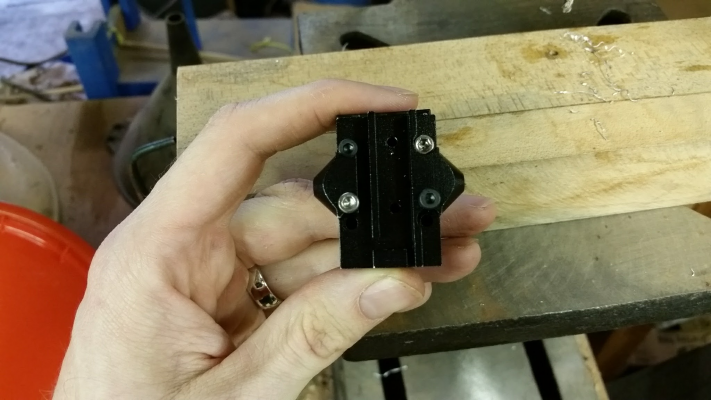
Pretty standard so far. Now here's where it gets a little more interesting. I plan on using the Robotdigg carriages at least for now. They have a 20x20 hole pattern for mounting to the bearing blocks. The problem is that the Igus bearing blocks have a 20x15 hole pattern. Now I know there are aluminum carriages out there that have the 20x15 hole pattern, but they don't have the belt tensioners and I'd have to rely on shifting the top triangle to tension the belts. I don't like that.
Here's one of the carriages next to a sample bearing block that I got. You can see the holes won't line up.
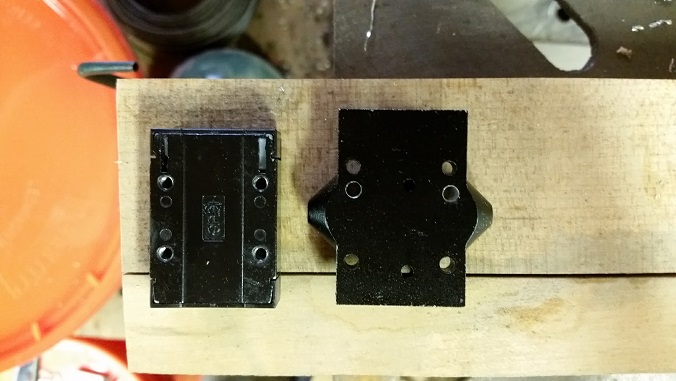
Luckily I caught this scenario in my CAD model and I had a sample bearing block. My CAD showed it would be safe if I mounted the carriage to the block and used the block as a template to drill pilot holes, and then drilled with the proper size bit.. So I used my Step Father's drill press with some 3-in-1 cutting oil and did exactly that.
Here they are side by side after drilled.
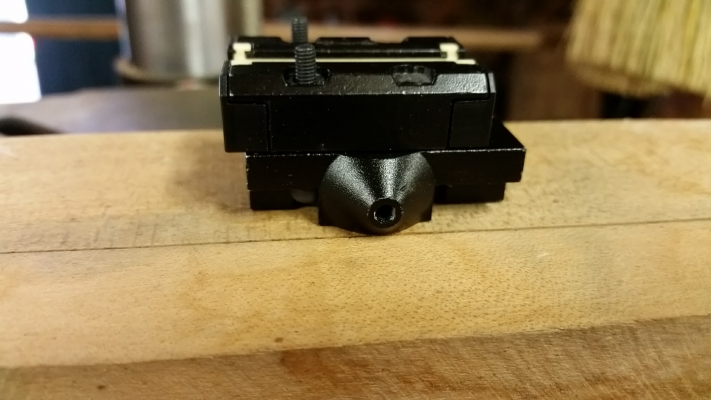
And finally mounted to a block.
Edited 6 time(s). Last edit at 09/13/2017 03:46PM by FA-MAS.
|
Re: FA-MAS mostly metal delta build - AKA Metal Gear September 13, 2017 03:48PM |
Registered: 9 years ago Posts: 1,159 |
Quote
FA-MAS
Pretty standard so far. Now here's where it gets a little more interesting. I plan on using the Robotdigg carriages at least for now. They have a 20x20 hole pattern for mounting to the bearing blocks. The problem is that the Igus bearing blocks have a 20x15 hole pattern. Now I know there are aluminum carriages out there that have the 20x15 hole pattern, but they don't have the belt tensioners and I'd have to rely on shifting the top triangle to tension the belts. I don't like that.
Here's one of the carriages next to a sample bearing block that I got. You can see the holes won't line up.
[attachment 98058 20170911_111529.jpg]
Luckily I caught this scenario in my CAD model and I had a sample bearing block. My CAD showed it would be safe if I mounted the carriage to the block and used the block as a template to drill pilot holes, and then drilled with the proper size bit.. So I used my Step Father's drill press with some 3-in-1 cutting oil and did exactly that.
[attachment 98059 20170911_111740.jpg]
Here they are side by side after drilled.
[attachment 98060 20170911_113003.jpg ]
And finally mounted to a block.
[attachment 98061 20170911_113242.jpg]
Strongly suggest you look at thePCB Smart effector that the duet guys are doing now [duet3d.com]
|
Re: FA-MAS mostly metal delta build - AKA Metal Gear September 13, 2017 03:52PM |
Registered: 10 years ago Posts: 651 |
Quote
dougal1957
Strongly suggest you look at thePCB Smart effector that the duet guys are doing now [duet3d.com]
It's definitely on the radar for an upgrade down the line.
|
Re: FA-MAS mostly metal delta build - AKA Metal Gear September 14, 2017 02:45AM |
Registered: 9 years ago Posts: 483 |
|
Re: FA-MAS mostly metal delta build - AKA Metal Gear September 14, 2017 04:27PM |
Registered: 9 years ago Posts: 978 |
I have a Zonestar D810 delta with steppers and controller at the top. I don't think it's any simpler to wire.... wires from the power supply, USB, and heated bed still have to be run up to the top of the printer. When I do my Big Rebuild, I plan to move the motors and controller to the bottom, with the controller mounted vertically, attached to the 2040 bottom rail.
|
Re: FA-MAS mostly metal delta build - AKA Metal Gear September 14, 2017 04:40PM |
Registered: 10 years ago Posts: 14,672 |
Quote
frankvdh
I have a Zonestar D810 delta with steppers and controller at the top. I don't think it's any simpler to wire.... wires from the power supply, USB, and heated bed still have to be run up to the top of the printer. When I do my Big Rebuild, I plan to move the motors and controller to the bottom, with the controller mounted vertically, attached to the 2040 bottom rail.
The configuration with motors and electronics on top makes a lot more sense with a mains-voltage bed heater and Duet WiFi electronics. Then the only wires running from top to bottom of the machine are the 24V power wires, which carry just a few amps, and the SSR control wires.
Large delta printer [miscsolutions.wordpress.com], E3D tool changer, Robotdigg SCARA printer, Crane Quad and Ormerod
Disclosure: I design Duet electronics and work on RepRapFirmware, [duet3d.com].
|
Re: FA-MAS mostly metal delta build - AKA Metal Gear September 14, 2017 04:46PM |
Registered: 10 years ago Posts: 651 |
Quote
frankvdh
I have a Zonestar D810 delta with steppers and controller at the top. I don't think it's any simpler to wire.... wires from the power supply, USB, and heated bed still have to be run up to the top of the printer. When I do my Big Rebuild, I plan to move the motors and controller to the bottom, with the controller mounted vertically, attached to the 2040 bottom rail.
Quote
dc42
The configuration with motors and electronics on top makes a lot more sense with a mains-voltage bed heater and Duet WiFi electronics. Then the only wires running from top to bottom of the machine are the 24V power wires, which carry just a few amps, and the SSR control wires.
I did consider this configuration. Considering that it'll probably be living on something the height of a kitchen counter and that'll be where I have to work on it, it would be easier if I kept everything low.
Happen to know the dimensions of the Duet Wifi off the top of your head?
Edited 1 time(s). Last edit at 09/14/2017 04:46PM by FA-MAS.
|
Re: FA-MAS mostly metal delta build - AKA Metal Gear September 14, 2017 05:33PM |
Registered: 10 years ago Posts: 14,672 |
No, but see [duet3d.com].
Large delta printer [miscsolutions.wordpress.com], E3D tool changer, Robotdigg SCARA printer, Crane Quad and Ormerod
Disclosure: I design Duet electronics and work on RepRapFirmware, [duet3d.com].
Large delta printer [miscsolutions.wordpress.com], E3D tool changer, Robotdigg SCARA printer, Crane Quad and Ormerod
Disclosure: I design Duet electronics and work on RepRapFirmware, [duet3d.com].
|
Re: FA-MAS mostly metal delta build - AKA Metal Gear September 15, 2017 11:40AM |
Registered: 6 years ago Posts: 35 |
Earlier this year, I moved all the motors and electronics down from the top. It was a pain to reroute everything but the extrusion channels helped greatly to direct and hide the wires. In the end, the printer is much more visually pleasing, and more importantly, it's no longer top heavy and I assume it's vibrating much less - not that it was vibrating visibly to begin with.
|
Re: FA-MAS mostly metal delta build - AKA Metal Gear September 16, 2017 04:16AM |
Registered: 8 years ago Posts: 3,525 |
Quote
dougal1957
Quote
FA-MAS
Quote
dougal1957
Quote
FA-MAS
Prepping the linear rail before building the frame. These are Igus TS-04-12 rails that I had them cut at 533 mm long. They had holes for screws so I put a screw in each with an M3 T-Nut on each.
[attachment 98053 20170909_113748.jpg]
You don't need a screw in every hole to mount them in fact you will prob fine that quite a lot wont even catch and you wont even know it just go for one every 4 or 5 holes it is sufficient
Thanks. They all do catch and sink below the surface of the rail as to not interfere with the blocks. But it is a lot of screws to work with if I need to do anything with them. I'll probably pull some out.
Yeah I would say no more than 5 or 6 across the whole length this is what I have in mine at 750 long
I only used 3, one at the top one in the middle and one at the bottom. I aligned the rail with the extrusion, then tightened the top one, did the same at the bottom then did up the middle one. About a year later and no sign anything has moved.
Simon Khoury
Co-founder of [www.precisionpiezo.co.uk] Accurate, repeatable, versatile Z-Probes
Published:Inventions
|
Re: FA-MAS mostly metal delta build - AKA Metal Gear September 16, 2017 11:17AM |
Registered: 10 years ago Posts: 651 |
I ended up taking them all out except for 3. Top, middle, and bottom. I find that if you tighten the middle one first, you can pivot the rail and align it with the extrusion.
Nothing much to see today, just replaced all the phillips head screws on the Robotdigg carriages, mounted them to the bearing blocks and put them on the rails.
Printing jigs to assemble the rods.
Edited 1 time(s). Last edit at 09/16/2017 11:18AM by FA-MAS.
Nothing much to see today, just replaced all the phillips head screws on the Robotdigg carriages, mounted them to the bearing blocks and put them on the rails.
Printing jigs to assemble the rods.
Edited 1 time(s). Last edit at 09/16/2017 11:18AM by FA-MAS.
|
Re: FA-MAS mostly metal delta build - AKA Metal Gear September 16, 2017 02:49PM |
Registered: 10 years ago Posts: 651 |
Problems building the arms. So I bought carbon fiber tubes from Goodwinds. They have an OD of 5.84 mm and an ID of 3.48 mm. The point was to tap the ends with an M4 thread. Then be able to screw set screws into them, epoxy them, and then screw the rod ends on.
What I'm finding is that the ends of the carbon fiber tubes are cracking when tapping. Now I'm going gently, but it just seems it's too much for it.
So I'm looking for solutions, that are:
A. Not magnetic arms
B. Still use the rod ends I have
C. Aren't finickey
I'm wondering if I should order the size of carbon fiber tubes that have an ID of 4 mm, don't worry about tapping them and just epoxy the set screw and rod end on?
Also considering aluminum tubes, onlinemetals.com has a 6.35 mm OD with ID of 3.86 that might work
Edit: Oho, onlinemetals has an aluminum tube with an ID 3.4, the perfect size to tap for an M4 thread.
Edited 1 time(s). Last edit at 09/16/2017 03:33PM by FA-MAS.
|
Re: FA-MAS mostly metal delta build - AKA Metal Gear September 16, 2017 04:15PM |
Registered: 9 years ago Posts: 1,159 |
|
Re: FA-MAS mostly metal delta build - AKA Metal Gear September 16, 2017 04:17PM |
Registered: 8 years ago Posts: 3,525 |
As far as I know with Haydns arms the ends are bonded on, on a jig. And they work great.
Simon Khoury
Co-founder of [www.precisionpiezo.co.uk] Accurate, repeatable, versatile Z-Probes
Published:Inventions
Simon Khoury
Co-founder of [www.precisionpiezo.co.uk] Accurate, repeatable, versatile Z-Probes
Published:Inventions
|
Re: FA-MAS mostly metal delta build - AKA Metal Gear September 16, 2017 05:34PM |
Registered: 10 years ago Posts: 14,672 |
Quote
dougal1957
you will not be able to get the lengths spot on if you thread them so go for 4mm ID tude and epoxy the screws in after attaching the Rod ends so that you can get them the same length
That's exactly what I did when I made carbon fibre arms using M4 set screws and Traxxas joints.
Large delta printer [miscsolutions.wordpress.com], E3D tool changer, Robotdigg SCARA printer, Crane Quad and Ormerod
Disclosure: I design Duet electronics and work on RepRapFirmware, [duet3d.com].
|
Re: FA-MAS mostly metal delta build - AKA Metal Gear September 17, 2017 11:16AM |
Registered: 10 years ago Posts: 651 |
Ordered new carbon fiber with a 4 mm ID so I can assemble the Traxxas, put the set screws in them, and then epoxy them into the rods.
Question about assembling the Traxxas. Freeze the balls, boil the housings one at a time for 30 sec. Press housings onto the balls? Side of the housings with the glossy rings towards me right?
Question about assembling the Traxxas. Freeze the balls, boil the housings one at a time for 30 sec. Press housings onto the balls? Side of the housings with the glossy rings towards me right?
|
Re: FA-MAS mostly metal delta build - AKA Metal Gear September 17, 2017 11:25AM |
Registered: 9 years ago Posts: 1,159 |
Cant remember that fact tbh honest but you should be able to determine whaich is the wider opening in the plastic bit and that goes onto the ball first! When it comes to do you jig you dont really need a printed part at all I just used some M3 Setscrews and tee nuts in a length of the extrusion but try and keep the temp environment the same for all the rods to couner the expansion of the ally extrusion (Hope this makes sense)
|
Re: FA-MAS mostly metal delta build - AKA Metal Gear September 17, 2017 06:39PM |
Registered: 9 years ago Posts: 483 |
|
Re: FA-MAS mostly metal delta build - AKA Metal Gear September 19, 2017 02:51PM |
Registered: 10 years ago Posts: 651 |
Anyone have any recommendations on good pushfit connectors for the bowden? I'm needing for 4 mm OD tube, but M6 thread for my hotend (reusing the all metal Hexagon I have) The ones I've used in the past were these cheapey brass things, that would never let go of the tube when you press the collar. I've had to destroy them before. I'd like something that actually works.
|
Re: FA-MAS mostly metal delta build - AKA Metal Gear September 23, 2017 10:51AM |
Registered: 10 years ago Posts: 651 |
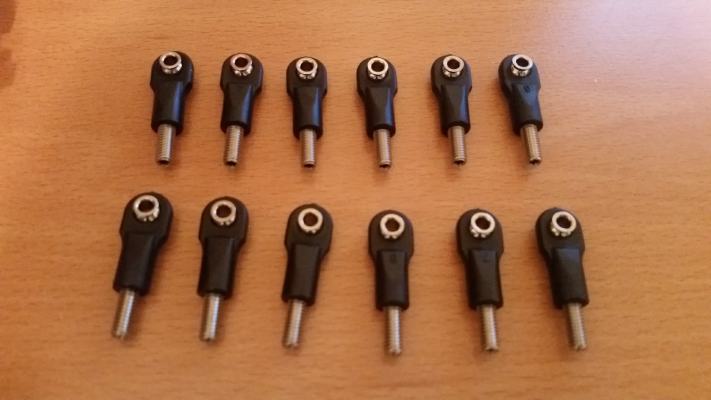
Got new carbon fiber with 4 mm ID and am working on assembling the Traxxas. These things kind of suck. I've assembled a pack of 12, 2 were perfect. fairly tight, no play. 2 were looser, yet still no play. The rest were garbage. I'm probably going to have to go through 2 more packs.
Edit: ended up buying a couple more packs and assembling them. I used the hot/cold method as before, but one thing I did was I used a spare one of the plastic pieces to press the others down onto the ball. It helped ensure I wasn't putting weird pressure on the one being pushed onto the ball. I ended up with 2 very stiff joints, with no play whatsoever.
Another thing I noticed previously, is when I would thread the M4 set screws into them, even if the joints were tight, they would become loose. Tapping the rod ends and then installing the M4 set screws prevented this. 12 perfectly tight joints.
Too bad I won't be able to cut or assemble the rods for a bit.
Edited 1 time(s). Last edit at 09/23/2017 07:50PM by FA-MAS.
|
Re: FA-MAS mostly metal delta build - AKA Metal Gear September 24, 2017 07:24AM |
Registered: 10 years ago Posts: 732 |
|
Re: FA-MAS mostly metal delta build - AKA Metal Gear September 24, 2017 03:39PM |
Registered: 9 years ago Posts: 483 |
|
Re: FA-MAS mostly metal delta build - AKA Metal Gear November 07, 2017 03:33PM |
Registered: 10 years ago Posts: 651 |
I've got the printer built and powered on. Just working on configuring the Duet Wifi now.
But I'm noticing something that may need addressing. When I was attaching the hotend to the effector, I noticed that it could twist a little bit. So I traced it back from there. The rods aren't the problem, there's no slop or play in my joints. It appears to be the bearing blocks on the linear rails.
As you know I'm using igus rail and blocks. It seems that if I grab the blocks and try to rotate clockwise/counter clockwise, that there is a slight amount of play/slop. This causes one of the arms to go high, the other low and causes a twisting motion on the effector.
So my question is, what to do.
1. Get different igus blocks with adjustable preload (cheapest option, and still fits with my desire to not have any recirculating ball bearings)
2. Switch to some form of recirculating ball bearing linear guide/block. Probably knock off (more expensive, id rather not have recirculating ball bearings, and am concerned about knock off quality)
Edit: We'll start with getting igus with adjustable preload. igus have been nice enough to let me return the ones I have and purchase the new ones. Looks like they're backordered though, so I'll probably try printing with the ones I have currently until then.
Edited 2 time(s). Last edit at 11/07/2017 04:07PM by FA-MAS.
|
Re: FA-MAS mostly metal delta build - AKA Metal Gear November 07, 2017 03:48PM |
Registered: 6 years ago Posts: 70 |
Sorry, only registered users may post in this forum.
