|
Developing a slicer for another robot, looking for help July 03, 2016 07:18PM |
Registered: 11 years ago Posts: 15 |
I make a 2D plotter called the Makelangelo. It can read DXF files. In Inkscape I can quantize an image down to N colors to produce nested outlines.
Currently that looks like this.
What I want is a nice way to generate the infill, given the size of the pen tip (think nozzle size).
In a perfect world there's a JAVA library that will do what I want and all I have to do is glue it into the open source Makelangelo app.
I haven't found one yet.
So... have I googled badly? Does such a lib exist? Are you willing to help me learn how to write this feature or able to assist in some other way? Please let me know.
|
Re: Developing a slicer for another robot, looking for help July 04, 2016 02:20AM |
Admin Registered: 16 years ago Posts: 13,891 |
... with SVG-files you can do this with generating fill patterns - [stackoverflow.com]
With bitmaps I've created a "hatch-image" and made a boolean AND overlay with the original image, so all the black areas in the image were converted to the hatch grid ...
Viktor
--------
Aufruf zum Projekt "Müll-freie Meere" - [reprap.org] -- Deutsche Facebook-Gruppe - [www.facebook.com]
Call for the project "garbage-free seas" - [reprap.org]
|
Looking to save each layer of an object as a separate file August 20, 2016 12:58PM |
Registered: 7 years ago Posts: 2 |
I want to slice an object into each layer and save each layer as a separate file.stl preferred. Why? Well I have various objects like organs that are to be teaching aids in biology I want the items sliced as thin as possible so 1 layer thick and I want to print off each layer separately so the students can see each thin layer (I'll put them on glass plates if they prove too fragile). Of course I expect various slices/layers to be at least somewhat fragile so I want each slice/layer to be able to be printed by itself if 1 breaks.
How can I save each slice to a separate file? I don't care about the naming convention as long as I know which slice is which.
How can I save each slice to a separate file? I don't care about the naming convention as long as I know which slice is which.
|
Re: Developing a slicer for another robot, looking for help August 22, 2016 02:38PM |
Registered: 10 years ago Posts: 580 |
JoeJJJ
(With apologies to the OP as this is off topic).
You can use Slic3r's Cut feature to create thin slices.
There is even a command line option to do it Slic3r Command Line
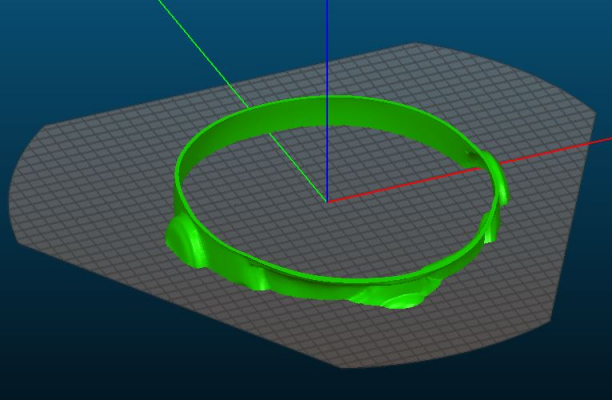
Here I used the Cut feature to make a section of a helmet I wanted to print full size to check the fit, before printing the whole thing:
My printer: Raptosaur - Large Format Delta - [www.paulwanamaker.wordpress.com]
Can you answer questions about Calibration, Printing issues, Mechanics? Write it up and improve the Wiki!
|
Re: Developing a slicer for another robot, looking for help August 22, 2016 03:02PM |
Registered: 10 years ago Posts: 580 |
With apologies to the OP, as this is not quite what he is looking for:
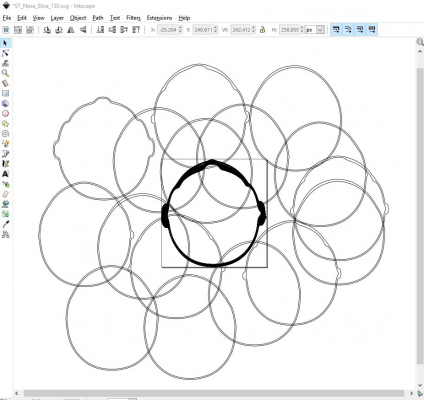
Slic3r also has an option to slice to SVG.
This creates a SVG (vector) file with a vector object for each layer, all stacked on top of one another.
The vector objects contain the outlines of the 3D object for that layer.
Here I sliced the above object to SVG, and then in Inkskape I turned off all fills, and set an outline color. Then I dragged out some individual object layers to see what I got.
My printer: Raptosaur - Large Format Delta - [www.paulwanamaker.wordpress.com]
Can you answer questions about Calibration, Printing issues, Mechanics? Write it up and improve the Wiki!
|
Re: Developing a slicer for another robot, looking for help August 26, 2016 07:43AM |
Registered: 7 years ago Posts: 2 |
I tried doing:
slic3r-console --cut 30 moai.stl
but that just gives me everything from the bottom to the cut as file moai.stl_lower.stl
and everything from the cut to the top as file moai.stl_upper.stl
I don't want those 2 files I wan one file with just that one layer nothing below or above the cut layer.
How can I get that?
|
Re: Developing a slicer for another robot, looking for help August 26, 2016 07:00PM |
Registered: 10 years ago Posts: 580 |
Well, for instance you can do slic3r-console --cut 30 moai.stl That will separate the upper and bottom part.
And then rename moai.stl_upper.stl to workfile.stl
Then do slic3r-console --cut 0.20 workfile.stl
That will give you the one layer that is between Z30 and Z30.20 mm
I wrote a batch file that will do this for as many layers as you want. I'm sure there are other programs that could do it also.
You can save the attached batch file as SplitSTL.bat in your Slic3r folder.
From a command prompt in your slicer folder - the following command would give you 100 0.2mm layers starting at Z30 mm until the file runs out...
SplitSTL moai.stl 30 0.20 100
Edit: I moved the batch file into an attachment, as the web page was deleting parts of function labels...
Edited 1 time(s). Last edit at 08/26/2016 07:04PM by Paul Wanamaker.
My printer: Raptosaur - Large Format Delta - [www.paulwanamaker.wordpress.com]
Can you answer questions about Calibration, Printing issues, Mechanics? Write it up and improve the Wiki!
Sorry, only registered users may post in this forum.

