Printing issue: too much plastic? too little? too hot? all of the above?
Posted by devilmostwanted
|
Printing issue: too much plastic? too little? too hot? all of the above? March 04, 2017 08:46PM |
Registered: 8 years ago Posts: 49 |
Hi there,
I have yet another printing problem. I got back to my printer after months of not touching it and I, again, have print quality problems. I am trying to print the following: [www.thingiverse.com]
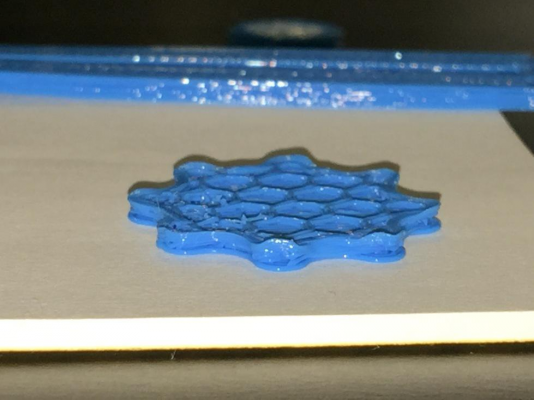
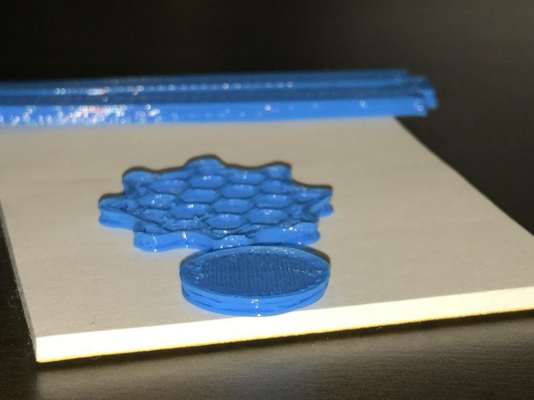
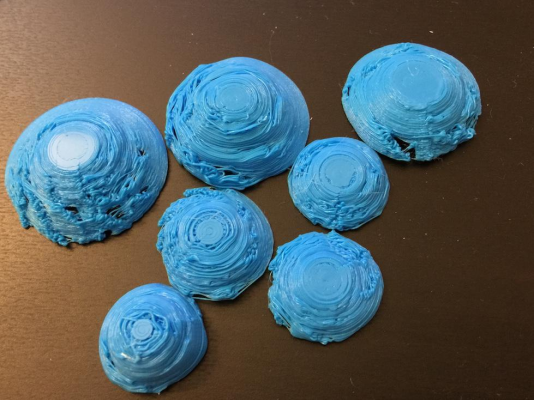
But as you can see in the photos below, they turn out to be horrible to the extent that i dont even continue printing. The fill is at 25%.
It seems to be extruding too much plastic in corners, but then not enough for the fill? Then some layers don't seem to get attached properly? I am lost. Any help would be greatly appreciated.
Thanks!!
|
Re: Printing issue: too much plastic? too little? too hot? all of the above? March 06, 2017 06:42PM |
Registered: 10 years ago Posts: 1,401 |
I would say all of the above, you have also some mechanical problems too.
But first you need to give some more info:
Type of filament
Temperatures
Printing speed
Nozzle size
Slicer settings
Extruder type (direct or bowden)
Your first layer height is to big, looks like you are over extruding and way too hot for either the filament, the speed or the size of the part.
But first you need to give some more info:
Type of filament
Temperatures
Printing speed
Nozzle size
Slicer settings
Extruder type (direct or bowden)
Your first layer height is to big, looks like you are over extruding and way too hot for either the filament, the speed or the size of the part.
|
Re: Printing issue: too much plastic? too little? too hot? all of the above? April 03, 2017 01:17AM |
Registered: 8 years ago Posts: 49 |
Hi there,
I am very sorry for the late response. For some reasons, the notification for the reply did not come into my inbox.
I ended up calibrating the printer and it fixed most of the problems. My E-steps were way off and that was causing over extrusion.
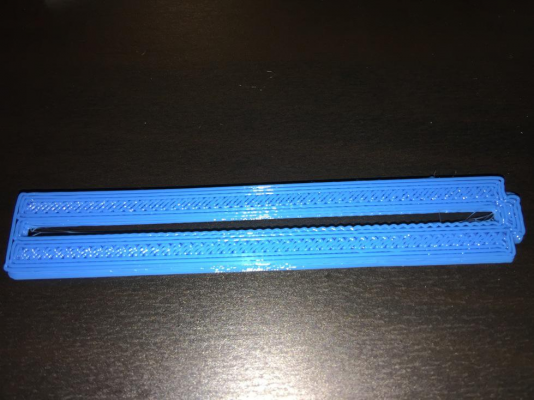
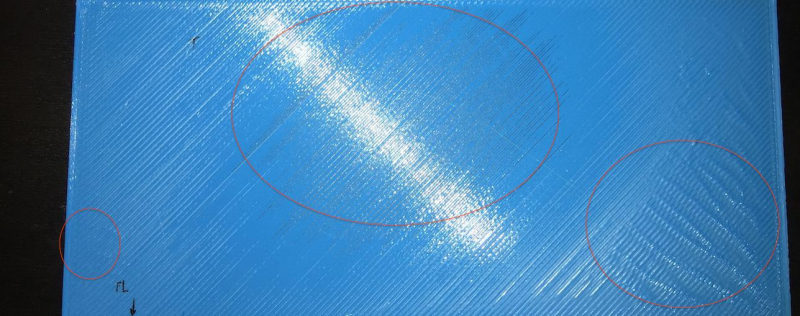
The only problem I am facing now is the the last photo:There is a tiny gap between every line of extrusion, perimeters and infills.
Looks as if the extrusion needs to be a bit more "fat" to touch the other line.
Here are the stats you asked about:
Type of filament: PLA
Temperatures: plastic 180, bed 70
Printing speed:
[*]First later height: 0.3mm
Nozzle size: 0.3
Extruder type (direct or bowden): I don't know what this mean
let me know what you think. I personally think it has to do with the extrusion width.
I am very sorry for the late response. For some reasons, the notification for the reply did not come into my inbox.
I ended up calibrating the printer and it fixed most of the problems. My E-steps were way off and that was causing over extrusion.
The only problem I am facing now is the the last photo:There is a tiny gap between every line of extrusion, perimeters and infills.
Looks as if the extrusion needs to be a bit more "fat" to touch the other line.
Here are the stats you asked about:
Type of filament: PLA
Temperatures: plastic 180, bed 70
Printing speed:
- Perimeters: 30 mm/s
- Small perimeters: 12.5mm/s
- External perimeters 50%
- Infill: 80mm/s
- Solid infill: 35mm/s
- Top solid infill: 20mm/s
- Bridges: 60 mm/s
- Gap infill: 20 mm/s
- Default extrusion width: 0.3 mm
- First layer: 0.6 mm
- Perimeters 0.3 mm
- External perimeters: 0
- Infill: 0.6 mm
- Solid infill: 0.6 mm
- Top solid infill: 0.45 mm
[*]First later height: 0.3mm
Nozzle size: 0.3
Extruder type (direct or bowden): I don't know what this mean
let me know what you think. I personally think it has to do with the extrusion width.
|
Re: Printing issue: too much plastic? too little? too hot? all of the above? April 03, 2017 11:27AM |
Registered: 10 years ago Posts: 1,401 |
You have few ways to fix that problem:
1. Infill to perimeter overlap, you can increase the overlapping percentage in the slicer.
2. Extrusion multiplier, you can increase the extrusion amount in the slicer.
3. Extrusion width, this one is the one that makes a fatter extrusion.
4. Z calibration, your nozzle to bed offset might be still a little off and need more adjustment to get the layers press correctly against the bed.
|
Re: Printing issue: too much plastic? too little? too hot? all of the above? April 03, 2017 06:52PM |
Registered: 8 years ago Posts: 49 |
Hey,
I just changed all of those values independently and that still did not work. I have attached the result
This is very strange. I have never had this problem.
I made the following changes throughout my experiment:
Infill %: From 15 to 20%
Multiplier: 1 -> 1.1
Extrusion width: 0.3 ->0.4
Perimeters: 0.3 -> 0.4
Infill: 0.6 -> 0.7
What is weird is that even in the preview of Repetier-Host it shows the lines as not connected........
|
Re: Printing issue: too much plastic? too little? too hot? all of the above? April 03, 2017 07:07PM |
Registered: 8 years ago Posts: 49 |
|
Re: Printing issue: too much plastic? too little? too hot? all of the above? April 04, 2017 01:53AM |
Registered: 10 years ago Posts: 1,401 |
Ok for a 0.3 nozzle 0.36 should be best, now if your slicer is showing the gap is because you haven't try to change infill to perimeter overlap, you need to increase it to at least 10% I usually set it at 20% but I use 3 perimeters shell so it will not show outside. Let me see if I can find the setting and I will post it.
|
Re: Printing issue: too much plastic? too little? too hot? all of the above? April 05, 2017 12:20AM |
Registered: 8 years ago Posts: 49 |
Thanks for your reply.
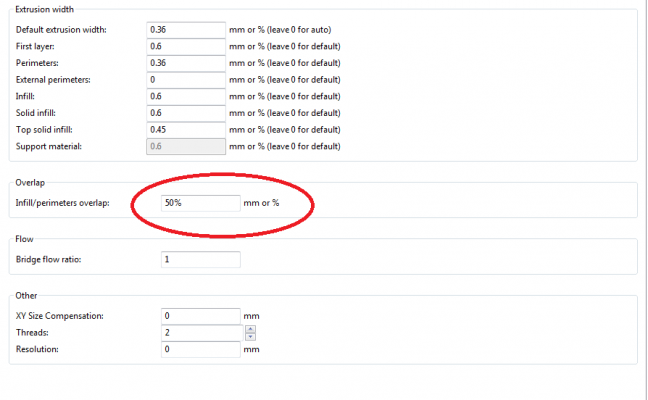
When you say infill to perimeter overlap, that's the percentage number in the advanced section of Slic3r right? I have attached a photo. I tried 10%, 15%, 25% and now 50%. They all look exactly the same.
There must be something else
When you say infill to perimeter overlap, that's the percentage number in the advanced section of Slic3r right? I have attached a photo. I tried 10%, 15%, 25% and now 50%. They all look exactly the same.
There must be something else

|
Re: Printing issue: too much plastic? too little? too hot? all of the above? April 05, 2017 08:46AM |
Registered: 10 years ago Posts: 1,401 |
|
Re: Printing issue: too much plastic? too little? too hot? all of the above? April 06, 2017 01:54AM |
Registered: 8 years ago Posts: 49 |
ggherbaz,
I found the problem!!!
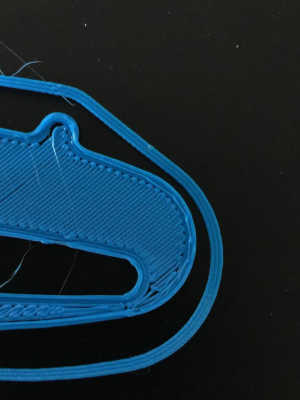
Basically, the nozzle wasnt close enough to the bed. I set the z-offset a little lower (-1) and now the lines stick together. HOWEVER, now I have another problem. Circles come out horrible and I have holes in my print. See the photo attached.
I thought it might be the rods so I lubricated the hell out of them. It didnt fix the problem. Then opened the extruder and cleaned it. Still nothing. I also tried tightening the screw on the extruder.(This photo helps: [www.geeetech.com]) Nothing!
Any ideas?
I am starting to think geeetech is to blame. I just want to throw this printer out the window and go buy another one. It is taking too much of my time. ugh.
Thanks for all your help!
Edited 1 time(s). Last edit at 04/06/2017 10:16AM by devilmostwanted.
|
Re: Printing issue: too much plastic? too little? too hot? all of the above? April 06, 2017 07:24AM |
Registered: 8 years ago Posts: 413 |
PLA, turn the bed off.
Confirm you set the nozzle diameter in Slic3r.
Only the 1st layer should be over extruded so set all the other widths to 0.36 or auto.
Layer height should generally be about 80% of nozzle diameter so don't set the layer height greater than 0.28 (your 1st layer is at 0.3)
The weird shape looks like you are not getting to the correct positions.
Check for loose joints. Check anything attached to the bed is not contacting the frame etc. Check cables are not tight or getting trapped. Check filament flows free - doesn't get trapped or the spool gets stuck.
Are the belts tight. Are the bearings on the carriages loose. Can the bed be moved in X/Y relative to the carriage (should not - it should move in Z due to the springs)
Some pictures would be useful.
|
Re: Printing issue: too much plastic? too little? too hot? all of the above? April 12, 2017 11:48PM |
Registered: 8 years ago Posts: 49 |
An update:
After hours and hours of troubleshooting and pretty much starting from scratch, I think I have found the problem.... The glass that I have put on the bed is not 100% flat. When placed on a flat surface it wobbles JUST A TINY BIT.
As you can see in the photo, I printed a one layer flat sheet. and top area is clearly not close enough to the hot end so the lines look like strings. On the lower right, it is too close and on the left side, it is perfect.
I have tried tightening and loosening the screws but nothing works. The glass is held down by four paper clips.
Is there any way to compensate for this? Or should I just buy a new glass? And how is there a way to make sure the glass is completely flat?
Thanks!
|
Re: Printing issue: too much plastic? too little? too hot? all of the above? April 14, 2017 04:08AM |
Registered: 9 years ago Posts: 125 |
Perhaps my glass is 0.05mm or more curved, but I do not have so bad problems or almost none. Some shop may have a "100%" straight stone table. I don't know about usual glass sellers, cutters. But a good provider from internet? This can be something other, because your flat print image does not looks so very awful.
Hmmm. And do you use print cooler?
Edited 1 time(s). Last edit at 04/14/2017 06:47AM by Plasteroid.
Prusa i3, Ramps 1.4. Catnozzle 0.4mm
SketchUp - Enveloping Globoid Worm Gear - Part One - 3D Printed: [youtu.be]
DesignSpark Mechanical & more precise screw thread: [youtu.be]
Nicer Screw Thread In SketchUp ( Bolts,Nuts): [youtu.be]
How To Model A Heart Shape In SketchUp: [youtu.be]
How To Draw 3D Printable Snap Fit Ball Joint In SketchUp: [youtu.be]
|
Re: Printing issue: too much plastic? too little? too hot? all of the above? April 14, 2017 12:43PM |
Registered: 7 years ago Posts: 13 |
If you do 3 way mesh bed leveling, what are your offsets? As I understand it, mesh leveling should handle most situations. I'm using "heavy duty glass" (3/16" iirc) from ACE hardware and, between it and my bed, it's off by about 0.5mm with no problems due to that. Thinner glass will bend if your underlying bed is significantly off from flat.
|
Re: Printing issue: too much plastic? too little? too hot? all of the above? April 16, 2017 07:00PM |
Registered: 8 years ago Posts: 49 |
Quote
Plasteroid
Perhaps my glass is 0.05mm or more curved, but I do not have so bad problems or almost none. Some shop may have a "100%" straight stone table. I don't know about usual glass sellers, cutters. But a good provider from internet? This can be something other, because your flat print image does not looks so very awful.
Hmmm. And do you use print cooler?
Quote
seattle_phil
If you do 3 way mesh bed leveling, what are your offsets? As I understand it, mesh leveling should handle most situations. I'm using "heavy duty glass" (3/16" iirc) from ACE hardware and, between it and my bed, it's off by about 0.5mm with no problems due to that. Thinner glass will bend if your underlying bed is significantly off from flat.
Yes I do use a fan.
In terms of the offsets, mine does 4 points and they are:
p1. Z: 0.10
p2. Z: 0.04
p3. Z: 0.07
p4. Z: 0.10
eqn coefficients: a: -0.00, b: 0.00 d: 0.09
They usually vary by 0.0X every time. but still in the same range.
I wonder if I can raise one side of the bed a bit to compensate for the imperfection? Would that work?
Edited 1 time(s). Last edit at 04/16/2017 07:00PM by devilmostwanted.
|
Re: Printing issue: too much plastic? too little? too hot? all of the above? April 17, 2017 09:56PM |
Registered: 7 years ago Posts: 13 |
|
Re: Printing issue: too much plastic? too little? too hot? all of the above? April 18, 2017 10:53AM |
Registered: 8 years ago Posts: 49 |
Quote
seattle_phil
I use 9 point (3x3) bed leveling - Marlin 1.1.0 rc3. Can you opt for 3x3? That would catch a bulge in the middle.
I have tried. But I keep getting an error when compiling the code:
#error "The Y axis probing range is not enough to fit all the points defined in AUTO_BED_LEVELING_GRID_POINTS"
My version is 1.0.2, I'm scared to update it. Bellow is my auto level code:
// set the rectangle in which to probe
#define LEFT_PROBE_BED_POSITION 25
#define RIGHT_PROBE_BED_POSITION 170
#define BACK_PROBE_BED_POSITION 160
#define FRONT_PROBE_BED_POSITION 40
// set the number of grid points per dimension
#define AUTO_BED_LEVELING_GRID_POINTS 2 //when I put this at 3, i get the error above.
What do you think?
|
Re: Printing issue: too much plastic? too little? too hot? all of the above? April 18, 2017 12:15PM |
Registered: 8 years ago Posts: 49 |
|
Re: Printing issue: too much plastic? too little? too hot? all of the above? June 09, 2017 09:24PM |
Registered: 8 years ago Posts: 49 |
Sorry, only registered users may post in this forum.
