Anything else?
Posted by bananaman
|
Anything else? September 09, 2015 07:40AM |
Registered: 8 years ago Posts: 11 |
Hi, I purchased an unbuilt Ormerod 1 here in Aus. Firmware was version 0.78 on a V0.6 Duet board.
I have another 3D printer (a modified Mendel clone) I haven't yet but I want to run it with Simplify 3D.
I've updated to 1.09 firmware.
I put it together OK, just could not get the three wire Z axis compensation to work at all, so I set the bed height manually and managed to print very good orthoganol tools.
Then I put it aside and waited for the Aluminium X-axis and bed, 4 wire probe and PanelDue to arrive from the UK.
I have now reassembled it.
Panel Due? All good.
Alu X-axis and bed fitting? The arm is amazingly rigid now. The bed is mainly good with the three points but I do have a slight warp which is the heated bed. A bit of bending should fix that.
4 wire probe? Well its showing a value and it changes if I stick a piece of paper under it. More setting up tomorrow for that.
I've done the picture clips mod for the bed and herring bone extruder gears.
I notice the X-arm extruder clip has a crack so I'll need to print another. Tensioned extruder?
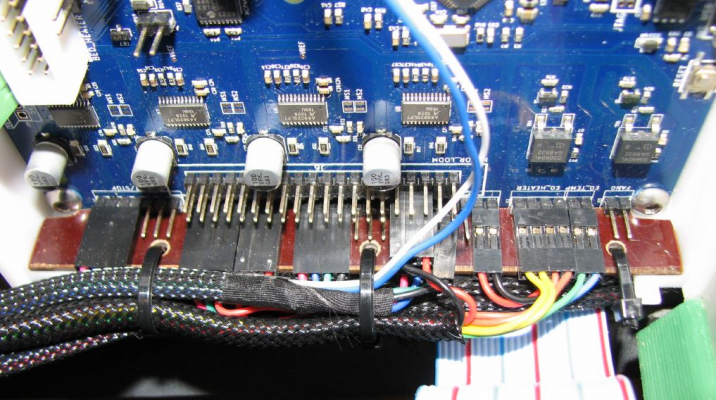
I do need to move it about a little on its bench at times and have had a few connectors move off the pins a bit too easily. Gave me some weirdness until I found the issue. Anyone else? Should I hot glue them?
The information I've found here has been incredibly useful so far. Thankyou.
Anything else I should look at or watch out for?
Regards
Brian
|
Re: Anything else? September 09, 2015 09:29AM |
Registered: 10 years ago Posts: 14,672 |
There is a cable tie point at the bottom of the Z tower. If you tie the cables coming down the Z tower to it, that should help stop them coming loose at the Duet. If the motor cables come loose while power is applied, you are likely to damage the stepper motor drivers on the Duet.
I had trouble with the connections to the Y homing switch and the thermistor coming loose. I ended up soldering them and covering the connections with heatshrink sleeving. I also soldered the bed thermistor to its crimp pins.
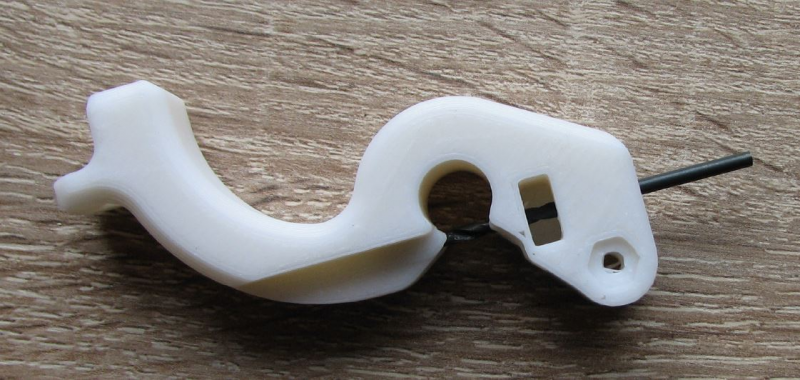
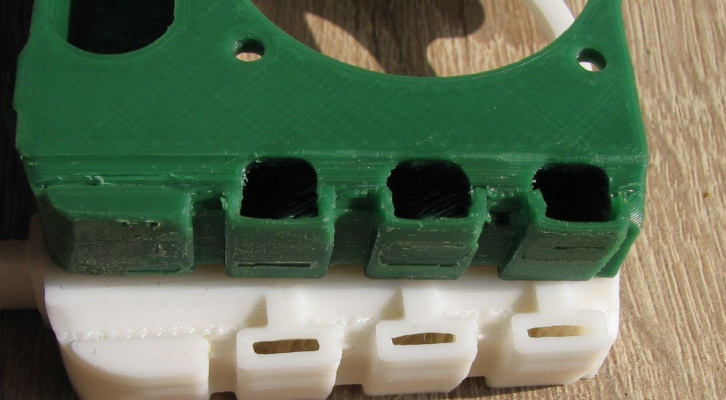
If you are going to reprint the extruder, consider using VortyZA's spring loaded variant, see [www.thingiverse.com].
Watch out for the Y belt coming loose in the slot. I recommend these Y-belt clamps [www.thingiverse.com] along with my shims [www.thingiverse.com] to let you adjust the belt tension. There is also a design for an adjustable belt tensioning device somewhere.
Are you certain that you really do have a warp in the bed? If the problem is that with 3-point levelling you can't get all 4 corners at the same height, that indicates that you have a slight twist between the Y axis parallel rods. You can eliminate that by loosening the attachment screws at one end of the Y axis and moving the outer end of one end plate up or down relative to the other.
Large delta printer [miscsolutions.wordpress.com], E3D tool changer, Robotdigg SCARA printer, Crane Quad and Ormerod
Disclosure: I design Duet electronics and work on RepRapFirmware, [duet3d.com].
|
Re: Anything else? September 09, 2015 10:15AM |
Registered: 10 years ago Posts: 1,230 |
Quote
dc42
...Are you certain that you really do have a warp in the bed? If the problem is that with 3-point levelling you can't get all 4 corners at the same height, that indicates that you have a slight twist between the Y axis parallel rods. You can eliminate that by loosening the attachment screws at one end of the Y axis and moving the outer end of one end plate up or down relative to the other.
yes that is most likely the problem, but if the heat bed really is warped, someone posted a fix for that:
Erik
|
Re: Anything else? September 09, 2015 12:21PM |
Registered: 10 years ago Posts: 1,230 |
Quote
bananaman
...I notice the X-arm extruder clip has a crack so I'll need to print another. Tensioned extruder?..
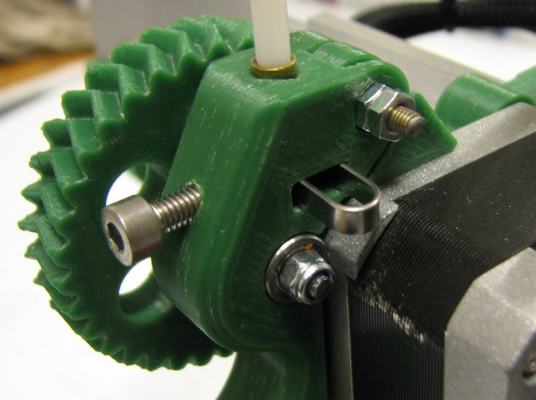
MasonStonehenge's spring-loaded extruder with the PTFE insert is the cats miaou, make sure to clean out the holes with a hand held 2mm drill bit and the filament will run right through when you feed it in (have read some folks have a problem with that, I never had)
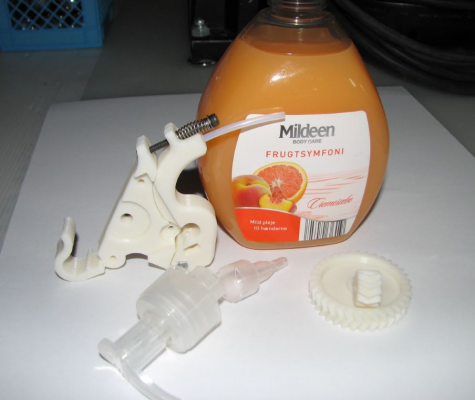
..and a spring from a soap dispenser (stock brand from Aldi) will fit right in
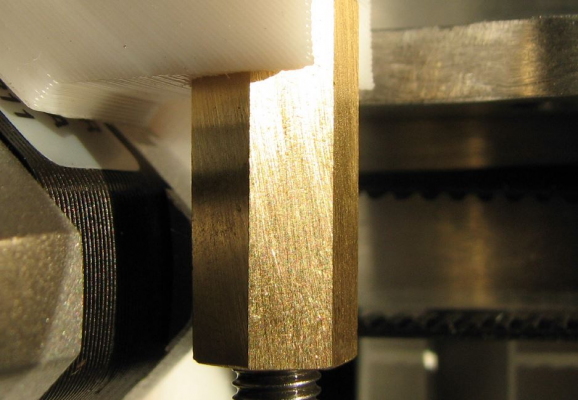
Also make sure the brass part cannot turn in the extruder or it might separate (un-screw) the PTFE tube, did for me, came home to a haystack of filament, looked like a big spider had cocooned the printer...
Notice how the PTFE tube will twist when the hotend moves in the + - x direction - when the extruder is feeding filament the brass bit is under pressure against the tongue and will not move, but with out that pressure it will turn, so if your print includes printing and non printing moves in the X direction the bras bit, if not properly fixed to the extruder will try to either tighten or loosen itself from the PTFE tube
Quote
I do need to move it about a little on its bench at times and have had a few connectors move off the pins a bit too easily. Gave me some weirdness until I found the issue..
If it's of the pins of the Duet you can secure the cables like I did, a slice of 2.5mm circuit board with holes for cable strips super glued to the bottom of the duet enclosure will make the connectors slide right in, support them from underneath and from sliding out
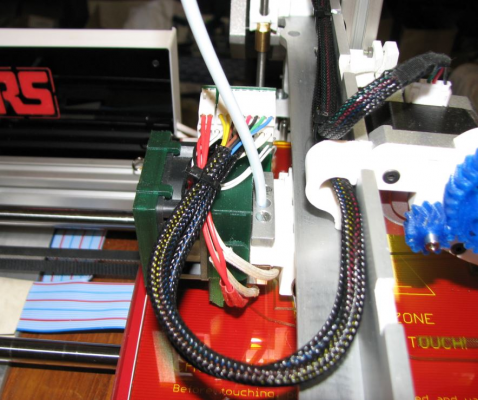
Its also important to secure the cables some distance from the pins/connectors so they can move with the hotend without any movement near the crimp or solder or the cores might break
Quote
..Anything else I should look at or watch out for?..
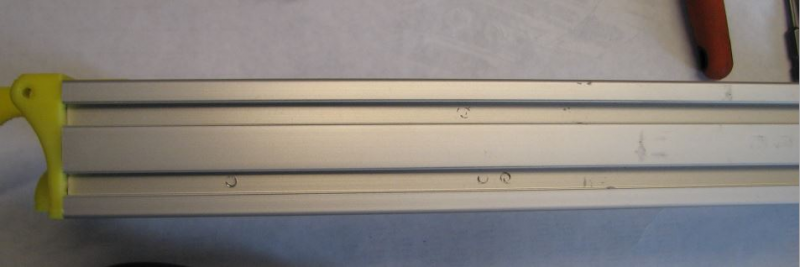
Watch out for the length of the screws, esp. on the y-extrusion, you may think everything is screwed down tight but that might just be an illusion
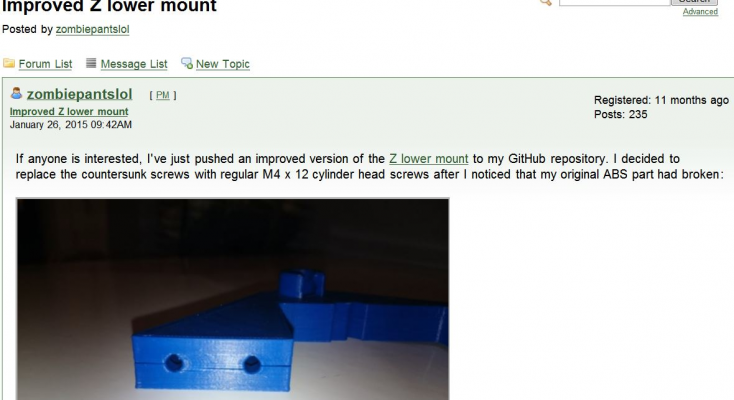
Also look out for cracks in parts with countersunk holes, esp. the parts that secures the y-extrusion to the z-extrusion - zombiepantslol made a better Z lower mount for cylinder head screws, but same thing goes for the z-corner-bracket, z-motor-brace and z-foot
the attachment of the z-extrusion to the y-extrusion is the weakest link on the ormerod imho, if you have the skills to use a hacksaw and access to a drill press I would highly recommend to secure those parts together metal to metal - esp. if you want to move the printer around
..and change the nut on the treaded rod for a long brass one if you haven't done so already
Cooling from the original hotend is marginal, you can open the air vents with a drill bit or print one of the alternatives
Erik
|
Re: Anything else? September 09, 2015 06:01PM |
Registered: 8 years ago Posts: 11 |
Thankyou very much for the excellent replies and ideas. I'll work through them.
I forgot to add in the original post that I have done the Y belt mod.
The bed was bent out of the box and was displaced around 3 or 4mm, I suspect something heavy had been stacked on the box for the past year before I got it.
I thought I had massaged it straight but heating up the bed must have released some tension so its around 0.1/0.2 now but that's too much.
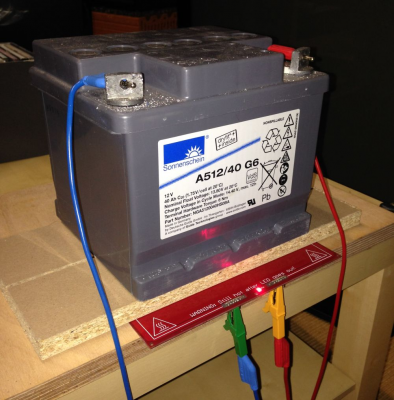
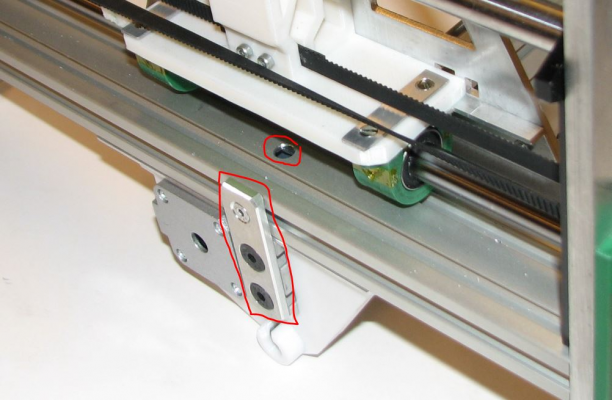
I'll likely replace it but I'll try the "fix" first, the bow is on the side showing in the image above. The other sides look straight by eye.
I really like that Duet connector mod. After my post I did a lot of checking of movement and heating, I got lucky I didn't damage anything. An example of the weirdness was the X-axis migrating to the right by 18mm each time you hit "Home"
It was actually DC42's PanelDue that pointed me in the right direction. I could see the probe value wildly changing up and down when it wasn't moving that made me think bad connection somewhere, then I saw some connectors displaced.
I have a mill and a lathe so in time I am going to make some alloy parts.
Thanks again Brian
|
Re: Anything else? September 13, 2015 05:35PM |
Registered: 8 years ago Posts: 11 |
Just looked at the lower z mount and it has cracked in two places where it wraps around the motor. Time to print another.
Can't source a long 5x0.8mm nut/socket anywhere on this side of the planet (none left on the Ebay links on another post) and postage makes it a very expense item from the one UK source I found.
I'll make something when I get downstairs to my workshop. (Had ankle fusion surgery so I'm pretty house bound at the moment, hence lots of 3D printing time).
New bed should arrive today.
DC42, do you still produce the Zaxis prob fan controller mod?
|
Re: Anything else? September 13, 2015 06:41PM |
Registered: 10 years ago Posts: 14,672 |
Quote
bananaman
DC42, do you still produce the Zaxis prob fan controller mod?
Yes, I have a few partly assembled boards that I can finish off as either dual nozzle, or single nozzle upgradable to dual. Send me a PM saying which country you are in, and I will give you the prices including carriage.
Large delta printer [miscsolutions.wordpress.com], E3D tool changer, Robotdigg SCARA printer, Crane Quad and Ormerod
Disclosure: I design Duet electronics and work on RepRapFirmware, [duet3d.com].
|
Re: Anything else? September 14, 2015 12:51PM |
Registered: 9 years ago Posts: 638 |
|
Re: Anything else? September 14, 2015 09:00PM |
Registered: 10 years ago Posts: 859 |
Just in the process of rebuilding my Ormerod. I've actually Bolted the Z axis profile to the Y axis profile, as I move my printer around abit (well about 1200 miles a month, and 2weeks/month in the Atlantic...So it gets some hammer).
I used a 6mm Gutter bolt, as they are low profile, and have a 6mm square that locks in to the extrusion nicely. I've found that by tighening the bolt and having a nut Flat Horizontally the bottom Z axis bearing just clears the nut nicely
using 3mm glass. I'll post some pictures in the next few days...
Kim
Please send me a PM if you have suggestions, or problems with Big Blue 360.
I won't see comments in threads, as I move around to much.
Working Link to Big Blue 360 Complete
|
Re: Anything else? September 15, 2015 08:03AM |
Registered: 10 years ago Posts: 2,472 |
Quote
Darathy
why is a long brass Z nut better then the original nut?
It causes less wear on the Z screw. If you have bed compensation enabled, the Z screw takes a huge hammering, and several people have had stripped threads. The long nut distributes the load over more threads, and brass against steel causes less wear.
If you do not use bed compensation it is not so critical because the Z screw only moves once per layer.
Dave
|
Re: Anything else? September 15, 2015 01:34PM |
Registered: 9 years ago Posts: 638 |
Quote
dmould
Quote
Darathy
why is a long brass Z nut better then the original nut?
It causes less wear on the Z screw. If you have bed compensation enabled, the Z screw takes a huge hammering, and several people have had stripped threads. The long nut distributes the load over more threads, and brass against steel causes less wear.
If you do not use bed compensation it is not so critical because the Z screw only moves once per layer.
Dave
Ah ty i indeed use bed compensation mostly becouse it elimineates the 0.1mm offset coused by the rod twist i cant get really rid of. i will look into getting the long brass nut(but then wont the nut wear out sooner?).
Would this [www.ebay.com] be long anaugh? or would 30mm be better? i cant find a 20mm version
Edited 1 time(s). Last edit at 09/15/2015 01:38PM by Darathy.
|
Re: Anything else? September 15, 2015 01:48PM |
Registered: 8 years ago Posts: 11 |
For any Australians, I found a source of nuts ranging from 10mm to 20mm long. Around $4.00ea. I have ordered a couple.
I have printed most of my new parts and ordered DC24s probe.
I've just been cleared to weight bear on my ankle so I can get into my shop again to make some alloy bits. Interested in seeing your pics Kim.
Another thing I find is I've knocked the bed a few times and it pops off the Y bearing very easily. In time that will wear and the bed "might" slide off the bearing during a print. I thought of securing that. Has this been an issue?
I printed the fan cover as discussed in other topics and found it hits the Duet case. The case is as far fwd as it can go. I have the Z arm in the "ideal" position the docs describe. I assume from that I can move it back/aft up to 5mm OK.
For airflow, I did some testing with thin paper strips. The air sure gets turbulent when it is at the home end of the arm.
Also the nozzle is 0.5mm. I see 0.3mm are available. I should be able to drill one out to 0.4mm? I find the nozzle hides under the hot end assembly quite well so a print start is a guess for a few seconds. I have also had the current probe "just" make contact with the extrusion on some test prints. It is positioned as shown in the build docs. Any issues with winding the nozzle down further, or will I run into Z probe set up problems? I guess I have around 2mm to play with?
Edited 1 time(s). Last edit at 09/15/2015 03:09PM by bananaman.
|
Re: Anything else? September 15, 2015 03:01PM |
Registered: 9 years ago Posts: 638 |
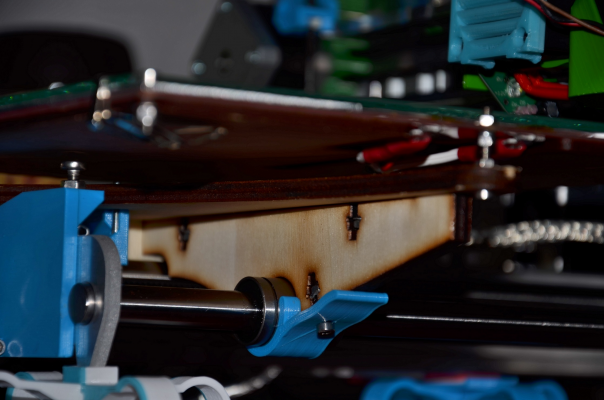
I think Zombiepantslol posted this: y-front-clamp.rar but i can not locate the post. It attaches to the cut out thats already made into the Wood with a M3 bolt washer and a nut. think M3x16-20bolt should be abaut right.
But i am not sure if it will fit Orm 1 .it fits Ormerod 2 but i think the lower part is abaut the same.
as for the nozzle you could Print a 0.5mm or 1mm thick plate that would look like the Insulator and put it on top of it. it would lower the nozzle a bit.
The wooden part in this picture:
Edited 2 time(s). Last edit at 09/15/2015 03:05PM by Darathy.
|
Re: Anything else? September 15, 2015 03:58PM |
Registered: 9 years ago Posts: 1,699 |
It won't fit on an Ormerod 1 as there is no possibility to connect the screw. At least regarding my version.
Slicer: Simplify3D 4.0; sometimes CraftWare 1.14 or Cura 2.7
Delta with Duet-WiFi, FW: 1.20.1RC2; mini-sensor board by dc42 for auto-leveling
Ormerod common modifications: Mini-sensor board by dc42, aluminum X-arm, 0.4 mm nozzle E3D like, 2nd fan, Z stepper nut M5 x 15, Herringbone gears, Z-axis bearing at top, spring loaded extruder with pneumatic fitting, Y belt axis tensioner
Ormerod 2: FW: 1.19-dc42 on Duet-WiFi. own build, modifications: GT2-belts, silicone heat-bed, different motors and so on. Printed parts: bed support, (PSU holder) and Y-feet.
Ormerod 1: FW: 1.15c-dc42 on 1k Duet-Board. Modifications: Aluminium bed-support, (nearly) all parts reprinted in PLA/ ABS, and so on.
|
Re: Anything else? September 15, 2015 06:58PM |
Registered: 8 years ago Posts: 11 |
Sorry, only registered users may post in this forum.
