Djinn5150's Smartrap Build
Posted by djinn5150
|
Djinn5150's Smartrap Build June 24, 2014 10:32PM |
Registered: 9 years ago Posts: 178 |
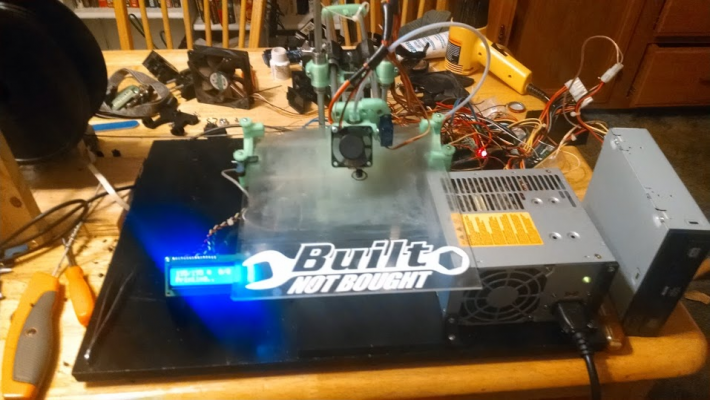
Well it is definately far from "done" but its together and working fairly well at the moment. Thanks again to everyone that has helped me out in my journey here.
This is in its current state.
Things I have still to do.
More photos during my build process and some print photos can be found here
This is in its current state.
Things I have still to do.
- Clean Up wiring
- Finish "Regpye's Extruder" and get it mounted
- Develop a 5 volt load for my PSU( it wont stay on unless I keep the CD drive hooked up)
- Clean Up wiring!!
- Mount Ramps board
- Complete a spool holder of sorts and mount it to my "build plate"
- Expand Y-Axis
- Upgrage to belt driven system
More photos during my build process and some print photos can be found here
|
Re: Djinn5150's Smartrap Build June 24, 2014 11:17PM |
Registered: 10 years ago Posts: 814 |
|
Re: Djinn5150's Smartrap Build June 24, 2014 11:51PM |
Registered: 9 years ago Posts: 178 |
|
Re: Djinn5150's Smartrap Build June 25, 2014 12:23AM |
Registered: 9 years ago Posts: 80 |
|
Re: Djinn5150's Smartrap Build June 25, 2014 12:46AM |
Registered: 9 years ago Posts: 178 |
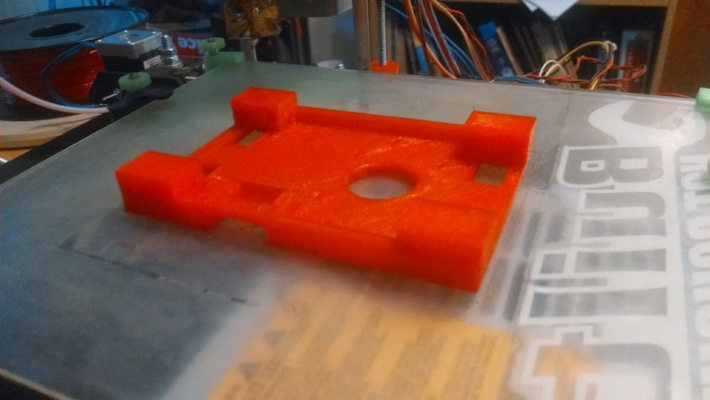
Now you got me thinking, I was planning on expanding the y-axis out and turning the print bed 90 degrees and having the sticker on the underside. Now I'm thinking I might be able to model that up in sketch up and print it up as a z-spreader/support with the z-rods in the wrench ends...hmmmm ideas ideasQuote
MelT
I better find a way to put that sticker somewhere in my machine.
Maybe I will 3d print it and put it in the support between the two z-rods
|
Re: Djinn5150's Smartrap Build June 25, 2014 03:04AM |
Registered: 10 years ago Posts: 349 |
Congrats Djinn,
What a beauty! ;-D
Is that a very old ATX PSU? I'm making a ATX PCB and I recently deleted the option for a pre-load because i thought it was a thing of the stone age.
Looks like i still need to have an option for it. You could eventually add speakers and camouflage it as a stereo set
What a beauty! ;-D
Is that a very old ATX PSU? I'm making a ATX PCB and I recently deleted the option for a pre-load because i thought it was a thing of the stone age.
Looks like i still need to have an option for it. You could eventually add speakers and camouflage it as a stereo set
|
Re: Djinn5150's Smartrap Build June 25, 2014 10:39AM |
Registered: 9 years ago Posts: 178 |
Yes its definitely an old PSU, I had added some led's to the 5v rail in hopes it would alleviate the problem, but I was not so lucky. I think today Will try powering the Arduino off it and see if that is enough draw to keep it alive. Going to need to do that anyway if I want to upgrade to a stand-alone at some point. 

|
Re: Djinn5150's Smartrap Build June 25, 2014 02:18PM |
Registered: 10 years ago Posts: 814 |
|
Re: Djinn5150's Smartrap Build June 25, 2014 07:00PM |
Registered: 11 years ago Posts: 791 |
Quote
djinn5150
Quote
madmike8
Looks good.
Are you looking at the same picture I am? Its a mess lolIt will come around in time, now that I have a feel for whats going on and what I "need" etc.
In all seriousness, thank you! There will be many more changes down the line.
Using the old power supplies we use to add a load resistor between the green wire and a black one, that held the power supply in the "on mode"
You should be able to do it by connecting the green wire from the power supply to the pin on the RAMPS that does the automatic turn on and off.
That pin is next to the reset button, the closest on the left when the reset button is facing you.
[regpye.com.au]
"Experience is the mother of all knowledge." --Leonardo da Vinci
|
Re: Djinn5150's Smartrap Build June 25, 2014 07:31PM |
Registered: 11 years ago Posts: 791 |
Quote
djinn5150
Yes its definitely an old PSU, I had added some led's to the 5v rail in hopes it would alleviate the problem, but I was not so lucky. I think today Will try powering the Arduino off it and see if that is enough draw to keep it alive. Going to need to do that anyway if I want to upgrade to a stand-alone at some point.
Have a look at this website it may help you a bit.
You don't have to go to all the same as he has done, buit it does tell you about the PSon (green wire to black)
PSU power supply
There is plenty of info on the net about this subject
[regpye.com.au]
"Experience is the mother of all knowledge." --Leonardo da Vinci
|
Re: Djinn5150's Smartrap Build June 26, 2014 12:05AM |
Registered: 9 years ago Posts: 178 |
Quote
regpye
Using the old power supplies we use to add a load resistor between the green wire and a black one, that held the power supply in the "on mode"
You should be able to do it by connecting the green wire from the power supply to the pin on the RAMPS that does the automatic turn on and off.
That pin is next to the reset button, the closest on the left when the reset button is facing you.
Thats actually how I have it hooked up. I can even turn the PSU on/off with M80/M81 but for some reason, If I don't leave the CD plugged in I will get about 1/2 way through a warm up cycle when the PSU will shut down, it almost acts like a circuit breaker, until I unplug it from the wall. If I have the CD plugged in it will run for hours on end with no problem's I believe it is the lack of a load on the 5v line that is the culprit, and I will most definitely have a look at the website you suggested.
On another note I got some new filament in today that has a high variance in diameter, to the point it is unusable on the default extruder(1.6-1.8), unfortunately it is just too loose. So I am waiting till I have my hobbed bolt in hand to try printing anything more. Perhaps I will take the time to figure out a good routing for my wiring and shorten things down abit to clean up the mess.
|
Re: Djinn5150's Smartrap Build June 26, 2014 05:39AM |
Registered: 10 years ago Posts: 349 |
|
Re: Djinn5150's Smartrap Build June 26, 2014 04:38PM |
Registered: 9 years ago Posts: 178 |
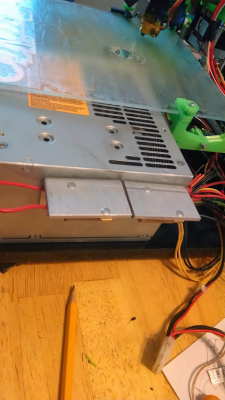
Came across a couple 10ohm 25 watt resistors in my shop today, decided to put them to work.  NO MORE CD ROM, between the 2 only pulling .25amp so hopefully not to much wasted juice. Going to change my firmware for the PSU defualt off and include a m80 in the startup and an m81 in the end code. To save on wasted electricity. Running a short test print now to see how it handles the load overall.
While I was in there i removed most of the 24pin pigtail jumpered what needed to be jumpered and left what I wanted long for my future expansion. I simply love this machine, my wife on the other hand hates the time I have devoted to my new "mistress" as she calls it.
 NO MORE CD ROM, between the 2 only pulling .25amp so hopefully not to much wasted juice. Going to change my firmware for the PSU defualt off and include a m80 in the startup and an m81 in the end code. To save on wasted electricity. Running a short test print now to see how it handles the load overall.
While I was in there i removed most of the 24pin pigtail jumpered what needed to be jumpered and left what I wanted long for my future expansion. I simply love this machine, my wife on the other hand hates the time I have devoted to my new "mistress" as she calls it.
|
Re: Djinn5150's Smartrap Build June 26, 2014 08:04PM |
Registered: 9 years ago Posts: 178 |
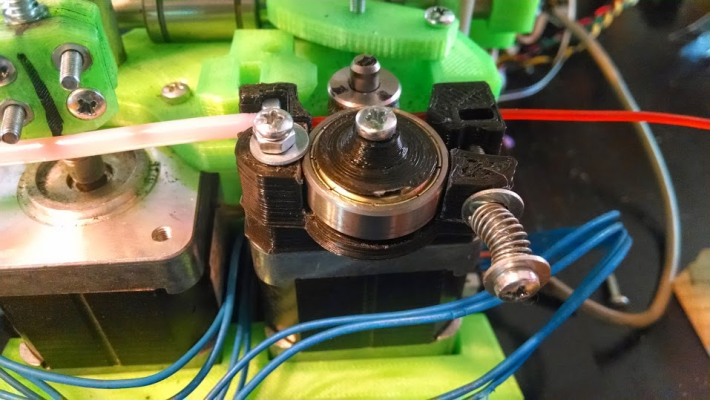
Can't ask for much better then this...well I could but it would be pushing it for now 
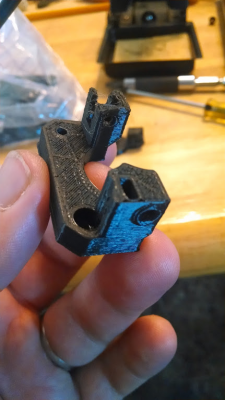
Now I can use my new filament, once my hobbed bolt shows up i'll move to Regpye's extruder, its printed and waiting.
For what its worth, the washer isn't actually pressing on the bearing

Now I can use my new filament, once my hobbed bolt shows up i'll move to Regpye's extruder, its printed and waiting.
For what its worth, the washer isn't actually pressing on the bearing

|
Re: Djinn5150's Smartrap Build June 26, 2014 09:46PM |
Registered: 9 years ago Posts: 80 |
|
Re: Djinn5150's Smartrap Build June 26, 2014 10:01PM |
Registered: 9 years ago Posts: 178 |
Thats a very good question, that I most definately do not have an answer to. The direct drive is definately working much better with the new extruder, not going to say I am getting "flawless" prints but if I don't have a lot of retractions it seems to be going good. Going to slow down my retraction speed and try this dinosaur again. It went great until it was just the head and spikes, lots of retractions chewed the filament and it stopped flowing smooth.
|
Re: Djinn5150's Smartrap Build June 26, 2014 10:49PM |
Registered: 11 years ago Posts: 791 |
Quote
MelT
Good that direct drive is working for you.
I wonder how powerful a taller motor is compared to a shorter one. Maybe enough to not need a geared extruder.
I have tried several sizes of motor for direct drive and they all suffered from the same problems, some larger ones where even worse.
If you go to geared it is possible to use a small motor, I have one that gives no trouble and has only a 35mm long motor and is very light weight. I might even try using that one again soon, I have a few that have been mothballed that I could be using instead of making new ones all the time, but there are so many new ideas to try ha..ha..
[regpye.com.au]
"Experience is the mother of all knowledge." --Leonardo da Vinci
|
Re: Djinn5150's Smartrap Build June 27, 2014 02:25AM |
Registered: 10 years ago Posts: 229 |
Bigger motors won't make any difference unless you have something to power them. The controller board can only provide so much current/voltage. If you want/need more torque, you have to supply more current/voltage to do the work. That's why the geared extruders are used, torque multiplication
Mark
Mark
|
Re: Djinn5150's Smartrap Build June 27, 2014 05:55AM |
Registered: 9 years ago Posts: 80 |
|
Re: Djinn5150's Smartrap Build June 29, 2014 02:37AM |
Registered: 10 years ago Posts: 349 |
|
Re: Djinn5150's Smartrap Build June 29, 2014 10:21PM |
Registered: 9 years ago Posts: 178 |
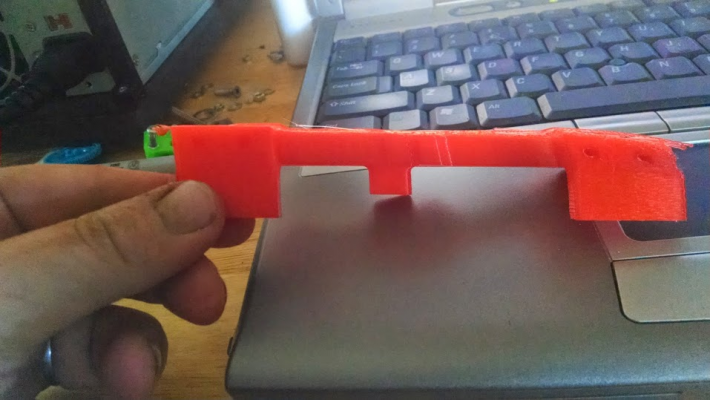
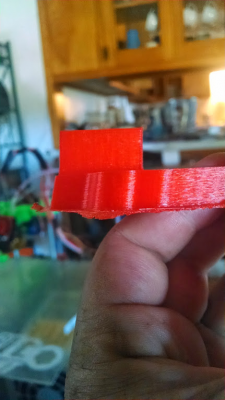
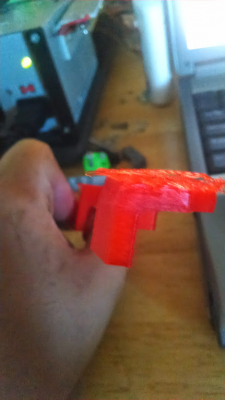
Ok so I am working on printing out Regpye's Wide Y setup, my printbed can barely fit 1 end on it at a time, I printed the + end first with 0 problems attempted the - Side and ended up with some lifting/warping( Which I am not worried about) and some of the leans.
All my lines are tight the leans seem to be in the +y/+x direction I am not maxing out when its running. Any ideas what might be causing it. Also the piece sits at a 45across the print surface from the X5 Y5 I think this is because of the angle and the size. But I am going to scale it down to run it quick just to see if its the positioning. Anyone have any ideas?
All my lines are tight the leans seem to be in the +y/+x direction I am not maxing out when its running. Any ideas what might be causing it. Also the piece sits at a 45across the print surface from the X5 Y5 I think this is because of the angle and the size. But I am going to scale it down to run it quick just to see if its the positioning. Anyone have any ideas?
|
Re: Djinn5150's Smartrap Build June 30, 2014 07:49AM |
Registered: 9 years ago Posts: 156 |
|
Re: Djinn5150's Smartrap Build June 30, 2014 01:04PM |
Registered: 9 years ago Posts: 178 |
|
Re: Djinn5150's Smartrap Build June 30, 2014 04:10PM |
Registered: 9 years ago Posts: 156 |
|
Re: Djinn5150's Smartrap Build July 01, 2014 11:14PM |
Registered: 9 years ago Posts: 178 |
I can't even begin to describe how happy this makes me...
I'll pick up hardware tomorrow I think. I have a belt that I scavenged from an old scanner, but I don't have a drive gear, does anyone know where to find a printable one? I have searched and printed a few but nothing is matching up right.
I'll pick up hardware tomorrow I think. I have a belt that I scavenged from an old scanner, but I don't have a drive gear, does anyone know where to find a printable one? I have searched and printed a few but nothing is matching up right.
|
Re: Djinn5150's Smartrap Build July 01, 2014 11:37PM |
Registered: 11 years ago Posts: 791 |
Quote
djinn5150
I can't even begin to describe how happy this makes me...
I'll pick up hardware tomorrow I think. I have a belt that I scavenged from an old scanner, but I don't have a drive gear, does anyone know where to find a printable one? I have searched and printed a few but nothing is matching up right.
There are OpenScad files available that will allow you to design and save STL files for just about any size gear pulley that you need.
I have a collection pf these files on my website that I have collected from various places.
You can download them by going to;
Gear Generators
Just click on the file in the list and it will download.
[regpye.com.au]
"Experience is the mother of all knowledge." --Leonardo da Vinci
|
Re: Djinn5150's Smartrap Build July 05, 2014 06:10PM |
Registered: 9 years ago Posts: 178 |
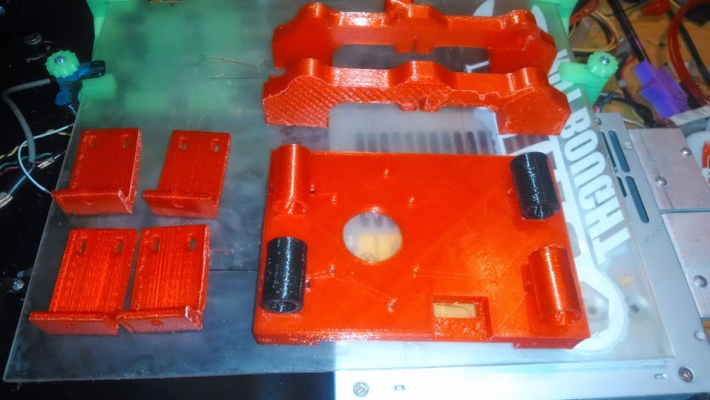
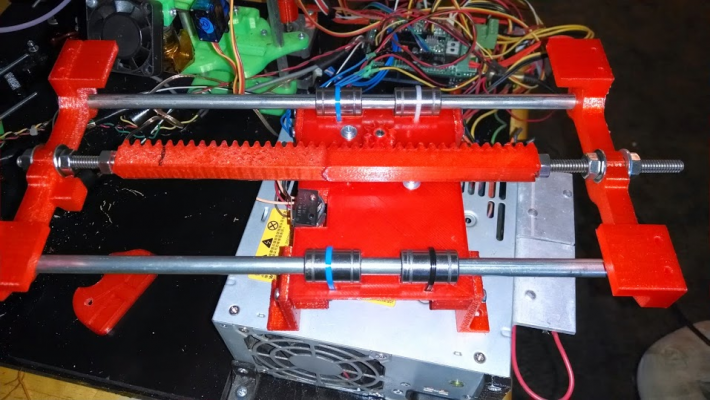
Where are my manners? Thank you Regpye for the link on the gear generators, I did end up going another route as my belt was just not going to work. So I made a few modifications to parts I had in hand and am evolving to a rack and pinion drive, at least for now.
Have to really re-arrange everything to accommodate the wider Y plate, so hopefully I will have it back up and running in the next day or two. Looks like I will have to really button down my wires this go round, I have been meaning to do that anyway so why not just get it done.
Have to really re-arrange everything to accommodate the wider Y plate, so hopefully I will have it back up and running in the next day or two. Looks like I will have to really button down my wires this go round, I have been meaning to do that anyway so why not just get it done.
|
Re: Djinn5150's Smartrap Build July 05, 2014 06:27PM |
Registered: 11 years ago Posts: 791 |
Quote
djinn5150
Where are my manners? Thank you Regpye for the link on the gear generators, I did end up going another route as my belt was just not going to work. So I made a few modifications to parts I had in hand and am evolving to a rack and pinion drive, at least for now.
Have to really re-arrange everything to accommodate the wider Y plate, so hopefully I will have it back up and running in the next day or two. Looks like I will have to really button down my wires this go round, I have been meaning to do that anyway so why not just get it done.
Hey! looking good, well done (Not the wiring though ha..ha..) What did you use to modify my Y ends to add the mounts for the rack? Or did you remake my files completely?
As for the wiring, I have been using MeshGuard from HobbyKing. It works very well for keeping the wires nice and neat, is not expensive and very easy to use. It also comes in several sizes and different colours. EDIT: Better link
I find that the smaller sizes are most useful as they can accept larger amounts of wires without any problem.
I use the smallest I can get for the wires from steppers, and I use the 6mm for most loom work.
They ship World-wide.
Edited 1 time(s). Last edit at 07/05/2014 06:33PM by regpye.
[regpye.com.au]
"Experience is the mother of all knowledge." --Leonardo da Vinci
|
Re: Djinn5150's Smartrap Build July 05, 2014 06:42PM |
Registered: 9 years ago Posts: 178 |
I will definitely check out the Hobbyking link, as for the modifications, I just eyeballed the positioning and drilled out the risers on the flat side of the belt holders. I would like to work on the actual models and make them "proper" for rack and pinion but things seem to be moving smoothly at the moment. That I think will be my first attempt at modifying a model in freecad, I am getting a good feel for that now too.
I knew I was going to have re-position things but didn't think it was going to throw my entire mounting system into chaos, oh well we live we learn, and we improve. How critical will the "square" need to be between the x and y axis, worst case it will just print skewed on the bed if I don't have it perfect right?
I knew I was going to have re-position things but didn't think it was going to throw my entire mounting system into chaos, oh well we live we learn, and we improve. How critical will the "square" need to be between the x and y axis, worst case it will just print skewed on the bed if I don't have it perfect right?
|
Re: Djinn5150's Smartrap Build July 05, 2014 06:47PM |
Registered: 11 years ago Posts: 791 |
On another note about cleaning up the builds.
I have a number of guys interested in building machines in my local area (local Mens' Shed)
I am going to be their adviser on building as I am local and also have some experience.
One aspect of building for a group is time to do everything, so I am looking at ways to save some time and do things a little differently than all printing of parts.
One part that takes a lot of time is the LCD case. I know many don't even use a case, just mount it somewhere and leave it exposed.
To me that seems untidy, so I thought about making the case from 3mm MDF.
I designed a basic case that accepts the Reprapdiscount controller and cut it out with my laser.
It came out pretty good and everything fits neatly, even with a back panel.
Only takes a few minutes to glue it together using PVA wood glue and held in place with a rubber band until it sets.
I used black MDF so it doesn't need any further finishing, but can easily be spray painted in any colour if needed.
Now all I have to print is a simple mount for the case that can be changed to suit whatever printer I am making at the time and glue that/them to the case with PVA glue as well.
I am going to start using these cases myself on my builds, because a printed case can take about 4 hours to print compared to 10 minutes to put one together this way.
[regpye.com.au]
"Experience is the mother of all knowledge." --Leonardo da Vinci
Sorry, only registered users may post in this forum.
