Home
>
Reprappers
>
Topic
ShadowRam's - First Build - Large Custom
Posted by ShadowRam
|
ShadowRam's - First Build - Large Custom April 16, 2013 01:18PM |
Registered: 11 years ago Posts: 265 |
Hello Everyone,
I'm new to the RepRap community.
I've recently got my hands on a Cartesian Bot that I've decided to take the plunge and make it into a 3D Printer.
It's fairly large compared to the standard RepRap machines I've seen.
I'm documenting my progress on a blog I've set up at www.shadowram.ca
I sure I'll be on here and the IRC channel asking all sorts of questions.
Everything you see on the frame, I acquired for $100.
So when all said and done, I'm expecting this build to cost me ~$500-$600
Edited 1 time(s). Last edit at 04/16/2013 01:19PM by ShadowRam.
I'm new to the RepRap community.
I've recently got my hands on a Cartesian Bot that I've decided to take the plunge and make it into a 3D Printer.
It's fairly large compared to the standard RepRap machines I've seen.
I'm documenting my progress on a blog I've set up at www.shadowram.ca
I sure I'll be on here and the IRC channel asking all sorts of questions.
Everything you see on the frame, I acquired for $100.

So when all said and done, I'm expecting this build to cost me ~$500-$600
Edited 1 time(s). Last edit at 04/16/2013 01:19PM by ShadowRam.
|
Re: ShadowRam's - First Build - Large Custom April 16, 2013 04:22PM |
Registered: 11 years ago Posts: 381 |
It looks like essentially you've built a cnc machine and your putting an extruder where the tool head would go. Nice job using scrap parts for the frame build. I'm wondering what kind of speeds you're going to get though. Let me know when you find out. I take it you are mostly going to be printing in PLA since a heated bed of this size will be difficult. Even with PLA you're probably going to need to build a raft when printing otherwise you will be fighting curling a lot with larger based prints. I have a desktop cnc that I've thought about adding an extruder to but I always run into another reprap I want to build or design. I like the chain drive, I saw quite a few different kinds like that a few days ago that I've been contemplating. Let me know how it all works out. Happy building.
--------------| For Everything |--------------------------
Check it out here:
[reprapsquad.wordpress.com].
---------| For Everything Prototype Related |------
Now featuring comp case mods:
[RepRapLab.wordpress.com]
--------------| Find us at Twitter|------------------------
@REPRAPSQUAD (RS Main)
[mobile.twitter.com]
@REPRAPSQUADHQ (ProtoLab)
[mobile.twitter.com]
|
Re: ShadowRam's - First Build - Large Custom April 16, 2013 07:19PM |
Registered: 11 years ago Posts: 265 |
As this is my first machine,
I will be mounting a floating heat-bed above the baseplate and keeping the print size within 12" x 12" x 12" at first.
If all goes well, I'll expand it.
I'm not expecting it to be the fastest printer in the world. It is larger and has more mass moving around in both X, Y directions.
The steppers are larger than the stardard rep-rap, so we'll see where my speed ends up.
I'm also starting with a 0.5mm nozzle and I'm not aiming for high resolution at this point either.
I'm mostly looking to get it functional, consistent, and reliable.
With it, I can then print parts I need for other robotic projects,

|
Re: ShadowRam's - First Build - Large Custom April 16, 2013 08:04PM |
Registered: 12 years ago Posts: 809 |
Very nice. those nema 23 steppers are about $35 each. you got a great deal considering everything.
- akhlut
Just remember - Iterate, Iterate, Iterate!
[myhomelessmind.blogspot.com]
- akhlut
Just remember - Iterate, Iterate, Iterate!
[myhomelessmind.blogspot.com]
|
Re: ShadowRam's - First Build - Large Custom April 27, 2013 09:41PM |
Registered: 11 years ago Posts: 24 |
|
Re: ShadowRam's - First Build - Large Custom April 30, 2013 04:09PM |
Registered: 11 years ago Posts: 265 |
Yes,
All 3-axis are working
https://www.youtube.com/watch?v=E_mMcdNbK4M
and just today I have the final pieces to complete the entire extruder.
Edited 1 time(s). Last edit at 04/30/2013 04:12PM by ShadowRam.
All 3-axis are working
https://www.youtube.com/watch?v=E_mMcdNbK4M
and just today I have the final pieces to complete the entire extruder.
Edited 1 time(s). Last edit at 04/30/2013 04:12PM by ShadowRam.
|
Re: ShadowRam's - First Build - Large Custom April 30, 2013 07:17PM |
Registered: 11 years ago Posts: 24 |
|
Re: ShadowRam's - First Build - Large Custom June 29, 2013 07:45AM |
Registered: 10 years ago Posts: 474 |
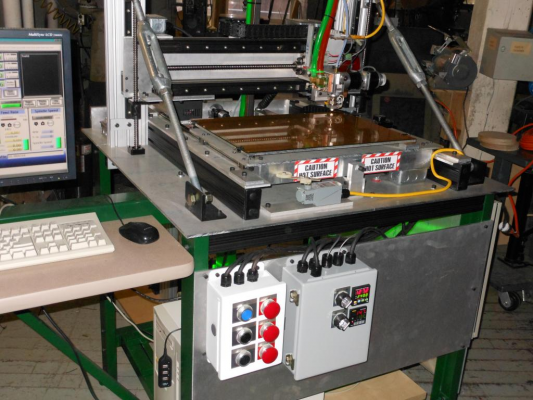
Hello just found this post hope everything's progressing well this is a picture of my machine I use a fairly large heated bed 17" x 14" I use a electric griddle I cut the edges off and mounted it to quarter inch aluminum jig plate
|
Re: ShadowRam's - First Build - Large Custom June 29, 2013 10:20AM |
Registered: 11 years ago Posts: 24 |
|
Re: ShadowRam's - First Build - Large Custom June 29, 2013 02:27PM |
Registered: 10 years ago Posts: 474 |
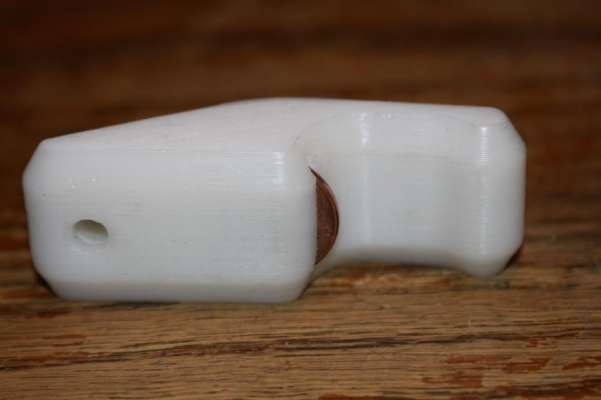
Thanks 17" x 14" x 14" can not show you anything that I printed for the company I'll show you just a couple test pieces a Yoda and a bottle opener Yoda was postprocessed with acetone bottle opener was is not
|
Re: ShadowRam's - First Build - Large Custom July 02, 2013 01:25PM |
Registered: 11 years ago Posts: 265 |
Very Nice,
I'm having some trouble with overshoot in 2 of 4 corners of a block, and getting a good useable working print surface.
First,
Mirror was working great until I printed a larger piece, and the PLA started to curl.
So I installed the PCB Heat Pad I ordered a while ago, Mirror had a chip in it, and upon heating, it failed by creating a sudden large crack down the middle of it.
Attempted to use a porcelain tile, not working out. But I've created a good bed support with leveling in all four 4 corners.
As for the overshoot, I thought it was my X-carriage twisting because it's only being driven by one end.
Stiffened it up, tighten belt had no effect.
My next hypothesis is that the Y-Axis is actually rotating on the linear slide slightly, so I'm devising a way to test and/or strengthen that theory.
|
Re: ShadowRam's - First Build - Large Custom July 02, 2013 01:51PM |
Registered: 12 years ago Posts: 36 |
yikes, broken mirror is too bad,
Porcelain tile seems cool, but too bad it's not working out for you, I would try to get another mirror/glass piece if I were you, I think you got unlucky with the crack.
I got a mirror piece at the hardware store and cut it with a glasscutter by hand, with wool insulation and seems to work quite well for me
|
Re: ShadowRam's - First Build - Large Custom July 03, 2013 08:32AM |
Registered: 10 years ago Posts: 474 |
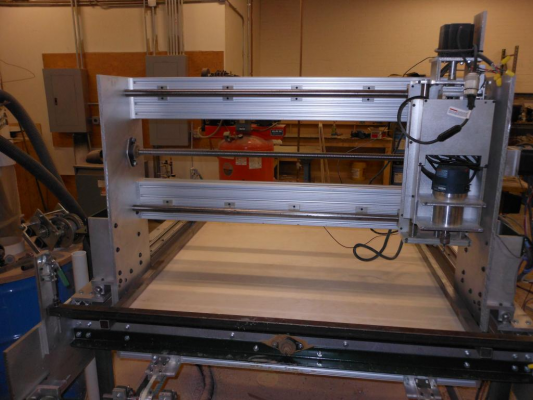
I think it might be a little bit of both when you build large moving devices it's never good to drive just from one side for the X the non-drive if you use the same size pully and a shaft connect it over to the other side same size timing belt and a non-drive freewheeling pully at other end here is a picture of a three axis router I built I use this method I drove it with a ballscrew in the middle but to stop any racking and cutting over a wide distance I use a shaft and timing belt to both sides the only picture I got isn't the best I don't know if you can see what I'm talking about
Edited 1 time(s). Last edit at 07/03/2013 08:39AM by cnc dick.
Edited 1 time(s). Last edit at 07/03/2013 08:39AM by cnc dick.
Sorry, only registered users may post in this forum.
