Steel i3 Prusa from Createc in Spain
Posted by RRuser
|
Steel i3 Prusa from Createc in Spain July 28, 2015 08:28AM |
Registered: 10 years ago Posts: 444 |
Just ordered this printer. "Psique" is the model name, and "Impresora" means printer:
[createc3d.com]
The build videos are here (understanding the Spanish is not needed)...
[www.youtube.com]
Note that their vids and pics show plastic X-axis parts; however they now ship with metal parts for those. They added those two videos as the last ones, so you can disregard the plastic X-axis videos.
I will be posting pics of my build. Reasons for choosing this version of a Prusa i3 printer are:
o Steel frame will not warp or crack (compared to acrylic). Should be good for endless years of upgrades and rebuilds.
o Steel frame has half the thermal expansion of aluminum, so will hold it's alignment better during room temperature changes.
o Steel frame weight will help keep the printer in place during faster print head moves.
o Power supply and electronics mount on the back of the frame, holding the frame down, and taking up less space.
o Has the LCD built into the frame, saving space. This is the only metal i3 I've ever seen to do this.
o Has the spool on top, saving space and reducing drag.
o Has a steel part that converts the 4-point adjustable bed to a 3-point bed.
o The parts are not hidden behind panels or cosmetics, so are easy to see and adjust.
o Uses all standard Ramps.
o Uses all standard Arduino.
o Uses pre-configured all-standard Marlin.
o Comes with a fan, and fan mount, for the electronics.
o End stops for Z are very easily adjustable.
o There were no steel Prusa i3 printers available in the USA.
o Createc has a maker shop in Spain, so hopefully they are on top of things.
Reasons for choosing the general category of a Prusa i3 printer:
o Will be printing exclusively in PET, which does not warp, therefore no enclosure is needed.
o No print-cooling fan is included, and should not be needed, for PET parts. Thus the head is simpler and lighter.
o No enclosure means easy access to the parts, and the parts run cooler.
o The 2-motor Z axis will not sag like single-motor cantilever machines can.
o The Prusa i3 is the most common and has the most help of any printer.
o The bed is a nice standard 200 X 200 mm size.
I chose the E3D Lite head (with PTFE) option for ease of use, and slower printing. Later I might get the all-metal head. Since I will be only using PET, I'll be at the upper end of the temperature for the PTFE, and thus a slower speed will allow heat to get to the filament better.
I'll be using Slic3r to begin with, although I also got a S3D license as a backup.
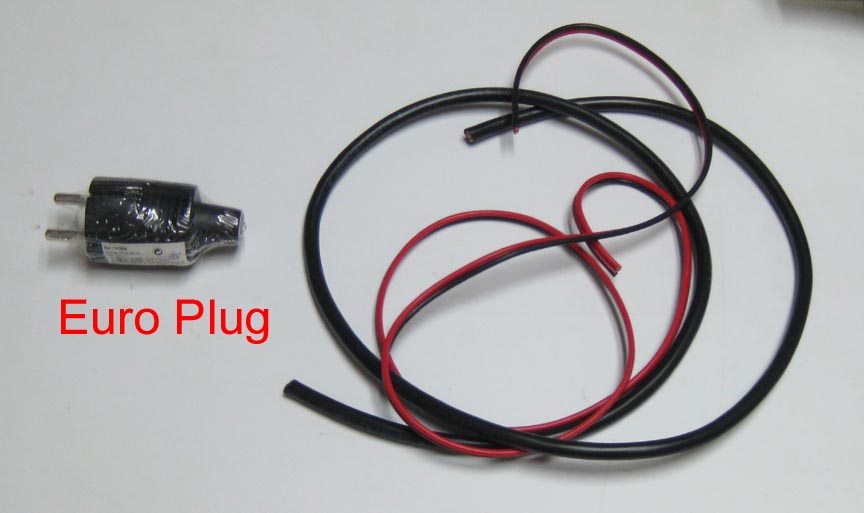
The power supply is of course switch-able to 120 volts for USA.
This kit require soldering, so keep that in mind if you have never soldered.
Reasons for choosing PET (or PETG) as the only filament are:
No shrinking or warping.
No smell.
No enclosure required.
Build plate can be heated or not (depends on brand of filament)
Does not absorb water or moisture from air, so does not need to be stored in a container.
Clear color is the most transparent of all filament materials.
Is much "tougher" that PLA or ABS; will bend before breaking.
Uses about the same extruder temps as ABS.
Does not need a print cooling fan like PLA does.
Also known as Polyester, PETG, PETT, PET+
Is what most soda pop bottles are made of.
Does not degrade in water.
FDA approved in the USA for food contact.
Not brittle.
Is the most recycled plastic.
[createc3d.com]
The build videos are here (understanding the Spanish is not needed)...
[www.youtube.com]
Note that their vids and pics show plastic X-axis parts; however they now ship with metal parts for those. They added those two videos as the last ones, so you can disregard the plastic X-axis videos.
I will be posting pics of my build. Reasons for choosing this version of a Prusa i3 printer are:
o Steel frame will not warp or crack (compared to acrylic). Should be good for endless years of upgrades and rebuilds.
o Steel frame has half the thermal expansion of aluminum, so will hold it's alignment better during room temperature changes.
o Steel frame weight will help keep the printer in place during faster print head moves.
o Power supply and electronics mount on the back of the frame, holding the frame down, and taking up less space.
o Has the LCD built into the frame, saving space. This is the only metal i3 I've ever seen to do this.
o Has the spool on top, saving space and reducing drag.
o Has a steel part that converts the 4-point adjustable bed to a 3-point bed.
o The parts are not hidden behind panels or cosmetics, so are easy to see and adjust.
o Uses all standard Ramps.
o Uses all standard Arduino.
o Uses pre-configured all-standard Marlin.
o Comes with a fan, and fan mount, for the electronics.
o End stops for Z are very easily adjustable.
o There were no steel Prusa i3 printers available in the USA.
o Createc has a maker shop in Spain, so hopefully they are on top of things.
Reasons for choosing the general category of a Prusa i3 printer:
o Will be printing exclusively in PET, which does not warp, therefore no enclosure is needed.
o No print-cooling fan is included, and should not be needed, for PET parts. Thus the head is simpler and lighter.
o No enclosure means easy access to the parts, and the parts run cooler.
o The 2-motor Z axis will not sag like single-motor cantilever machines can.
o The Prusa i3 is the most common and has the most help of any printer.
o The bed is a nice standard 200 X 200 mm size.
I chose the E3D Lite head (with PTFE) option for ease of use, and slower printing. Later I might get the all-metal head. Since I will be only using PET, I'll be at the upper end of the temperature for the PTFE, and thus a slower speed will allow heat to get to the filament better.
I'll be using Slic3r to begin with, although I also got a S3D license as a backup.
The power supply is of course switch-able to 120 volts for USA.
This kit require soldering, so keep that in mind if you have never soldered.
Reasons for choosing PET (or PETG) as the only filament are:
No shrinking or warping.
No smell.
No enclosure required.
Build plate can be heated or not (depends on brand of filament)
Does not absorb water or moisture from air, so does not need to be stored in a container.
Clear color is the most transparent of all filament materials.
Is much "tougher" that PLA or ABS; will bend before breaking.
Uses about the same extruder temps as ABS.
Does not need a print cooling fan like PLA does.
Also known as Polyester, PETG, PETT, PET+
Is what most soda pop bottles are made of.
Does not degrade in water.
FDA approved in the USA for food contact.
Not brittle.
Is the most recycled plastic.
|
Re: Steel i3 Prusa from Createc in Spain July 28, 2015 08:38PM |
Registered: 9 years ago Posts: 476 |
|
Re: Steel i3 Prusa from Createc in Spain July 29, 2015 12:36AM |
Registered: 10 years ago Posts: 444 |
|
Re: Steel i3 Prusa from Createc in Spain July 31, 2015 09:58PM |
Registered: 10 years ago Posts: 444 |
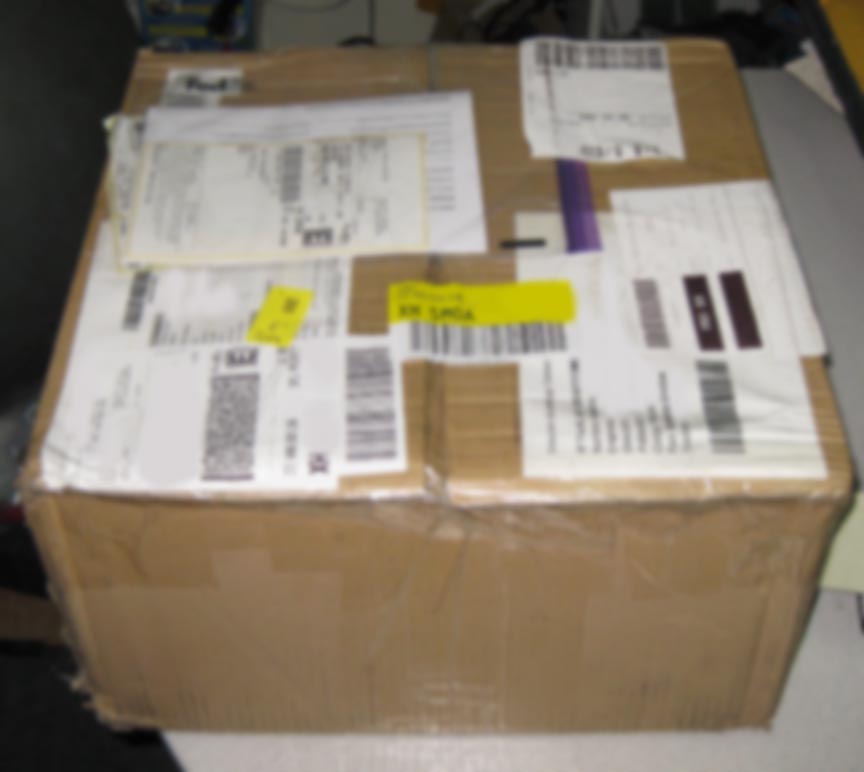
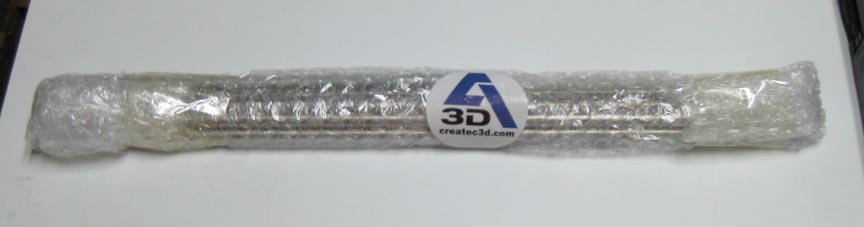
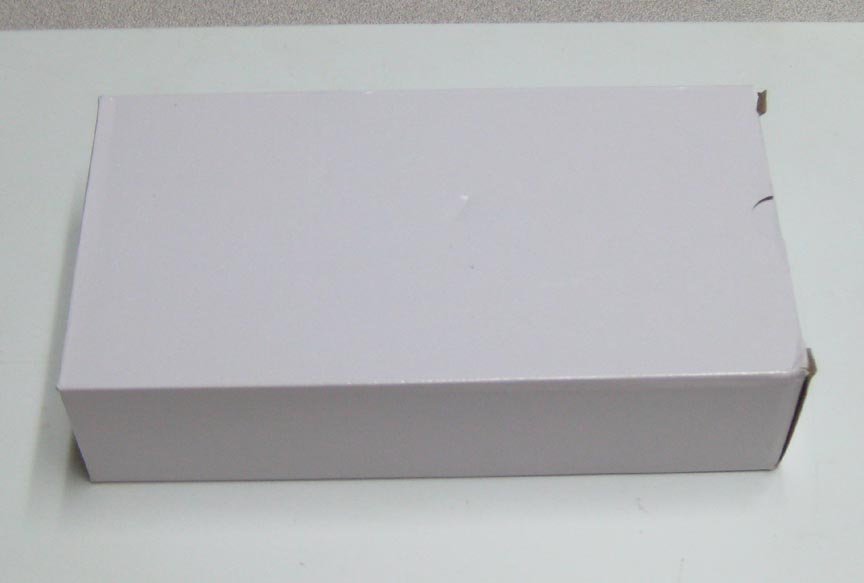
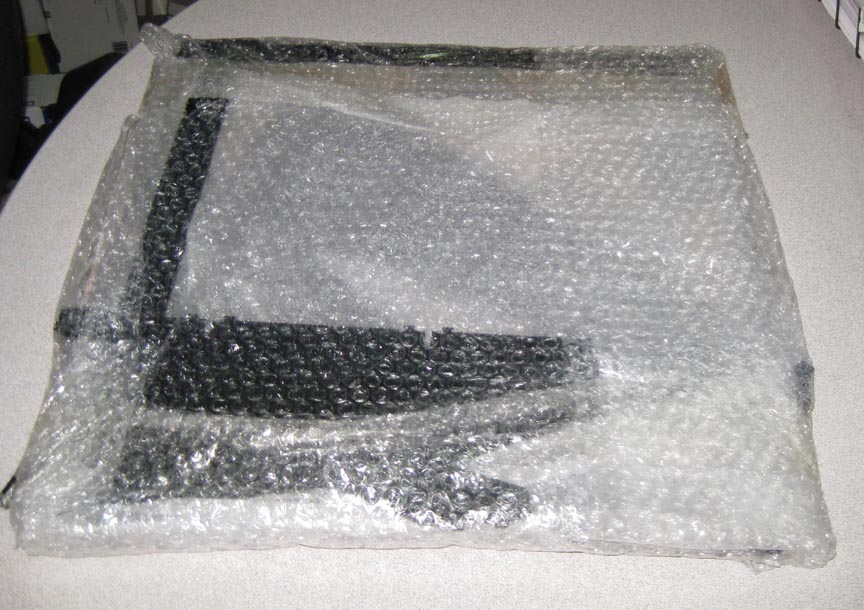
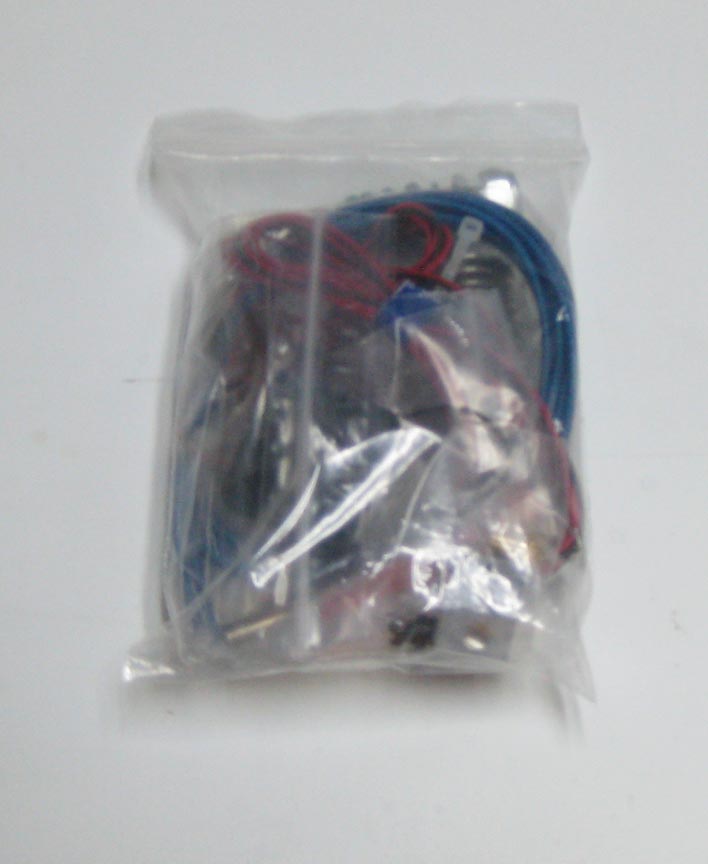
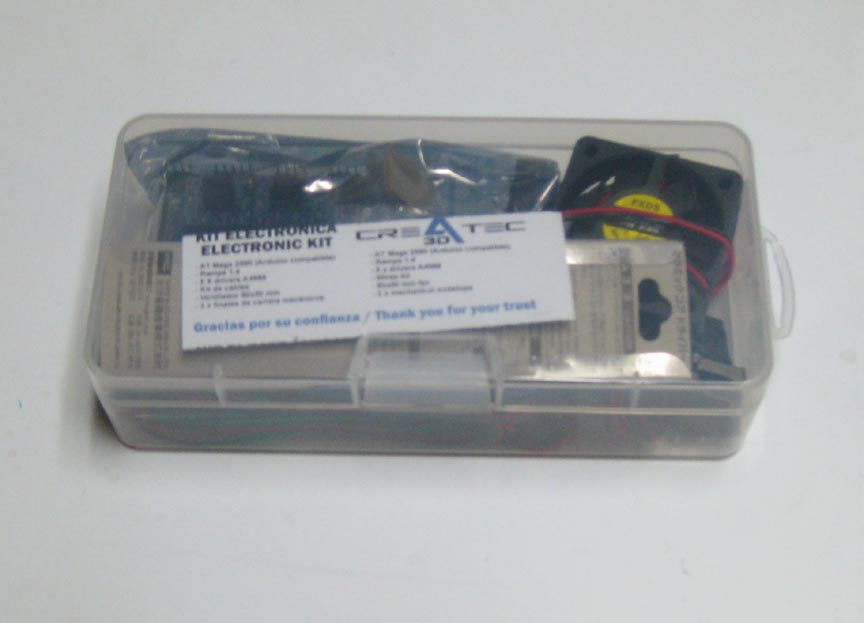
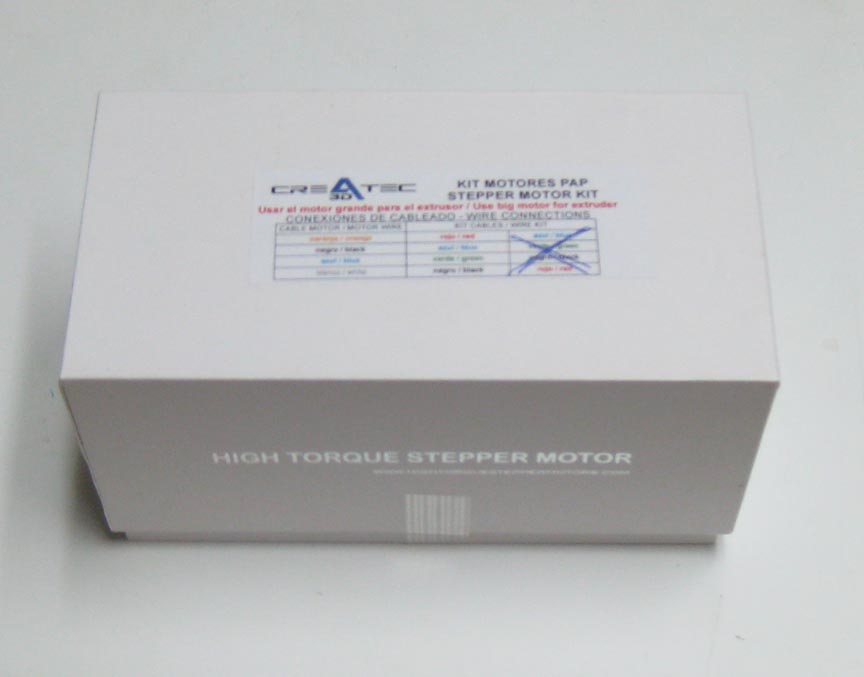
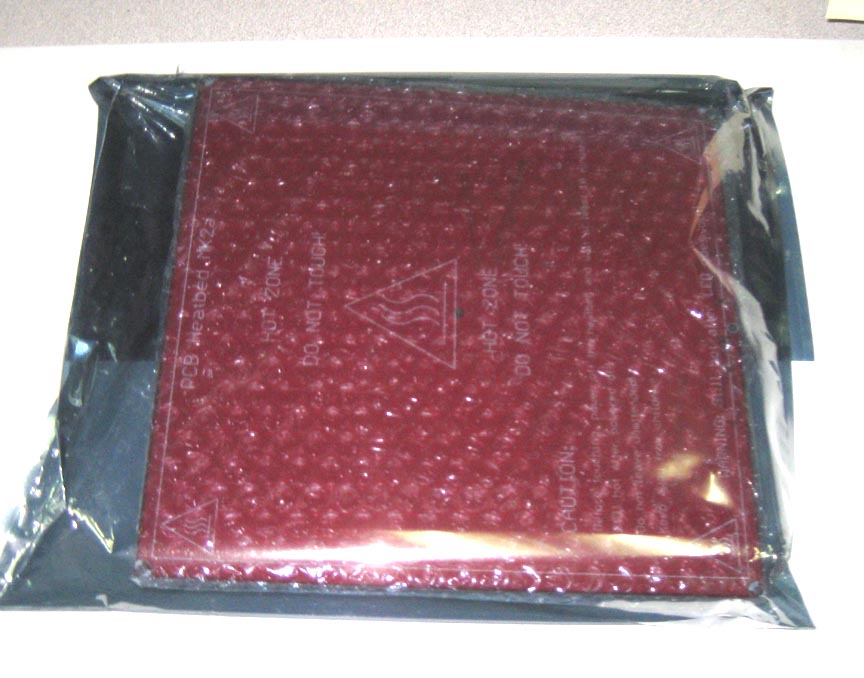
Package arrived in good shape, 3 days from Spain to California
Attachments:
open | download - 1.jpg (39 KB)
open | download - 2.jpg (106.4 KB)
open | download - 3.jpg (37.9 KB)
open | download - 4.jpg (27.5 KB)
open | download - 5.jpg (19.3 KB)
open | download - 6.jpg (23.6 KB)
open | download - 7.jpg (107.9 KB)
open | download - 8.jpg (58.2 KB)
open | download - 9.jpg (40.2 KB)
open | download - 10.jpg (37.9 KB)
|
Re: Steel i3 Prusa from Createc in Spain July 31, 2015 10:00PM |
Registered: 10 years ago Posts: 444 |
|
Re: Steel i3 Prusa from Createc in Spain August 02, 2015 07:11AM |
Registered: 9 years ago Posts: 476 |
|
Re: Steel i3 Prusa from Createc in Spain August 03, 2015 12:11AM |
Registered: 10 years ago Posts: 444 |
|
Re: Steel i3 Prusa from Createc in Spain August 03, 2015 02:30AM |
Registered: 9 years ago Posts: 476 |
|
Re: Steel i3 Prusa from Createc in Spain August 03, 2015 08:31AM |
Registered: 9 years ago Posts: 6 |
|
Re: Steel i3 Prusa from Createc in Spain August 04, 2015 02:48PM |
Registered: 10 years ago Posts: 444 |
This corresponds to Createc's video:
Createc Steel Prusa i3 "Psique" video#1 - Frame
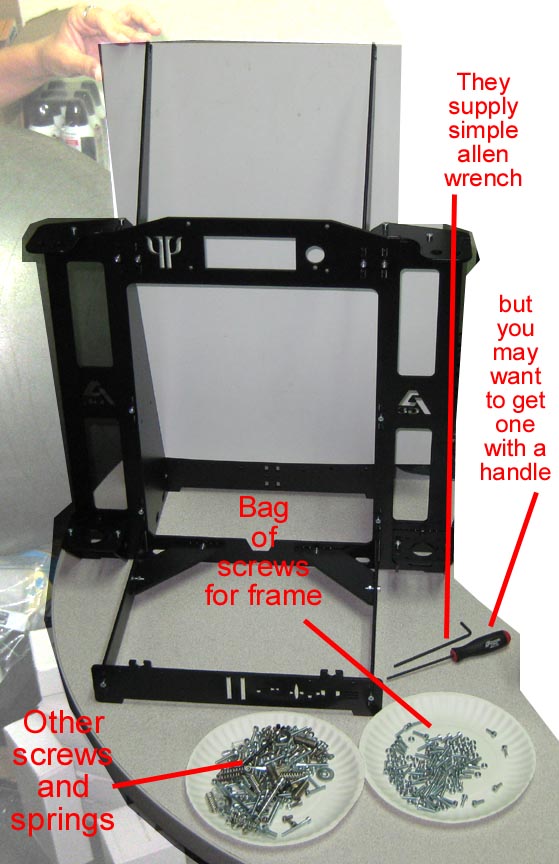
The 3 mm metal frame parts are very heavy duty, and powder coated black. Since they are the same 3 mm as the Createc aluminum version, these steel ones are much heavier, which I wanted so as to keep the printer in place:
Steel Frame
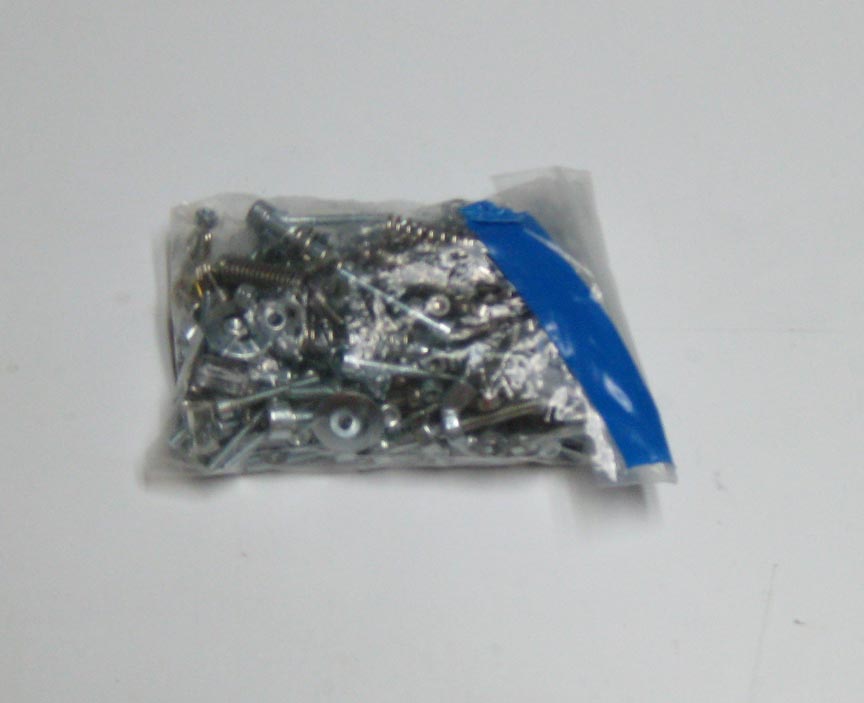
Frame went to together very fast, about 20 minutes, once I figured out how to use screw connector.
The screws are the larger ones, in the bag with two sizes.
The triangle part, which is the brace on the back Z side, is very solid and adds more weight.
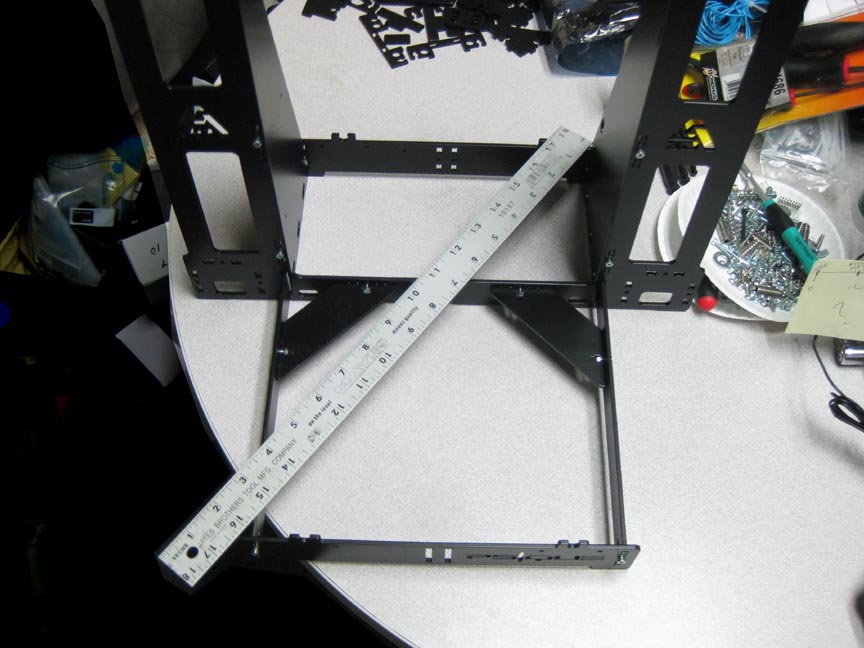
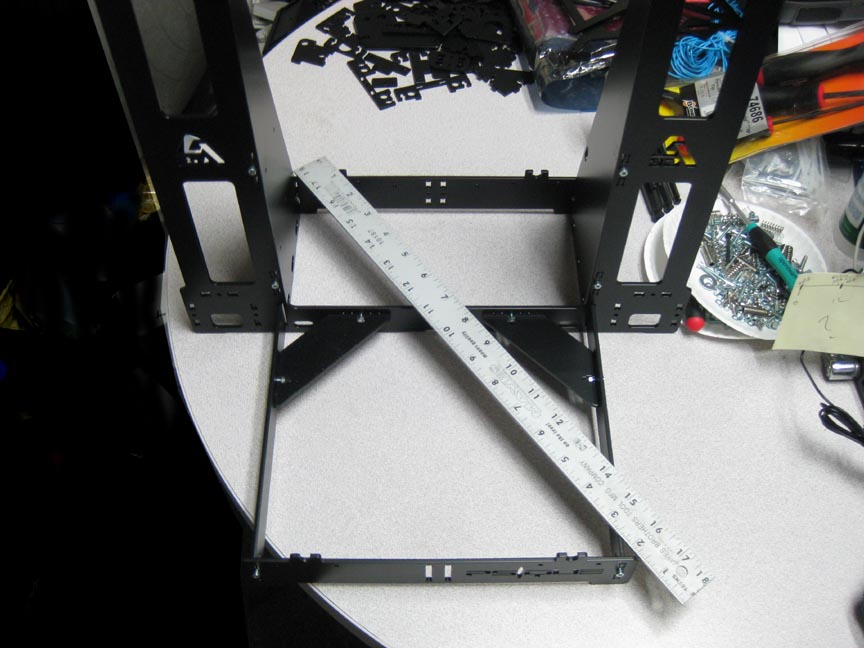
As with any printer, leave all the screws a little loose, and then measure the square-ness diagonally, and make it equal, and then tighten all the screws. A hex tool (allen wrench) is included, but you may want to also get a ball-hex driver with a bigger soft handle to do most of the tightening.
The finished frame is very very solid, 10 pounds (4.5 kg) without any other hardware attached. I think you could drop it on the floor and it would stay in alignment. And of course, with steel having half the thermal expansion of aluminum, temperature changes are less of a concern.
Createc Steel Prusa i3 "Psique" video#1 - Frame
The 3 mm metal frame parts are very heavy duty, and powder coated black. Since they are the same 3 mm as the Createc aluminum version, these steel ones are much heavier, which I wanted so as to keep the printer in place:
Steel Frame
Frame went to together very fast, about 20 minutes, once I figured out how to use screw connector.
The screws are the larger ones, in the bag with two sizes.
The triangle part, which is the brace on the back Z side, is very solid and adds more weight.
As with any printer, leave all the screws a little loose, and then measure the square-ness diagonally, and make it equal, and then tighten all the screws. A hex tool (allen wrench) is included, but you may want to also get a ball-hex driver with a bigger soft handle to do most of the tightening.
The finished frame is very very solid, 10 pounds (4.5 kg) without any other hardware attached. I think you could drop it on the floor and it would stay in alignment. And of course, with steel having half the thermal expansion of aluminum, temperature changes are less of a concern.
|
Re: Steel i3 Prusa from Createc in Spain August 05, 2015 01:50PM |
Registered: 8 years ago Posts: 5,232 |

|
Re: Steel i3 Prusa from Createc in Spain August 06, 2015 09:53AM |
Registered: 10 years ago Posts: 444 |
|
Re: Steel i3 Prusa from Createc in Spain August 07, 2015 02:09AM |
Registered: 8 years ago Posts: 5,232 |
|
Re: Steel i3 Prusa from Createc in Spain August 07, 2015 02:00PM |
Registered: 10 years ago Posts: 444 |
|
Re: Steel i3 Prusa from Createc in Spain August 09, 2015 08:39PM |
Registered: 9 years ago Posts: 977 |
|
Re: Steel i3 Prusa from Createc in Spain August 10, 2015 08:23PM |
Registered: 10 years ago Posts: 444 |
|
Re: Steel i3 Prusa from Createc in Spain August 10, 2015 09:49PM |
Registered: 10 years ago Posts: 444 |
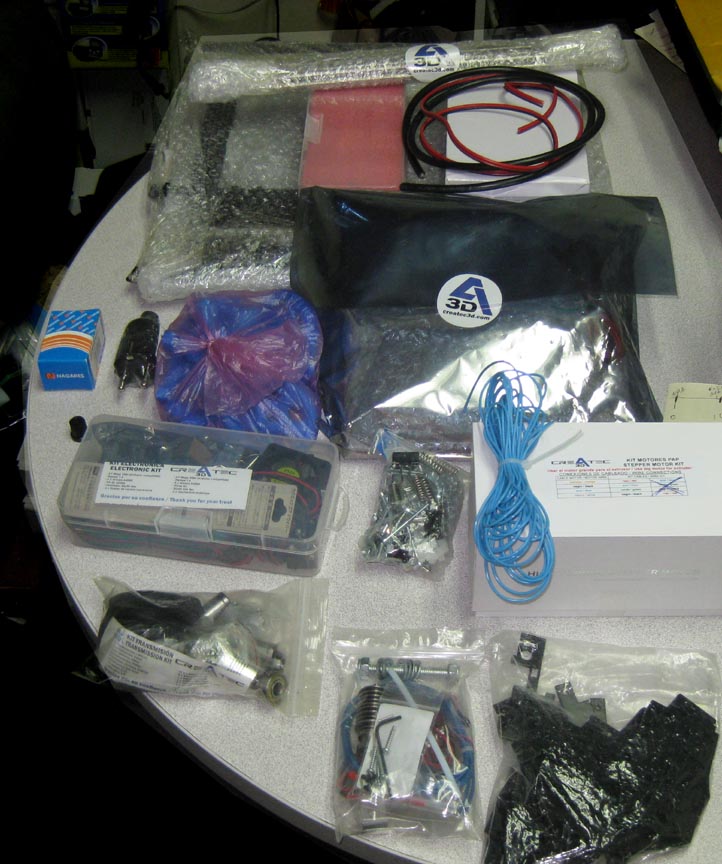
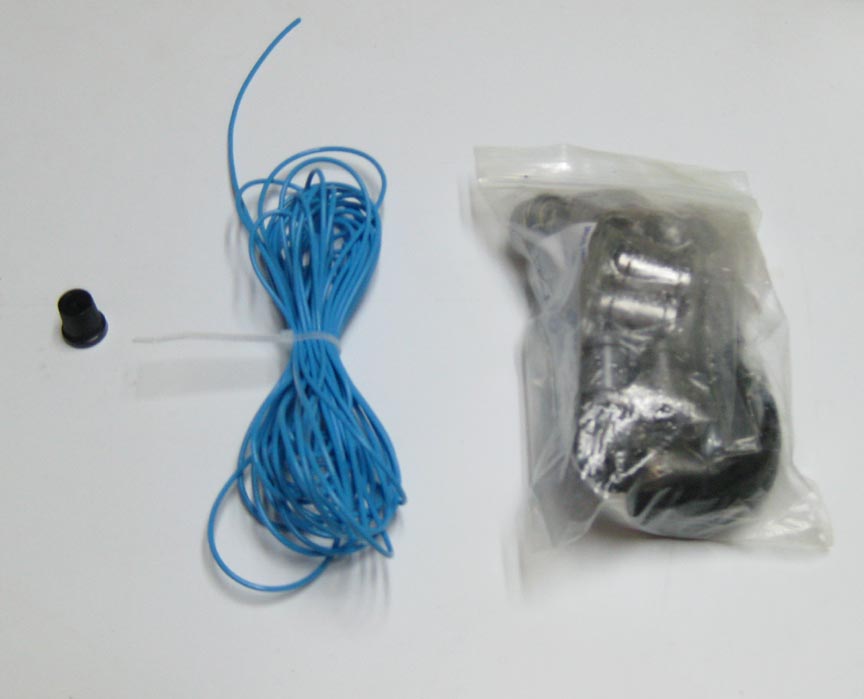
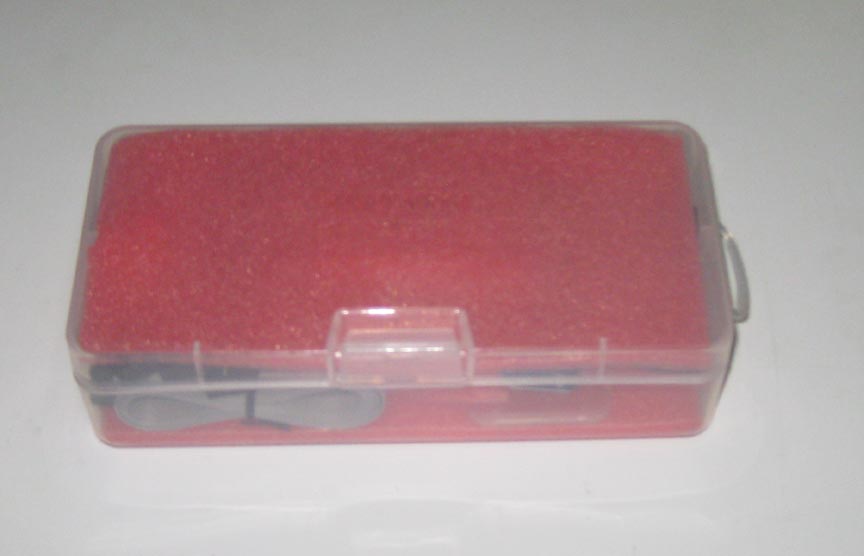
This corresponds to Createc's video:
Createc Prusa Steel i3 "Psique" video #2 - Y axis
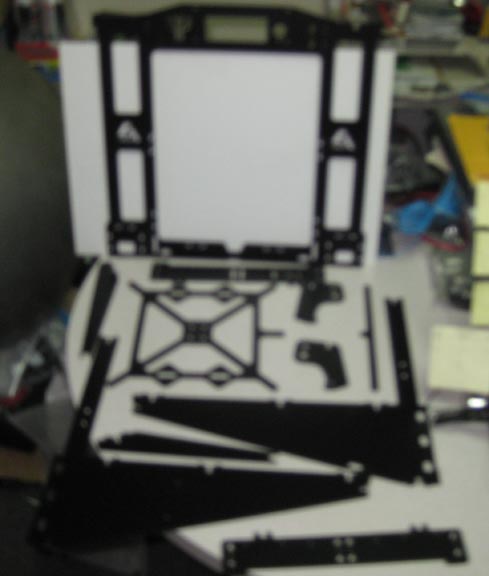
These attached pics of kit parts are slightly different from the video.
Createc Prusa Steel i3 "Psique" video #2 - Y axis
These attached pics of kit parts are slightly different from the video.
Attachments:
open | download - 1.jpg (497 KB)
open | download - 2.jpg (492.5 KB)
open | download - 3.jpg (574 KB)
open | download - 5.jpg (419.7 KB)
open | download - 6.jpg (441.1 KB)
open | download - 7.jpg (391.1 KB)
open | download - 8.jpg (568.5 KB)
open | download - 9.jpg (401.1 KB)
open | download - 10.jpg (527.7 KB)
open | download - 11small.jpg (529.1 KB)
|
Re: Steel i3 Prusa from Createc in Spain August 11, 2015 08:15AM |
Registered: 9 years ago Posts: 977 |
Thanks for the pictures.
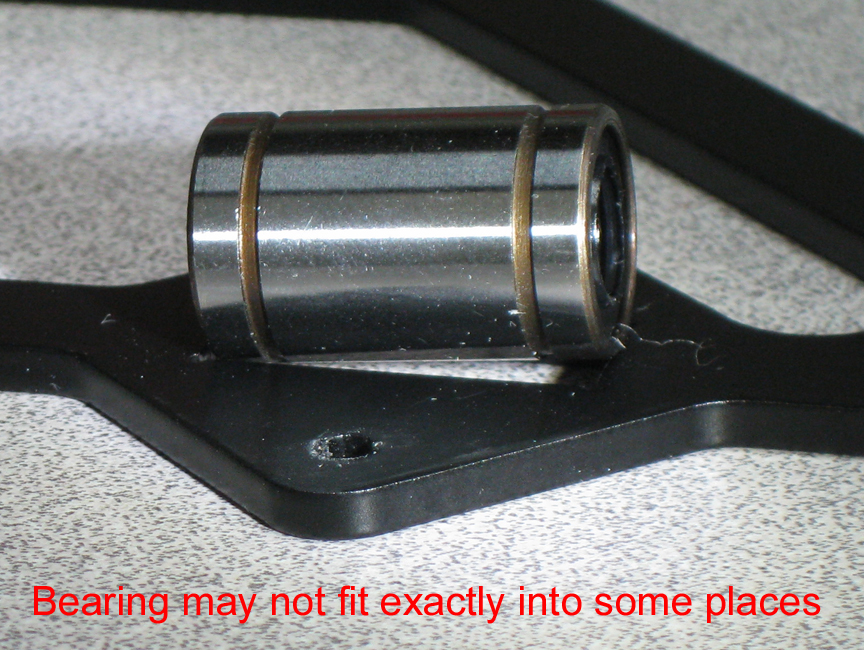
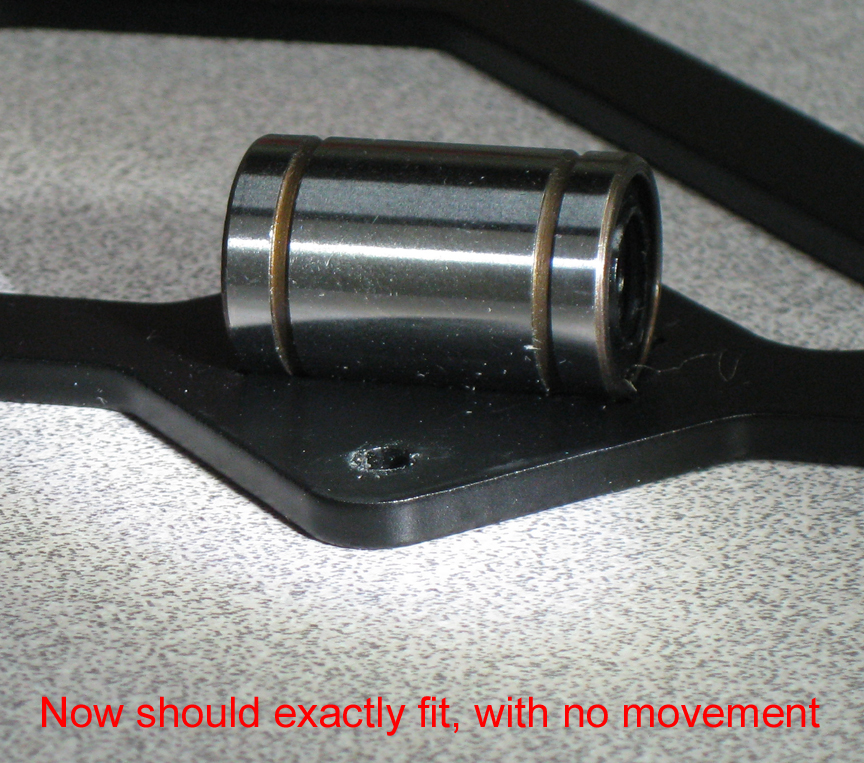
In the first picture above, you mention that some bearings do not fit. You'll probably find that this is the case with other parts too, they don't fit and will require filing until you get to the bare steel.
Note that epoxy powder coating is not really recommended for the P3Steel, for the simple reason that it is difficult to control the thickness of the paint, and as you mentioned the paint is extremely hard. So you are essentially losing all the narrow tolerances that the steel laser cutting manufacturing process allowed in the first place, and that the P3Steel was designed for originally.
This is why the P3Steel 2.5DXL is manufactured with zinc plating, with a thickness that does not affect laser cut tolerances.
|
Re: Steel i3 Prusa from Createc in Spain August 11, 2015 12:38PM |
Registered: 8 years ago Posts: 100 |
|
Re: Steel i3 Prusa from Createc in Spain August 12, 2015 12:05AM |
Registered: 10 years ago Posts: 444 |
|
Re: Steel i3 Prusa from Createc in Spain September 16, 2015 01:08AM |
Registered: 10 years ago Posts: 444 |
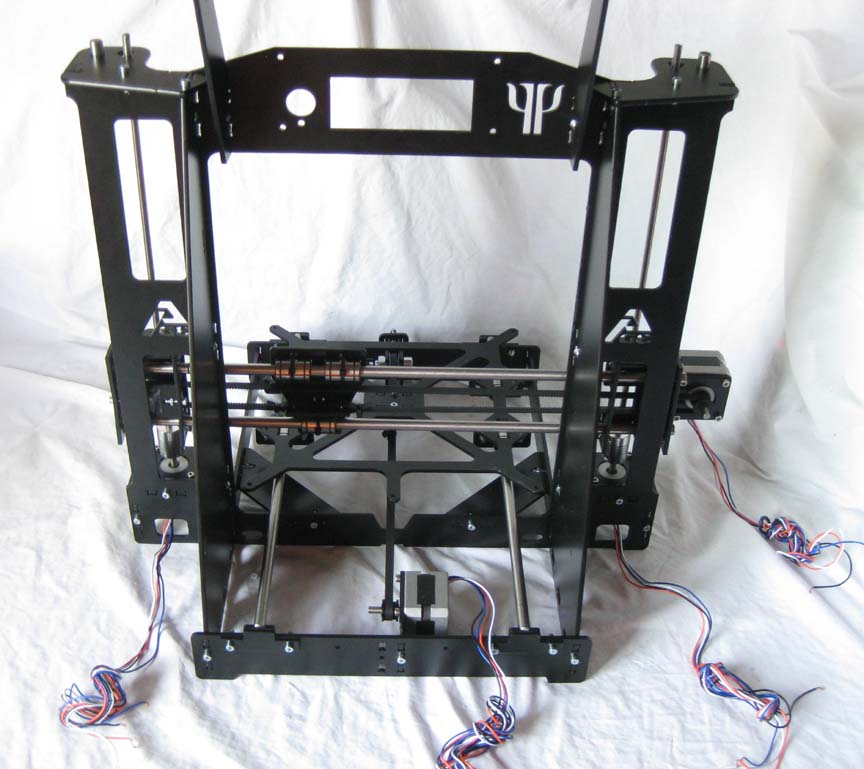
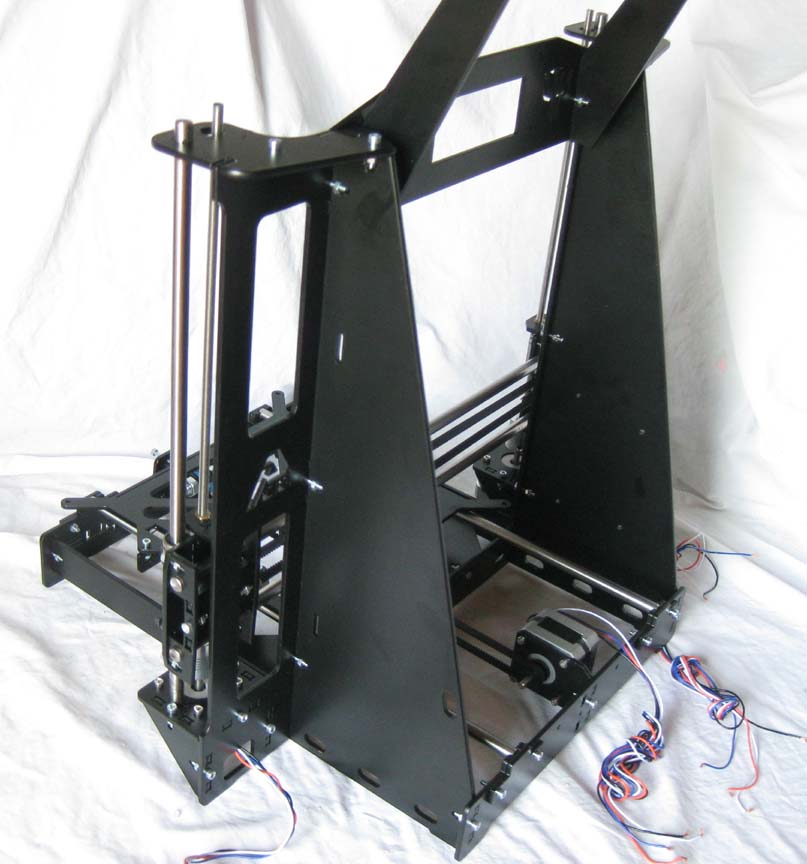
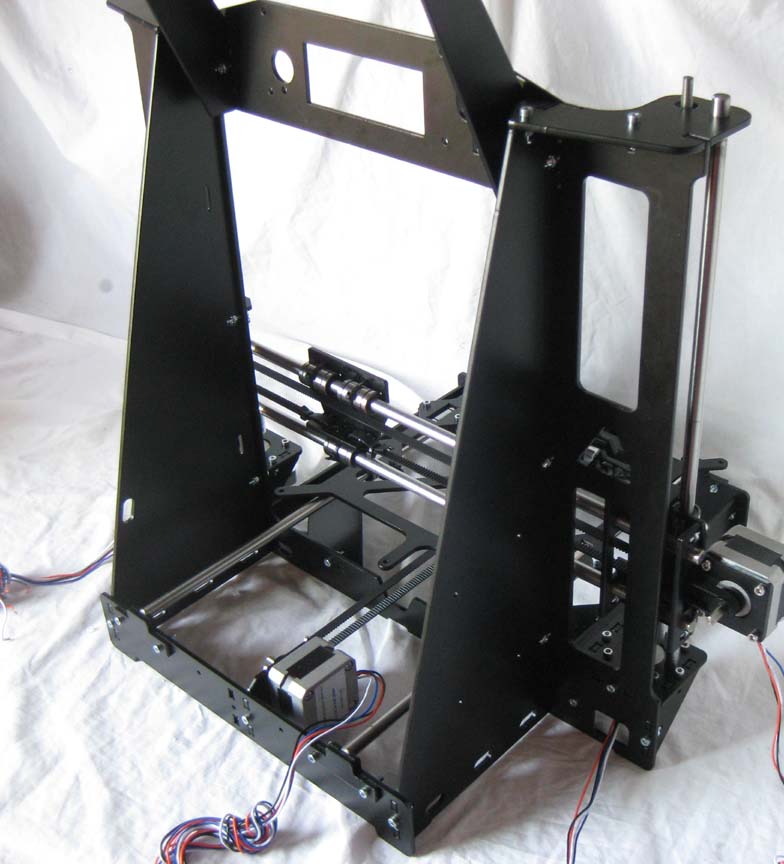
This corresponds to Createc's video for the steel X axis:
[www.youtube.com]
(don't use the video for the plastic X axis, which is video #3).
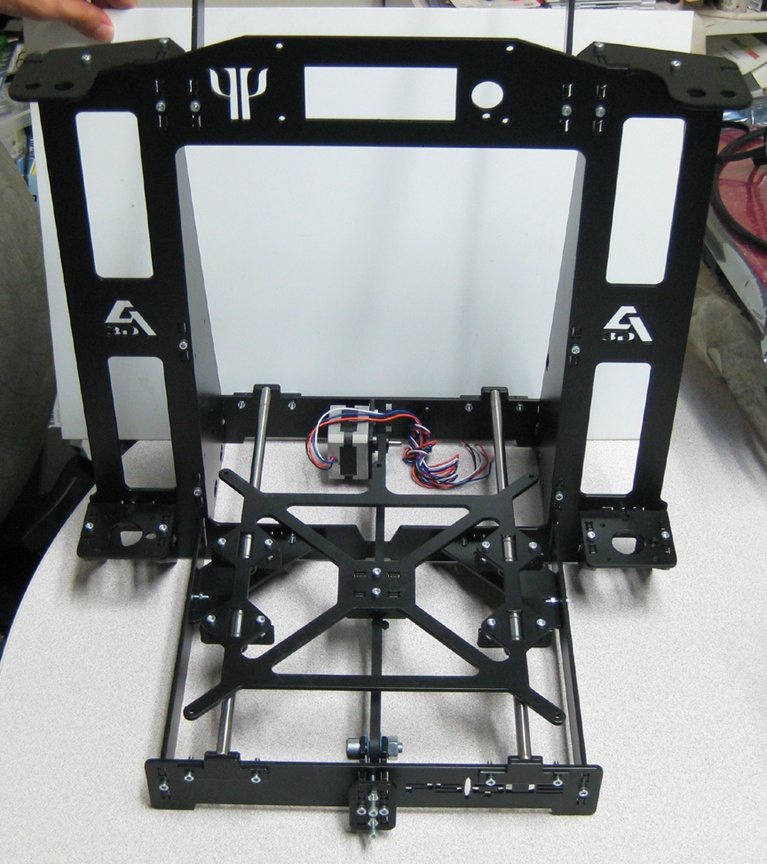
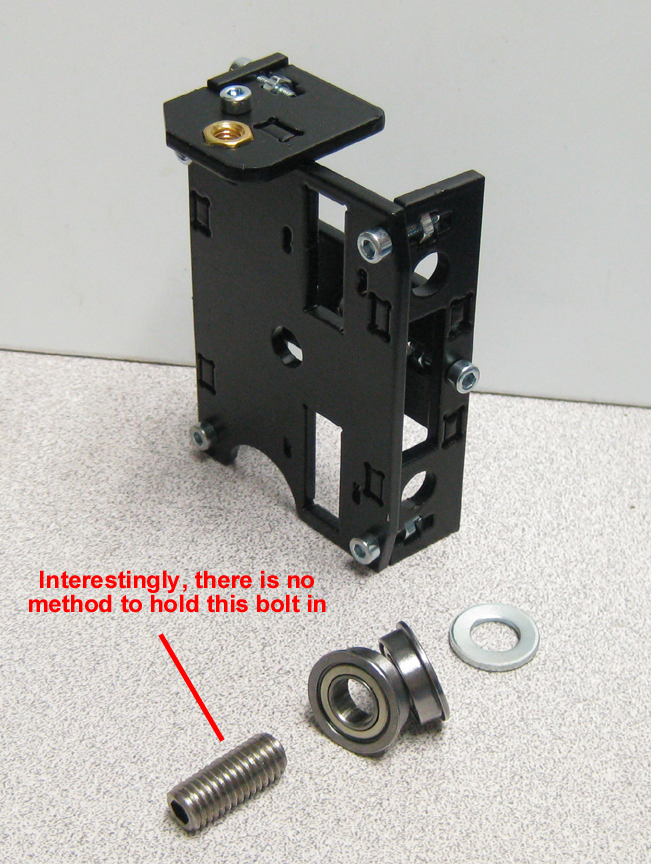
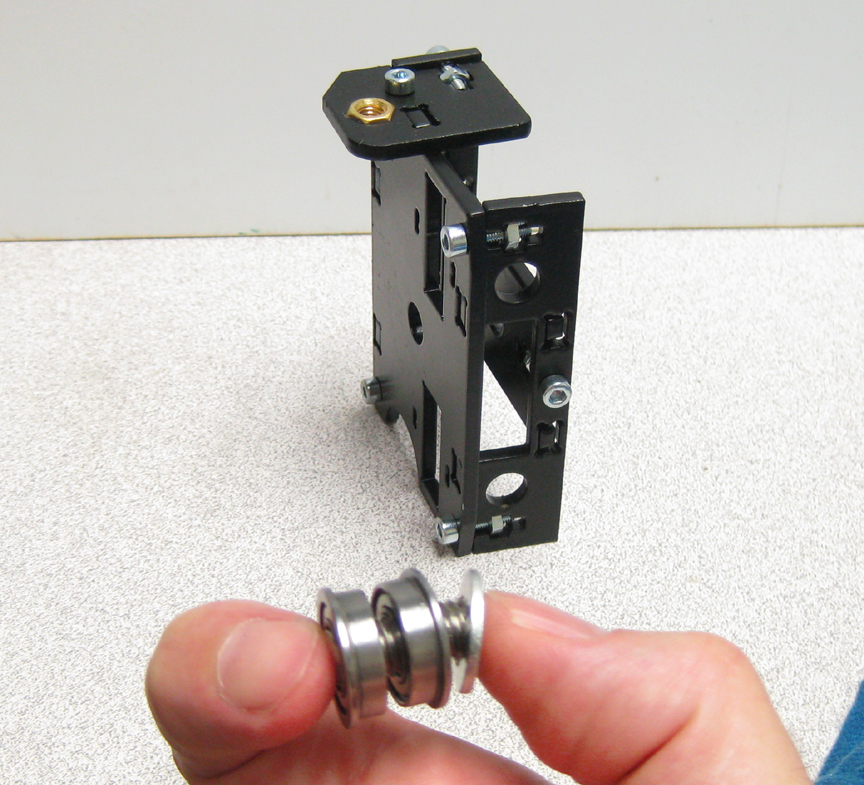
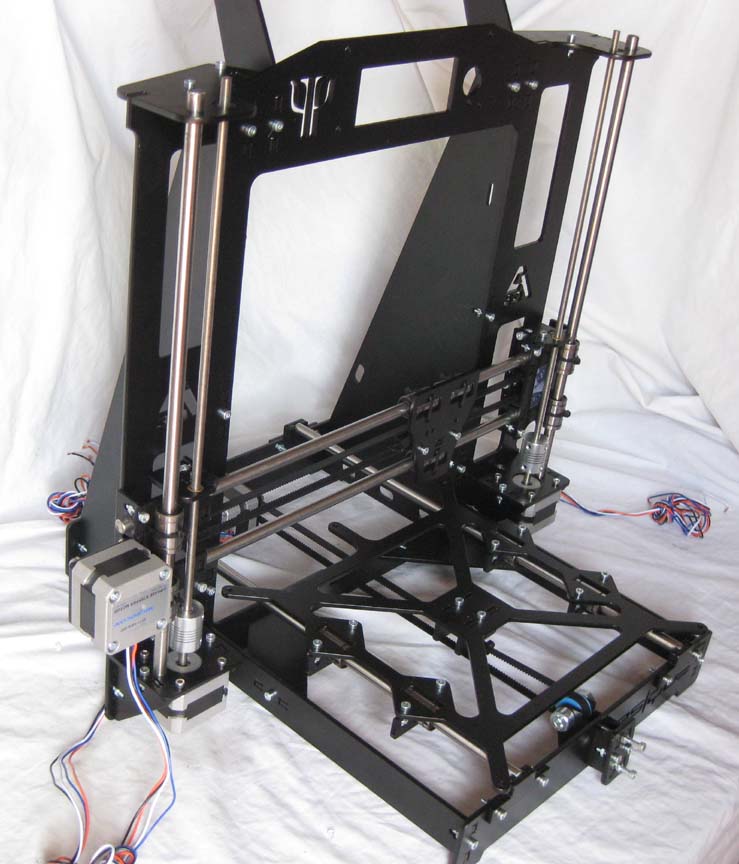
Aside from being a steel i3 (which is rare but very stable), and aside from being the only one I could find where the LCD was built into the frame, the X axis is also steel. It's the only steel i3 X axis I've seen. It is harder to assemble, and it does help if you are good with metal. But if there is any truth that key alignment parts printed in low-melting point plastic is not a stable solution, then a steel X axis should be good for many years and many mods.
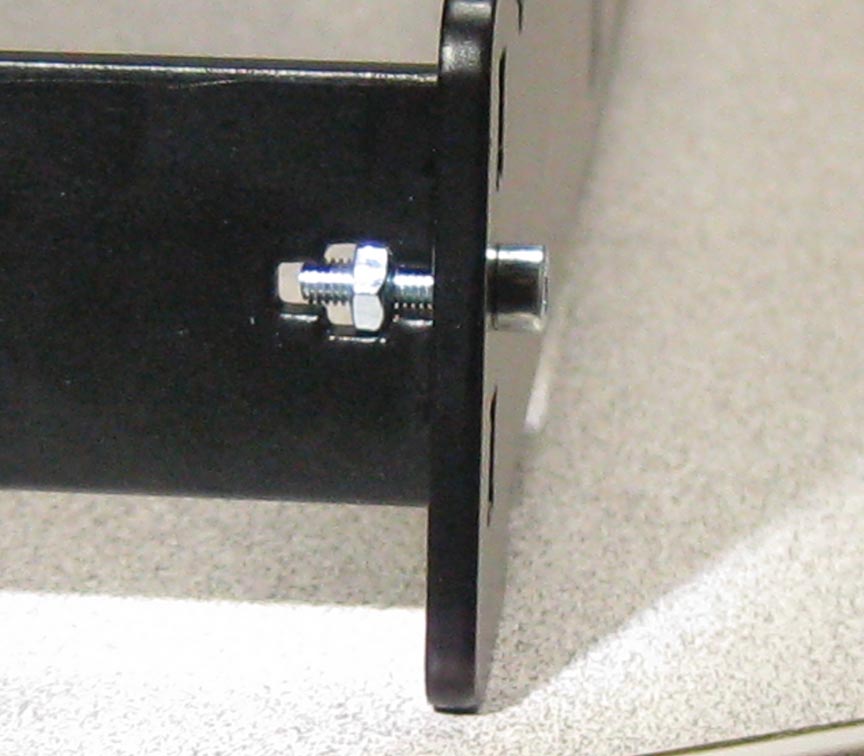
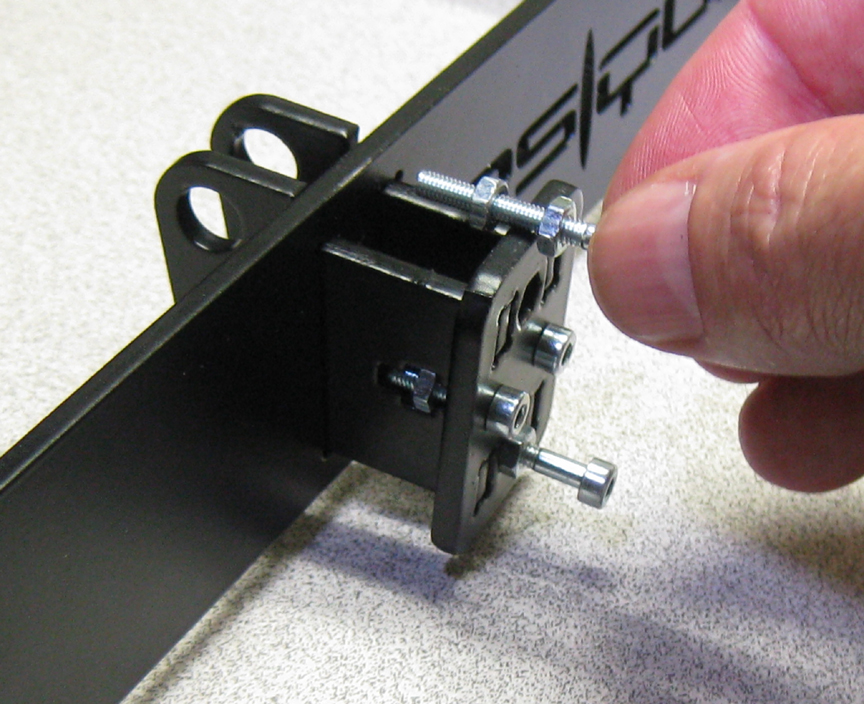
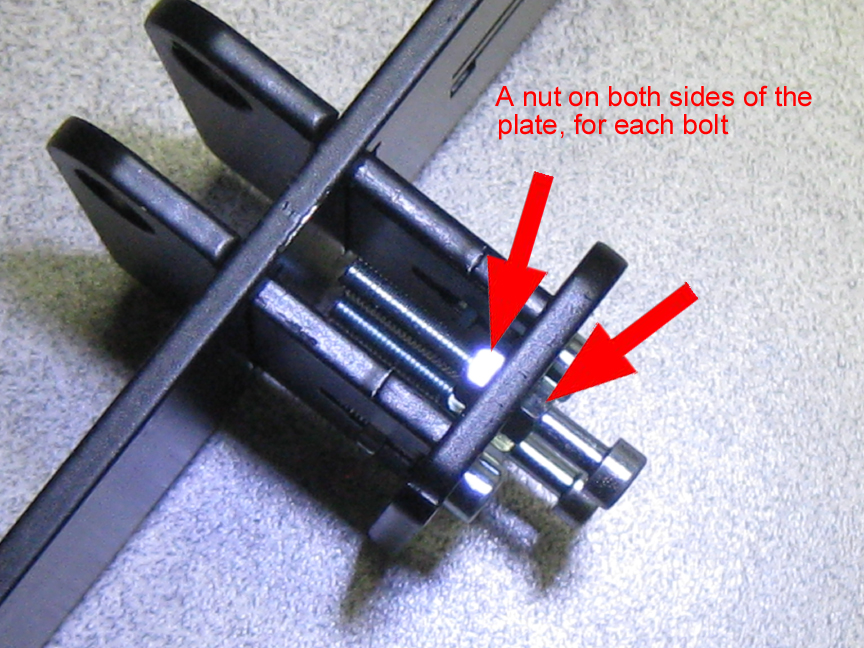
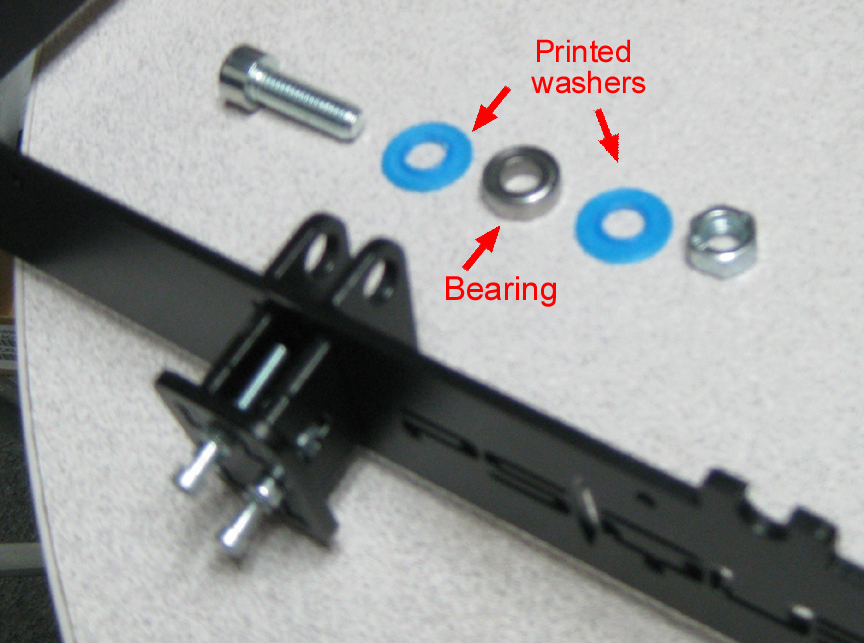
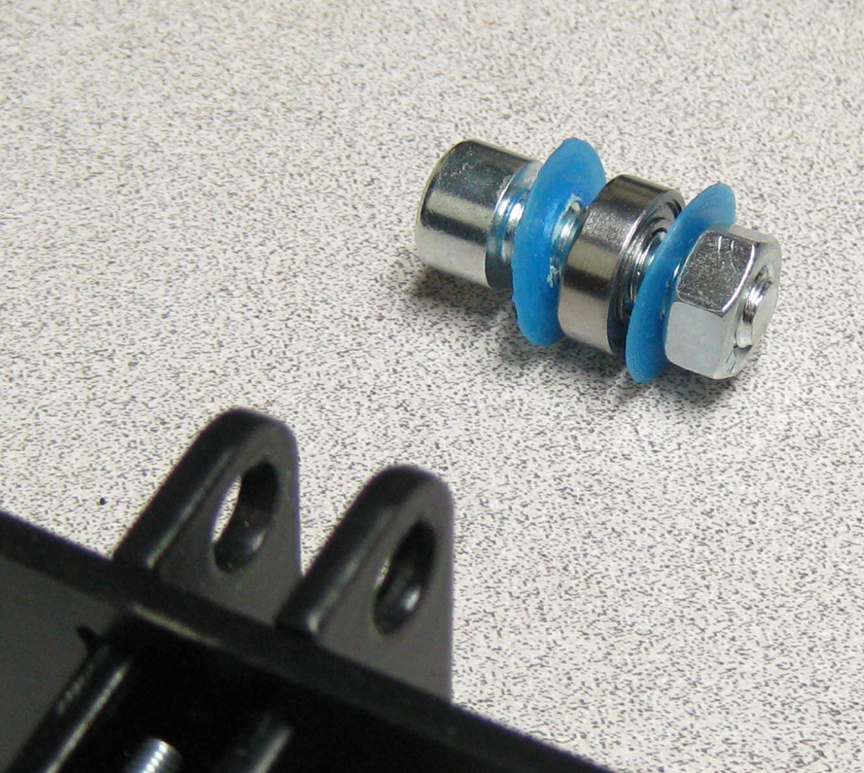
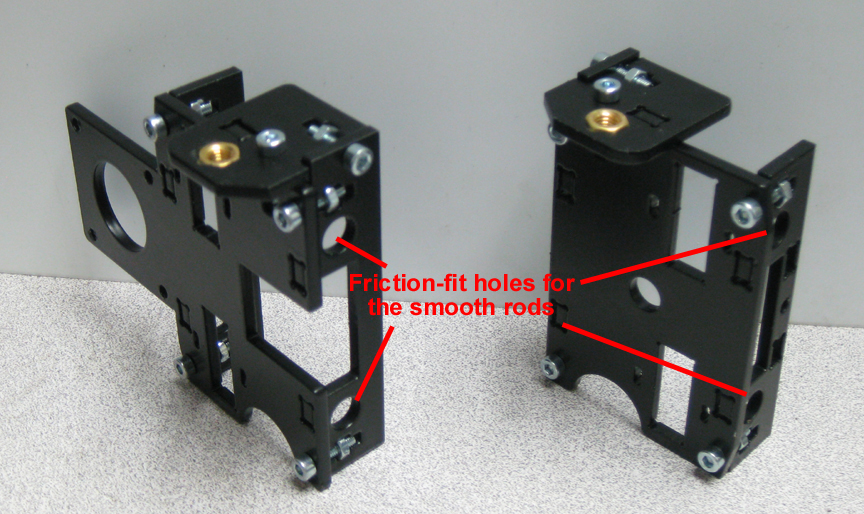
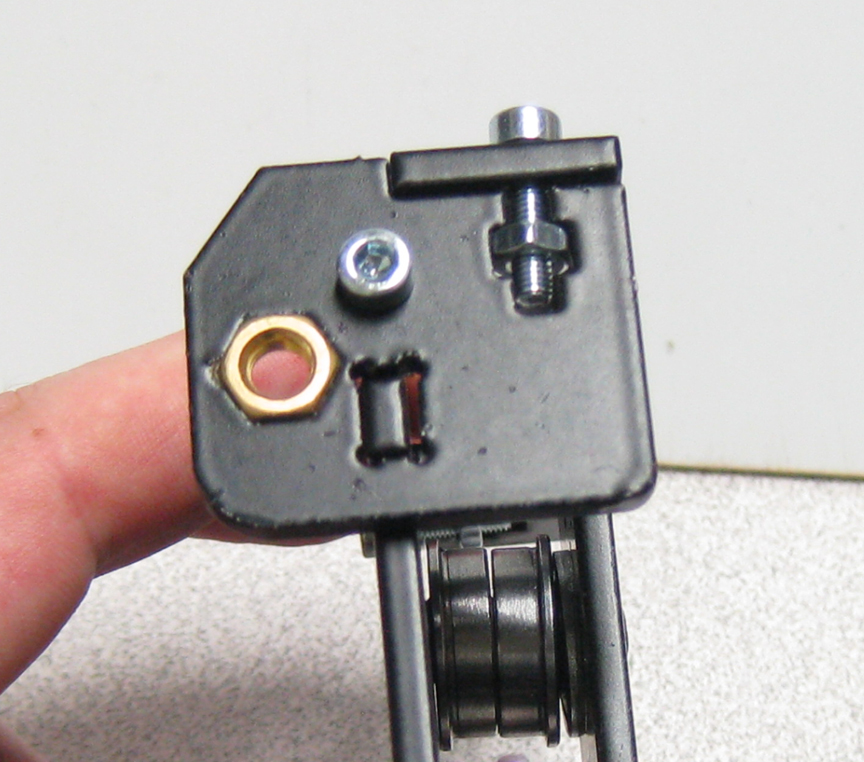
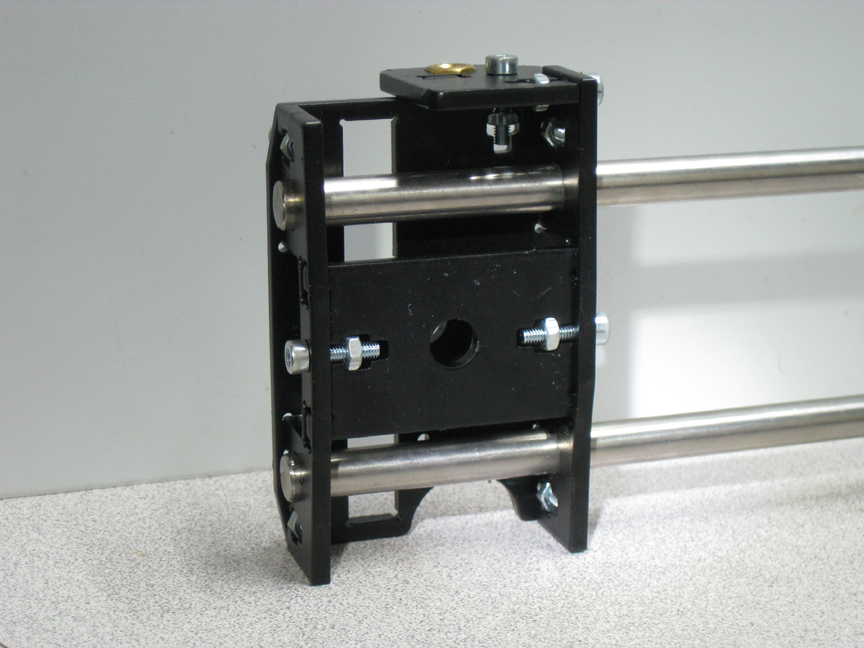
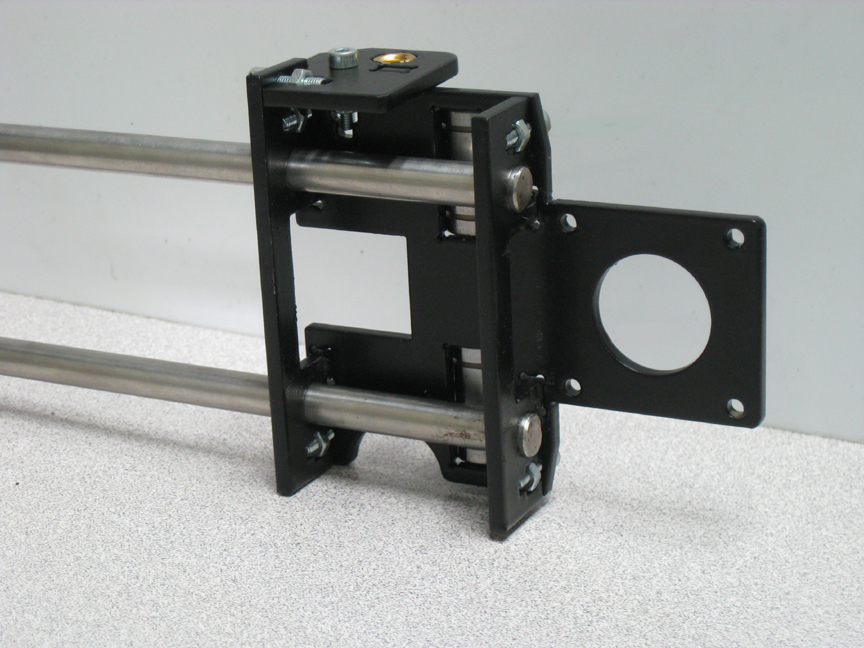
For me the X was the hardest steel part to assemble, mostly because the force you need to get the smooth rods through the friction-fit holes tends to push the friction-fit metal away (because it is not supported laterally). Meaning, the structure is meant to hold well and perform well, but not necessarily be easy to build. The force I had to use to get the rods through the holes would surely have destroyed any plastic X structure, including nylon and PC. But it's permanent, and is never going to crack, doesn't care about humidity, and has half the thermal expansion of aluminum. No powder coating has come off, either.
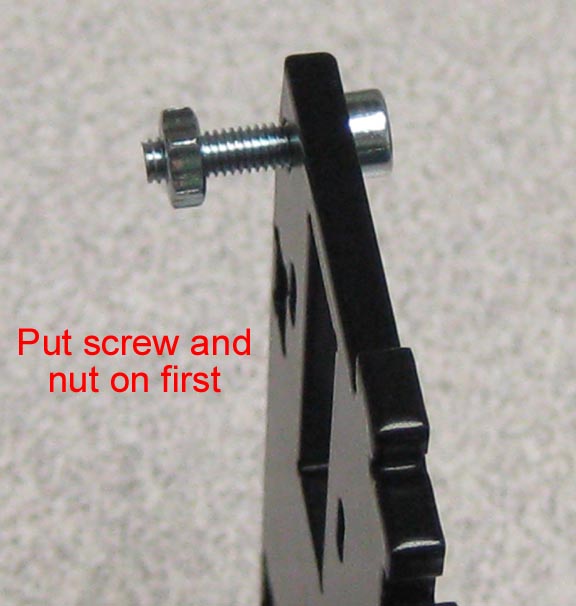
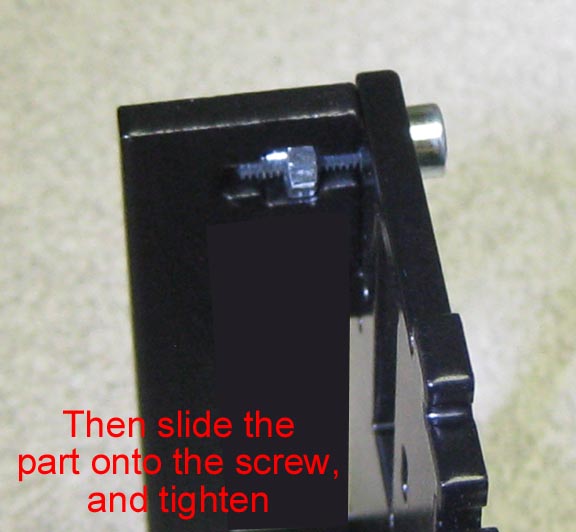
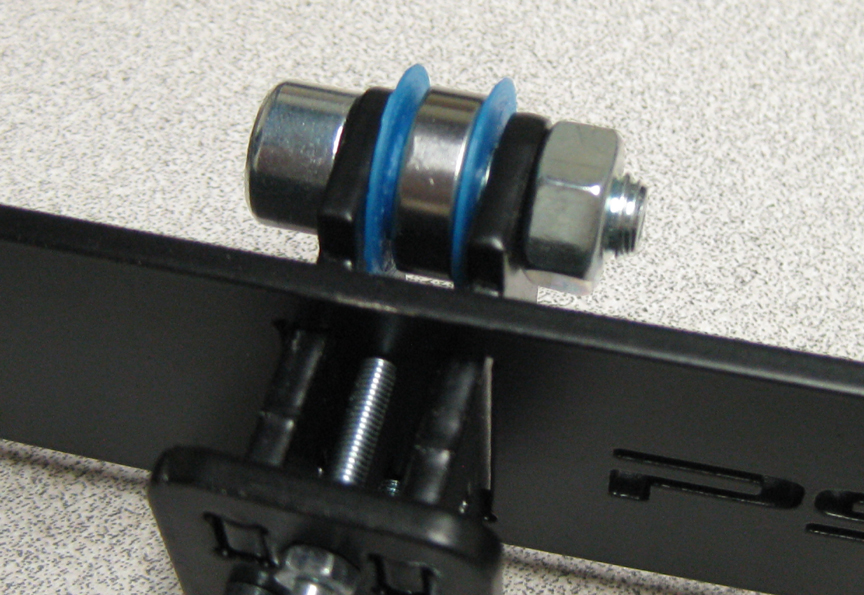
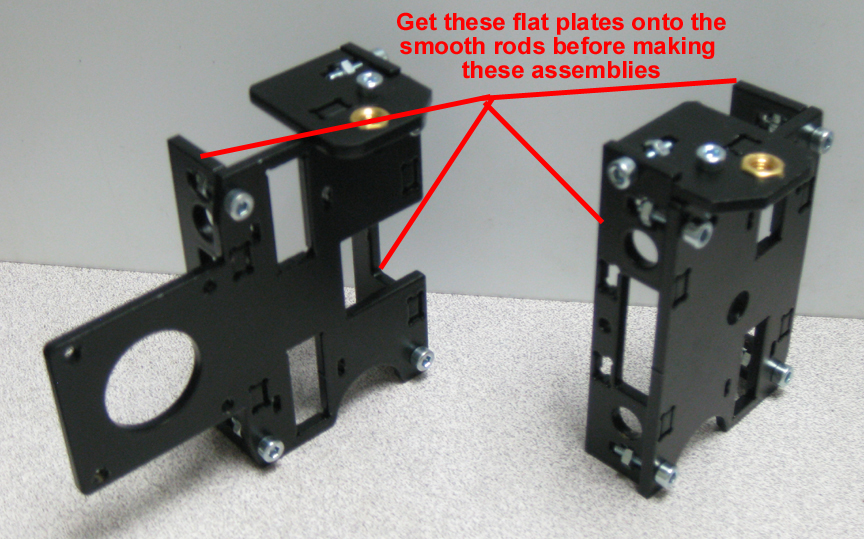
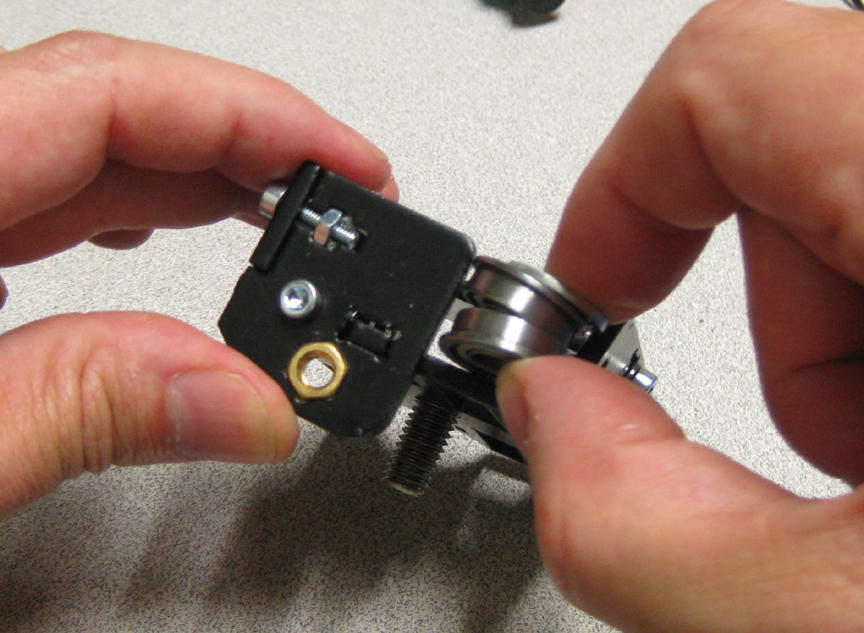
The trick I found after building it (which I'll use for the second printer) and getting the smooth rods through the holes is to not build the X assembly first and then push the rods through (like their video does). Instead, get the metal plates (with the friction-fit holes) over the rods first, and then build the X assembly. Pushing a flat metal plate (with the friction-fit hole) over the rod is relatively easy, because you can push ("hammer") the plate with a circular tool such as a large socket wrench. This applies the pressure to the plate in an even fashion, around the rod, so the plate goes down evenly. Once the plates are on the rods, the rest is easy screw-tighening.
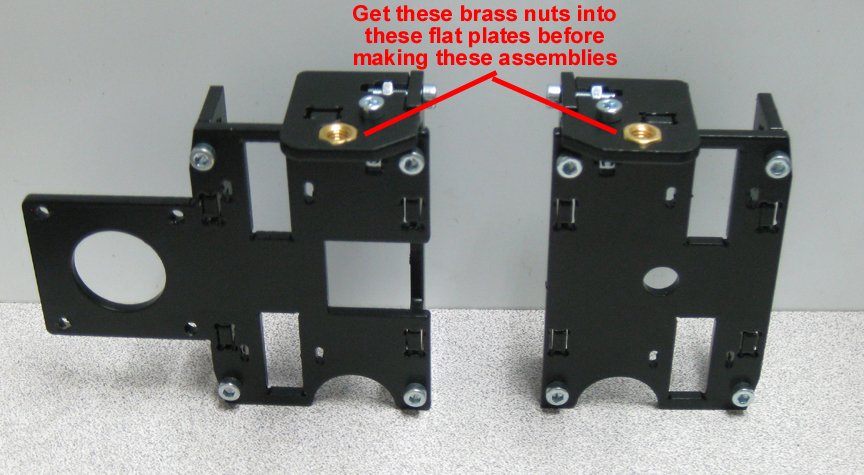
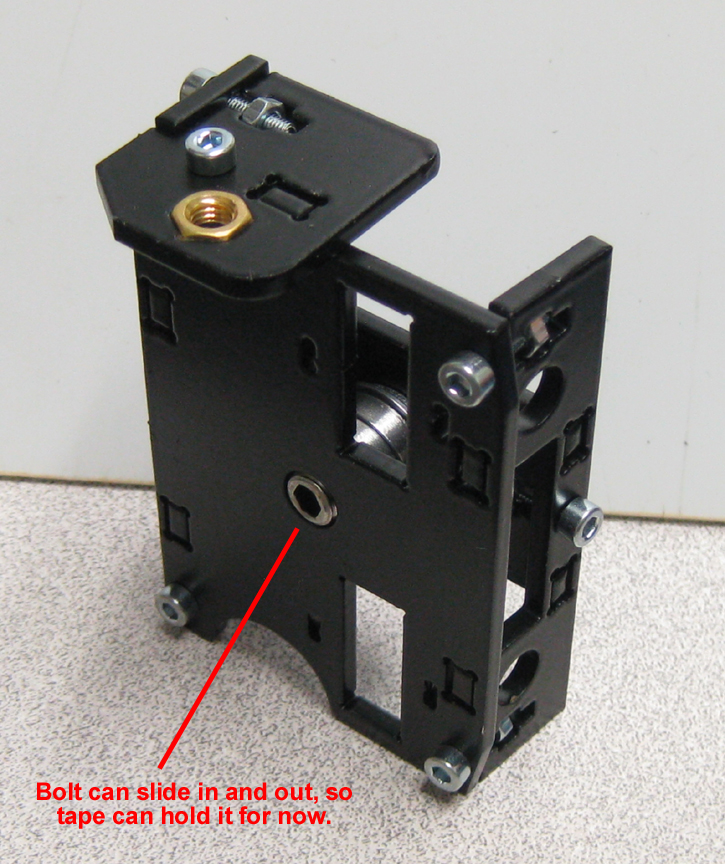
Also, the brass nuts for the Z threaded rods is a friction-fit ("hammer into place"), so it's probably best to also put those into place before putting the assembly together. And get these nuts very very straight, because any mis-alignment causes binding. Be prepared to adjust them later so that the top of the threaded rod spins without any wobble at all.
Unfortunately, I don't have pics of assembling the X the proper way, since I did it the "hard" way and built the assembly first and then tried to get the rods through. But I'll try to point out the correct way in the pics:
[www.youtube.com]
(don't use the video for the plastic X axis, which is video #3).
Aside from being a steel i3 (which is rare but very stable), and aside from being the only one I could find where the LCD was built into the frame, the X axis is also steel. It's the only steel i3 X axis I've seen. It is harder to assemble, and it does help if you are good with metal. But if there is any truth that key alignment parts printed in low-melting point plastic is not a stable solution, then a steel X axis should be good for many years and many mods.
For me the X was the hardest steel part to assemble, mostly because the force you need to get the smooth rods through the friction-fit holes tends to push the friction-fit metal away (because it is not supported laterally). Meaning, the structure is meant to hold well and perform well, but not necessarily be easy to build. The force I had to use to get the rods through the holes would surely have destroyed any plastic X structure, including nylon and PC. But it's permanent, and is never going to crack, doesn't care about humidity, and has half the thermal expansion of aluminum. No powder coating has come off, either.
The trick I found after building it (which I'll use for the second printer) and getting the smooth rods through the holes is to not build the X assembly first and then push the rods through (like their video does). Instead, get the metal plates (with the friction-fit holes) over the rods first, and then build the X assembly. Pushing a flat metal plate (with the friction-fit hole) over the rod is relatively easy, because you can push ("hammer") the plate with a circular tool such as a large socket wrench. This applies the pressure to the plate in an even fashion, around the rod, so the plate goes down evenly. Once the plates are on the rods, the rest is easy screw-tighening.
Also, the brass nuts for the Z threaded rods is a friction-fit ("hammer into place"), so it's probably best to also put those into place before putting the assembly together. And get these nuts very very straight, because any mis-alignment causes binding. Be prepared to adjust them later so that the top of the threaded rod spins without any wobble at all.
Unfortunately, I don't have pics of assembling the X the proper way, since I did it the "hard" way and built the assembly first and then tried to get the rods through. But I'll try to point out the correct way in the pics:
Attachments:
open | download - X1.jpg (370.2 KB)
open | download - X2.jpg (401.7 KB)
open | download - X3.jpg (406.3 KB)
open | download - X4.jpg (487.4 KB)
open | download - X5.jpg (499.3 KB)
open | download - X6.jpg (455.6 KB)
open | download - X7.jpg (448.7 KB)
open | download - X8.jpg (369.4 KB)
open | download - X9.jpg (405.9 KB)
open | download - X10.jpg (426.4 KB)
|
Re: Steel i3 Prusa from Createc in Spain October 08, 2015 12:54AM |
Registered: 10 years ago Posts: 444 |
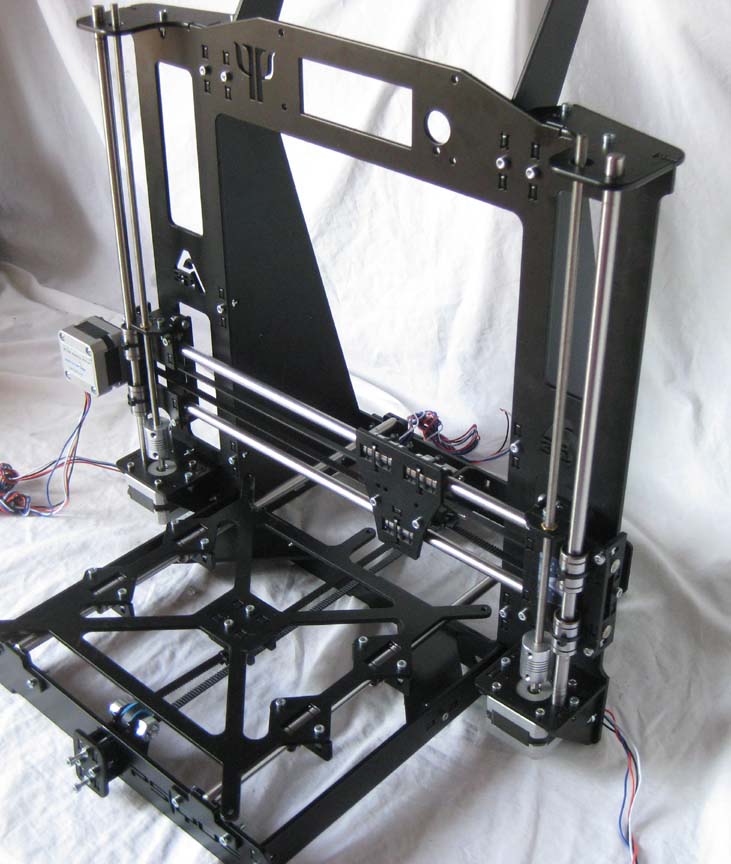
This corresponds to Createc's video for the Z axis:
[www.youtube.com]
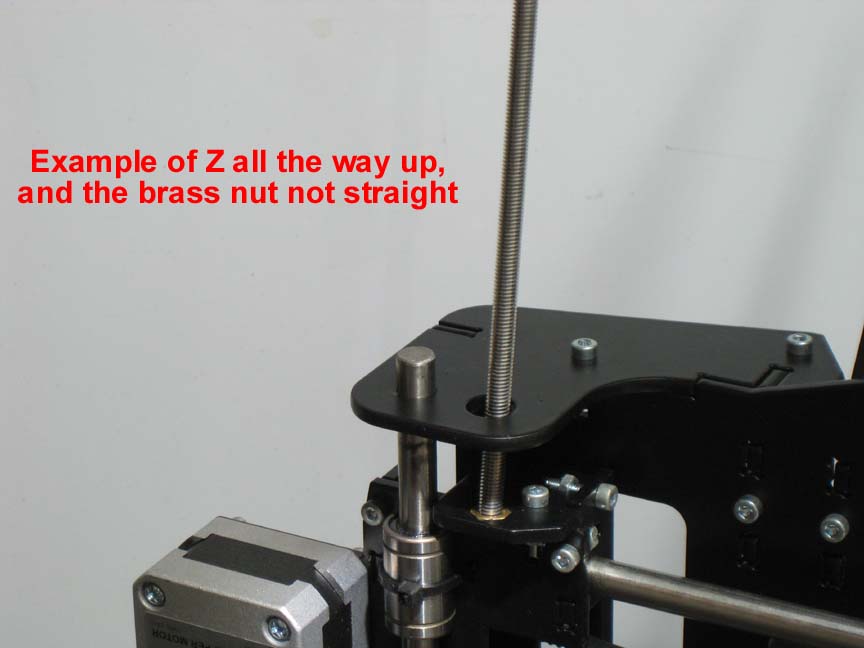
Remember you are using the black steel X pieces; not the blue plastic ones in the video. Other than that, the main thing I can stress is to be prepared to spend some time positioning the X carriage onto the X smooth rods, and the brass nut in the X carriage, so that there is absolutely no binding of the threaded rods as the Z moves up and down.
This binding comes about because of the very slight tilting of the brass nut that is press-fit into the X carriage. Although you will never have to worry about warped wood, cracked plastic, or the higher thermal expansion of aluminum, the steel X carriage is a challenge to put together without binding because there are no screw adjustments for the Z brass nut; the press-fit is permanent and non-changing. But it must be perfect, and this takes some time to adjust.
So one thing to do differently from the video is to leave the threaded rods loose for a while (not connected to the motor), and experiment with the brass nut and X carriage placement. Then connect to the motors and test the position by hand-rotating the Z motors and watching the top of the threaded rod to see if it stays in the center of the hole in the top plate. It needs to stay dead center to avoid binding.
Also, raise one of the Z sides up more than the other, and then vise versa; if they start binding at about the same tilt, this is good. However if one direction starts binding way sooner than the other direction, then that tells you the brass nut is tilted.
The brass nut should really have been put in perfectly before assembling the X carriage, but if it needs adjustment (you cannot use a hammer now) you will have to use large pliers to very slightly tilt it. Then try the threaded rod rotation test, and the vertical Z test, and the tilted Z test again. Eventually it will be smooth, and permanent, because there is nothing to warp, expand, or crack.
[www.youtube.com]
Remember you are using the black steel X pieces; not the blue plastic ones in the video. Other than that, the main thing I can stress is to be prepared to spend some time positioning the X carriage onto the X smooth rods, and the brass nut in the X carriage, so that there is absolutely no binding of the threaded rods as the Z moves up and down.
This binding comes about because of the very slight tilting of the brass nut that is press-fit into the X carriage. Although you will never have to worry about warped wood, cracked plastic, or the higher thermal expansion of aluminum, the steel X carriage is a challenge to put together without binding because there are no screw adjustments for the Z brass nut; the press-fit is permanent and non-changing. But it must be perfect, and this takes some time to adjust.
So one thing to do differently from the video is to leave the threaded rods loose for a while (not connected to the motor), and experiment with the brass nut and X carriage placement. Then connect to the motors and test the position by hand-rotating the Z motors and watching the top of the threaded rod to see if it stays in the center of the hole in the top plate. It needs to stay dead center to avoid binding.
Also, raise one of the Z sides up more than the other, and then vise versa; if they start binding at about the same tilt, this is good. However if one direction starts binding way sooner than the other direction, then that tells you the brass nut is tilted.
The brass nut should really have been put in perfectly before assembling the X carriage, but if it needs adjustment (you cannot use a hammer now) you will have to use large pliers to very slightly tilt it. Then try the threaded rod rotation test, and the vertical Z test, and the tilted Z test again. Eventually it will be smooth, and permanent, because there is nothing to warp, expand, or crack.
|
Re: Steel i3 Prusa from Createc in Spain October 23, 2015 02:26PM |
Registered: 8 years ago Posts: 72 |
|
Re: Steel i3 Prusa from Createc in Spain October 23, 2015 03:41PM |
Registered: 10 years ago Posts: 444 |
I'm ordering another one, so yes, it is working great. Waiting on new frames.
The rods are straight, power supply is strong, glass is not broken, frame is solid, and the powder coating has not come off anywhere. I chose the E3Dlite6 and it works great for PETG. Nothing was missing, and several parts had extras.
The PLA-printed extruder took a little hand-finishing before using. There were two different ones, and the narrow extruder is the one to use; I used the wide one by mistake and lost about 1" of print space on the bed. Also I'm only using 1 spring on the idler; with both springs the hobbed bolt flattened the PETG too much and it got stuck in the liner. With 1 spring, it's perfect. And of course with a Wades, you can see the wheel turn (and turn it by hand), so you know what's going on.
I think I looked at all i3's, and before that, most other desktops, for about 2 years. I'm most glad I did not get an acrylic one.
|
Re: Steel i3 Prusa from Createc in Spain October 23, 2015 06:15PM |
Registered: 8 years ago Posts: 72 |
Sorry, only registered users may post in this forum.