组装Y轴
            介绍|搭建框架|组装Y轴|组装X轴|组装Z轴|组装热床|挤出机组装|热端组装|电源|布线|调试|打印
                                多颜色/多材料|维护|故障排除|改进
目标
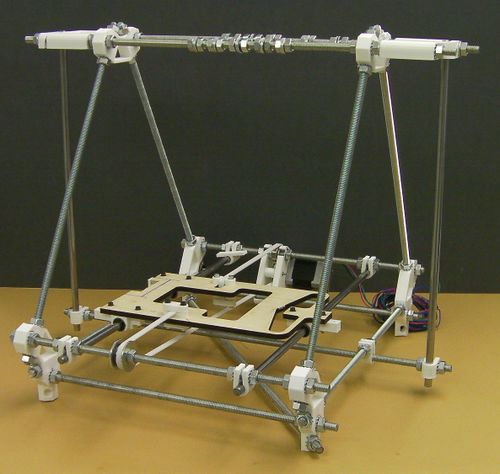
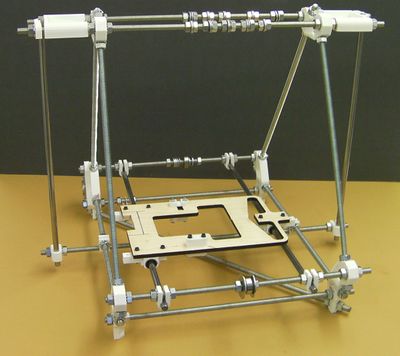
在这个阶段的最后,你的机器将会像这样:
Tools
你将使用到以下工具:
- M8 (13mm) 扳手
- 可调节扳手
- M3 内六角扳手
- M3 六角固定螺丝
- M3 扳手
- 尖嘴钳
- 侧铣刀
第一步:Y电机安装
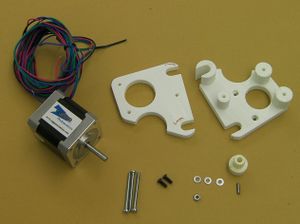
| |
| 物品 | 数量 |
| 打印的Y电机箱(底座) | 1 |
| 打印的Y电机盖 | 1 |
| Nema 17 电机 (如下) | 1 |
| M3 x 35mm 螺丝 | 3 |
| M3 x 10mm 固定螺丝 | 1 |
| M3 螺母 | 1 |
| M3 x 8mm 螺丝 | 2 |
| M3 垫圈 | 3 |
| 模压齿滑轮 | 1 |
套件中包含4个Nema17电机和一个Nema14电机,小的那个是用来驱动挤出机的。
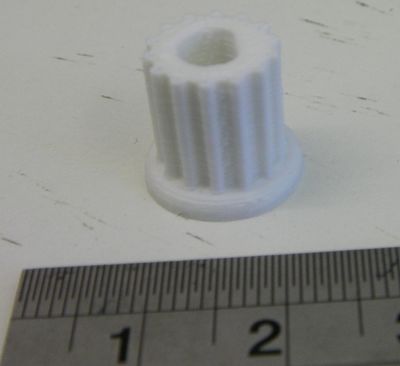
后面的Mendel版本套件中的打印齿滑轮如下图:
这可以很简单的和电机轴连接,具体如下
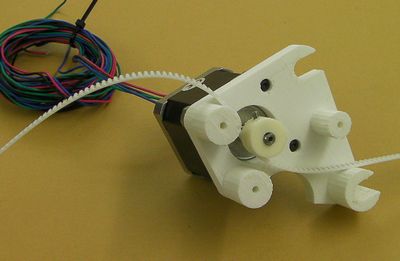
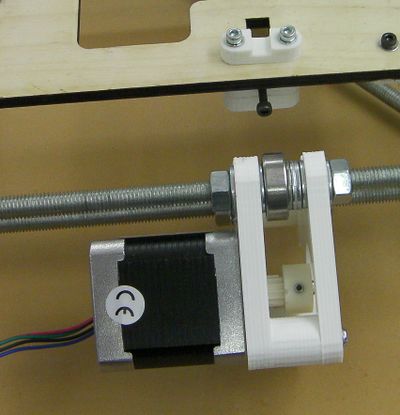
使用两个短的螺丝把它安装在电机上,大约插入电机轴的一半左右:
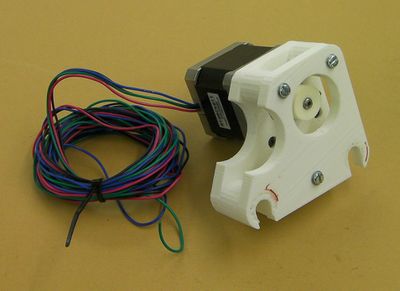
线从电机底部出来,如图所示。
If you have a moulded pulley, screw the set screw into the toothed-belt pulley. Take care not to cross the threads - the plastic is not hard. Screw it in far enough to project into the hole down the middle, then back it off so it is no longer projecting. Blow any displaced pieces of plastic from the central hole. Put the pulley on the motor shaft with its hub outermost, as shown. Use the toothed belt to get it roughly the right distance along the shaft. Align the set screw with the flat on the shaft, and tighten it. Do not over tighten it - the pulley has an internal embedded nut, and over tightening will cause this to fracture the pulley.
If you have a printed pulley push it onto the shaft. It should be a tight fit, and you may have to tap it into place. Use a soft hammer, or a wood block. If you place a tube against the pulley that will fit over the motor shaft (or an M8 nut works well), you can tap the end of the tube to place the pulley. Support the motor shaft, not the motor body, from the other end as you tap. You can secure the pulley with a drop of superglue if you like (make sure the shaft is completely free of grease). Take care that no glue gets near the shaft's entry to the motor.
Use the remaining screws, washers and nut to attach the other half of the mount cage. There is a recess for the nut, which should be a tight fit. Take care when tightening to pull the nut into its recess that the hexagon of the nut is aligned with the hexagonal recess.
Step: 2 The Y frog
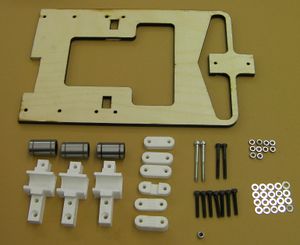
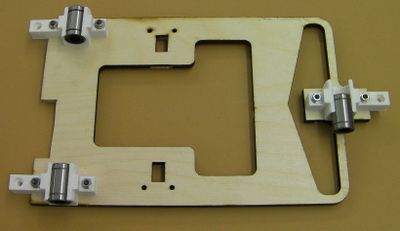
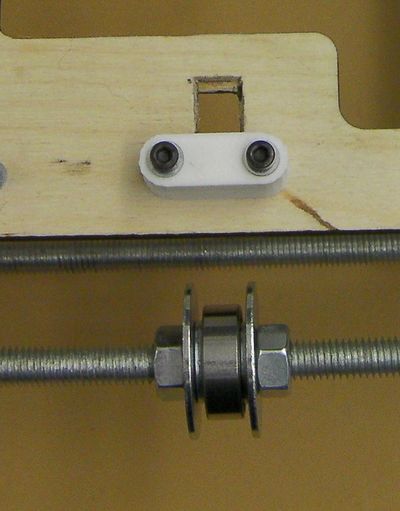
Attach the bearing holders to the lasercut part with 20mm screws, nuts and washers (2 washers per screw, one on each side). Later versions of Mendel come with a Y-frog that doesn't have the cut-out on the left in the picture below. The Y-frog is otherwise symmetrical, so you can swap top and bottom, it makes no difference. Don't tighten the nuts:
Push the bearings into the bearing holders from the side as shown on the right. Do not try to clip them in from on top. The bearings should be a snug fit. But if they are a bit lose, simply wrap a little Kapton tape two or three times round the lose bearing. Get it flat without wrinkles or bubbles.
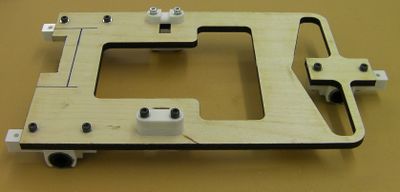
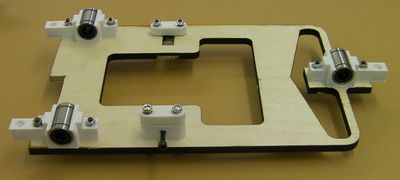
Attach the belt holders:
The far one in the picture uses the 40mm screws. From the top the order is:
- Belt guide (curved part towards you in the picture).
- Lasercut frog
- Tensioner (hexagonal cavity towards you in the picture; grip end pattern downwards).
- 7mm thick clamp
The near one in the picture uses the 35mm screws. From the top the order is:
- 7mm thick clamp.
- 4mm thick grip (grip on top).
- Lasercut frog
- 7mm thick clamp (just for load spreading).
Here is a view from underneath to reveal some of the hidden detail:
Fit the nylock nut in the hexagonal hole in the tensioner, and loosely put the remaining screw in it. This screw will tension the belt by pushing on it.
Now to fit the frog to the machine:
With the front of the machine facing you, slacken the right-hand nuts only that hold the U clamps with the smooth Y rods. (If you leave the left-hand nuts alone you will be able to re-tighten the rods in exactly the same place - so make sure they don't turn.)
Slide the rods towards the back of the machine. Slide the Y frog over them, using a gentle twisting motion to insert the rods into bearings while watching the opposite end of each bearing to make sure none of its balls get pushed out of their tracks. If they do, they can be reseated by pressing them back into the track with the tip of a chopstick. As a precaution, cover the area under the frame with a tissue to catch any balls that might fall out.
Replace the rods in their U clamps and re-tighten the right-hand nuts on those.
Tighten the M3 screws and nuts that attach the bearing holders to the frog.
Check that the frog slides completely freely back and forth. If it is tight at one end and lose at the other, then the rods aren't parallel. If it is tight at both ends and lose in the middle, then the rods are too close or too far apart. In both cases, measure the rod gap (which should be 175 mm from before - remember the lasercut measuring template) at both ends and in the middle, and get things right by adjusting the right-hand rod only.
Step 3: The Y belt
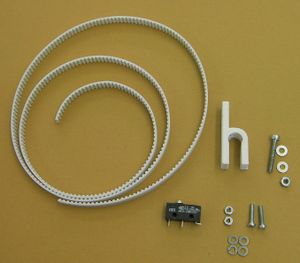
| |
| Item | Quantity |
| Toothed belt | see below |
| Printed XY endstop holder | 1 |
| microswitch | 1 |
| M2.5x16mm screws | 2 |
| M2.5 washers | 4 |
| M2.5 nuts | 2 |
| M3x20mm screw | 1 |
| M3 washers | 2 |
| M3 nuts | 1 |
Note that the X and Y axis endstop holders are identical, and you want one of those. The Z endstop holder has a longer leg.
Use the full length of toothed belt with your kit to fit this together. You will cut it to the right length when you have finished this step.
Bend the lead on the microswitch as shown in the picture above.
Fit the Y motor and mount:
Adjust its position so that the middle of the bearing is opposite the belt-tensioning screw on the frog. You will find that for this and the idler below you can put your eye level with the frog and line up the middle of the bearings with the belt guide on the frog.
Tighten the four M8 nuts that hold the Y motor mount, taking care that the distance from the left-hand top and bottom nuts to the corresponding nuts on the frame vertices are the same.
Tighten the Y-belt idler:
Line the bearing up to match the belt clamp on the frog.
If you have done everything right so far, the belt tensioner on the frog should be towards the back of the machine.
Put one end of the belt between the bottom clamp on the tensioner and the tensioner part with the nylock nut in. Have the free length of the belt pointing towards the front of the machine. Position the belt so that its teeth lock with the indentations in the tensioner. You should be able to feel this as you move the belt.
Run the belt up through the hole in the frog, and fold it back in the groove in the belt guide. Get the belt square and central in the guide and clamp, then tighten the M3 screws and nuts that retain it. These need to be tight, but not so tight that they bend the clamp.
Run the belt over the bearing above the motor, round the motor's drive pulley, under the frog to the front of the machine, over the idler pulley, and back to the clamp on the front of the frog.
Thread the belt through the front clamp, get everything square, and pull the belt so there is no slack. It doesn't need to be taught.
Tighten the clamp.
Check the toothed drive pulley on the motor - it needs to be positioned so that the belt runs over the centre of the bearing. Slacken its set screw and move it if need be.
Cut off any spare belt with sidecutters - leave about 20mm free sticking out of the far side of the clamp.
Set the belt tension with the tensioning screw. The belt needs to be taught, but no so taught that it impedes the turning of the motor. Be gentle...
Check that the frog still moves freely front and back in the machine - there should be a certain resistance from the magnets in the motor, that is all.
Also check that the belt runs true. It should not tend to move from side to side more than 1mm or so. If it drifts (and especially if it rubs against edges and so becomes hard to move) then adjust the front bearing left or right to get the belt running square over that. You can move the motor left and right too, but it is often more effective to slacken its nuts and to tilt it very slightly relative to the threaded bars by not having the bars at the very bottom of the U-shaped slots in the motor's carrying frame. Then re-tighten the nuts.
Cut the off the excess belt - the remainder will be used to make the X axis. Leave 10mm or so sticking out of the clamps at either end.
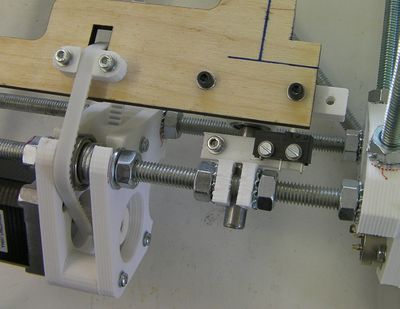
Finally, attach the endstop microswitch to the h-shaped printed bracket with the M2.5 screws, washers and nuts. Attach the bracket to the frame at the back beside the motor:
Use the M3 screw, two washers, and nut to secure it. Before tightening these, make sure that the frog hits the button on the switch at the end of its travel.
