|
How to fix an aluminium X-arm-kit with an unwanted groove December 31, 2015 12:17PM |
Registered: 9 years ago Posts: 1,699 |
Hello,
I had two problems with my Ormerod 1. The first problem is that my x-carriage broke. The second problem is a big groove at my X-arm-kit from DaveK which is in use by many users here. So I decided to show you how to fix this problem and you can also see this as a little warning: How to prevent this.
For me it is important to say here that you can blame nobody for anything. It is just an accident which can happen under bad circumstances. The only person you may blame is yourself as there are two mounting problems which causes them. I am not sure if you need both, but at me it were probably both problems.
For your information this is only suitable for X-carriages up to version 528.4. Sorry for the picture quality but at the moment it is very dark here as it is raining the hole day and I had to use artificial light.
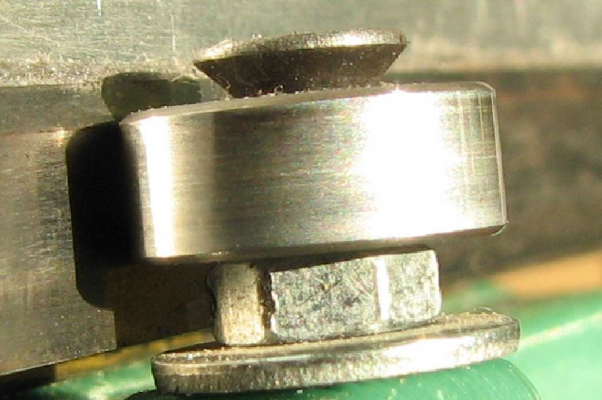
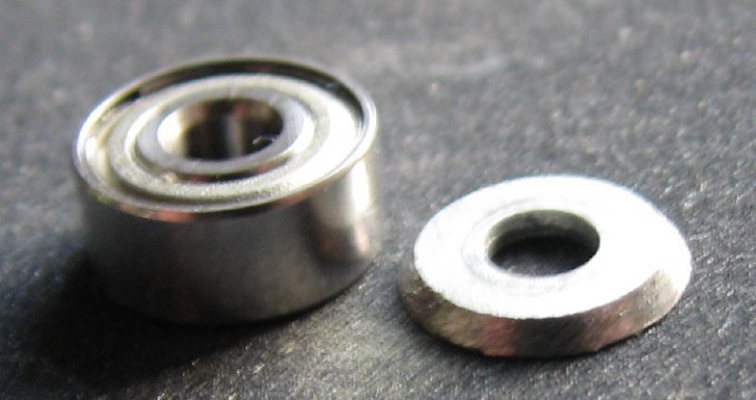
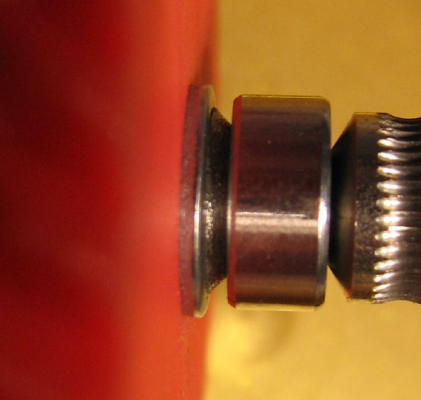
The problem is caused by the bearing of the X-carriage. One problem is that it is a little bit too small and it may be not aligned to the running surface so the contact area is only the edge of the bearing. So it is like a knife as aluminium is weaker than stainless steel. The second problem is the washer between the bearing and the x-carriage. Especially if you use the original bearing MR93ZZ it is important that the totally flat side of the washer is heading to the X-carriage. Otherwise it is most probably that the bearing will be blocked and cannot run freely. So an unaligned and/ or blocked bearing causes the problem.
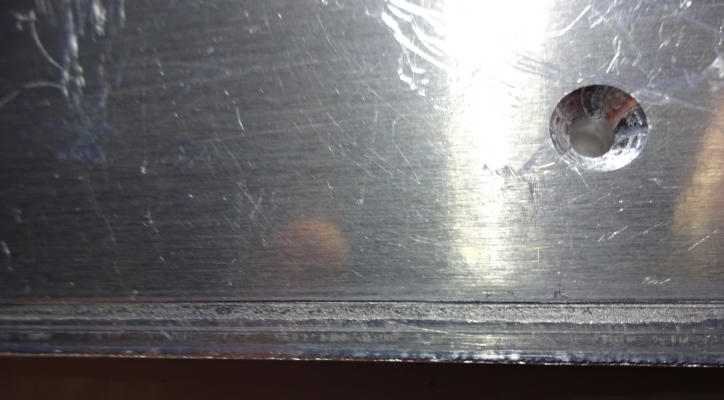
If you wait too long like me it looks something like this:
So what do you need?
You will need some super glue suitable fur metal especially Aluminium and a metal shim. This shim should be made of stainless steel and it should be about 250mm long and a maximum width of about 12.5mm. You will later see why as I had a width of 13mm. You will also needs some sort of clamping tools and the normal mounting tools as well as cleaning tools.
At this point the normal Disclaimer:
This is a how-to for use if you really know what you do. I am not responsible if you, your printer or something else get harmed or damaged directly or indirectly in any way. Super glue is not a toy and can cause seriously damage to your skin. Unless you really know what you are doing you should not use it. Please read carefully all information that belongs to your super glue. I am not responsible if you glue yourself to anything or if you glue anything to anything else and you cannot get rid of the connection or you damage something while getting rid of the connection.
I decided to buy a metal lineal. It was 300mm long and unfortunately 13mm wide.
So I cleaned it to get rid of the rest of the label and cut it to 260mm. My intention was to get the cut underneath the Aluminium extrusion to get it out of sight.
Unfortunately you will have to disassemble the complete X-arm to get the piece solely (sorry no picture her)
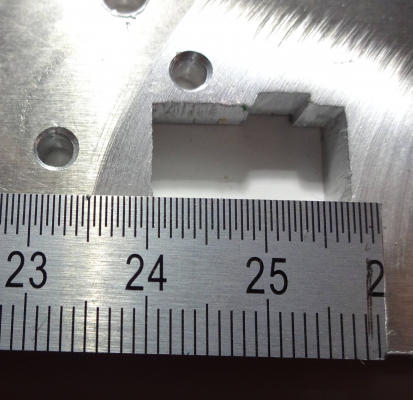
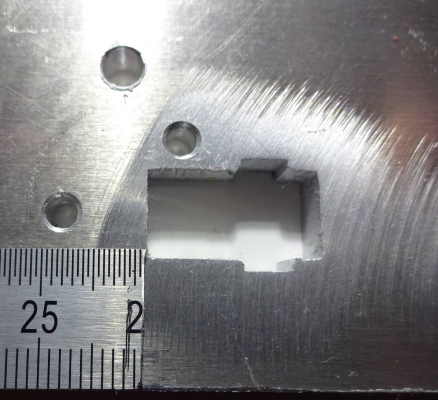
The decision to cut the lineal to 260mm was a big mistake as it would block the z-runner mounting hole:
But simply cutting it to 240mm would also not work as you may see at the groove that the bearing is running a little bit underneath the z-runner-mount:
Before getting any further I was considering which side I should use.
This one:
Or this one:
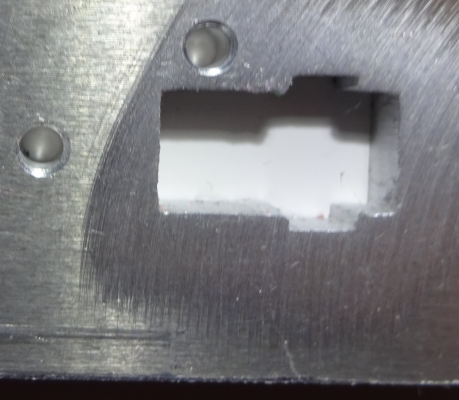
Just kidding. The scale would be more than a problem: It would showing in the wrong direction or it would be upside down. There would be an offset and the scale itself is graved into the metal so it would be at least increasing the running noise and I am not sure if this would not affect the print negatively. So I decided to cut the lineal to 250mm and made a cut-out between 240mm and 250mm. not perfectly as I did it by hand. The result:
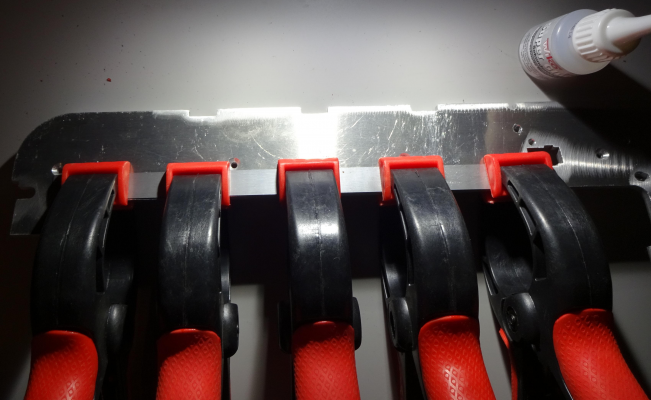
Clean both parts intensively. Attach the super glue and align your shim with the bottom side of your X-arm. The front should be aligned with the end of the area which goes down. See the picture above. After aligning the shim (be careful as the glue prevents very fast to align the shim any further and also watch out for your hand and clothes) you should remove any glue coming out of the connection. After that you should add the clamping tools. Beware if there is any rest of glue the clamping tools may get stuck at the X-arm!
Please make sure you use enough clamps so the shim is getting even at the X-arm. I may have used one more clamp, but I would not have thought that I would need such a distance. okay the front is only for optical reason.
So now you have to wait until the glue got really dried. I hope that everything is good at my part. Next year I will now more.
I hope this instruction may be of use for one or another person here in the forum.
Best regards,
Sven
Slicer: Simplify3D 4.0; sometimes CraftWare 1.14 or Cura 2.7
Delta with Duet-WiFi, FW: 1.20.1RC2; mini-sensor board by dc42 for auto-leveling
Ormerod common modifications: Mini-sensor board by dc42, aluminum X-arm, 0.4 mm nozzle E3D like, 2nd fan, Z stepper nut M5 x 15, Herringbone gears, Z-axis bearing at top, spring loaded extruder with pneumatic fitting, Y belt axis tensioner
Ormerod 2: FW: 1.19-dc42 on Duet-WiFi. own build, modifications: GT2-belts, silicone heat-bed, different motors and so on. Printed parts: bed support, (PSU holder) and Y-feet.
Ormerod 1: FW: 1.15c-dc42 on 1k Duet-Board. Modifications: Aluminium bed-support, (nearly) all parts reprinted in PLA/ ABS, and so on.
|
Re: How to fix an aluminium X-arm-kit with an unwanted groove December 31, 2015 02:45PM |
Registered: 8 years ago Posts: 23 |
|
Re: How to fix an aluminium X-arm-kit with an unwanted groove December 31, 2015 03:01PM |
Registered: 9 years ago Posts: 1,699 |
I considered that, but the most delivered X-arm kits were not intended for this use and so the bottom side of the X-arm were not precise and even enough for this. As far as I know there was a change in production to allow this. It may have worked with my X-arm, but I still would have had trouble with the accuracy. Maybe you got a newer one but my bottom side is really rough.
Slicer: Simplify3D 4.0; sometimes CraftWare 1.14 or Cura 2.7
Delta with Duet-WiFi, FW: 1.20.1RC2; mini-sensor board by dc42 for auto-leveling
Ormerod common modifications: Mini-sensor board by dc42, aluminum X-arm, 0.4 mm nozzle E3D like, 2nd fan, Z stepper nut M5 x 15, Herringbone gears, Z-axis bearing at top, spring loaded extruder with pneumatic fitting, Y belt axis tensioner
Ormerod 2: FW: 1.19-dc42 on Duet-WiFi. own build, modifications: GT2-belts, silicone heat-bed, different motors and so on. Printed parts: bed support, (PSU holder) and Y-feet.
Ormerod 1: FW: 1.15c-dc42 on 1k Duet-Board. Modifications: Aluminium bed-support, (nearly) all parts reprinted in PLA/ ABS, and so on.
|
Re: How to fix an aluminium X-arm-kit with an unwanted groove January 01, 2016 09:44AM |
Registered: 10 years ago Posts: 1,230 |
Nice Howto and great pictures!
Yes, Darathy's picture is a good example of how it should look
[forums.reprap.org]
Yes that is important and might clear the outer ring of the bearing but the original washers is quite thin (0.6mm) and if you tighten the screw too much might "sink" into the soft plastic, bend up and block the bearing
For the x-runner I used a more solid 1.0mm washer with a drilled out 3mm nut on top to clear the bearing, this will make the bearing sit a bit higher so to clear the extruder I use a lower sitting counter sunk screw
Another option would be to modify (grind) a 1.0mm washer to clear the outer ring as I did for the extruder
Yes, because of that I prefer the slower drying glue
Erik
Quote
Treito
The problem is caused by the bearing of the X-carriage. One problem is that it is a little bit too small and it may be not aligned to the running surface so the contact area is only the edge of the bearing. So it is like a knife as aluminium is weaker than stainless steel.
Yes, Darathy's picture is a good example of how it should look
[forums.reprap.org]
Quote
The second problem is the washer between the bearing and the x-carriage. Especially if you use the original bearing MR93ZZ it is important that the totally flat side of the washer is heading to the X-carriage
Yes that is important and might clear the outer ring of the bearing but the original washers is quite thin (0.6mm) and if you tighten the screw too much might "sink" into the soft plastic, bend up and block the bearing
For the x-runner I used a more solid 1.0mm washer with a drilled out 3mm nut on top to clear the bearing, this will make the bearing sit a bit higher so to clear the extruder I use a lower sitting counter sunk screw
Another option would be to modify (grind) a 1.0mm washer to clear the outer ring as I did for the extruder
Quote
be careful as the glue prevents very fast to align the shim any further and..
Yes, because of that I prefer the slower drying glue
Erik
|
Re: How to fix an aluminium X-arm-kit with an unwanted groove January 01, 2016 10:08AM |
Registered: 9 years ago Posts: 1,699 |
The problem with the slower drying glue is that it is more liquid as far as I know so it is much more complicated to handle. This glue stayed at the place where I put it on. It is of middle liquidity. The other one I have is really liquid and so it runs to everywhere especially where you cannot need it.
Probably I will use the old bearing as distance holder. The old bearing is slightly damaged.
And I am sorry, but at the picture from Darathy I cannot locate anything.
Regarding your Extruder: There are also other gears at Thingiverse which offers such a grind. I hope I can assemble the X-arm tomorrow. I first have to printout a new spool holder as mine broke yesterday. It was only a test so I go back to the proven design even though it has some disadvantages, but in sum it is working very well.
Slicer: Simplify3D 4.0; sometimes CraftWare 1.14 or Cura 2.7
Delta with Duet-WiFi, FW: 1.20.1RC2; mini-sensor board by dc42 for auto-leveling
Ormerod common modifications: Mini-sensor board by dc42, aluminum X-arm, 0.4 mm nozzle E3D like, 2nd fan, Z stepper nut M5 x 15, Herringbone gears, Z-axis bearing at top, spring loaded extruder with pneumatic fitting, Y belt axis tensioner
Ormerod 2: FW: 1.19-dc42 on Duet-WiFi. own build, modifications: GT2-belts, silicone heat-bed, different motors and so on. Printed parts: bed support, (PSU holder) and Y-feet.
Ormerod 1: FW: 1.15c-dc42 on 1k Duet-Board. Modifications: Aluminium bed-support, (nearly) all parts reprinted in PLA/ ABS, and so on.
|
Re: How to fix an aluminium X-arm-kit with an unwanted groove January 01, 2016 10:34AM |
Registered: 9 years ago Posts: 638 |
i used epoxy and put as thin as i could and put cloth clipers through all the lenght and it still pushed quite a bit of glue out. I did put a strip of painters tape to the lenght but i should have removed it before the glue cured.
Edited 1 time(s). Last edit at 01/01/2016 10:55AM by Darathy.
Edited 1 time(s). Last edit at 01/01/2016 10:55AM by Darathy.
|
Re: How to fix an aluminium X-arm-kit with an unwanted groove January 01, 2016 10:47AM |
Registered: 10 years ago Posts: 1,230 |
|
Re: How to fix an aluminium X-arm-kit with an unwanted groove January 01, 2016 11:01AM |
Registered: 10 years ago Posts: 1,230 |
Quote
Darathy
i used epoxy and put as thin as i could and put cloth clipers through all the lenght and it still pushed quite a bit of glue out.
yes, the glue coming out all around the perimeter is the downside of making sure enough was applied - like ketchup running down your sleeve while eating a hotdog :-)
Erik
|
Re: How to fix an aluminium X-arm-kit with an unwanted groove January 01, 2016 11:12AM |
Registered: 9 years ago Posts: 1,699 |
Okay thanks Erik. Using the old X-carriage it was not possible to achieve that. I hope that the new printout will be better.
To be honest it was my intention that some glue would get out of the shim. In this way I was sure that the glue was spread throughout the shim without the danger to get glue on my hands or at unwanted areas.
Slicer: Simplify3D 4.0; sometimes CraftWare 1.14 or Cura 2.7
Delta with Duet-WiFi, FW: 1.20.1RC2; mini-sensor board by dc42 for auto-leveling
Ormerod common modifications: Mini-sensor board by dc42, aluminum X-arm, 0.4 mm nozzle E3D like, 2nd fan, Z stepper nut M5 x 15, Herringbone gears, Z-axis bearing at top, spring loaded extruder with pneumatic fitting, Y belt axis tensioner
Ormerod 2: FW: 1.19-dc42 on Duet-WiFi. own build, modifications: GT2-belts, silicone heat-bed, different motors and so on. Printed parts: bed support, (PSU holder) and Y-feet.
Ormerod 1: FW: 1.15c-dc42 on 1k Duet-Board. Modifications: Aluminium bed-support, (nearly) all parts reprinted in PLA/ ABS, and so on.
Sorry, only registered users may post in this forum.
