Hello a little heatbed/Y-Carriage issue.
Posted by Jarva
|
Hello a little heatbed/Y-Carriage issue. October 18, 2015 10:19PM |
Registered: 8 years ago Posts: 11 |
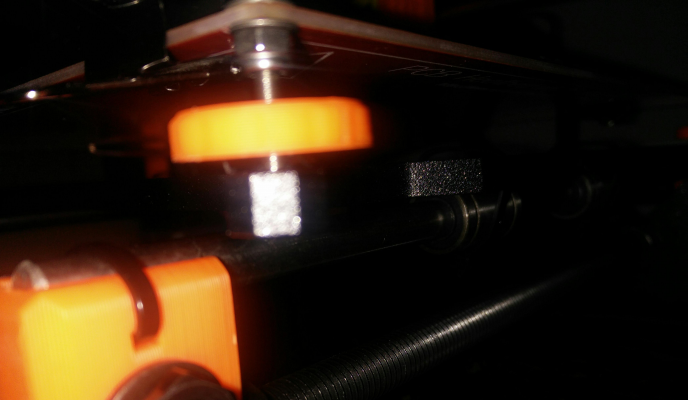
Hello RepRap Members I finally fully assembled my Prusa i3 Kit from Josef Prusa. Only issue is the Heatbed isnt sitting in the carriage correctly(Not flat against the adjustment nut). Due to this I cant calibrate/level the print bed. This problem applies to all four corners.
Here is a picture of the setup with the heatbed and carriage.
Any of you guys/girls ever faced this problem/situation? Any Tips/help is appreciated
Edited 3 time(s). Last edit at 10/19/2015 12:06AM by Jarva.
Currently own a Original Prusa I3 Kit by Josef Prusa.
Currently Working on (Leveling Heating bed) 10/18/15
Future Plans: Get Octoprint running and maybe print another reprap.
|
Re: Hello a little heatbed/Y-Carriage issue. October 18, 2015 11:01PM |
Registered: 9 years ago Posts: 182 |
|
Re: Hello a little heatbed/Y-Carriage issue. October 18, 2015 11:16PM |
Registered: 8 years ago Posts: 11 |
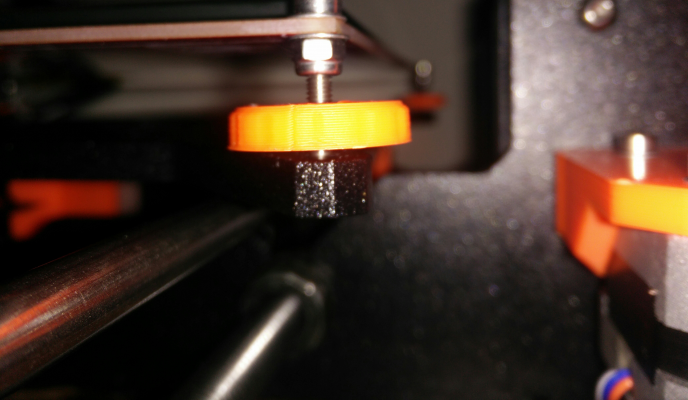
This kit never included any springs for the heatbed. I followed all instructions from here. The main issue is that the screw doesnt slide all the way down into the carraige leaving a gap of 1-5mm between the carriage and adjustment nylon nut(Orange Part).
Here is another picture hopefully could help you guys identify the issue. I think its because of the flex the pcb heatbed has causes the screw to have a slight angle instead of being straight.
Edited 1 time(s). Last edit at 10/18/2015 11:16PM by Jarva.
Here is another picture hopefully could help you guys identify the issue. I think its because of the flex the pcb heatbed has causes the screw to have a slight angle instead of being straight.
Edited 1 time(s). Last edit at 10/18/2015 11:16PM by Jarva.
|
Re: Hello a little heatbed/Y-Carriage issue. October 18, 2015 11:22PM |
Registered: 8 years ago Posts: 338 |
Quote
Jarva
This kit never included any springs for the heatbed. I followed all instructions from here. The main issue is that the screw doesnt slide all the way down into the carraige leaving a gap of 1-5mm between the carriage and adjustment nylon nut(Orange Part).
Here is another picture hopefully could help you guys identify the issue. I think its because of the flex the pcb heatbed has causes the screw to have a slight angle instead of being straight.
you need some springs, for leveling.
|
Re: Hello a little heatbed/Y-Carriage issue. October 18, 2015 11:27PM |
Registered: 8 years ago Posts: 11 |
Quote
Qdeathstar
you need some springs, for leveling.
Where would the spring be placed and also what spring is recommended for a M3x18 Screw?
Thank you Q and gmckee for the advice/help.
Currently own a Original Prusa I3 Kit by Josef Prusa.
Currently Working on (Leveling Heating bed) 10/18/15
Future Plans: Get Octoprint running and maybe print another reprap.
|
Re: Hello a little heatbed/Y-Carriage issue. October 19, 2015 12:08AM |
Registered: 9 years ago Posts: 476 |
I think a spring from any cheap pen would do, but I doubt its strengths. Can refer to mine here [imgur.com] and just ignore those sketches, it was meant to be on other thread.
As for mine, I replaced the orange rosette to this thing here [www.thingiverse.com] so that I don't have to use 2 hand to screw it
As for mine, I replaced the orange rosette to this thing here [www.thingiverse.com] so that I don't have to use 2 hand to screw it
|
Re: Hello a little heatbed/Y-Carriage issue. October 19, 2015 08:44PM |
Registered: 8 years ago Posts: 11 |
Quote
sarf2k4
I think a spring from any cheap pen would do, but I doubt its strengths. Can refer to mine here [imgur.com] and just ignore those sketches, it was meant to be on other thread.
As for mine, I replaced the orange rosette to this thing here [www.thingiverse.com] so that I don't have to use 2 hand to screw it
Ah thanks i am reading on the other forum where the offical fourm is for the product. I read that all i need to do is push it down, Ill give that one a try and see how it goes as currently atm I dont have any springs(or pens really).
Currently own a Original Prusa I3 Kit by Josef Prusa.
Currently Working on (Leveling Heating bed) 10/18/15
Future Plans: Get Octoprint running and maybe print another reprap.
|
Re: Hello a little heatbed/Y-Carriage issue. October 22, 2015 08:48AM |
Registered: 10 years ago Posts: 444 |
|
Re: Hello a little heatbed/Y-Carriage issue. October 24, 2015 06:29PM |
Registered: 8 years ago Posts: 11 |
Quote
RRuser
If it is a 3-point design, you could do it without springs. Theoretically you could also do it with 4-point, but you might have a difficult time.
Can you elaborate ?
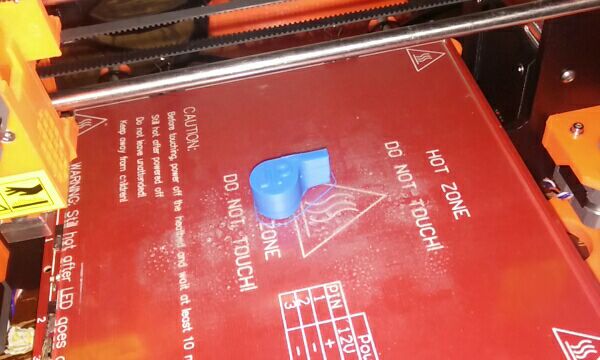
So i decieded to wing it and have it semi leveled for a print. Here are the results.
One thing i noticed off the bat was that the skirt and the first layer of the main print ended up overlapping/touching.
I can conclude some problems are introduced due to unleveled build platform.
I want the communities thought on this.
Thanks
Currently own a Original Prusa I3 Kit by Josef Prusa.
Currently Working on (Leveling Heating bed) 10/18/15
Future Plans: Get Octoprint running and maybe print another reprap.
|
Re: Hello a little heatbed/Y-Carriage issue. October 24, 2015 08:01PM |
Registered: 9 years ago Posts: 182 |
I would take a look at the pictorial print troubleshoot guidehere. It looks like you have a bit of axis drift and temperature issues. Make sure your belts are tight and try the print cooler and incrementally up the temprature.
Just remember not to get impatient. It takes time to get everything perfect.
Prusa i3 Rework - Ramps 1.4 - E3d Lite6 - Full Graphic LCD Controller
Just remember not to get impatient. It takes time to get everything perfect.
Prusa i3 Rework - Ramps 1.4 - E3d Lite6 - Full Graphic LCD Controller
|
Re: Hello a little heatbed/Y-Carriage issue. October 24, 2015 09:54PM |
Registered: 8 years ago Posts: 11 |
Quote
gmckee
I would take a look at the pictorial print troubleshoot guidehere. It looks like you have a bit of axis drift and temperature issues. Make sure your belts are tight and try the print cooler and incrementally up the temprature.
Just remember not to get impatient. It takes time to get everything perfect.
Ah thank you that page is really helpful.
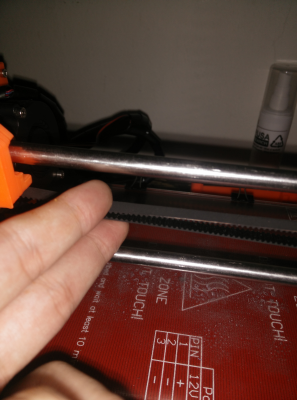
Would you say this is alot of play on the y axis belt?
Currently own a Original Prusa I3 Kit by Josef Prusa.
Currently Working on (Leveling Heating bed) 10/18/15
Future Plans: Get Octoprint running and maybe print another reprap.
|
Re: Hello a little heatbed/Y-Carriage issue. October 25, 2015 11:34PM |
Registered: 10 years ago Posts: 444 |
Springs only help when adjusting from one side. If you replace the springs with a nut, then you just do a hard-adjust instead, from both sides (hex driver on top, wrench or pliers holding the nut on the bottom).
Springs don't really do anything else, such as a shock absorber on a car would.
Springs don't really do anything else, such as a shock absorber on a car would.
|
Re: Hello a little heatbed/Y-Carriage issue. October 29, 2015 10:29PM |
Registered: 8 years ago Posts: 11 |
Quote
RRuser
Springs only help when adjusting from one side. If you replace the springs with a nut, then you just do a hard-adjust instead, from both sides (hex driver on top, wrench or pliers holding the nut on the bottom).
Springs don't really do anything else, such as a shock absorber on a car would.
How should I proceed? I finally got a dremel 200 ,I am currently thinking about using it to grind out the HB screw holes a bit so the screws would slide through the holes with a little bit of resistance.
Currently own a Original Prusa I3 Kit by Josef Prusa.
Currently Working on (Leveling Heating bed) 10/18/15
Future Plans: Get Octoprint running and maybe print another reprap.
|
Re: Hello a little heatbed/Y-Carriage issue. November 03, 2015 11:01PM |
Registered: 8 years ago Posts: 11 |
Update: I semi fixed the heatbed issue by drilling/grinding out the mounting holes for the screws to slide through(There was flex in the HB PCB so it caused alot of friction with the screws and mounting hole.) Now the only issue I face is a little bit of x blacklash and sometimes curling of the print(ABS). Looking into printing a belt tensioner and the curling could ethier be a slight deviation on how leveled the bed is or the heatbed isnt hot enough or a slight breeze.
Any tips would be great.
PS on the bottom of the print it doesnt seem like the base layers touch each other.
Currently own a Original Prusa I3 Kit by Josef Prusa.
Currently Working on (Leveling Heating bed) 10/18/15
Future Plans: Get Octoprint running and maybe print another reprap.
Any tips would be great.
PS on the bottom of the print it doesnt seem like the base layers touch each other.
Currently own a Original Prusa I3 Kit by Josef Prusa.
Currently Working on (Leveling Heating bed) 10/18/15
Future Plans: Get Octoprint running and maybe print another reprap.
|
Re: Hello a little heatbed/Y-Carriage issue. November 06, 2015 06:54AM |
Registered: 10 years ago Posts: 444 |
Sorry, only registered users may post in this forum.


