Folger Prusa i3 Kit from ebay
Posted by Waltermixx
|
Re: Folger Prusa i3 Kit from ebay December 16, 2014 03:03AM |
Registered: 9 years ago Posts: 6 |
OK set the vref and all seems ok but I have a few problems,
It seems that my heated bed cant really reach to 110c for ABS printing. I replaced the cable to more thick one(and it helped a bit now I can reach 90c but still take an hour).
I check the solder points and they seem fine also I have the folder kit PSU from folger.
is there a chance that the bed temp reading are far from the truth and I am reaching 110c? (I don't have a way to measure temp).
also when I start printing there is the first step that mark the outer limits of the print and then its print the first layer of the actual print , the extroder extrud only in the middle of the first layer. what do I need to change/play with in marlin/slice3 in order to fix it?
|
Re: Folger Prusa i3 Kit from ebay December 16, 2014 03:19AM |
Registered: 9 years ago Posts: 110 |
Quote
mickey
OK set the vref and all seems ok but I have a few problems,
It seems that my heated bed cant really reach to 110c for ABS printing. I replaced the cable to more thick one(and it helped a bit now I can reach 90c but still take an hour).
I check the solder points and they seem fine also I have the folder kit PSU from folger.
is there a chance that the bed temp reading are far from the truth and I am reaching 110c? (I don't have a way to measure temp).
also when I start printing there is the first step that mark the outer limits of the print and then its print the first layer of the actual print , the extroder extrud only in the middle of the first layer. what do I need to change/play with in marlin/slice3 in order to fix it?
First, for your heated bed, as has been covered in this thread about a dozen times, place some sort of insulation under the heated bed and then place a piece of cardboard on top of the glass you will be printing on. When the bed comes up to temp, remove the cardboard and start printing.
For the second issue, that outer layer is called a skirt. I am assuming you are printing something with a very small footprint and that's why it takes so long for the filament to come out. Look in your slicer settings for skirt and set it to 3 layers. That should get enough of the plastic into the extruder to allow you to print.
|
Re: Folger Prusa i3 Kit from ebay December 16, 2014 08:40AM |
Registered: 9 years ago Posts: 59 |
|
Re: Folger Prusa i3 Kit from ebay December 16, 2014 10:54AM |
Registered: 9 years ago Posts: 26 |
Quote
HairLikeFrodo
I've been thinking about buying this kit but was worried about the print quality. Would you guys mind showing off your prints from this machine? I'm curious to see the difference from person to person. I've already looked at all the past photos.
Just go for it, man. Print quality is pretty standard for a Prusa i3.I guess that's because the parts are pretty standard. Lots of things can effect the output slicer program, print program, temperature. calibration, filament brand and quality, print surface prep etc. These factors will vary no matter which printer you use. As far as the kit goes, mine was 100% complete and everything worked. Packaging was outstanding. It has proven to be a great printer, and an awesome value.
|
Re: Folger Prusa i3 Kit from ebay December 16, 2014 11:34AM |
Registered: 9 years ago Posts: 7 |
Hi everyone,
First time posting but been reading this forum religiously over the last week.
I build my Folger kit over 2-3 nights and spent maybe 2 hours figuring out for the configurations that worked for me.
This thread has been great and wanted to thank all the main active people (You know who you are!) who have contributed - this has really helped my build be successful. Thank you!
Still have to fine tune my prints but at the moment - things work pretty nicely. Can set up a print and leave it!
Last Issue I have is: I'm still trying to figure out my Hot Extruder Motor issue - I really think I just need a fan - I don't think my vref can go any lower without causing flow issue.
Don't have a meter to check the actully values - been going my eye at the moment.
Here's is a time lapse of a test print.
[www.youtube.com]
Using painter tape for now - works great and lets you drag a bit if you happen to.
Notes (which can be found through this thread) that were my main pain points:
- The thermistor for the heatbed is built in! Posted by ColdFront [forums.reprap.org]
- Y Endstop - is a b$#ch - no matter how you look at it. figure out a way to make it work Or manually trigger it when you home it and print yourself a better piece (Waltermixx posted a link to a good one). I put mine on the front - on the guide bar and tilted it so it goes under the bed but is hit but the frame when it comes forward. I loose about 20mm of print area.
- Configuration. If you home position is back left - you are set. If not - (My home is front right) I used the MAX end stop ports on the RAMPS board for both the x and y. Than I set the configuration to
#define X_HOME_DIR 1
#define Y_HOME_DIR 1
#define Z_HOME_DIR -1
- Other important configuration - if you axis are moving in reverse.
#define INVERT_X_DIR true // for Mendel set to false, for Orca set to true
#define INVERT_Y_DIR false // for Mendel set to true, for Orca set to false
#define INVERT_Z_DIR false // for Mendel set to false, for Orca set to true
#define INVERT_E0_DIR false // for direct drive extruder v9 set to true, for geared extruder set to false
#define INVERT_E1_DIR false // for direct drive extruder v9 set to true, for geared extruder set to false
#define INVERT_E2_DIR false
#define min_software_endstops false //If true, axis won't move to coordinates less than HOME_POS.
#define max_software_endstops true //If true, axis won't move to coordinates greater than the defined lengths below.
-Quick test - I set these values to around 20 - and once my endstops were hit - i made sure I could not go pass my endstop or more then 20 in the other direction.
// Travel limits after homing
#define X_MAX_POS 200
#define X_MIN_POS 0
#define Y_MAX_POS 200
#define Y_MIN_POS 0
#define Z_MAX_POS 185
#define Z_MIN_POS 0
- If you can not move your axis in one direction - this is because you MUST home your axis before you can move freely.
Anyhow - Will post any extruder motor fixes I find - thinking a fan on it would fix it.... Please send any links if you know the fix.
|
Re: Folger Prusa i3 Kit from ebay December 16, 2014 04:58PM |
Registered: 9 years ago Posts: 26 |
Quote
mickey
OK set the vref and all seems ok but I have a few problems,
It seems that my heated bed cant really reach to 110c for ABS printing. I replaced the cable to more thick one(and it helped a bit now I can reach 90c but still take an hour).
I check the solder points and they seem fine also I have the folder kit PSU from folger.
is there a chance that the bed temp reading are far from the truth and I am reaching 110c? (I don't have a way to measure temp).
also when I start printing there is the first step that mark the outer limits of the print and then its print the first layer of the actual print , the extroder extrud only in the middle of the first layer. what do I need to change/play with in marlin/slice3 in order to fix it?
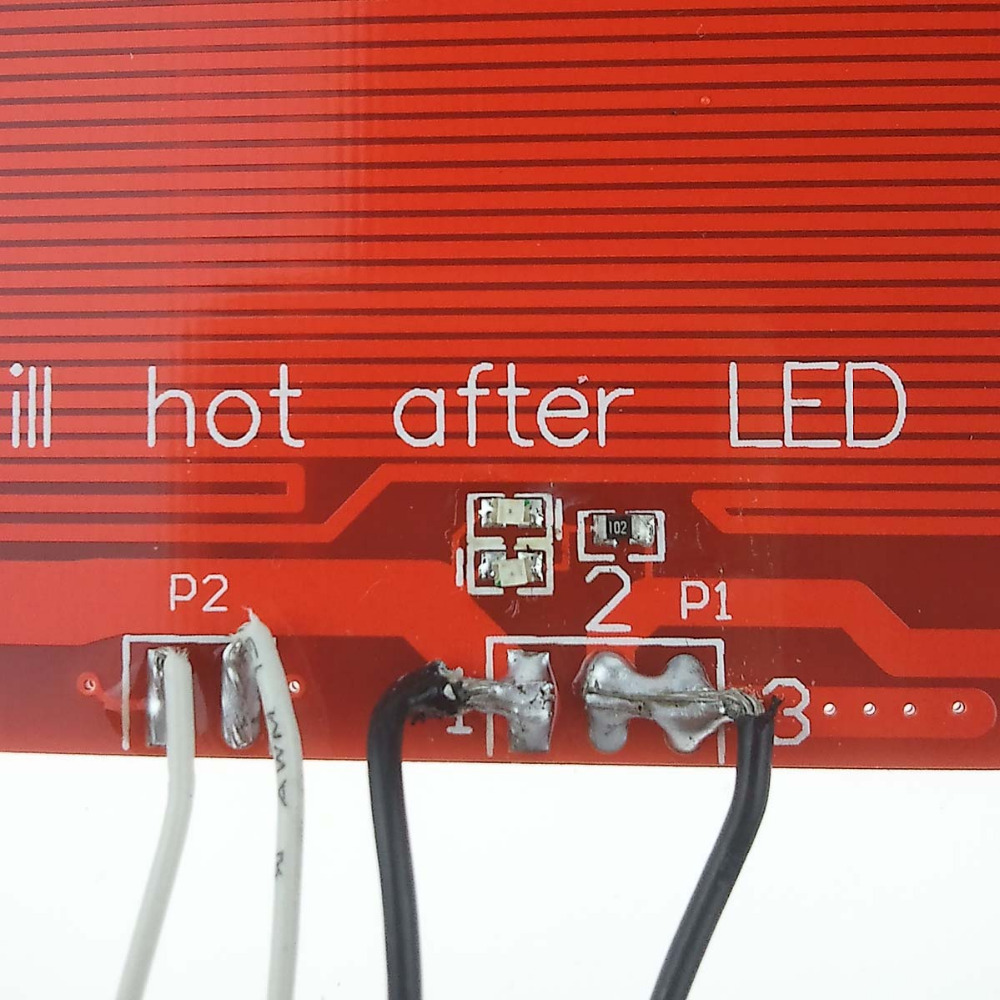
Did you solder your bed correctly. Make sure to solder your negative lead to both 2 and 3. I had the same problem it took hours to get up to 90 degrees. I changed my soldering, now it gets up to temp in less than 5 minutes. I don't have any insulation just glass on top of the heat bed. I also use 14 ga wire.
Edited 1 time(s). Last edit at 12/16/2014 05:02PM by KeyserSoze3d.
|
Re: Folger Prusa i3 Kit from ebay December 16, 2014 09:04PM |
Registered: 9 years ago Posts: 25 |
I started working on my kit last night. As i was watching videos on folgers google drive video had playback errors so Left it for while. Come back to find the manual for the build! Niccccce
Having some problems with my bearings not fitting in the x-carriage... I just cannot get them to fit at all. Are these supposed to "snap" into place or set nicely?
y axis idler bearing - simple problem but supposed to use M3 18mm bolt/nut. I only have 16mm with my kit (no biggie goto fastener store get bunch)
Only issues so far. Manual looks much more promising for easy build from this noob!
Must say I am very impressed with John at Folger tech though; I was missing my acrylic motor mounts and he shipped them out to me right away - even though they were having some issues around the shop that day.
Parts not here but by time I get to that part of build they'll be here. I been working alot hours lately so mine maybe the slowest build here as much as I want to get it built.
Follow Up - for life of me could not get one bearing to install into X carriage... applied little heat and still no success by hand. Installed smooth rod to make sure bearings lined and up and finally got the bearing to install!
Edited 1 time(s). Last edit at 12/17/2014 08:45PM by Booda.
|
Re: Folger Prusa i3 Kit from ebay December 17, 2014 12:30AM |
Registered: 9 years ago Posts: 5 |
Hey guys,
Like everyone else I built my kit a couple days ago over a few nights. Had an issue with the Z axis bearings not being secure in the 3d printed part.
I ended up using a piece of thin acetate as a shim to hold the bearing in place. So far its working but I may need to print a new part for it. Maybe once I get the printer dialed in
Also had a few missing parts, screws and the graphic LCD i ordered, but FolgerTech shipped them asap which ended up arriving quicker than I expected.
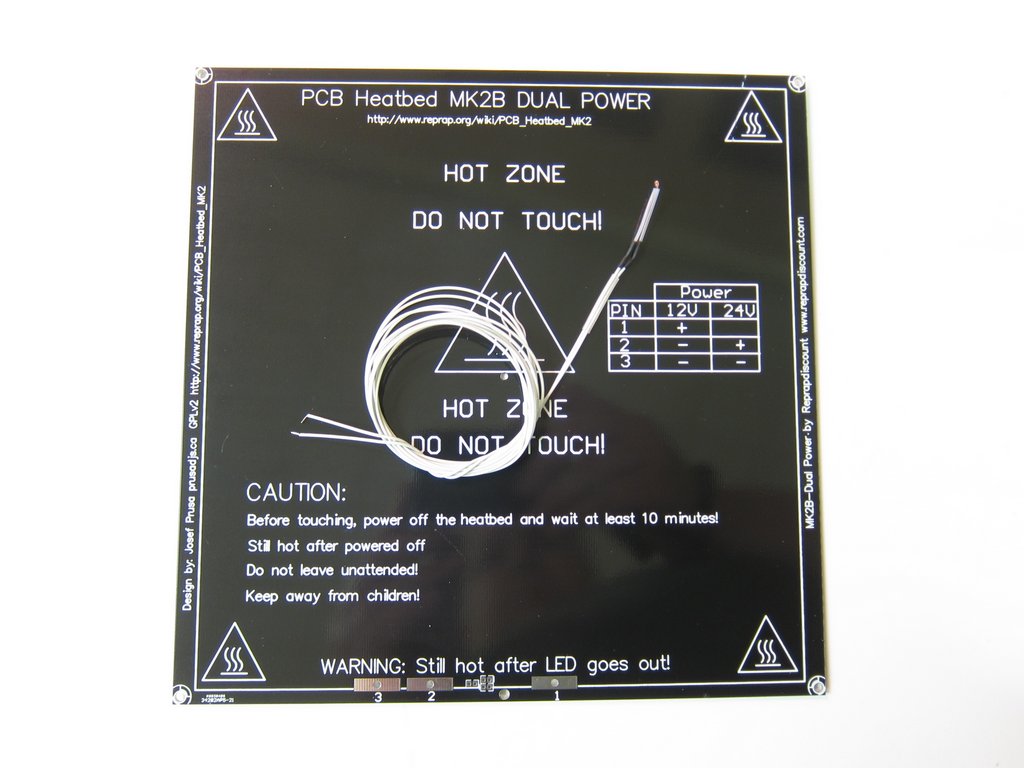
Unlike everyone else though. I received a different heat bed. I received a black MK2B heat bed with a thermistor you have to install yourself.
Also the heat bed was warped like a ruffled potato chip. I am using glass to cover the top but needed about 8 binder clips to get it to flatten out.
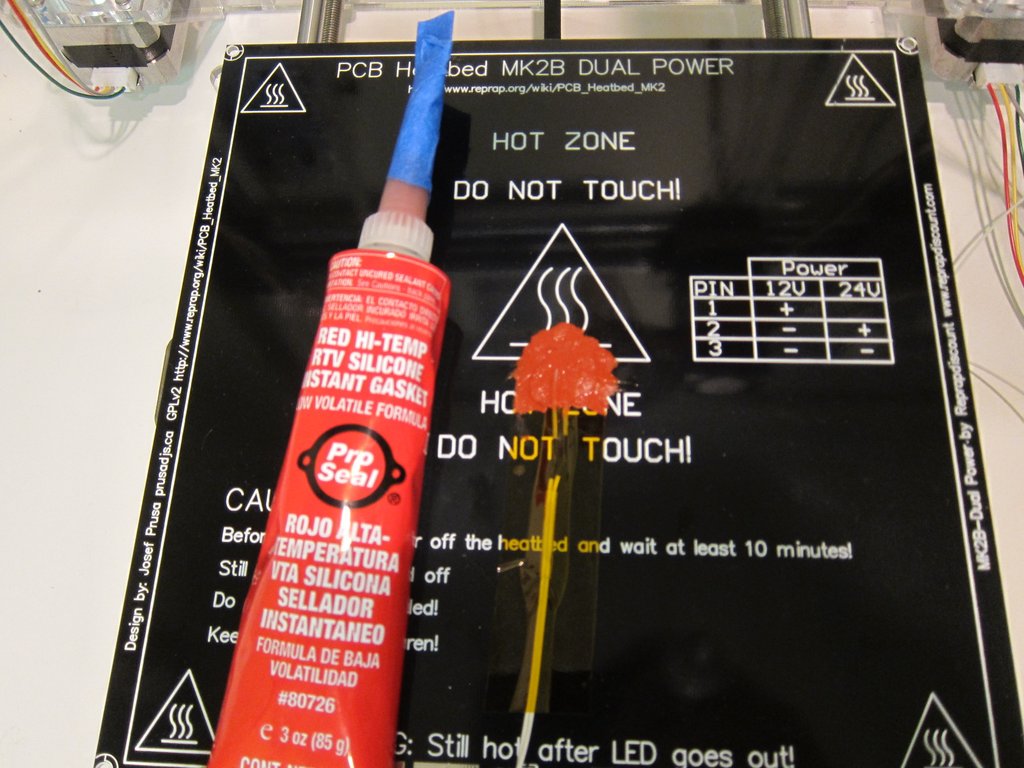
I installed the thermistor under the bed in the center hole with RTV silicone high temp instant gasket (see attached pics) and used kapton tape to secure the thermistor wires to the underside of the heat bed.
I also made sure the thermistor was just below the top side of the board and installed the Heat Bed with the heat traces up. not sure how everyone else is installing the head bed. Traces up or down.
I figured with the head bed traces facing down it would warp the acrylic carriage. Not happy with the flex in the acrylic carriage and my ruffled potato chip heat bed.
I think I will order a new heat bed and a boroscilicate glass print surface. Not sure though.
Well all I need now is time but life tends to conflict with our hobbies..
Like everyone else I built my kit a couple days ago over a few nights. Had an issue with the Z axis bearings not being secure in the 3d printed part.
I ended up using a piece of thin acetate as a shim to hold the bearing in place. So far its working but I may need to print a new part for it. Maybe once I get the printer dialed in
Also had a few missing parts, screws and the graphic LCD i ordered, but FolgerTech shipped them asap which ended up arriving quicker than I expected.
Unlike everyone else though. I received a different heat bed. I received a black MK2B heat bed with a thermistor you have to install yourself.
Also the heat bed was warped like a ruffled potato chip. I am using glass to cover the top but needed about 8 binder clips to get it to flatten out.
I installed the thermistor under the bed in the center hole with RTV silicone high temp instant gasket (see attached pics) and used kapton tape to secure the thermistor wires to the underside of the heat bed.
I also made sure the thermistor was just below the top side of the board and installed the Heat Bed with the heat traces up. not sure how everyone else is installing the head bed. Traces up or down.
I figured with the head bed traces facing down it would warp the acrylic carriage. Not happy with the flex in the acrylic carriage and my ruffled potato chip heat bed.
I think I will order a new heat bed and a boroscilicate glass print surface. Not sure though.
Well all I need now is time but life tends to conflict with our hobbies..
|
Re: Folger Prusa i3 Kit from ebay December 17, 2014 02:08AM |
Registered: 9 years ago Posts: 61 |
After reading through the build manual on Folger's site, I agree that most of the M3 nuts should have been nylocks. Problem is that I only got 9 with my kit. I went and bought Fastenal out today so I can replace all of the standard nuts that I used.
The other problem that I have is that I don't have the right pin crimper for the pins that go to the extruder fan or the heatbed thermistor. Also I can't find it locally so I am at a standstill. The only other way that I know of to use the pins is to crimp them with needlenose pliers and then solder them, but I don't want to do that.
The other problem that I have is that I don't have the right pin crimper for the pins that go to the extruder fan or the heatbed thermistor. Also I can't find it locally so I am at a standstill. The only other way that I know of to use the pins is to crimp them with needlenose pliers and then solder them, but I don't want to do that.
|
Re: Folger Prusa i3 Kit from ebay December 17, 2014 02:53AM |
Registered: 9 years ago Posts: 13 |
|
Re: Folger Prusa i3 Kit from ebay December 17, 2014 08:34AM |
Registered: 9 years ago Posts: 7 |
|
Re: Folger Prusa i3 Kit from ebay December 17, 2014 10:09AM |
Registered: 9 years ago Posts: 6 |
Quote
KeyserSoze3d
Quote
mickey
OK set the vref and all seems ok but I have a few problems,
It seems that my heated bed cant really reach to 110c for ABS printing. I replaced the cable to more thick one(and it helped a bit now I can reach 90c but still take an hour).
I check the solder points and they seem fine also I have the folder kit PSU from folger.
is there a chance that the bed temp reading are far from the truth and I am reaching 110c? (I don't have a way to measure temp).
also when I start printing there is the first step that mark the outer limits of the print and then its print the first layer of the actual print , the extroder extrud only in the middle of the first layer. what do I need to change/play with in marlin/slice3 in order to fix it?
Did you solder your bed correctly. Make sure to solder your negative lead to both 2 and 3. I had the same problem it took hours to get up to 90 degrees. I changed my soldering, now it gets up to temp in less than 5 minutes. I don't have any insulation just glass on top of the heat bed. I also use 14 ga wire.
OK so I sorted out the bed heating issue, turn out that it was bad solder points(big cold solder point),isolation,and wire thickness.
other issue I cant figure out is that my prints are still not quit good, but I understand this all about playing with settings to finally get the prints to be good.
the settings that I know to be relevant in the firmware(I use the configuration.h file that was posted earlier in this thread ) are :
DEFAULT_AXIS_STEPS_PER_UNIT {79.7, 80.3, 4030, 90}
is there another settings in the firmware that can help make the prints more accurate?
also can someone with reasonable printings publish his slice3 settings to have a reference start in this area?
and one last thing, if I make a spacer that turn out ellipse rather than round , with what do I need to play to fix it? is it an issue with the build itself rather than settings?
|
Re: Folger Prusa i3 Kit from ebay December 17, 2014 11:26AM |
Registered: 9 years ago Posts: 110 |
Quote
mickey
Quote
KeyserSoze3d
Quote
mickey
OK set the vref and all seems ok but I have a few problems,
It seems that my heated bed cant really reach to 110c for ABS printing. I replaced the cable to more thick one(and it helped a bit now I can reach 90c but still take an hour).
I check the solder points and they seem fine also I have the folder kit PSU from folger.
is there a chance that the bed temp reading are far from the truth and I am reaching 110c? (I don't have a way to measure temp).
also when I start printing there is the first step that mark the outer limits of the print and then its print the first layer of the actual print , the extroder extrud only in the middle of the first layer. what do I need to change/play with in marlin/slice3 in order to fix it?
Did you solder your bed correctly. Make sure to solder your negative lead to both 2 and 3. I had the same problem it took hours to get up to 90 degrees. I changed my soldering, now it gets up to temp in less than 5 minutes. I don't have any insulation just glass on top of the heat bed. I also use 14 ga wire.
OK so I sorted out the bed heating issue, turn out that it was bad solder points(big cold solder point),isolation,and wire thickness.
other issue I cant figure out is that my prints are still not quit good, but I understand this all about playing with settings to finally get the prints to be good.
the settings that I know to be relevant in the firmware(I use the configuration.h file that was posted earlier in this thread ) are :
DEFAULT_AXIS_STEPS_PER_UNIT {79.7, 80.3, 4030, 90}
is there another settings in the firmware that can help make the prints more accurate?
also can someone with reasonable printings publish his slice3 settings to have a reference start in this area?
and one last thing, if I make a spacer that turn out ellipse rather than round , with what do I need to play to fix it? is it an issue with the build itself rather than settings?
You need to print calibration pieces and measure. And when you're done measuring you need to do the math to figure out what your new step values should be in those directions and update your configuration.h and then reprint a different calibration piece and measure again. After a bit of this, these are my settings:
#define DEFAULT_AXIS_STEPS_PER_UNIT {80.45, 80.56, 3993.89, 101}
I just printed some coin sorting trays, [www.thingiverse.com], and all my holes are perfectly round.
As for slicer settings, I've been going back and forth between Cura and Slic3r and I find that somethings print better with Cura and others print better with Slic3r. In Cura I've got my speed up a bit more than in Slic3r, but I'm currently printing with a 0.2mm layer height, 1.0 mm Shell Thickness, 0.6mm Bottom/Top thickness, 30% fill Density (sometimes I go to 20 or 40 depending on what I'm printing), 60mm/s print speed (though I have pushed this up to 100).
Under "Advanced" in Cura, I've got retraction set to 40mm/s with 4.5mm retraction, 0.2mm initial layer thickness, Travel Speed 175mm/s, Bottom Layer speed 20mm/s, infill speed 100mm/s.
I'll mess with my Slic3r settings again later since I want to slow down my bridging speed significantly (printing at 245 makes for a bit of sag on the first layer of larger bridged hollow items).
|
Re: Folger Prusa i3 Kit from ebay December 17, 2014 11:53AM |
Registered: 9 years ago Posts: 110 |
Also, I did find this link for helping you understand the settings in Slic3r [richrap.blogspot.com]
It is very helpful
It is very helpful
|
Re: Folger Prusa i3 Kit from ebay December 17, 2014 02:10PM |
Registered: 9 years ago Posts: 18 |
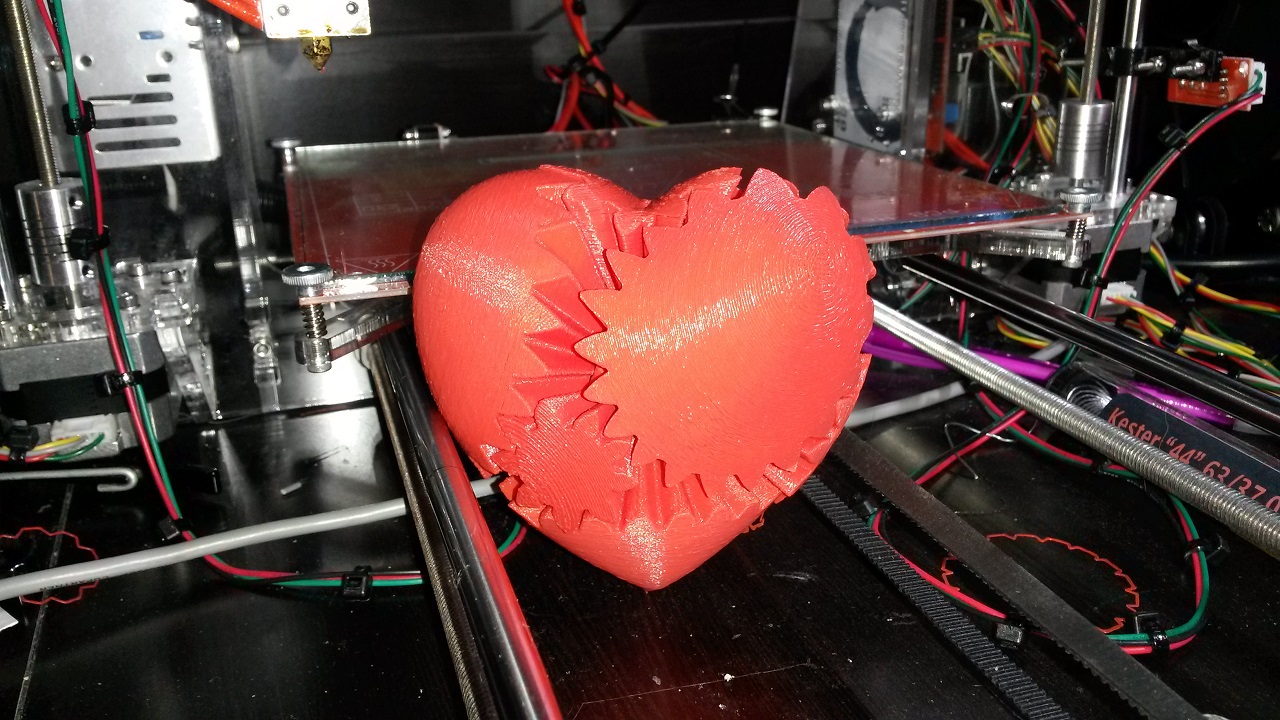
Quick little print for reference. It's a hot end duct I found on thingiverse. Glow in the dark pla by mg chemicals (bought at fry's $20). 15% infill, no print supports or rafts, .2mm height and 50mm/s. Roughly 2.5hrs to print as my 5th print on this printer. I have yet to adjust the vref's and calibrate any axis, but it's pretty close as you can see.
Very please with the way its printing so far. I'm only printing on pla at the moment and might do abs in the next week or so.
-Omar
Very please with the way its printing so far. I'm only printing on pla at the moment and might do abs in the next week or so.
-Omar
|
Re: Folger Prusa i3 Kit from ebay December 17, 2014 03:01PM |
Registered: 9 years ago Posts: 208 |
|
Re: Folger Prusa i3 Kit from ebay December 17, 2014 05:34PM |
Registered: 9 years ago Posts: 23 |
I just bought a full graphic reprap smart controller and I can't figure out what to change in the golfer techs software so can someone please send me their configuration or tell me what to do if you also have the full graphic smart lcd controller. Also I cant get a good print at more than 40mms with pla. I have transparent color and orange. Could it be the temperatures what temps should I use for those colors and at what speed.
|
Re: Folger Prusa i3 Kit from ebay December 17, 2014 10:17PM |
Registered: 9 years ago Posts: 208 |
Please do a good ole fashioned re-read of this thread. Full graphic smart LCD has been covered and my config file provided, make sure you also downloaded the library file for it as well... Do no replace your configuration.h file with mine, but scroll down to the LCD section so you know which lines to enable...for PLA printing, it's best to have a fan blowing down on your print, see the post above for a suitable blower.
Cheers.
Cheers.
|
Re: Folger Prusa i3 Kit from ebay December 17, 2014 11:23PM |
Registered: 9 years ago Posts: 61 |
Back on track. I found the crimpers (almost) locally today. Went back and replaced what I could with nylock nuts, then added the split washers to the bolts holding the X and Y axis motors.
Looked through the build document that Folger put together and thought they mounted the extruder mount on the wrong side. Started scrolling through the pictures and realized that I had my motor mounted on the wrong side. OOPS! I had to remove the top supports and loosen the couplers to lift out and flip the assembly end for end. Then I had to cut all the zip ties and remount the extruder plate back to the front. Luckily I didn't cut the belt too short so that went back together.
Got all the end stops mounted in the positions that were called out in the manual but the last one was too small for the Z axis rod. I put the mounting bolt through it and ran a 5/16 drill bit through it, then it mounted fine.
Also added blue locktite to the rest of the Y axis bed nuts and mounted the Y axis to the frame. At this point the printer is mechanically complete minus the hotbed.
Tomorrow I get to start wiring the thing.
I have to admit that the manual came out just in time or I would have had some real problems coming up.
|
Re: Folger Prusa i3 Kit from ebay December 18, 2014 12:24AM |
Registered: 9 years ago Posts: 133 |
Quote
Drozes
Hi everyone,
First time posting but been reading this forum religiously over the last week.
I build my Folger kit over 2-3 nights and spent maybe 2 hours figuring out for the configurations that worked for me.
This thread has been great and wanted to thank all the main active people (You know who you are!) who have contributed - this has really helped my build be successful. Thank you!
Still have to fine tune my prints but at the moment - things work pretty nicely. Can set up a print and leave it!
Last Issue I have is: I'm still trying to figure out my Hot Extruder Motor issue - I really think I just need a fan - I don't think my vref can go any lower without causing flow issue.
Don't have a meter to check the actully values - been going my eye at the moment.
Here's is a time lapse of a test print.
[www.youtube.com]
Using painter tape for now - works great and lets you drag a bit if you happen to.
Notes (which can be found through this thread) that were my main pain points:
- The thermistor for the heatbed is built in! Posted by ColdFront [forums.reprap.org]
- Y Endstop - is a b$#ch - no matter how you look at it. figure out a way to make it work Or manually trigger it when you home it and print yourself a better piece (Waltermixx posted a link to a good one). I put mine on the front - on the guide bar and tilted it so it goes under the bed but is hit but the frame when it comes forward. I loose about 20mm of print area.
- Configuration. If you home position is back left - you are set. If not - (My home is front right) I used the MAX end stop ports on the RAMPS board for both the x and y. Than I set the configuration to
#define X_HOME_DIR 1
#define Y_HOME_DIR 1
#define Z_HOME_DIR -1
- Other important configuration - if you axis are moving in reverse.
#define INVERT_X_DIR true // for Mendel set to false, for Orca set to true
#define INVERT_Y_DIR false // for Mendel set to true, for Orca set to false
#define INVERT_Z_DIR false // for Mendel set to false, for Orca set to true
#define INVERT_E0_DIR false // for direct drive extruder v9 set to true, for geared extruder set to false
#define INVERT_E1_DIR false // for direct drive extruder v9 set to true, for geared extruder set to false
#define INVERT_E2_DIR false
#define min_software_endstops false //If true, axis won't move to coordinates less than HOME_POS.
#define max_software_endstops true //If true, axis won't move to coordinates greater than the defined lengths below.
-Quick test - I set these values to around 20 - and once my endstops were hit - i made sure I could not go pass my endstop or more then 20 in the other direction.
// Travel limits after homing
#define X_MAX_POS 200
#define X_MIN_POS 0
#define Y_MAX_POS 200
#define Y_MIN_POS 0
#define Z_MAX_POS 185
#define Z_MIN_POS 0
- If you can not move your axis in one direction - this is because you MUST home your axis before you can move freely.
Anyhow - Will post any extruder motor fixes I find - thinking a fan on it would fix it.... Please send any links if you know the fix.
I am glad I am not the only one found the Y Endstop - is a b$#ch, as a matter of fact, all three endstops are b$#ches! For me the X endstop is the worst, then the Y then the Z, Once I master the printing, I am going to make my own.

|
Re: Folger Prusa i3 Kit from ebay December 18, 2014 09:08AM |
Registered: 9 years ago Posts: 7 |
Anyone have suggestions on lowering the temp on my Extruder Motor
At the moment - I can't measure the vref (getting a multimeter for christmas - so I can not buy one or wife will cut me) but if I lower it anymore - it won't extrude.
I am getting decent prints currently - but the motor literally becomes too hot to touch. I've added two small heatsinks - unsure if they help or not.
My only thoughts are:
-The path the filament follows is too tight - causing me to use more vref to power it through. (here is the filament i am using [www.amazon.ca] Will try a different one once I receive another spindle for christmas).
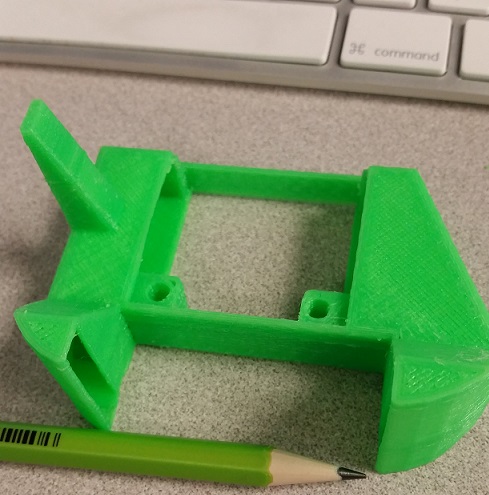
-The hotend may be on backwards? You can see that there is roughly a 4mm underhand of the hotend to the motor - could heat be traveling up to the motor this way?
I'm really unsure - Any help is greatly appreciated.
Edited 1 time(s). Last edit at 12/18/2014 09:35AM by Drozes.
At the moment - I can't measure the vref (getting a multimeter for christmas - so I can not buy one or wife will cut me) but if I lower it anymore - it won't extrude.
I am getting decent prints currently - but the motor literally becomes too hot to touch. I've added two small heatsinks - unsure if they help or not.
My only thoughts are:
-The path the filament follows is too tight - causing me to use more vref to power it through. (here is the filament i am using [www.amazon.ca] Will try a different one once I receive another spindle for christmas).
-The hotend may be on backwards? You can see that there is roughly a 4mm underhand of the hotend to the motor - could heat be traveling up to the motor this way?
I'm really unsure - Any help is greatly appreciated.
Edited 1 time(s). Last edit at 12/18/2014 09:35AM by Drozes.
|
Re: Folger Prusa i3 Kit from ebay December 18, 2014 11:57AM |
Registered: 9 years ago Posts: 18 |
My extruder motor also gets pretty warm. I think its the combination of the heat transfer from the hot end and it's constant moving. I'll measure the temp with an IR on the makerbot at work just to compare the temps.
Not sure on filament brand, but looks like a decent one.
Your hot end is like mine with the wires facing to the left, facing the power supply. I think waltermix switched his around and flipped it in the software so that the wires go towards the arduino/ramps.
....Just measured the makerbot and it was max 106F. So yeah, if yours is hot to the touch, I think you nailed it. It's probably squishing the filament too much and needs all that power to do so. I haven't opened up the plastic hob gear case to see if there is any adjustability, but maybe thats what you need to do.
A quick check on how much the filament is being squished, just retract the filament and look at the grooves in it. If they are really deep then yeah the extruder motor is probably working pretty hard.
Hope some of that helps.
|
Re: Folger Prusa i3 Kit from ebay December 18, 2014 01:30PM |
Registered: 9 years ago Posts: 10 |
Ok got my folger a couple days ago we had it up the first night after a 14 hour build we made it print a crappy blob and a offset issue. A new firmware load and some settings off here and it seems to be much better.
The issue I'm having now is confusing me. I have home set well I think I do z is really close and it will hit the limit switch . I think it is where it should be, but when I start print the nozzle will be like .125 inch off the glass and it seems to take a few passes before it prints decent.
Some basic settings
.25mm first layer
2 skirts
pla 200*c
I used a slicer tutorial on youtube for base settings for pla
using pront..... With slicer not repitier host
|
Re: Folger Prusa i3 Kit from ebay December 18, 2014 03:16PM |
Registered: 9 years ago Posts: 10 |
ok here is the video i used for base settings on slicer
[www.youtube.com]
after i slice im useing pronterface.
I think I found the print height issue. it looks like even though i set my two z heights with calipers its still off. what do you guys use as reff points to measure. just reset the z and re leveled bed. lets see if this works. still stumped about inital pla feed
|
Re: Folger Prusa i3 Kit from ebay December 18, 2014 04:48PM |
Registered: 9 years ago Posts: 10 |
getting better i guess lol. something is up with my z. x and y seem to have correct scale but z is stretched. i attached a pic of a part we make at work and a slightly scaled down version i just printed. I have not adjusted my stepper voltage no idea if thats going to have anything to do with it or should i be looking at marlin settings. the 20mm cube i printed was 19.98mmx19.97mmx25.7mm


|
Re: Folger Prusa i3 Kit from ebay December 18, 2014 07:03PM |
Registered: 9 years ago Posts: 76 |
I worked with the people at FolgerTech (very accommodating by the way) and put 2 manuals together for the Prusa I3 from them. There's a build manual (rev 1.1) and a config guide for the marlin/repetier/slicer config.
So, here's the two manuals:
[drive.google.com]
Enjoy everybody!
Edited 2 time(s). Last edit at 12/18/2014 09:01PM by MakerFront.
So, here's the two manuals:
[drive.google.com]
Enjoy everybody!
Edited 2 time(s). Last edit at 12/18/2014 09:01PM by MakerFront.
|
Re: Folger Prusa i3 Kit from ebay December 18, 2014 07:22PM |
Registered: 9 years ago Posts: 76 |
|
Re: Folger Prusa i3 Kit from ebay December 18, 2014 07:23PM |
Registered: 9 years ago Posts: 10 |
I have a couple issues I hope you guys can help me with. My bed reads 0 for temp and doesn't heat. I've metered all wiring and it's good. I checked the resistance from my wires to the thermistor and they're good, but get open across the thermistor. At room temp should I get a reading from the thermistor? I believe that with no reading from the thermistor, the bed doesn't heat, is this correct?
Forgot to mention, while attempting to heat the bed and probing the thermistor for resistance, the LED came on for an instant. Pronterface read about 100*, I believe it used the meter to close the thermistor circuit, which seems to be open somewhere in the board.
Another issue is the extruder fan. Does it only run while the extruder is at temp? Is there a way to turn it on manually with pronterface to check it? I haven't done a test print since the bed isn't working right yet.
Edited 1 time(s). Last edit at 12/18/2014 07:27PM by Jamus.
|
Re: Folger Prusa i3 Kit from ebay December 18, 2014 07:27PM |
Registered: 9 years ago Posts: 76 |
You should get a reading of around 100k ohms at room temp. Depending on how you wired your fan, it will either be on all the time (if you wired it to 12V) or it is controlled by the software (if wired to D9). In repetier host, click the fan icon on the manual control tab, if the fan comes on, you're okay, you'll just have to configure slicer for cooling all the time. It's covered in the config manual I made.
Making it better for Makers!
[makerfront.com]
Making it better for Makers!
[makerfront.com]
|
Re: Folger Prusa i3 Kit from ebay December 18, 2014 07:57PM |
Registered: 9 years ago Posts: 76 |


Sorry, only registered users may post in this forum.