Heated Bed
|
English • العربية • български • català • čeština • Deutsch • Ελληνικά • español • فارسی • français • hrvatski • magyar • italiano • română • 日本語 • 한국어 • lietuvių • Nederlands • norsk • polski • português • русский • Türkçe • українська • 中文(中国大陆) • 中文(台灣) • עברית • azərbaycanca • |
Release status: Prototype
| Description | Prototype of a heated bed which avoids warp and the need for raft
|
| License | |
| Author | |
| Contributors | |
| Based-on | |
| Categories | |
| CAD Models | |
| External Link |
Contents
- 1 Introduction
- 2 Mechanical Construction
- 3 Heater types
- 4 Electric construction
- 5 Operational considerations
- 6 Skeinforge options for heated bed
- 7 Links
Introduction
A heated build platform (HBP) improves printing quality by helping to prevent warping. As extruded plastic cools, it shrinks slightly. When this shrinking process does not occur throughout a printed part evenly, the result is a warped part. This warping is commonly seen as corners being lifted off of the build platform. Printing on a heated bed allows the printed part to stay warm during the printing process and allow more even shrinking of the plastic as it cools below melting point. Heated beds usually yield higher quality finished builds with materials such as ABS and PLA. A HBP can also allow users to print without rafts.
Here are some examples of HBP results:
- Nophead with his HBP; tests on ABS and with various thermoplastics (PLA, PCL and HDPE).
- Casainho followed the steps above and got the same results.
You can verify all the information on this page, looking on the many blog and forum messages about this subject over Internet.
The current design of Heated Bed on this page is almost equal of the one made by James Glanville.
Also keep in mind that despite the title this page only describes one out of many heated bed designs.
Mechanical Construction
The flat and heated part of the bed can be made of various materials, each with different advantages and disadvantages.
Thermal Insulation
Regardless of the materials used, the heated bed should be thermally insulated so that it doesn't melt or soften any plastic parts underneath the bed. Commonly used insulator materials are cardboard, wool, and cotton cloth on top of medium density fiberboard MDF. The heated bed can also be mounted directly to a wooden platform without any noticeable negative effects. See the forums at Bits from Bytes for discussions on various combinations[1]
Wool may be a good option for insulation because its ignition temperature is 600C. [2]
Wiring
The HBP requires around 6A of current to operate (12 Volts over 2 Ohms) and the selected wire needs to handle this current. The minimum recommended size for this amount of current is 20 gauge wire. Lamp wire (18 to 14AWG), some automotive wire, and some speaker wire can handle this amount of current. Regardless of the type of wire used, make sure it is a large enough gauge (note that the smaller the number, the thicker the wire), it can handle constant flexing (solid wire should not be used here), and that it can handle being exposed to 100 degrees Celsius (around the maximum temp of the bed) without degradation.
Short lengths of Teflon coated wire, or a similar heat-resistant wire, can be used to bridge the connection between a heat sensitive wire (such as lamp wire) and the heated build platform.
Using an overly thin gauge of wire or having bad connections can damage your equipment and cause fire and electric shock.
Surface Materials
See also: Bed material
Kapton Tape
Kapton tape is useful as a build surface as hot, extruded plastic adheres to it easily and cooled parts can be peeled off of the tape without damaging the part or the Kapton tape.
Kapton tape must be applied without any bubbles. This video provides a technique to do so flawlessly.
MarcusWolschon reports that 70°C seems to be adequate for printing ABS plastic on Kapton tape.[3]
Blue Painter's Tape
A cheaper alternative to Kapton tape is blue painter's tape. The light wax surface allows hot, extruded plastic to adhere to the surface well. Unlike Kapton tape, it can be more difficult to remove cooled parts from the blue painter's tape which leads to small rips and tears. As the blue painter's tape is cheap, easy to find, and easy to work with, it isn't a problem to replace the tape after a few prints.
Bare Surfaces
Only few people have had good results printing directly onto various metal surfaces like copper, brushed aluminium, and bare glass.
On bare glass you can use hair spray to improve the adhesion. A light spray will help enormously with both PLA and ABS! You can print PLA **without** a heated surface if you use hairspray. Not all brands work well, try out "strong" spray.
Many people favor "AquaNet Extra Super Hold" (purple bottle) as the hairspray of choice for improving adhesion to bare glass.
PVA Glue
A simple solution especially good for PLA is mixing a white PVA based glue like Elmer's Glue-All or School Glue. The ratio is about 1 part glue to 10 parts water. Apply it to a hot bed and allow the solution to fully dry.
Glue Stick
Various people and companies (SeeMeCNC, ShapingBits) uses Elmer's glue sticks (Elmer's All Purpose, Cra-Z-Art washable, Scotch Permanent Glue Stick) to keep ABS, PLA, and Nylon sticking to their glass beds. It keeps the build adhered to the bed just enough so its easy to pull off once the print is done without a scraper knife, but wont fall off on its own accord, and it is easier to clean off of your print than hairspray or painters tape. In the case of too thick PVA film on the bed, PLA parts might not release when cooling down, but since PVA is water soluble, a simple (warm) water bath would release it.
Also, on a Rostock style printer, and maybe other printers, you can reportedly set up some G-code to have the hotend platform run into the print once finished, knocking it off the bed, and then start again, accomplishing several consecutive prints. This is possible through the glue stick method because, as stated earlier, it just has enough stick to the bed to keep it on while printing, but can be easily removed later.
Testing has shown that nylon will stick very well to purple to clear washable school glue by Elmers. 4 hours into printing and a 100+ mm wide object is still sticking to the bed
Jello Solution
Folks at the 3d printing brazil group have discovered that a solution of 1:10 jello to water adhere both PLA and ABS if the heated bed is over 60°C, the bond is really strong and the part pops itself up when the print is finished and the bed cools down
HBP Material
See also: Bed material
Glass
A heated bed can be built using a good quality glass (3mm thickness for example). Glass can be found at hardware stores, home improvement stores, and many craft stores that have picture framing services. Many of these stores will cut the glass to size with little or no additional cost. Casainho, for example, purchased a piece of 3mm thickness glass for his Mendel for only 1.5€. While inexpensive and easy to find, remember that glass can be a very unpredictable material and can break when heated.
Advantages of using glass:
- It can be purchased in flat sheets.
- Thicker sheets of glass do not bend (at least for our tolerances).
- It is a commonly found material and can be purchased for little cost (200x225x3mm for 1.5€)!
- Low thermal conductivity means that sudden spikes or drops in temperature do not happen, giving a (theoretically) more thermally stable build platform.
Disadvantages:
- Standard glass can fracture when not heated evenly.
- Low thermal conductivity can lead to hot spots which can cause cracking.
- Special tools are required to drill and cut glass.
- Glass is a heavy material which can lead to jittering issues on the axis moving the build platform.
See Casainho message about using glass.
Normal glass is ideally used on top of an aluminium or copper plate, so the temperature is evenly spread. According to a glass supplier user rkoeppl asked, normal glass should not be used for temperatures over 80-100 Celsius. Single pane safety glass is more expensive, but can safely be used for temperatures of up to 200 Celsius. If higher temperatures are needed there is the option to use borosilicate glass, the same type of glass that is used for oven doors. If you use normal glass to reduce your risk of it cracking: Keep it the same size or smaller than the heated zone (or the difference in expansion between the cold edge and the warm centre may cause it to crack), and don't have a fan directed on to it (eg to cool the extrusion) - cool centre and warm edge is also likely to crack it.
Due to the low thermal conductivity, the temperature on the top of the plate as opposed to bottom side of the plate (which is being heated) may be different. In most cases, this should only be a couple degrees, but be aware of this effect when choosing bed temperatures if your thermistor is below the glass.
User Casainho recorded a video (on 2010.08.18) that shows the Mendel Heated Bed made using glass and Kapton tape: View the high quality original vorbis video file.
Metal
A flat metal sheet can also be used as a build surface (with or without tape) and as a heat spreading device. Due to most metal's high thermal conductance, a metal sheet will spread heat evenly.
Note that most metals can expand quite a bit when heated, so if the metal sheet is not allowed to expand on the heated bed, it can bow and damage your prints. Bowing can also occur if the edges of the metal sheet cool faster than the center, so sheets larger than the heater are not recommended. The thinner the sheet, the more prevalent the bowing can be.
The specific heat (this can be thought of as how fast a material heats up and cools) can be vary different for different metals. Aluminum, for example, has a low specific heat and will heat and cool very quickly. Steel and copper have a much higher specific heat and take a lot longer to heat up or cool down. There are advantages and disadvantages to high and low specific heats, so experimentation might be necessary for some people. While it doesn't change the specific heat of the material itself, thicker sheets of metal will also hold their heat longer.
One user is experimenting with a quick release bed made of thin steel [4] that is magnetically held flat against a thicker non-magnetic heated bed. (Curie temperature of neodymium magnets is around 300ºC -- low for a magnet, but safely above the 220ºC maximum build plate temperature).
Ceramic
Ceramic combines the flat properties of glass without the shattering problems caused by uneven heating and can be cut and drilled much easier without fracturing. Note that the thermal conductivity of ceramic is far lower than glass, so fast heating may be problematic. See the glass section for more details.
On the RepMan a ceramic wall tile has shown good results.
Ceramic can be used for the bed itself or as insulating standoffs.
Heated Build Chamber (HBC)
Please see Heated Build Chamber page
Discussion
We're organized in this RepRap-Forum with gathering ideas, troubleshooting, and designing the heated bed. Please join us and remember you're welcome to log in and edit this page as well!
If you've come to this page, you may well want to look at this heated bed design too.
Heater types
Various designs for heating the beds (be the actual bed made of whatever) have been used.
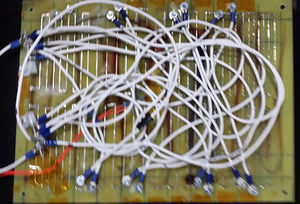
Nichrome
[5] uninsulated nichrome wire attached to the bottom of the bed with Kapton tape.
Attachment methods
If you have a piece of protoboard or PCB the size of your heated bed, you can use it as the backing for your nichrome wire. Just cover the areas touched by the wires in kapton tape. Since you can't solder nichrome, an alternative solution is to drill and countersink holes in the nichrome and secure the wire against the PCB and the screw itself. With all of the nichrome securely fastened to the PCB, you can cleanly (or not so cleanly) wire the rest of the connections at-will.
My configuration used long loops to get the resistance (around 6.2ohms per length). With longer wires in parallel, uninsulated steel wire would probably work for this as well at lower voltages.
You'll still need to have something pressed up against it to print on. If you use glass, best to use oven glass--this design shattered window plate. Kapton tape is a sufficient electrical insulator for a metal heat spreader.
Aluminium Clad Resistors
Pros:
- very cheap,
- can handle ABS and PLA easily,
- Mains or 12V powered
TO220 Resistors
"Don't use TO220 resistors. All mine failed eventually so I use AL clad now, which have never failed."
--nophead
Hot Plate
"Hot plates" are normally used for cooking, and take mains voltage
Grip Heater
Motorcycle grip heaters work off of 12V, and deliver about 35W to 2 flexible pads of about 100x50. See http://open3dp.me.washington.edu/2012/03/of-hbp-and-other-hot-things/ or http://www.google.com/?q=grip%20heater .
Etched PCB as a heating Element
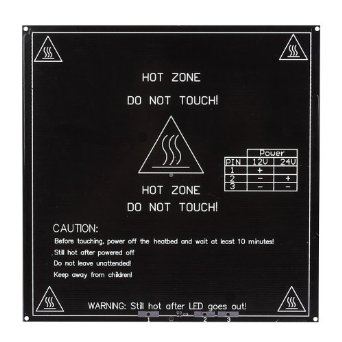
Main Article: PCB Heatbed
Pros:
- Even Heat Distribution
- Simple, clean implementation
- Very little space required
- Lightweight
Cons:
- Relatively expensive (if you use a professionally manufactured board)
Stripboard PCB as a heating Element
Ghetto HBP on thingiverse is an example.
Pros:
- Cheap
- Even Heat Distribution
- Simple, clean implementation
- Very little space required
- Lightweight
Cons:
- Must be soldered into the desired configuration
- Large stripboards are relatively hard to find
Milled PCB as a heating Element
Pros:
- Less expensive choice
- Fun to make ;-)
Cons :
- 20x20cm copper-clad blank plates are hard to find. Exploring whether 2 15x20 plates side by side will fit the intended use.
Note: Cheap pcb blank plates from eBay often have way less than the usual 35 microns copper thickness.
If no data on thickness is available, estimate experimentally by measuring the resistance of a trace of known length and width.
Spreadsheet to calculate trace resistance: Media:trace_resistance.ods
A great online [PCB trace resistance calculator] with thermal correction.
Clothes Iron
Some have used a cheap (in every sense of that word) clothes iron. These can be purchased locally anywhere in the world, and will require some modification (mostly disassembly, and removal of the unused parts).
Tip: Go for the cheapest option, they usually come with a Stainless steel soleplate, but that is only a thin seet covering the actual casted alumium body of the heater.
Attention: if you remove the integrated thermostat to controll the clothes iron from firmware, please bear in mind that the temperature measured at the build platform, could be very far from the clothes iron temperature. In my first setup, the clothes iron reach 300ºC, while the build platform (a 5mm aluminium sheet) was only at 80º. This would cause the heat fuse to blow, or in the worst case, a fire, so if you remove the termostat (with usually rates for <200ºC at the hightest setting) make sure the conductivity between the clothes iron and your build platform is good enough so the build platform draws enought power to keep the clothes iron temperature close. The other alternative is limiting the power aplied to the iron (using the max PWM option in FW) or using a smaller model (asuming you could not improve the heat conductivity between them.
Pros:
- Very inexpensive ($14 plus few screws)
- Very fast heat up (1600W)
- Integrated thermostat (just turn the dial to select the temperature, altought this is not very precise).
- Mains voltage. No need to draw prower from the power supply so you could settle with a smaller PS.
- Most irons come with a little indicator light that shows when it is heating.
- The knobs and buttons on the iron come with little springs that look like they will be good for extruder idler.
- Glass can be removed and a spare one used for quick swapover between prints.
Cons:
- Heavy. In most printers where the build plantform moves, this is a big problem, often requiring bigger steppers. However in deltas and other kind of printers with stationary build platform, this problem is irrelevant.
- It's taller than the majority of alternatives (especially when you leave the thermostat) so your build height might be reduced
- You need to use a SSR (Solid State Relay) if you want to control it from the firmware.
- Mains voltage. Danger if not installed safely.
Silicone Heating Mat
See the Heated WolfBed (in German), Silicone Heater Pad in sizes silicone heater pad
Pros:
- Fast heating
- Reliable
- Most use mains voltage - DOESN'T require any amps from the 12 volt supply
- Very low height
- Easy to install (commonly adhesive backed)
- Can be relatively inexpensive in regular sizes (~220x200mm)
- 12 V types can be run directly from the controller MOSFET without a relay
- Integrated thermistor
- Long life span
- Available in larger sizes (>=500x500mm)
Cons:
- Total cost might be more expensive than other heating method [silicon mat (50€) + solid state relay (16€) + Glass (5-10€)]
- Requires additional mount plate (such as glass/aluminum sheet)
- Mains voltage, but can be purchased for 12 V. Need GROUND line to aluminum bed for safety.
- Relatively high temperatures possible (safety problem if thermistor dies/falls off. Strongly recommend using a thermal fuse to prevent such issue)
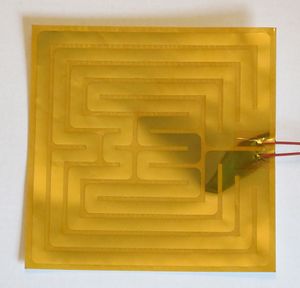
Polyimide film heater
Similar to the silicone heating mat but sandwiched between Kapton films
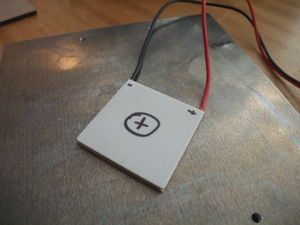
Peltier Element
There have been reports here & there on utilizing the Peltier effect through often cheap of the shelf Peltier elements. They are commonly used amongst other things for thermoelectric cooling.
They can be sourced, e.g eBay.
Electric construction
To power the bed, you should use a PC PSU or universal power supply that can output at least 10A @ 12V.
You may be able to get universal laptop-PSUs with adjustable voltage for a range of 15-24V at 80-180W.
The heating elements can be nichrome wire, power resistors for higher temperatures or ready-made, flat heating-pads for lower temperatures.
nichrome wire is cheaper and takes less space then power resistors.
(Note that for first tests a thermometer for the apropriate range and manually controlling the PSU-voltage can be enough to print. So you can postpone the electronics for later if this is not your strong point.) [suggested improvement: have two separate heaters spacially interleaving, one under-powered all the time, the other controlled by PWM. This would ease the current burden on the PWM power circuit. It would also improve temperature accuracy.]
Electronics Design #1
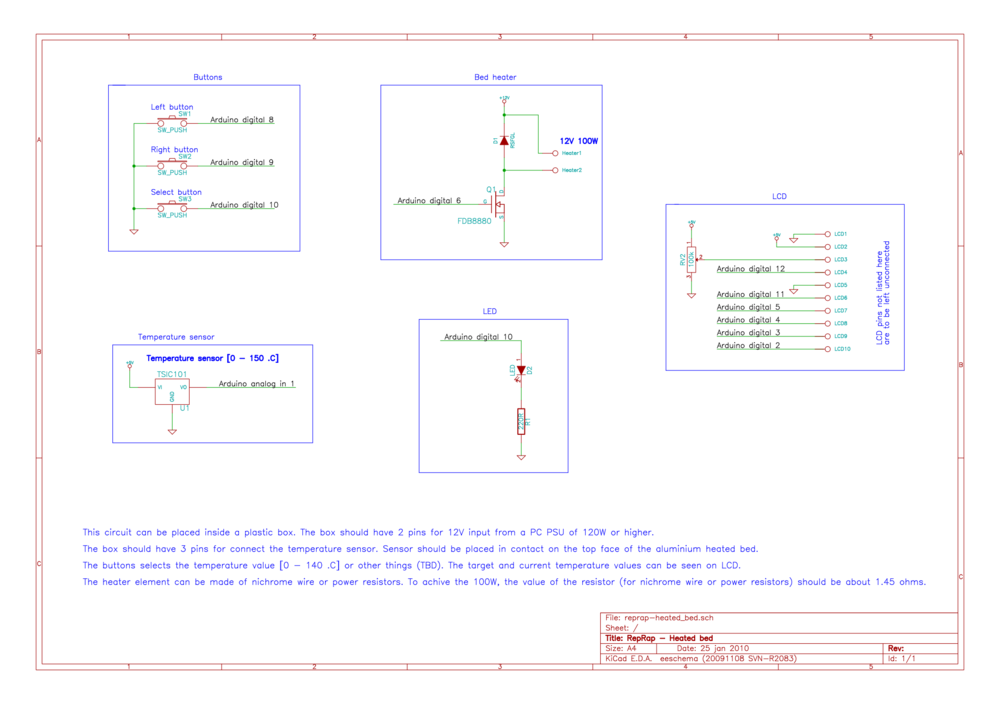
One possible electronic control circuit (NOT TESTED YET) can be the following one. It uses an Arduino to read the temperature from an appropriate sensor and PWM one power MOSFET. Target and current temperature values can be seen on a LCD. Target temperature can be selected using three buttons.
Temperature sensor
The TSIC101 is supplied with +5V from the Arduino board. It outputs a linear voltage between 0 and 1 volt. 0 volt for -50ºC and 1 volt for 150ºC.
Ardunio can be configured to have an ADC voltage reference of 1.1V, which means it can read steps of 1.1V/10bits ~= 1mV.
Since TSIC101 outputs 5mV for each 1ºC, Arduino will be able to measure each step of 0.2ºC (TSIC101 resolution is 0.1ºC).
We may not let the TSIC101 going over 140ºC for his safety, since 150ºC is the maximum.
Power MOSFET
The power MOSFET FDB8880 is rated for maximum VDss of 30V, which means it can cut at least 24V, however, we will be using 12V.
It can cut also as maximum 11A with no heatsink.
Any MOSFET with an Rds(on) of less than about 20 milliohms at Vgs=4.5v,Tj=175c will be suitable, such as IRL3803 and STP55NF06.
It is controlled by Arduino digital 6 which can output a PWM signal of +5V.
The diode D1 is a protection against any possible voltage surges because of commuting the heater element.
Alternatively, you could use a Heated Bed MOSFET Power Expansion Module. An example of this is the Little Driver or the Power_Expander.
(TODO: include schematics and board-layout here)
LCD
More info on Arduino LCD page.
Buttons
The three buttons let user select the target temperature. More functionalities can be added to firmware and use these three buttons to navigate on menus, for example.
There should be a MODE button, UP button and DOWN button;
The display must be a minimum of 4 characters (although 8 would be the useful minimum). 10 would be pure luxury and 2 lines would be overkill (unless it can be purchased for less than a one line display).
The mode button when pressed toggles between: On - Set - Off and then back to On.
The display appears as: "(Bed|Set|Off)[@: =][ 1-9][ 0-9][0-9][°]*[CF]*" when expressed as a regular expression.
In On and Off mode the Bed temperature is constantly displayed with a one second update. In Set mode we see the temperature that the bed should be heated to. This set temperature should be saved in EEPROM so it is available on the next start.
The Arduino have pull-up resistors that should be enable for the buttons working correctly.
LED
The LED can be used to signal something to user. It is a 20mA LED with 2V Vf.
Firmware
- There is no need to implement PID control on firmware, but it can be done.
- Last temperature values inputed by user should be saved on EEPROM, so user do not need to input it again.
- There could be a few profiles (with temperature value changed by user), one for each kind of plastic, like for ABS target temperature = 120ºC and PLA target temperature = 55ºC.
- Maybe a cool down slope is important, like let user define how much time the bed should take to go from target temperature to final one.
Schematic
Schematic source files for KiCad.
Schematic:
Electronics Design #2
This design uses a simple analog control circuit and is easy and cheap to build (20$US for the electronics).
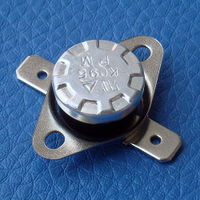
Bi-metal temperature switch
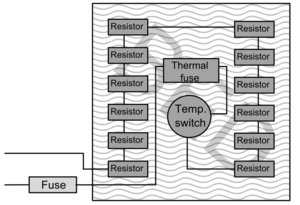
A simple bimetal NC temperature switch controls the temperature. These switches are on (=connected) when the temperature is below the value of the switch, when the temperature gets above the rated value of the switch it turns off (disconnects). When the temperature of the switch has dropped below a certain point, say 10C cooler than the rated temperature the switch turns on again. For printing ABS a switch with a rating of 140C works and keeps the temperature of the bed between 125-140 degrees. The switches can be bought for a few dollars on the internet for (search on ebay: "NC Thermostat Temperature Switch Bimetal Disc").
Thermal fuse
To protect the bed from over-heating in case of a problem a thermal fuse is used. A rating of around 200C should work.
Fuse
For safety a fuse is placed in the circuit for safety in case of a short. The rating of the fuse is dependant of the voltage and wattage you are using.
Power resistors
The bed is heated with power resistors. In my (North90ty) case for a 220mm by 230mm bed made out of 4.6mm aluminium around 150W of power is needed to heat the bed to 125C, i use no insulation under the bed and the printer is in a cool room. I use 12 10W resistors which are wired so they equal 70 Ohms. My bed is powered on 115V AC. Power resistors can be glued to the bed with epoxy steel, look at the temperature rating of the epoxy steel before you buy it, a rating around 500C is recommended.
Grounding of the bed and printer
For your safety it is important to ground the bed and the printer, especially when using a high voltage power supply or power straight from the net (110/220AC).
Circuit
SAFETY
It is very important to use:
- grounding of the bed to prevent electrical shocks [citation needed: shocks from a 12-24V supply? (Clarification: This seems to be a mains powered bed, not a 12 or 24 volt bed)]
- a thermal fuse to protect against over heating
- fuses for safety in case of a short (almost all power supplies have these built in, but extra safety isn't a bad thing).
Electronics Design #3, 230V
See [Hackaday Project]
Operational considerations
Initial heating
Due to the nature of things, the heated bed radiates heat. Loss of radiated heat from the bed results in poor efficiency when heating, which results in the need for more power to reach the desired temperature. A suggestion was made to try using a lid over the heated bed, to keep the heat trapped above the bed. Initial tests have proved successful at improving the initial heating time, though no detailed data on how much faster this improves heating is currently available.
The test lid was acrylic and approximately the same size as the bed. The piece of acrylic was on spacers that provided approximately 10mm clearance between the bed and the acrylic lid. Removal of the lid (to allow extruding) resulted in an almost immediate 5ºC temp drop (at 110ºC), which was then easily compensated for by the heating circuit in a minute or two.
Further suggestions have been made along the following lines:
- Thermal blank: Effectively a plate to cover the entire plate except for the area to be printed. Some suggestions are to use the printer to print this thermal plate, however there is the issue of the waste of plastic and/or re-use of these blanks over multiple prints yet to be addressed.
- Sliding plates blank: Same basic principle as the above, using sliding plates that can be moved into place around the bed to cover the non-printing area.
None of these ideas have yet been tested.
Removing the final printed piece
You should let the Heated Bed and piece cool down to avoid warping.
The printed piece may be very dificult to release from the Heated Bed. A good way to release it is using a hair dryer, blowing hot air against the piece when both Heated Bed and piece are cold (blowing approximated 20 seconds). If you want to release the piece when both Heated Bed and piece are hot, you may instead blow cold air, or use a wet towel and squeeze water around the piece and into the holes.
You can also use a pen knife to release the piece but be careful to not hurt yourself.
Skeinforge options for heated bed
Skeinforge has an option to control a heated bed and chamber.
Since we are not controlling the heated bed via gcode using the RepRap main board or the RepRap extruder board, we don't need that Skeinforge option.
We don't need a raft if the bed is flat enough but we need to print the first layer at a lower speed so the plastic can stick to Kapton tape.
Skeinforge options for this are in "Raft" -> "Object First Layer".
Keep in mind that skeinforge often renames options in newer versions or moves them to a different tab.
Here the main description taken from Skeinforge Manual at the RepMan-wiki:
Object First Layer
The first layer of your object is printed "differently" from the rest of the object. In some cases (especially if you are printing without raft) it is needed to print the first layer of your object slower or to deploy bit more filament.
Links
- Casainho Heated Bed using glass and nichrome wire
- Flexible HeatBed RobotDigg
- NopHead Heated Bed solution
- Prusajr Heated Bed solution
- Heated Bed
- Host_Software
- Reprapmall Heat bed
- RepRap: Blog: "No-curl hair dryer" 2008-12-11 : rather than buy nicrome wire and manually attach it to the bed and add some safety features around it, it reduces assembly time and may reduce net cost to buy a cheap off-the-shelf hair dryer (which already includes nicrome wire and some safety features) and clamp it in place.

