blt3dp's mostly metal delta build - AKA Metal Gear
Posted by blt3dp
|
Re: FA-MAS mostly metal delta build - AKA Metal Gear November 27, 2017 11:42AM |
Registered: 10 years ago Posts: 651 |
Checked the lower triangle
It's constructed so that all the towers are placed equally apart, within 0.2 mm
I'm pretty sure the upper triangle is built with the same accuracy (I'll double check when I get home)
I could shim these to get them super close, but I don't know how much of an effect that would have
I also checked that the bed is perpendicular to the towers
Also that I'm using metal corners, I'm fairly sure they're rotated at all
I'm confident that all 6 rods are the exact same (I use the same jig for all 6, 1 at a time. Though I don't know the exact length center to center)
I'm also fairly confident the bearings on the carriages are the same level
Also there's no play in any of the rod ends or the linear rails
***
The only thing I'm really not confident in is that the spacing between the bearings on the carriages, and the effector
They are different. I did shim them with the smallest washers that I had to get them close, but I believe they're still 0.3 mm difference.
I'm planning on shimming or filing to get them more accurate.
***
I also have a question,
It's possible to move the carriages one at a time correct?
What I'd like to do is move them all to a measurable position. Say I have a rod or something (measuring stick) I can place against one of the lower triangle vertices along one of the towers. Move that carriage to barely touch the top of that rod. Do the same for the other 2. Set that position as a known X0 Y0 and a Z height of my choosing. But then I'd know the exact center of the bed. Would there be a way for me to measure endstop corrections from there?
Edit: Guess I could do it the hard way. Adjust an endstop correction one at a time using M666, re-home, place my measuring stick and then move the whole effector down. Then do the same for the other 2?
Edited 2 time(s). Last edit at 11/27/2017 12:30PM by FA-MAS.
|
Re: FA-MAS mostly metal delta build - AKA Metal Gear November 27, 2017 01:14PM |
Registered: 10 years ago Posts: 14,672 |
If you are running RepRapFirmware then you can use G91 followed by G1 S2 commands to move the carriages individually. See [duet3d.com].
You could also generate a height map using M557 and G29, and publish it here. Some height map patterns are indicative of particular issues.
Edited 1 time(s). Last edit at 11/27/2017 01:16PM by dc42.
Large delta printer [miscsolutions.wordpress.com], E3D tool changer, Robotdigg SCARA printer, Crane Quad and Ormerod
Disclosure: I design Duet electronics and work on RepRapFirmware, [duet3d.com].
|
Re: FA-MAS mostly metal delta build - AKA Metal Gear November 28, 2017 12:13PM |
Registered: 10 years ago Posts: 651 |
Took about 2 hours and went over the entire machine yesterday.
Adjusted the lower triangle so precisely that it put the towers within 0.01 mm difference
Placed the bed directly on the triangle
Double checked that the towers were perpendicular to the bed using a big square, I did have to adjust one slightly
Adjusted the upper triangle so precisely that it put the towers within 0.01 mm difference too, this one took a little doing. Even though I had my extusions milled by misumi, one of them was slightly longer and wouldn't allow me to adjust the distance to what the others are. I had to file it down.
Top and bottom frames triangles match
Now the effector/carriages
I knew they were different, by 0.5 mm
I though shipping them with a washer that I thought was 0.5 mm would work. I found that the washer was 1.0 mm
I removed them and ended up filing down the effector/carriages to get them to within 0.02
Put it all back together and tweaked my config.g file slightly
Homed, ran G32 S2 and got this
************************
9:03:45 AM
G32 S2
Calibrated 6 factors using 10 points, deviation before 0.401 after 0.006
************************
Before I couldn't get it sub 0.014
I haven't tried a print yet, but soon.
Edit: Forgot, I found a loose pulley. I don't know if I just never tightened it up or if it had worked itself loose. Fixed that too.
Edited 2 time(s). Last edit at 11/28/2017 07:29PM by FA-MAS.
|
Re: FA-MAS mostly metal delta build - AKA Metal Gear November 28, 2017 12:35PM |
Registered: 8 years ago Posts: 3,525 |
Excellent result. If you probe just the central 100mm or so, of the bed you might see an even lower number.
But that's about as good as its likely to get without searching for the hairs in the palms of your hands.
Simon Khoury
Co-founder of [www.precisionpiezo.co.uk] Accurate, repeatable, versatile Z-Probes
Published:Inventions
But that's about as good as its likely to get without searching for the hairs in the palms of your hands.
Simon Khoury
Co-founder of [www.precisionpiezo.co.uk] Accurate, repeatable, versatile Z-Probes
Published:Inventions
|
Re: FA-MAS mostly metal delta build - AKA Metal Gear November 28, 2017 12:39PM |
Registered: 10 years ago Posts: 651 |
|
Re: FA-MAS mostly metal delta build - AKA Metal Gear December 03, 2017 11:11AM |
Registered: 10 years ago Posts: 651 |
Still having a problem getting that first layer perfect enough. It's either too high or too low in parts. Here's a heightmap.
also here's the probe section of config.g
And my bed.g
also here's the probe section of config.g
M558 P1 X0 Y0 Z0 H5 F900 T3600 ; Set Z probe type to unmodulated, the axes for which it is used and the probe + travel speeds
G31 P500 X20.5 Y-12.5 Z3.376 ; Set Z probe trigger value, offset and trigger height
M557 R75 S20 ; Define mesh grid
And my bed.g
; bed.g
; called to perform automatic delta calibration via G32
;
; generated by RepRapFirmware Configuration Tool on Fri Nov 10 2017 13:27:35 GMT-0800 (PST)

; Clear any bed transform
M561

; Probe the bed at 6 peripheral and 3 halfway points, and perform 6-factor auto compensation
; Before running this, you should have set up your Z-probe trigger height to suit your build, in the G31 command in config.g.
G30 P0 X0 Y74.9 H0 Z-99999
G30 P1 X64.87 Y37.45 H0 Z-99999
G30 P2 X64.87 Y-37.45 H0 Z-99999
G30 P3 X0 Y-74.9 H0 Z-99999
G30 P4 X-64.87 Y-37.45 H0 Z-99999
G30 P5 X-64.87 Y37.45 H0 Z-99999
G30 P6 X0 Y37.4 H0 Z-99999
G30 P7 X32.39 Y-18.7 H0 Z-99999
G30 P8 X-32.39 Y-18.7 H0 Z-99999
G30 P9 X0 Y0 H0 Z-99999 S6
|
Re: FA-MAS mostly metal delta build - AKA Metal Gear December 03, 2017 11:43AM |
Registered: 10 years ago Posts: 14,672 |
Judging from your Z probe trigger height, you are not using a nozzle contact Z probe, so I guess you have a Z probe that is offset from the nozzle. In which case, any geometrical error that causes the tilt of the effector to vary with XY position (i.e. most types of geometrical error) will cause the trigger height to vary with XY position, giving you a false height map. See [duet3d.com].
What type of Z probe is it, and how far from the nozzle is it?
Large delta printer [miscsolutions.wordpress.com], E3D tool changer, Robotdigg SCARA printer, Crane Quad and Ormerod
Disclosure: I design Duet electronics and work on RepRapFirmware, [duet3d.com].
What type of Z probe is it, and how far from the nozzle is it?
Large delta printer [miscsolutions.wordpress.com], E3D tool changer, Robotdigg SCARA printer, Crane Quad and Ormerod
Disclosure: I design Duet electronics and work on RepRapFirmware, [duet3d.com].
|
Re: FA-MAS mostly metal delta build - AKA Metal Gear December 03, 2017 11:45AM |
Registered: 10 years ago Posts: 651 |
|
Re: FA-MAS mostly metal delta build - AKA Metal Gear December 03, 2017 11:56AM |
Registered: 10 years ago Posts: 14,672 |
Judging from your height map, I think you have some variable effector tilt as the effector moves in the X direction. I suggest you put a circular spirit level on the effector so that you can see what tilt there is; and/or measure the height of the bottom edge of the sensor board above the bed at different positions.
You can compensate for varying trigger height in bed.g using the H parameter on the G30 commands; but G29 bed probing will still be affected by variations in trigger height. So you may be better results if you don't use mesh bed compensation, just auto calibration.
Can't you get the sensor closer to the nozzle? When I was using an IR probe on my delta, I had the back of the sensor about 11mm from the nozzle, making the offset of the sensitive area about 13mm. Here's a rather old photo of it.
The later version used the new style E3D heater block, the new style IR sensor, and a silicone sick over the block.
Large delta printer [miscsolutions.wordpress.com], E3D tool changer, Robotdigg SCARA printer, Crane Quad and Ormerod
Disclosure: I design Duet electronics and work on RepRapFirmware, [duet3d.com].
|
Re: FA-MAS mostly metal delta build - AKA Metal Gear December 03, 2017 12:00PM |
Registered: 10 years ago Posts: 651 |
|
Re: FA-MAS mostly metal delta build - AKA Metal Gear December 03, 2017 01:51PM |
Registered: 10 years ago Posts: 651 |
Here's what my initial trigger height at 0,0
3.534
Here's my bed.g and where it triggered at each point,
I just include the difference, plus or minus in the H parameter correct?
G30 P0 X0 Y74.9 H0 Z-99999 - 3.650
G30 P1 X64.87 Y37.45 H0 Z-99999 - 3.676
G30 P2 X64.87 Y-37.45 H0 Z-99999 - 3.568
G30 P3 X0 Y-74.9 H0 Z-99999 - 3.791
G30 P4 X-64.87 Y-37.45 H0 Z-99999 - 3.798
G30 P5 X-64.87 Y37.45 H0 Z-99999 - 3.771
G30 P6 X0 Y37.4 H0 Z-99999 - 3.621
G30 P7 X32.39 Y-18.7 H0 Z-99999 - 3.551
G30 P8 X-32.39 Y-18.7 H0 Z-99999 - 3.711
G30 P9 X0 Y0 H0 Z-99999 S6
|
Re: FA-MAS mostly metal delta build - AKA Metal Gear December 03, 2017 02:07PM |
Registered: 10 years ago Posts: 651 |
I've done G32 with those adjusted probe trigger heights, and started a print. The first layer looks alot better. Except, It's like the bed is tilted, so one corner of a square (100 mm x 100 mm) is squashed too much. I had to babystep it to get it to print clean. There's got to be some way of adjusting for that.
|
Re: FA-MAS mostly metal delta build - AKA Metal Gear December 03, 2017 02:51PM |
Registered: 10 years ago Posts: 651 |
Blah, I think I may have figured it out.
So 2 things,
When I adjusted the frame to be geometrically perfect, to ensure the towers were at 90 degrees to the bed, I placed the aluminum plate on the lower triangle and measured it that way. Problem is, I later placed the bed on printed holders to mount it. Turns out they varied slightly in height, probably introducing a tilt. I did away with those and the print bed is directly on the triangle now, held down by some M4 screws.
Second, back when I had installed the ir sensor, and it didn't seem to be triggering reliably. I got a replacement, but never installed it because the original all of a sudden started to trigger reliably. Well, it stopped again. I replaced it and it's been fine. I found that there was in fact a solder joint that wasn't soldered on the original one as the ir reciever fell off when i barely touched it.
Printing another first layer,
Thus far it looks good possibly could use some fine tuning on the Z0 position, but it looks promising.
Edit: ohmygosh, I forgot to tension the belts from when I adjusted the frame.
Edited 1 time(s). Last edit at 12/03/2017 03:08PM by FA-MAS.
|
Re: FA-MAS mostly metal delta build - AKA Metal Gear December 04, 2017 12:15PM |
Registered: 10 years ago Posts: 651 |
|
Re: FA-MAS mostly metal delta build - AKA Metal Gear December 10, 2017 06:28PM |
Registered: 10 years ago Posts: 651 |
Frame's for sale if anyone wants it.
http://forums.reprap.org/read.php?94,800287
Edited 1 time(s). Last edit at 12/10/2017 06:28PM by FA-MAS.
http://forums.reprap.org/read.php?94,800287
Edited 1 time(s). Last edit at 12/10/2017 06:28PM by FA-MAS.
|
Re: FA-MAS mostly metal delta build - AKA Metal Gear May 01, 2018 09:07PM |
Registered: 6 years ago Posts: 9 |
I'm sorry to see the frame isn't working as it should, but I think you're giving up too fast.
The arms look a bit too long in my opinion. It gives me the feeling I want to write holding the pen close to the eraser.
If I were you I would check all arms between them to see if they are equal. Just stand them all up against the table and see how even they are now. They also have to point in the same directions.
This guy is using 10/7mm rods, and it seems he knows what he's doing. Select 1.25X speed and watch the whole thing:
[youtu.be]
He has too long videos, but you should see what he did with those strong arms. They worked just fine, but he made a new design just because he could:
[youtu.be]
Also, lose the IGUS, and buy proper carriages that you don't have to drill holes yourself. Get used to the thought they suck, and move on.
[forums.reprap.org]
I'm surprised you didn't check the aluminum extruders between them-self before you installed them. Too bad you paid for them to be cut "professionally".
Now it's a bit too late, but I would have? also checked the famous Robotdigg corners between themselves, stacked on top of each other, and than checked the angles.
Build, or better yet buy a good (long enough) 60° template and a 90° one, and check all angles.
Make sure the bed is actually straight, cold and hot, and don't just use your eyes to check. Take thermal expansion into account. If those M4 hold the plate too tight, something's got to give.
Also make sure both sides are parallel to each other.
As others said before me, carefully read this [duet3d.dozuki.com] . I'm sure you overlooked something.
"Unfortunately, auto calibration can't easily distinguish between bed tilt and differences in tower separation."
You have such a beautiful setup. It would be a shame to let this baby die. You seem smarter than me, based on CAD and what not. Show yourself you can finish this build.
If you sell, someone else is going to build a good delta and you'll regret selling it.
No need to reply to this if your mind is set on selling.
Edited 1 time(s). Last edit at 05/01/2018 09:10PM by Gheorghe.
|
Re: FA-MAS mostly metal delta build - AKA Metal Gear May 01, 2018 09:18PM |
Registered: 10 years ago Posts: 651 |
|
Re: FA-MAS mostly metal delta build - AKA Metal Gear August 12, 2018 06:20PM |
Registered: 10 years ago Posts: 651 |
Thinking about revisiting this with proper linear rails. Anyone have any recommendations on where to get good ones that are between 500-600mm long? I hear the stainless steel ones from the obotdigg are good. I wanna make sure my extrusions are milled square and even lengths. Additionally I’d like to get a bottom plate made out of cast tooling plate to attach everything to. I’m still wanting to use my traxxas joints, I’ve got those rods assembled and they move without play. Also thinking about a Precision Piezo Orion.
|
Re: FA-MAS mostly metal delta build - AKA Metal Gear August 13, 2018 04:40PM |
Registered: 10 years ago Posts: 651 |
So I've decided that I'm going to continue this. Looking at linear rails, I'm wondering if I should either get some original IKO rails (used) from ebay. The only issue is again the hole spacing, they're 20 mm apart horizontally and 21.6 mm part vertically (WTF). This is of course different than any of the carriages that are out there. I could attempt to make a solution to use them or I could go with the Robotdigg Stainless Steel rails and blocks, which seem to be ok and compatible with all the carriages and accessories out there. I'm leaning towards the Robotdigg rails. Whatcha think?
Edit: Going with the robotdigg rails and carriages.
Edited 1 time(s). Last edit at 08/14/2018 03:32PM by FA-MAS.
Edit: Going with the robotdigg rails and carriages.
Edited 1 time(s). Last edit at 08/14/2018 03:32PM by FA-MAS.
|
Re: FA-MAS mostly metal delta build - AKA Metal Gear August 26, 2018 10:07AM |
Registered: 10 years ago Posts: 651 |
Just got my linear rails from Robotdigg. They’re much better than the igus, there is absolutely no play. I ordered a couple with 2 blocks just so I’d have extra ball bearings just in case the blocks were missing any. Looks like all the balls are there, and they move well without any play. That would definitely get rid of the effector wobble.
|
Re: FA-MAS mostly metal delta build - AKA Metal Gear September 01, 2018 12:11PM |
Registered: 10 years ago Posts: 651 |
I had previously taken this machine apart. Now I'm rebuilding it.
I've rebuilt the lower triangle and gotten the verticals installed. I used my cast tooling plate bed and a very large square to make sure the towers were perpendicular to the bed.
I've also gotten one of the Robotdigg linear rails installed.
Absolutely no play, freaking fantastic.
I've rebuilt the lower triangle and gotten the verticals installed. I used my cast tooling plate bed and a very large square to make sure the towers were perpendicular to the bed.
I've also gotten one of the Robotdigg linear rails installed.
Absolutely no play, freaking fantastic.
|
Re: FA-MAS mostly metal delta build - AKA Metal Gear September 04, 2018 01:27PM |
Registered: 10 years ago Posts: 651 |
Ugh, I'm starting to think the Robotdigg Alu Vertices are preventing me from getting the verticals perfectly perpendicular to the bed. It looks like there are too many points of freedom to consider when building.
First only using 2 screws to hold the verticals will pull them towards the outside of the vertex. That's fine if the slot for the 2040 is actually perpendicular to the top and bottom faces of the vertex. the vertices are definitely extruded and then saw cut. I'd bet the blade isn't square to the length of the slot for the verticals. Lets call that the Y direction.
Next, there's nothing to to prevent rotation along the other direction. A small rotation at the bottom could be quite a big difference at the top if you're building a meter tall machine. There should be 2 screws along the side to prevent that rotation. Lets call that the X direction.
Also, the whole vertex could be rotated about the Y, X, and Z directions. You can't use the faces of the vertices to align your extrusions for the lower and upper triangles as the cuts are most likely not square.
I'm redesigning the frame to use cast tooling plate for the top and bottom and 4060 extrusion which will be milled square and attached directly to the plates.
|
Re: FA-MAS mostly metal delta build - AKA Metal Gear September 25, 2018 12:02PM |
Registered: 10 years ago Posts: 651 |
Finalizing the design for my delta without vertices and wanted to ask the forum's opinion.
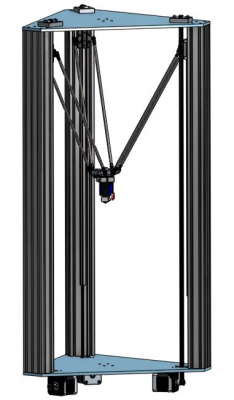
Looking at the picture below, should I leave it this way with the motors at the bottom and mount the electronics (Duet Ethernet, SSR) at the bottom? This would mean that most of the wiring would come into the bottom and could be tucked underneath with the motors. I'd of course have to find a way to put legs on it so there's space beneath. Also the extruder would be mounted half way up one of the verticals and the wiring from the effector would have to also attach mid way and then run down to the bottom. Endstop wires would have to come all the way down from the top.
Or, should I flip it over so the motors are at the top? I could mount the Duet up there, the motors would be there already, extruder could be mounted up there and then the wires could run with the bowden tube up to the top, endstops would wouldn't have very far to go. The only things I'd have to worry about is the wire carrying 24v down to the bottom to the SSR, the bed thermistor wiring, the wiring carrying 24v up to the Duet (I'm using an external 24v brick), and the ethernet wiring going down to the bottom (if i choose to have a connector at the bottom).
|
Re: FA-MAS mostly metal delta build - AKA Metal Gear February 07, 2019 10:52AM |
Registered: 10 years ago Posts: 651 |
Back at it. Continued on with the design in my last post and here's where I'm at s far. The top and bottom are 1/4" MIC6 that I designed and had WaterJet cut. The vertical extrusions are Misumi 4060 that I had milled square and to the same lengths.
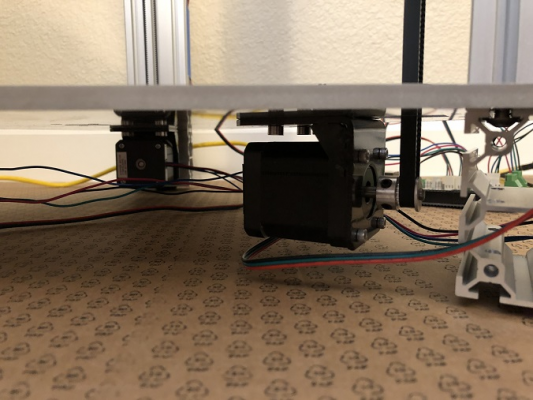
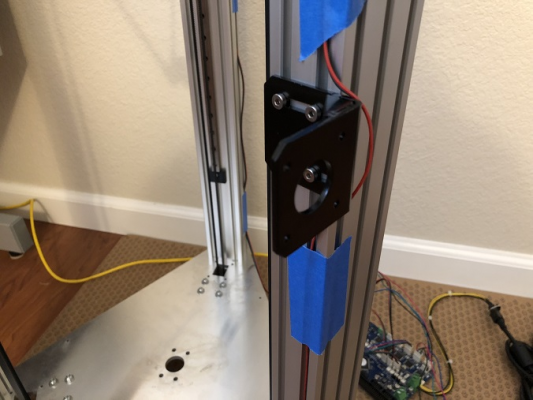
On the bottom, I used pre-made motor mounts that I got off of amazon. I didn't know the hole spacing when I had the top and bottom cut so I had to drill the holes to mount them myself. I used a few pieces of 4060 to raise the bottom plate to make room for the motors
Here's how I did the idlers, basically left over Robotdigg idler parts that I printed a plastic holder for. They're currently held in place with set screws and the belt tension keeps them in place, but I'll be changing them to actual M4 screws.
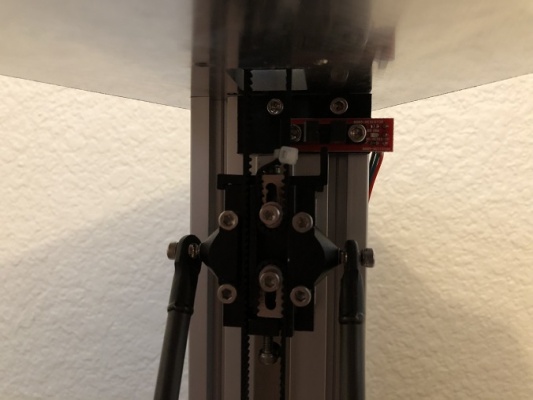
Here you can see that I'm using Robotdigg stainless steel mgn12 clone linear rails, there's absolutely no play in these rails and they glide smoothly. To the blocks I am using the Robotdigg Kossel carriages. They must have changed something because there is no clearance for the M3 screw head to recess in it's spot so I had to make spacers. Either way, they're installed firmly. You can also see one of my endstop mounts which holds an optical endstop. You can also see the endstop flag that I have attached to the carriage. Also that I'm using Traxxas rod ends. I had assembled 5 packs of these to get enough without any play in them.
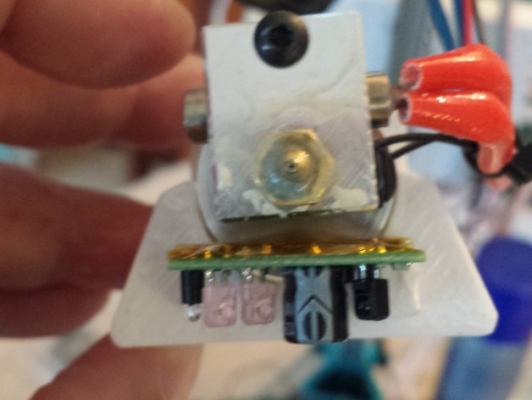
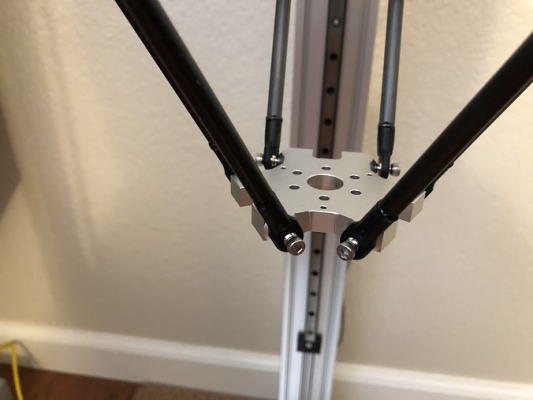
This is a picture of the effector that I'll be using currently. Again the other ends of the rods with the Traxxas ends. There is no play in the effector at all. I cannot wiggle it one bit by hand. I'll be installing a Precision Piezo Orion and an E3D v6.
This is where I plan to mount the E3D Titan.
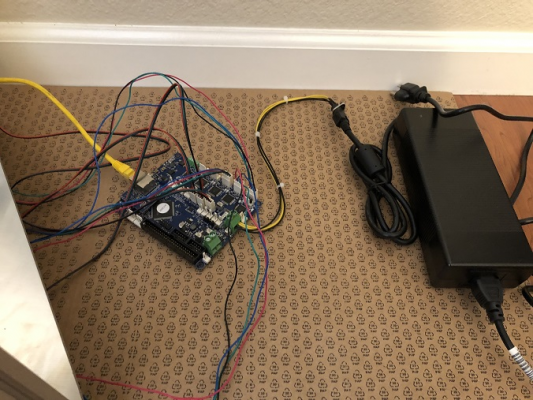
Lastly, here's the electronics. Just for testing. I don't want to mount them under the bottom plate and I didn't want to have to remove the bed to get at them so I'll probably be printing an enclosure to mount them to the rear vertical extrusion similar to dc42's original mount. It's a Duet Ethernet 1.02 (I've had it a while), running the newest firmware and a 24v PSU.
Things I plan to change.
1. Move to a Smart Effector and Carriage Adapters.
2. Ditch the Robotdigg carriages. Truthfully, the idea of built in tensioners is nice but the parts are such low quality that I had to fight with them to even get them assembled correctly. That means I'd have to design my own method for attaching the belt to the block. It's ok, I have an idea.
3. Ditch the Robotdigg idler assemblies. They're also kind of garbage, I don't think they're fully concentric. Plus I'd rather use toothed pulleys of the same model as I have on the motors. I have some ideas on how to do this too.
4. Design a method to tension the belts, I'm thinking of making my idler mounts a 2 piece whereas you could tighten screws on the top piece and it would press against the bottom and pull them further apart.
4. I'd probably get the top and bottom recut at some point. I'd like to have the holes for the motor mount cut more accurately than I did by hand and I'd like to adjust the idler holes to match (kind of an OCD thing).
Edited 4 time(s). Last edit at 02/07/2019 11:12AM by FA-MAS.
|
Re: FA-MAS mostly metal delta build - AKA Metal Gear February 07, 2019 11:16AM |
Registered: 10 years ago Posts: 651 |
Oh yeah, it moves. Exactly as I thought it would. Ran a test print with cold extrusion turned on (since I don't have a hotend or a bed installed) and ramped it up to 150 mm/s moves and 120 mm/s print speed and it finished a "job" about 4 times faster than my Prusa i2 would have. Plus it was much quieter.
Hope to get the hotend and bed installed this weekend and maybe see how it calibrates.
Edited 1 time(s). Last edit at 02/07/2019 11:23AM by FA-MAS.
Hope to get the hotend and bed installed this weekend and maybe see how it calibrates.
Edited 1 time(s). Last edit at 02/07/2019 11:23AM by FA-MAS.
|
Re: FA-MAS mostly metal delta build - AKA Metal Gear February 20, 2019 06:20PM |
Registered: 10 years ago Posts: 651 |
Thought I'd post an update. I have all the hardware assembled. Everything's all wired up, it needs to be cleaned up though.
Oh, and now I know what you guys mean about the fan being the loudest part. Before I hooked up the e3d fan, i could hear the motor hum when idle. I'm used to the Noctua fan on my old Prusa. I'll be getting another one for the new printer, that ed3 fan is crazy.
And here's calibration using a 106 mm radius (212mm diameter)
Edited 2 time(s). Last edit at 02/20/2019 06:51PM by FA-MAS.
|
Re: FA-MAS mostly metal delta build - AKA Metal Gear February 27, 2019 10:53AM |
Registered: 10 years ago Posts: 651 |
Aha, figured out a good way to measure my diagonal rod length. I scanned one and imported it into my CAD program. I then scaled it to 1:1 and did a sketch on top of it so I could measure between centers. Turns out my actual rods came out pretty close to what I had modeled in CAD originally. At least now I can be confident in the measurement I put in my config file.
|
Re: FA-MAS mostly metal delta build - AKA Metal Gear February 27, 2019 07:17PM |
Registered: 10 years ago Posts: 651 |
So, I updated my config with the correct delta rod length and adjusted delta radius. Also updated the calibration factors to 8 and I'm super impressed with how well it calibrated.
And it seems to do so reliably.
Also upped the temperature because of some under-extrusion and I must say the first layer is slightly pornographic. Wish i could get a picture to show it.
Edited 1 time(s). Last edit at 02/27/2019 07:18PM by FA-MAS.
And it seems to do so reliably.
Also upped the temperature because of some under-extrusion and I must say the first layer is slightly pornographic. Wish i could get a picture to show it.
Edited 1 time(s). Last edit at 02/27/2019 07:18PM by FA-MAS.
|
Re: FA-MAS mostly metal delta build - AKA Metal Gear March 16, 2019 04:25PM |
Registered: 6 years ago Posts: 8 |
|
Re: FA-MAS mostly metal delta build - AKA Metal Gear March 17, 2019 11:00AM |
Registered: 10 years ago Posts: 651 |
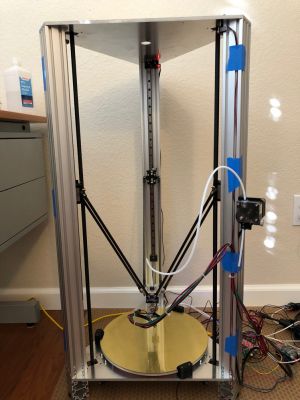
Nothing's really changed visually from my last picture. I'm going to be switching effectors, I think the one I'm using is limiting the movement. Although 262 mm diameter isn't "limited", It could be 300mm. I'm waiting on a couple of parts and I'm designing and printing a box for the electronics. I'm designing that to be modular so if I wanted to test out the electronics on another printer or try other electronics, I could just swap out the box with another. Plus I'd rather have them easily accessible without having to take off the bed or turn the printer over.
Edit: I'm using 6 mm wide belts. I did plan for 9 mm if I wanted to in the future. The face of my extrusions are 52.1 mm away from the bed. The bed is 304.8 mm (12 in) in diameter.
Edited 4 time(s). Last edit at 03/18/2019 10:42AM by FA-MAS.
Edit: I'm using 6 mm wide belts. I did plan for 9 mm if I wanted to in the future. The face of my extrusions are 52.1 mm away from the bed. The bed is 304.8 mm (12 in) in diameter.
Edited 4 time(s). Last edit at 03/18/2019 10:42AM by FA-MAS.
Sorry, only registered users may post in this forum.
