Verteez Smartrap build
Posted by verteez
|
Re: Verteez Smartrap build May 04, 2014 09:49AM |
Registered: 10 years ago Posts: 116 |
|
Re: Verteez Smartrap build May 05, 2014 01:12PM |
Registered: 10 years ago Posts: 116 |
I have problem with my extruder, the mottor started to skip. Anny idea what to do?
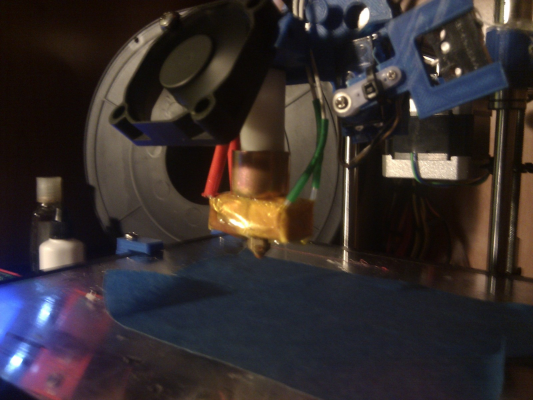
I decided to use chinese J-head while Im still waiting for the J-head lite v2. the filament is comming out of the nozzle curved, and the extruder is skipping. Anny idea?
I just want to have this new hotend xD
I decided to use chinese J-head while Im still waiting for the J-head lite v2. the filament is comming out of the nozzle curved, and the extruder is skipping. Anny idea?
I just want to have this new hotend xD
|
Re: Verteez Smartrap build May 05, 2014 02:57PM |
Registered: 10 years ago Posts: 814 |
|
Re: Verteez Smartrap build May 05, 2014 06:41PM |
Registered: 10 years ago Posts: 349 |
|
Re: Verteez Smartrap build May 06, 2014 03:09PM |
Registered: 10 years ago Posts: 116 |
So, the crappy chinese hot end officially died today.. Im just pissed of because of this. Only money lost, eh.
But! Happines in pain, parts of my J-head lite V2 came today, YAY I have just finished assembling and started the first print with it.
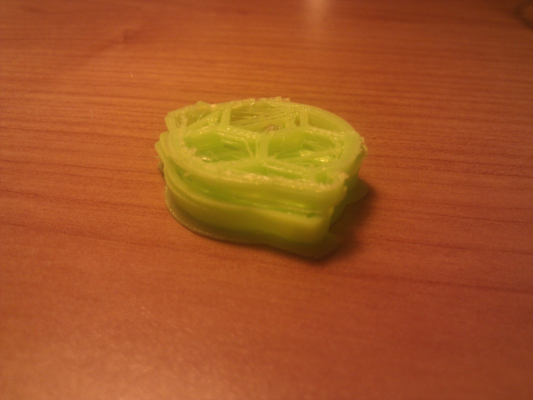
But I still got problems. The PLA just dont want to stick onto bed, even on blue tape have problems I still got the problem with extruder, will try to callibrate again. I have also noticed that my print was tilted in X axis, so I have stopped it(also of "airprinting"). Should I recallibrate the microstepping, or the stepper driver?
I'm allso struggling with setting up the nozzle level. I just cant set it right
The print was done with Cura. The settings:
Leyer Height 0.1mm
Shell thickness 0.8mm
bottom thickness 0.6mm
infill 20%
print speed 40%
Temp 220C
flow of filament 95%
The nozzle is 0.35mm
Sorry for the crappy camera
But! Happines in pain, parts of my J-head lite V2 came today, YAY
 I have just finished assembling and started the first print with it.
But I still got problems. The PLA just dont want to stick onto bed, even on blue tape have problems
 I still got the problem with extruder, will try to callibrate again. I have also noticed that my print was tilted in X axis, so I have stopped it(also of "airprinting"). Should I recallibrate the microstepping, or the stepper driver?
 I'm allso struggling with setting up the nozzle level. I just cant set it right

The print was done with Cura. The settings:
Leyer Height 0.1mm
Shell thickness 0.8mm
bottom thickness 0.6mm
infill 20%
print speed 40%
Temp 220C
flow of filament 95%
The nozzle is 0.35mm
Sorry for the crappy camera

|
Re: Verteez Smartrap build May 06, 2014 04:29PM |
Registered: 10 years ago Posts: 18 |
Did you change the thermistor setting in your firmware? According to the J-head Lite V2 Thingiverse page the hotend uses a Honeywell 100k thermistor (Digikey # 480-3135-ND). This is different then the default thermistor set in the SmartRap firmware. A quick glance at the thermistortables.h shows they are quite different from one another. So while you think you are at 220C, you may actually be significantly cooler... or hotter. I didn't look at the table too closely.
Change the line:
#define TEMP_SENSOR_0 1
to...
#define TEMP_SENSOR_0 7
Edited 1 time(s). Last edit at 05/06/2014 04:30PM by milt.
Change the line:
#define TEMP_SENSOR_0 1
to...
#define TEMP_SENSOR_0 7
Edited 1 time(s). Last edit at 05/06/2014 04:30PM by milt.
|
Re: Verteez Smartrap build May 06, 2014 05:56PM |
Registered: 10 years ago Posts: 116 |
|
Re: Verteez Smartrap build May 08, 2014 12:00PM |
Registered: 10 years ago Posts: 116 |
So, I have recalibrated the extruder once again, and now its working. I have also given him a bit more pover on the stepper driver. Unfortunatelly, I don't know why, but the holder of the bowden calbe near the hot end just got ripped off, so I must think about something else to fix it..
I was trying to callibrate my printer from the instruction here Calibration
and after printing the 0.5mm thin wall for callibration the layer, wich came out really good from the first time
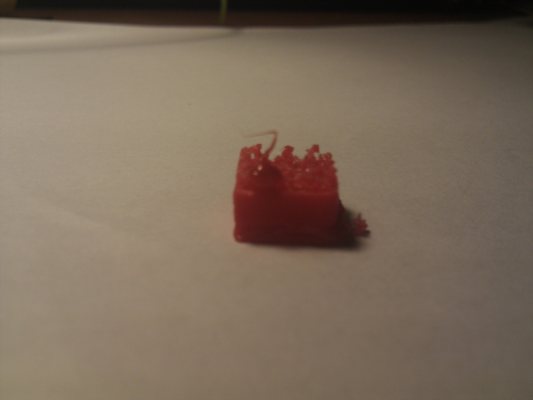
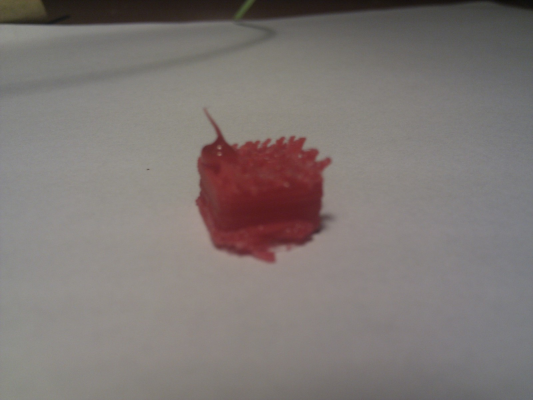
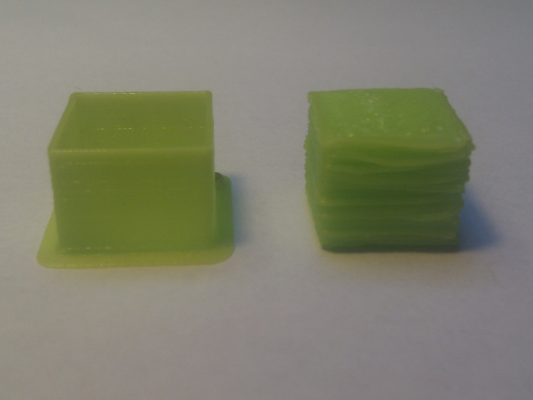
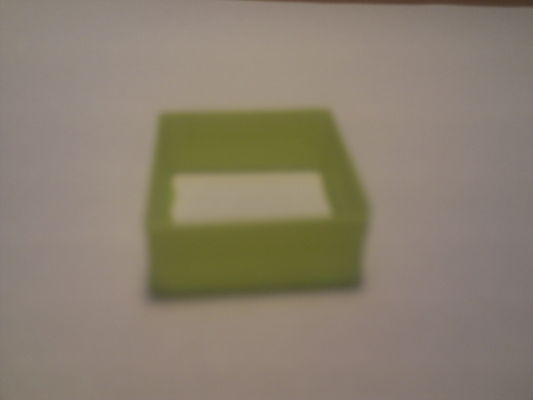
But I got stuck on calibration of infill.. While printing the 20mm cube, the nozzle is dragging the filament, it's extruded too much and I dont know how to set it up right in Slic3r.
Compared
Also, do somebody know what I can do that the filament wont be sticking to the nozzle after comming out? I also have to callibrate the
Perrimeters,
Bridging,
Overhang,
Oozebane.
But first I wanted to get ride of this infill problem.
|
Re: Verteez Smartrap build May 08, 2014 05:25PM |
Registered: 10 years ago Posts: 349 |
Hi Kamil,
Here is another calibration guide:
[manual.slic3r.org]
I've been walking trough several guides now and it still feels like i'm going backwards, so it's good to see that you are having progress. :-)
Today I used a sheet of paper as print bed, and to my surprise the PLA stuck to the paper better then all the other methods i've tried.
|
Re: Verteez Smartrap build May 08, 2014 06:06PM |
Registered: 10 years ago Posts: 116 |
Hi BackEMF,
I have been trying this guide also I got the same like you, the more I try to fix it, the more it's messed up..
Just moment ago it was printing pretty nice, I have decided to print something bigger. Some little monster from thingiverse, but don't know why the layers while printing were not lined, they were moved. Also the nozzle was dragging the filament while printing next layers and infill, when the test cube was printed fine.
So I tought it could be the microstepping, done math once again and it was even worst. Whats even more bad is that I have forgotten my last good setting :< I will just try tomorrow once again, and probably will take out one jumper to get 1/8 on microcontroler. I don't know why, but my ramps seted up to 1/16 were working better on values from 1/8..weird. When I set the correct values(correct from doing math) the print output is too big, or too small.
And the worst thing ever, my printer is being to self destruct..and I cant print new parts because on not printing correctly :C Just now my extruder bearing holder cracked, I must to calibrate it quickly and print a new one. Also a mount for the J-head lite.
Someone help?
I have been trying this guide also
 I got the same like you, the more I try to fix it, the more it's messed up..
Just moment ago it was printing pretty nice, I have decided to print something bigger. Some little monster from thingiverse, but don't know why the layers while printing were not lined, they were moved. Also the nozzle was dragging the filament while printing next layers and infill, when the test cube was printed fine.
So I tought it could be the microstepping, done math once again and it was even worst. Whats even more bad is that I have forgotten my last good setting :< I will just try tomorrow once again, and probably will take out one jumper to get 1/8 on microcontroler. I don't know why, but my ramps seted up to 1/16 were working better on values from 1/8..weird. When I set the correct values(correct from doing math) the print output is too big, or too small.
And the worst thing ever, my printer is being to self destruct..and I cant print new parts because on not printing correctly :C Just now my extruder bearing holder cracked, I must to calibrate it quickly and print a new one. Also a mount for the J-head lite.
Someone help?
|
Re: Verteez Smartrap build May 08, 2014 07:20PM |
Registered: 10 years ago Posts: 814 |
Ok, I think the reason your tip is dragging is the Z offset. I had issues with my Z nut moving up and down in its slot. I finally cut a small piece of spring and squeezed it in there to keep the nut pressed up against the top of the slot. Anyways I was adjusting the Z offset per print. I would write down my Z offset, and the adjust it .1 in either direction till i got the first layer i wanted. M555 Z?. I also found that if I happen to tweak the machine while removing a part that I'd have to readjust it.
Are you sure of your stepper's steps? If you thought you had a .09 degree stepper, and really had 1.8 degree stepper?
Are you sure of your stepper's steps? If you thought you had a .09 degree stepper, and really had 1.8 degree stepper?
|
Re: Verteez Smartrap build May 08, 2014 07:56PM |
Registered: 10 years ago Posts: 349 |
|
Re: Verteez Smartrap build May 08, 2014 08:02PM |
Registered: 10 years ago Posts: 992 |
ho.. lot of troubles adjusting here i see.
We are not there yet with this model i think . It's so long to have a real good design , working at everyone's home, with all different printers and options. But we will have it, i'm sure.
verteez, i can print you some parts if you want.
the Smartrap project
[smartfriendz.com]
[www.thingiverse.com]
[reprap.org]
[github.com]
doc assemblage: [reprap.org]
NEW: Forum smartfriendz: [smartraptalk.smartfriendz.com]
|
Re: Verteez Smartrap build May 08, 2014 09:01PM |
Registered: 10 years ago Posts: 349 |
Serge,
Yes getting all the settings right is quiet a challenge, one minute you think you are getting there and the other minute then it's all messed up again.
In my case i discovered that the printed layers need cooling, it looks like Kamil also needs cooling though i'm not 100% sure (i'm still learning myself)
I also tried to print 50% slower but then I stell get messy prints. (but maybe the manual feeding also adds to the trouble)
Sometimes it's a bit frustrating, though i'm sure this part of the build is valueable.
|
Re: Verteez Smartrap build May 09, 2014 02:32PM |
Registered: 10 years ago Posts: 116 |
Hi all,
Madmike8,
I'struggling with the Z offset all the time, almost before every print. Now its somehow a bit better. Dont know what to do, bacause when i set my Z offset correctly, my layers are squized, but when I change it that they are fine, then the nozzle is to hight I the filament is not sticking to bed, and then print and is waved. I have blocked the Z nut with tight wrap, so it's always the sime when measuring the bed level.Yes, Im sure of my microsteps, I have done them once again this morning. Now they are fine, but I have new problem, will write it down there.
BackEMF,
Yes, you are right. It's like learning to walk, in my case im also walking like a drunk, while learning And no, the printed layers are not cooling to slow, I would say that they are fine. My problem is the filament comming out of the nozzle on itself, It's doing the biggest mess, and also ruin the first layers. I don't know how to stop it, I have checked the oozebane in slicer setting.
Smartfriendz,
Yes, but im trying to overcome them somehow. For now with my broken parts the hot glue is a big help, but not for too long.The model is good, but 3d printed printer for a newbie is a easy to breake thing itslef. I think that it will be more and more stable and reliable in near future Mostly thanks to You, and lot of people from this forum. Im sad that I can't use cad, or similar things, so I'm not too big help to project
For the parts, it would be cool and really nice, but I will try to live with them this month. If the printer die at all, then I will ask You for this. Also, I dont have anny money left this month
So, what's so far of the new problems.
-I came to this that my first layers are just to high to stick propetly to bed, bud if I callibrate the Z offset, then the layers make a mess.
-the filament is sticking to the nozzle, doing also the mess on the bed, and print.
-from my last print I can say thet i have problem with my infill. It's not sticking at the begining, somewhere too much, somewhere not anny, and it's once too thin, or too thick. (photo at the end)
-also, somehow my D1 diode have just died 0.o So For running the printer now I must to connect arduino to PC, and the ramps like before have external pover supply. But I have ordered new hour ago, so I will fix it when it will arrive, and after 23rd May (my last exam)
-other problem is the correct size of the print output, but I will veriffy it leater, when it will start to print good.
-the last problem is with the bed, with it's center. Don't know why, but after callibrating the microsteps(now are good, for sure) the printer prints something what is centred in RH at the down left corner (looking from front) So I don't know why my print is moved so much from the center. Also the autohome is moved from it's previsious position to other. I thing it's because from changing the microsteps, but they are fine, so how to fix it?
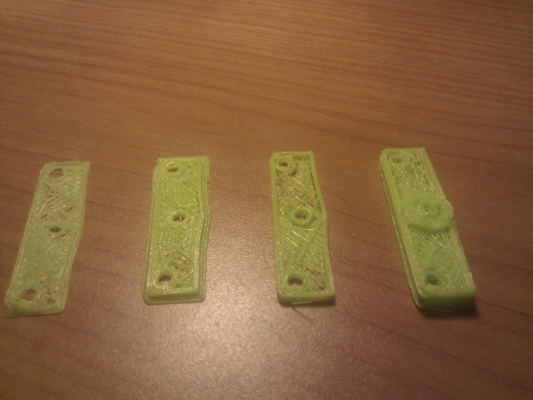
Attemps to print new extruder bearing holder from this morning.
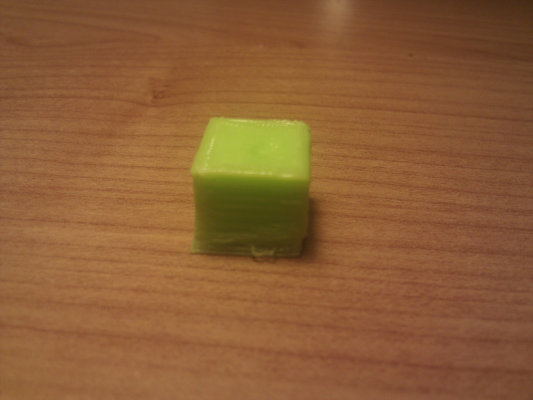
Yesterday infill test cube.
Yesterday misslined layers of Cute Octopus from Thingiverse.
Yesterday misslined attempt to print Omnom omnom from Cut the rope Android game.
All these F*cked up prints since Thursday.
My last slic3r setting, mostly not changed to much, and used today for the extruder bearing holder part:
Nozzle 0.35mm
Layer height 0.15
first layer height 35mm/%
fill density 0.4
fill pattern honeycomb
top/bottom fill pattern rectlinear
skirt 3 layers height, 5mm distance from object, 3 loops, 3mm minimum extrusion
top solid layers 3, bottom 4
Rest is like from github settings:
perimeter speed 20
infill speed 30
travel speed 40
perimeters extrusion width = 0.35mm
infill extrusion width 0.67mm
solid infill extrusion width 0.59mm
top infill extrusion width 0.59mm
first layer extrusion width 0.70mm
Kamil.
Madmike8,
I'struggling with the Z offset all the time, almost before every print. Now its somehow a bit better. Dont know what to do, bacause when i set my Z offset correctly, my layers are squized, but when I change it that they are fine, then the nozzle is to hight I the filament is not sticking to bed, and then print and is waved. I have blocked the Z nut with tight wrap, so it's always the sime when measuring the bed level.Yes, Im sure of my microsteps, I have done them once again this morning. Now they are fine, but I have new problem, will write it down there.
BackEMF,
Yes, you are right. It's like learning to walk, in my case im also walking like a drunk, while learning
 And no, the printed layers are not cooling to slow, I would say that they are fine. My problem is the filament comming out of the nozzle on itself, It's doing the biggest mess, and also ruin the first layers. I don't know how to stop it, I have checked the oozebane in slicer setting.
 Smartfriendz,
Yes, but im trying to overcome them somehow. For now with my broken parts the hot glue is a big help, but not for too long.The model is good, but 3d printed printer for a newbie is a easy to breake thing itslef. I think that it will be more and more stable and reliable in near future
 Mostly thanks to You, and lot of people from this forum. Im sad that I can't use cad, or similar things, so I'm not too big help to project
For the parts, it would be cool and really nice, but I will try to live with them this month. If the printer die at all, then I will ask You for this. Also, I dont have anny money left this month

So, what's so far of the new problems.
-I came to this that my first layers are just to high to stick propetly to bed, bud if I callibrate the Z offset, then the layers make a mess.
-the filament is sticking to the nozzle, doing also the mess on the bed, and print.
-from my last print I can say thet i have problem with my infill. It's not sticking at the begining, somewhere too much, somewhere not anny, and it's once too thin, or too thick. (photo at the end)
-also, somehow my D1 diode have just died 0.o So For running the printer now I must to connect arduino to PC, and the ramps like before have external pover supply. But I have ordered new hour ago, so I will fix it when it will arrive, and after 23rd May (my last exam)
-other problem is the correct size of the print output, but I will veriffy it leater, when it will start to print good.
-the last problem is with the bed, with it's center. Don't know why, but after callibrating the microsteps(now are good, for sure) the printer prints something what is centred in RH at the down left corner (looking from front) So I don't know why my print is moved so much from the center. Also the autohome is moved from it's previsious position to other. I thing it's because from changing the microsteps, but they are fine, so how to fix it?
Attemps to print new extruder bearing holder from this morning.
Yesterday infill test cube.
Yesterday misslined layers of Cute Octopus from Thingiverse.
Yesterday misslined attempt to print Omnom omnom from Cut the rope Android game.
All these F*cked up prints since Thursday.
My last slic3r setting, mostly not changed to much, and used today for the extruder bearing holder part:
Nozzle 0.35mm
Layer height 0.15
first layer height 35mm/%
fill density 0.4
fill pattern honeycomb
top/bottom fill pattern rectlinear
skirt 3 layers height, 5mm distance from object, 3 loops, 3mm minimum extrusion
top solid layers 3, bottom 4
Rest is like from github settings:
perimeter speed 20
infill speed 30
travel speed 40
perimeters extrusion width = 0.35mm
infill extrusion width 0.67mm
solid infill extrusion width 0.59mm
top infill extrusion width 0.59mm
first layer extrusion width 0.70mm
Kamil.
|
Re: Verteez Smartrap build May 09, 2014 03:40PM |
Registered: 10 years ago Posts: 10 |
|
Re: Verteez Smartrap build May 09, 2014 03:53PM |
Registered: 10 years ago Posts: 814 |
|
Re: Verteez Smartrap build May 09, 2014 05:34PM |
Registered: 10 years ago Posts: 349 |
|
Re: Verteez Smartrap build May 09, 2014 09:51PM |
Registered: 11 years ago Posts: 791 |
Looking at the prints, I feel that the problem may be with the stepper motor settings. Have you checked the current settings from the motor drivers?
Seems like lost steps to me. Just a thought.
[regpye.com.au]
"Experience is the mother of all knowledge." --Leonardo da Vinci
Seems like lost steps to me. Just a thought.
[regpye.com.au]
"Experience is the mother of all knowledge." --Leonardo da Vinci
|
Re: Verteez Smartrap build May 10, 2014 05:21AM |
Registered: 10 years ago Posts: 116 |
Hi guys,
Heyzeus,
I will try today with the 2mm and 2.5mm layer height, and post the results.
Madmike8,
I will probably swich to belts, but for now I don't have time for this. Maybe next month. I think that the layers were skipped, because I had too much microsteps then, and the fishing line slipped on the shaft. Now it seams Ok, but will see this.
BackEMF,
Thanks for such kind words, Im happy then
Regpye,
So, you say that I should adjust the voltage on the stepper drivers, or again change the microstepping?
My current microstepping is 106.10 from 48mmm motor 1.8 degree, 200 turns, 0.30mm fishing line and 4.5 motor shaft.
Only the bearing holder was printed on this tepup, rest was before on other setting(probably wrong and too less or too much)
To all, how about changing the Z axis microstepping? Should I do this? Or its the best option like it is now? I left the stock setting of 4000.
Heyzeus,
I will try today with the 2mm and 2.5mm layer height, and post the results.
Madmike8,
I will probably swich to belts, but for now I don't have time for this. Maybe next month. I think that the layers were skipped, because I had too much microsteps then, and the fishing line slipped on the shaft. Now it seams Ok, but will see this.
BackEMF,
Thanks for such kind words, Im happy then

Regpye,
So, you say that I should adjust the voltage on the stepper drivers, or again change the microstepping?
My current microstepping is 106.10 from 48mmm motor 1.8 degree, 200 turns, 0.30mm fishing line and 4.5 motor shaft.
Only the bearing holder was printed on this tepup, rest was before on other setting(probably wrong and too less or too much)
To all, how about changing the Z axis microstepping? Should I do this? Or its the best option like it is now? I left the stock setting of 4000.
|
Re: Verteez Smartrap build May 10, 2014 05:57AM |
Registered: 11 years ago Posts: 791 |
Quote
verteez
Regpye,
So, you say that I should adjust the voltage on the stepper drivers, or again change the microstepping?
My current microstepping is 106.10 from 48mmm motor 1.8 degree, 200 turns, 0.30mm fishing line and 4.5 motor shaft.
Only the bearing holder was printed on this tepup, rest was before on other setting(probably wrong and too less or too much)
What I am saying is, have you checked the current that the motors are set for? For that size motor you should be pulling close to 2 amps. I would be setting the voltage to around 1 to 1.2 volts and see how it goes. Any higher it would cause the stepper controller to shut down, and any lower could cause lost steps due to under current. Have you got heatsinks on the stepper drivers, and maybe a fan blowing over the heatsinks (mine don't seem to need it, but depends on your motors too)
[regpye.com.au]
"Experience is the mother of all knowledge." --Leonardo da Vinci
|
Re: Verteez Smartrap build May 10, 2014 06:42AM |
Registered: 10 years ago Posts: 116 |
|
Re: Verteez Smartrap build May 10, 2014 02:00PM |
Registered: 10 years ago Posts: 148 |
Your problem with the infill is that you extrude to much pla in there so the actual height of the object gets higher and higher for each layer of infill and the nozzle starts to dragg and sometimes even drag your print from the bed.
You changed hotend so I do ask you these small things......
Is the nozzle at the same size as the old one?
You must be sure you have the right step settings for the extruder in the marlin firmware as you can get away with some small errors with to fast if you have a small nozzle but terrible if you get a larger nozzle where the pla flows easier.
All machines neads to be adjusted with this method as all machines are slightly different even with the same hardware..
[richrap.blogspot.se]
Be sure the thermistor setting is correct in marlin.
Use pronterface and calculate your pid setting and don't use something you find on the web.
I had the exact problems like you when I had the wrong pid and step setting for my extruder on my prusa.
|
Re: Verteez Smartrap build May 11, 2014 12:46AM |
Registered: 11 years ago Posts: 791 |
Quote
verteez
No, I havent checked that, how to do this?
Right now Im changing the steps per mm with new math, and results are just ideal.
Yes, I have heatsinks on the stepper drivers, and they dont look like need to have a fan.
You need a multimeter or a low voltage meter so you can read the values from the adjustment pot.
If you have a multimeter, make a connection for it that will plug the negative lead into a spare driver socket that has an earthed connection,
If you get a spare positive multimeter probe, shape it with a file to be a small screwdriver that will fit the pot. Use some heatshrink tube to insulate all but the end of the new screwdriver you have made.
Set the voltage range to 20 volts or lower so that you can read what voltage is across the pot.
The screwdriver will act as the probe for the positive and you have already earthed the negative. The reading that will appear on the meter is the voltage that you are setting. It should be between 0.8 volt and 1.2volts depending on the motor that you have. 1.2 volts will be giving you close to 2 amps the maximum allowed for these drivers.
[regpye.com.au]
"Experience is the mother of all knowledge." --Leonardo da Vinci
|
Re: Verteez Smartrap build May 11, 2014 02:08PM |
Registered: 10 years ago Posts: 116 |
Ok, I think that I started to move in right direction. I have decided to recalibrate whole printer once again. This time with your advides and more precision. Prints result and setting at the end 
1.So, I started with calibrating the stepper motor drivers.
2.Next I have moved to callibrating the microsteps for X and Y axis. I have done math like before, but then made more precision calibration using method from here page 7. It work well.
3. I have also calibrated my Z axis, now it's like it should be. I have lost the website, but the method was something like:
(wanted 30mm height *present microstepping) / actual height moved after 30mm comend= correct microstepping
Don't know if its how it should be done, but I have odeal precision of my prints height now.
4. Also, I have callibrated the extruder from Regpye link
5. Changed the PID settings
6. Calibrated my auto bed leveling with method from here
7. Fixed my extruder with new printed bearing holder part(came out ugly, but work well)
8.Changed my layer height like Heyzeus said to 0.25mm and slowed down my speed like Madmike8 told.
9.Greased the rods
10. Changed the blue tape to only glass with office glue stick.
_________________________________________________________________________________________________________________
So now the photos.
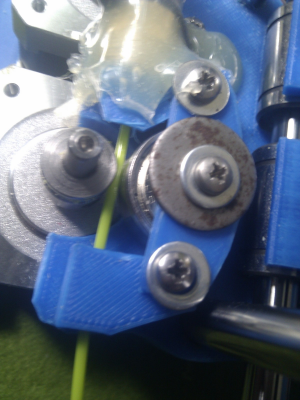
Here you can see my old extruder bearing holder. It was broken apart, so I was trying to save him with some glue and washers.. The tension was to small, and the filament flow was poor because of this.
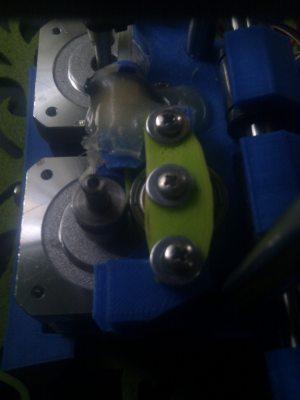
A new one in place, ugly but work. I will change it all annyway to Regpye geared extruder. You can also notice that I have used push-fit bowden connector from old dead chinese crappy hotend. Only because my bowden tube was pushed off by moving filament. It couldn't stay in place.. I have made it in MacGyver, bit harsh style. Ripped off place to fit this connetror, glued with hot glue, and secured with selflocking band.
Now the prints.
I have started again with the layer height test-quiet nice output
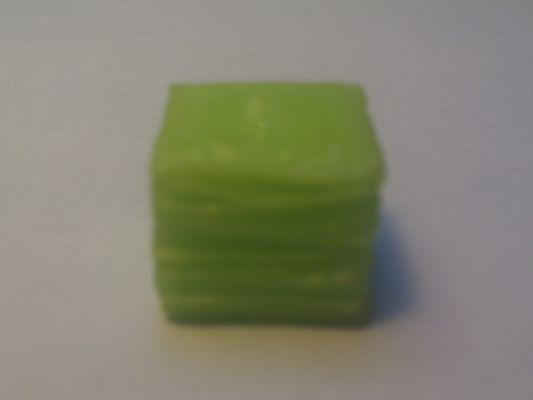
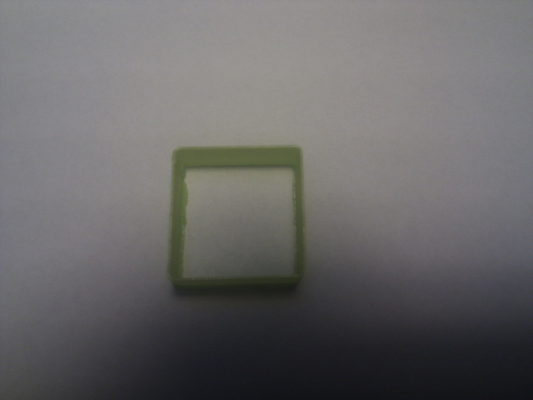
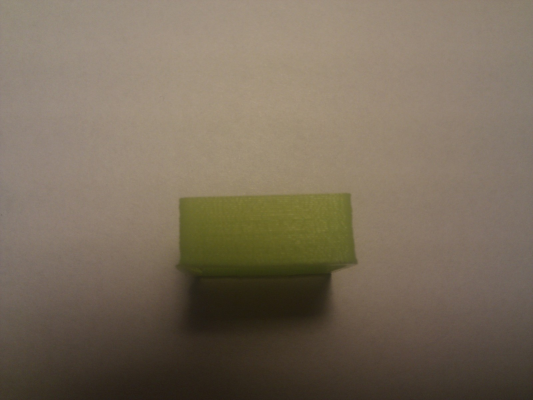
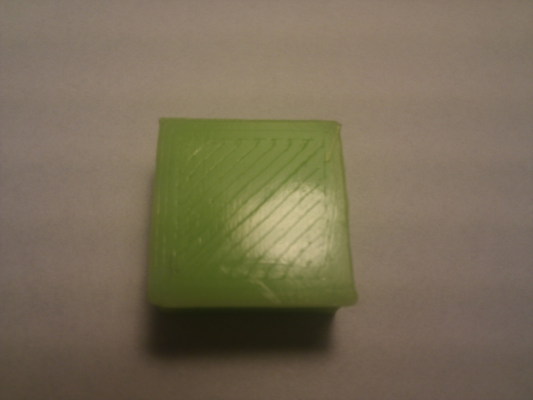
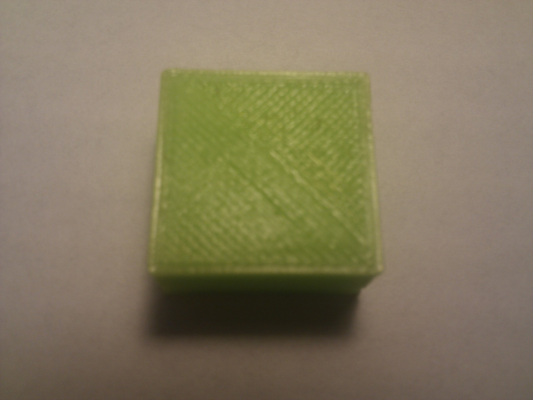
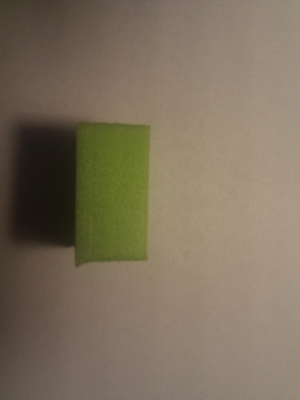
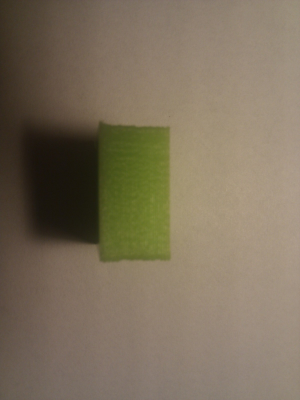
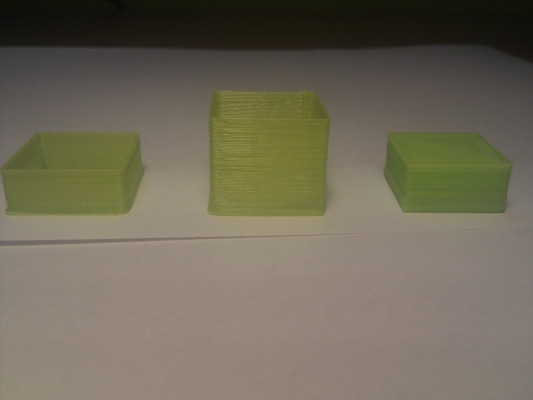
Next I have printed the problemacit from last time infill test..and I was schocked with the result.
Bottom
Top(not finished, because of filament end. 1minute left untill end)
Side
Comparision.
_________________________________________________________________________________________________________________
My questions and conclusions.
C-I think that the callibration was good. Now I can get pretty nice things, so will try something next; like perimeters calibration, bridging and just the precision.
C-I should ask you guys about the tips at the begining. It would save me lot of efford.
C-I will chect the current on the motor tomorow, like the Regpye said.
Q-Do you guys think looking at the photos that I should lower, or move up the nozzle? Im asking mostly about the infill cube, because the layers are so visible(all prints are the same settings)
Q-I have problem with prints temp, because of fan. Whe I set, for example 210C, after the fan starts running because of gcode, my temp dropp to about 190/188. I must always check it, and sometimes turn it off. Or is it right?
Q- What to do with the inclined walls? What I mean is that, as you can see in the pictures, they are not straight, but tilted in some directions. I know that it's mostly because of bed, but shouldn't the auto bed leveling prevent something like this?
Q-What to do with these not straight walls?
Q Anny idea what should I also check/do/change?
___________________________________________________________________________________________________________________
My settings:
Temp 210C first layers, 200C after
Nozzle 0.35mm
Layer height 0.25
first layer height 35mm/%
fill density 0.4
fill pattern honeycomb
top/bottom fill pattern rectlinear
skirt 3 layers height, 5mm distance from object, 3 loops, 3mm minimum extrusion
top solid layers 3, bottom 4
perimeter speed 20 mm/s
small perimeters 18 mm/s
infill speed 20 mm/s
solid infill 25 mm/s
bridges 30 mm/s
gap infil 15 mm/s
travel speed 35 mm/s
perimeters extrusion width = 0.35mm
infill extrusion width 0.67mm
solid infill extrusion width 0.59mm
top infill extrusion width 0.59mm
first layer extrusion width 0.70mm
Anny changes recomended?
___________________________________________________________________________________________________
Uff, very busy two days, im gonna get some beer as reward
I have even fallen asleep last night while I was waiting for the the extruder bearing holder print to finish (few attempts).
Kamil.

1.So, I started with calibrating the stepper motor drivers.
2.Next I have moved to callibrating the microsteps for X and Y axis. I have done math like before, but then made more precision calibration using method from here page 7. It work well.
3. I have also calibrated my Z axis, now it's like it should be. I have lost the website, but the method was something like:
(wanted 30mm height *present microstepping) / actual height moved after 30mm comend= correct microstepping
Don't know if its how it should be done, but I have odeal precision of my prints height now.
4. Also, I have callibrated the extruder from Regpye link
5. Changed the PID settings
6. Calibrated my auto bed leveling with method from here
7. Fixed my extruder with new printed bearing holder part(came out ugly, but work well)
8.Changed my layer height like Heyzeus said to 0.25mm and slowed down my speed like Madmike8 told.
9.Greased the rods
10. Changed the blue tape to only glass with office glue stick.
_________________________________________________________________________________________________________________
So now the photos.
Here you can see my old extruder bearing holder. It was broken apart, so I was trying to save him with some glue and washers.. The tension was to small, and the filament flow was poor because of this.
A new one in place, ugly but work. I will change it all annyway to Regpye geared extruder. You can also notice that I have used push-fit bowden connector from old dead chinese crappy hotend. Only because my bowden tube was pushed off by moving filament. It couldn't stay in place.. I have made it in MacGyver, bit harsh style. Ripped off place to fit this connetror, glued with hot glue, and secured with selflocking band.
Now the prints.
I have started again with the layer height test-quiet nice output
Next I have printed the problemacit from last time infill test..and I was schocked with the result.
Bottom
Top(not finished, because of filament end. 1minute left untill end)
Side
Comparision.
_________________________________________________________________________________________________________________
My questions and conclusions.
C-I think that the callibration was good. Now I can get pretty nice things, so will try something next; like perimeters calibration, bridging and just the precision.
C-I should ask you guys about the tips at the begining. It would save me lot of efford.
C-I will chect the current on the motor tomorow, like the Regpye said.
Q-Do you guys think looking at the photos that I should lower, or move up the nozzle? Im asking mostly about the infill cube, because the layers are so visible(all prints are the same settings)
Q-I have problem with prints temp, because of fan. Whe I set, for example 210C, after the fan starts running because of gcode, my temp dropp to about 190/188. I must always check it, and sometimes turn it off. Or is it right?
Q- What to do with the inclined walls? What I mean is that, as you can see in the pictures, they are not straight, but tilted in some directions. I know that it's mostly because of bed, but shouldn't the auto bed leveling prevent something like this?
Q-What to do with these not straight walls?
Q Anny idea what should I also check/do/change?
___________________________________________________________________________________________________________________
My settings:
Temp 210C first layers, 200C after
Nozzle 0.35mm
Layer height 0.25
first layer height 35mm/%
fill density 0.4
fill pattern honeycomb
top/bottom fill pattern rectlinear
skirt 3 layers height, 5mm distance from object, 3 loops, 3mm minimum extrusion
top solid layers 3, bottom 4
perimeter speed 20 mm/s
small perimeters 18 mm/s
infill speed 20 mm/s
solid infill 25 mm/s
bridges 30 mm/s
gap infil 15 mm/s
travel speed 35 mm/s
perimeters extrusion width = 0.35mm
infill extrusion width 0.67mm
solid infill extrusion width 0.59mm
top infill extrusion width 0.59mm
first layer extrusion width 0.70mm
Anny changes recomended?
___________________________________________________________________________________________________
Uff, very busy two days, im gonna get some beer as reward

I have even fallen asleep last night while I was waiting for the the extruder bearing holder print to finish (few attempts).
Kamil.
|
Re: Verteez Smartrap build May 11, 2014 02:26PM |
Registered: 10 years ago Posts: 116 |
Profit!
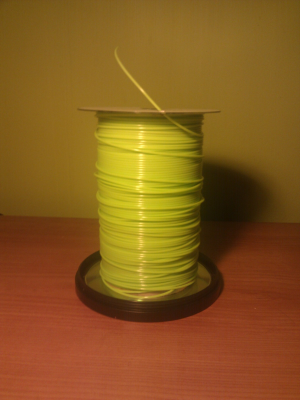
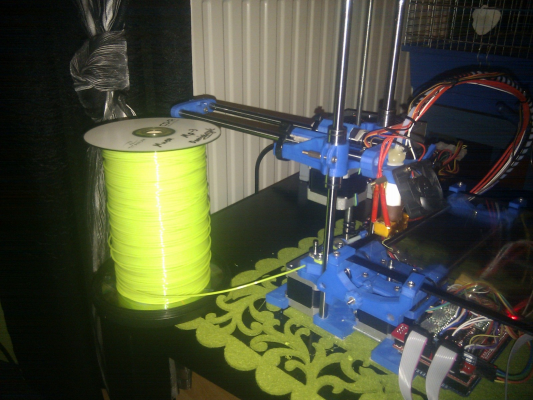
Homemade filament spool holder, works like a dream :3
Made in only 8 min.
Things used:
-Two old CD's
-Botoom of old CD box
-Some cardboard roll (diameter around 8cm)
-anny quick drying glue
Here you have cheap and fast to do spool holder
Homemade filament spool holder, works like a dream :3
Made in only 8 min.
Things used:
-Two old CD's
-Botoom of old CD box
-Some cardboard roll (diameter around 8cm)
-anny quick drying glue
Here you have cheap and fast to do spool holder

|
Re: Verteez Smartrap build May 11, 2014 06:13PM |
Registered: 10 years ago Posts: 814 |
|
Re: Verteez Smartrap build May 12, 2014 04:55AM |
Registered: 10 years ago Posts: 349 |
Well done Kamil!
Maybe you could set the max fan speed a bit lower? 255 is max so lets say set it to 200?
What is your Z-offset?
The wobble in the walls might be due to to play in a ax adapter or eventually a fishingline that is not tense enough.
Yesterday i managed to clog the hotend so that will keep me busy this evening. (accidently i entered a very long retraction length...)
After all that I will certainly try your settings.
Good to see the fix worked on your extruder, i've been trying the same thing but without any results. My steppers drivers are at 1 Volt this is about the max that my 1.6A motors are happy with, above that they get noisy and the drivers get hot and the motors start to stutter.
PS old recordplayers also make good spoolholders and eventually also good 3D scanner platforms? :-D
|
Re: Verteez Smartrap build May 12, 2014 12:51PM |
Registered: 10 years ago Posts: 116 |
Ok, so I have menaged yesterday to print 4 attemps of perimeter test. Two first were wrong, not fiting. So I have decided to move up the nozzle, then next 2 were perfect. Fitting a bit tight, but the whole way 
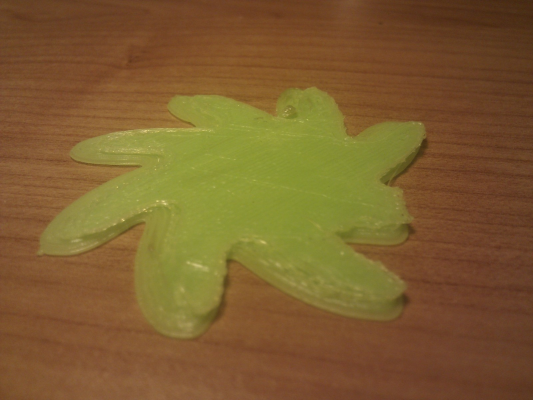
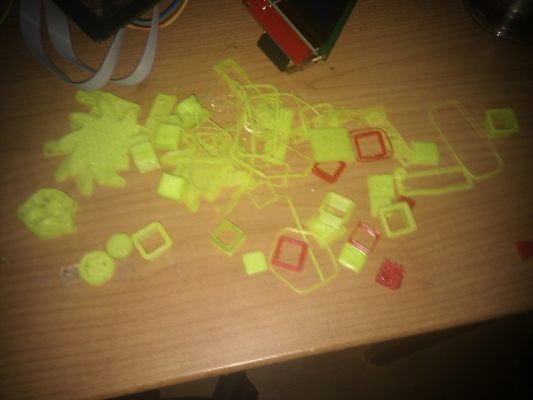
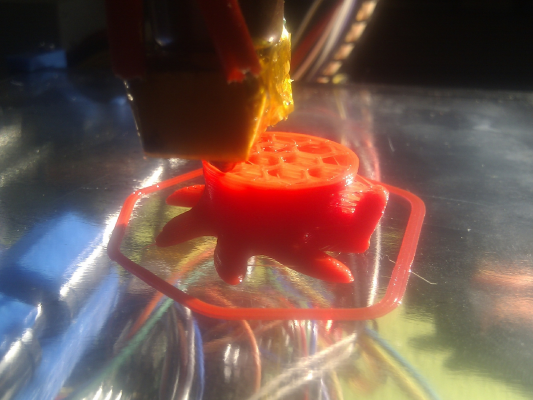
Today happy because of victory over perimeter test, I decided to print Cute Octopus..and then my luck ended. The layers at each of 3 attemps moved, very angry, because of wasted (cool looking neon green) filament I discovered why.
So, my hotend holding part wasnt fitting all the way on the rods, so the nozzle could move back and forward. I used hammer and fixed this. Next I decided to tighten the fishing line on X and Y axis, and lower the pover on stepper drivers just a bit.
Result? You can see it below.
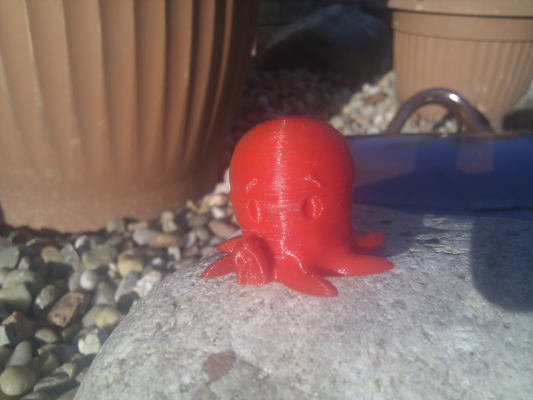
You can see that the layer above the eyes has moved, but that was my fault. I tried to remove the bulb, when the print just popped of the bed. I decided to quickly save it using the tape, but as you can notice, it has moved a bit.
Trying to polish it with sand paper was wrong, and not happy ending. Only some dirt has left.
But HEY, look at my octopus. It came out pretty nice!
Settings.
layer height 0.20mm
print time 1h 27min
scale 50%
infill 15%
temp. 200C at beginning, after around 190/180C. <-- all because of the fan. (it even once dropped to 156C)
Rest of settings is like in last post.
Kamil.
Edited 1 time(s). Last edit at 05/12/2014 12:56PM by verteez.

Today happy because of victory over perimeter test, I decided to print Cute Octopus..and then my luck ended. The layers at each of 3 attemps moved, very angry, because of wasted (cool looking neon green) filament I discovered why.
So, my hotend holding part wasnt fitting all the way on the rods, so the nozzle could move back and forward. I used hammer and fixed this. Next I decided to tighten the fishing line on X and Y axis, and lower the pover on stepper drivers just a bit.
Result? You can see it below.
You can see that the layer above the eyes has moved, but that was my fault. I tried to remove the bulb, when the print just popped of the bed. I decided to quickly save it using the tape, but as you can notice, it has moved a bit.
Trying to polish it with sand paper was wrong, and not happy ending. Only some dirt has left.
But HEY, look at my octopus. It came out pretty nice!

Settings.
layer height 0.20mm
print time 1h 27min
scale 50%
infill 15%
temp. 200C at beginning, after around 190/180C. <-- all because of the fan. (it even once dropped to 156C)
Rest of settings is like in last post.
Kamil.
Edited 1 time(s). Last edit at 05/12/2014 12:56PM by verteez.
|
Re: Verteez Smartrap build May 13, 2014 04:47AM |
Registered: 10 years ago Posts: 116 |
Hey guys!
I have question to you all. Im in middle of printing no servo Jhead mount, and I wanted to ask how to use it when it will be done. I mean, after compiling the marlin, what then? Do I need to change something, set it somehow like before to work? Or just leave it and watch the magic?
Kamil.
I have question to you all. Im in middle of printing no servo Jhead mount, and I wanted to ask how to use it when it will be done. I mean, after compiling the marlin, what then? Do I need to change something, set it somehow like before to work? Or just leave it and watch the magic?

Kamil.
Sorry, only registered users may post in this forum.
